Along the keel, it seems a rabbit is to be cut to allow the hull planking to sit flush with the surface of the keel. Two questions: First, the depth is the thickness of one or two planks (for a dual-planked gull); do we allow some glue thickness? Second, is there a tool commercial, or has someone designed a jig to scribe the line evenly along the length of the keel for the rabbit? If I have posted this in the wrong sub-forum, my apologies. Please direct me to where it belongs, and I'll move it.
-

Win a Free Custom Engraved Brass Coin!!!
As a way to introduce our brass coins to the community, we will raffle off a free coin during the month of August. Follow link ABOVE for instructions for entering.
You are using an out of date browser. It may not display this or other websites correctly.
You should upgrade or use an alternative browser.
You should upgrade or use an alternative browser.
Hi Dr Mark,
Welcome to SoS. Your posting is a new thread and hence it is the correct place, but you could also create a build log and post questions about your build on that thread too.
The term for a recess along the keel is a rabbet, not to be confused with a long eared mammal that in Australia is a pest and hunted, a rabbit.
Most builders who create the rabbet do so by sanding or using a burr to rough out the long trench that the planks ends fit in to. There are tools specifically designed to rout out a rabbet but most are oversized for ship modeling. You could also use a narrow chisel which like most things in model shipbuilding requires considerable patience and attention to detail.
Ideally the rabbet contour should accept the corner of the plank and tends to be a triangular shape. The depth should be equal to the thickness of the planks to create a flush finish with the keel, although some sanding will inevitably be required to achieve a seamless finish. The glue should not add to the thickness and if it does you have used too much glue.
Thanks much! I will start my first log when I get started on my model. I am currently in the research phase, collecting reference books, ensuring I have the correct tools, and asking the newbie questions that drive the seasoned pros nutsHi Dr Mark,
Welcome to SoS. Your posting is a new thread and hence it is the correct place, but you could also create a build log and post questions about your build on that thread too.
The term for a recess along the keel is a rabbet, not to be confused with a long eared mammal that in Australia is a pest and hunted, a rabbit.
Most builders who create the rabbet do so by sanding or using a burr to rough out the long trench that the planks ends fit in to. There are tools specifically designed to rout out a rabbet but most are oversized for ship modeling. You could also use a narrow chisel which like most things in model shipbuilding requires considerable patience and attention to detail.
Ideally the rabbet contour should accept the corner of the plank and tends to be a triangular shape. The depth should be equal to the thickness of the planks to create a flush finish with the keel, although some sanding will inevitably be required to achieve a seamless finish. The glue should not add to the thickness and if it does you have used too much glue.
 .
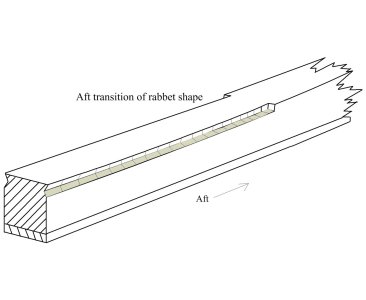
.Keep in mind that the rabbet shape is dynamic in that it changes to match the angle of the framing along its entire length. It is near 90 degrees at the after most part of the keel. Sometime in the 18th century it ended short of the sternpost but I have never been able to find out why this change happened and would like to find out why this took place.
Allan
Allan

Last edited:
This is beyond helpful, Thanks! But the change is interesting and from an engineering perspective I am curious as well. Continuing the Rabbet up the sternpost in theory would protect the ends of the hull planks, and seem more hydrodynamic if the shipwrights on the 18th century had discovered the science of flow yet.
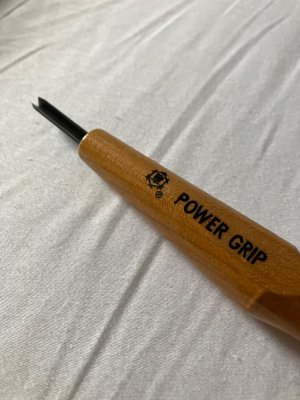
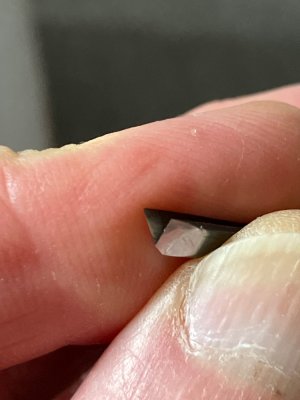
I was able to find the same set on Amazon for $20. Five chisels, sized from 1.5mm - 5mm. Thank you for the advice!V and U shaped small chisels are available for cutting Lino blocks for printing art. They are excellent for cutting the rabbet.
View attachment 493969View attachment 493970
This particular range is Japanese, about £10 each and using them is truly a joy!
The inner post is not as thick as the stern post and it does create a rabbet even when the rabbet on the keel came up short of the inner post. Hard to explain in words how this works but you can see the step on many contemporary drawings on the RMG Collections site in low resolution and quite a few of these drawings in high resolution on the WikiCommons site. There are about 3000 drawings on the Wiki site, with about 800 of them in high res. https://commons.wikimedia.org/wiki/Category:Ship_plans_of_the_Royal_Museums_Greenwich.Continuing the Rabbet up the sternpost in theory would protect the ends of the hull planks,
As to chisels, everyone has a favorite way to use them on the rabbet and like Smithy I like the v shape. I also like and sometimes prefer a flat blade which for me is easier to use to form the dynamic shape simply by twisting the blade as you go.
Allan
I received my micro V (Lino) chisels yesterday, a set of 5 sized 1-5mm. I will experiment on the Model Expo series I am using to practice skills on.The inner post is not as thick as the stern post and it does create a rabbet even when the rabbet on the keel came up short of the inner post. Hard to explain in words how this works but you can see the step on many contemporary drawings on the RMG Collections site in low resolution and quite a few of these drawings in high resolution on the WikiCommons site. There are about 3000 drawings on the Wiki site, with about 800 of them in high res. https://commons.wikimedia.org/wiki/Category:Ship_plans_of_the_Royal_Museums_Greenwich.
As to chisels, everyone has a favorite way to use them on the rabbet and like Smithy I like the v shape. I also like and sometimes prefer a flat blade which for me is easier to use to form the dynamic shape simply by twisting the blade as you go.
Allan
Along the keel, it seems a rabbit is to be cut to allow the hull planking to sit flush with the surface of the keel. Two questions: First, the depth is the thickness of one or two planks (for a dual-planked gull); do we allow some glue thickness? Second, is there a tool commercial, or has someone designed a jig to scribe the line evenly along the length of the keel for the rabbit? If I have posted this in the wrong sub-forum, my apologies. Please direct me to where it belongs, and I'll move it.
Hi, 'Doc', here's the rabbit on the keel of my Victory!Along the keel, it seems a rabbit is to be cut to allow the hull planking to sit flush with the surface of the keel. Two questions: First, the depth is the thickness of one or two planks (for a dual-planked gull); do we allow some glue thickness? Second, is there a tool commercial, or has someone designed a jig to scribe the line evenly along the length of the keel for the rabbit? If I have posted this in the wrong sub-forum, my apologies. Please direct me to where it belongs, and I'll move it.

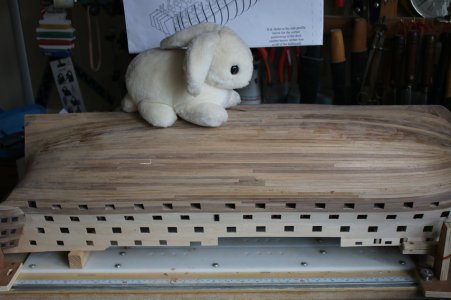
G'Day, here's a rabbit on the keel of my VictoryHi Dr Mark,
Welcome to SoS. Your posting is a new thread and hence it is the correct place, but you could also create a build log and post questions about your build on that thread too.
The term for a recess along the keel is a rabbet, not to be confused with a long eared mammal that in Australia is a pest and hunted, a rabbit.
Most builders who create the rabbet do so by sanding or using a burr to rough out the long trench that the planks ends fit in to. There are tools specifically designed to rout out a rabbet but most are oversized for ship modeling. You could also use a narrow chisel which like most things in model shipbuilding requires considerable patience and attention to detail.
Ideally the rabbet contour should accept the corner of the plank and tends to be a triangular shape. The depth should be equal to the thickness of the planks to create a flush finish with the keel, although some sanding will inevitably be required to achieve a seamless finish. The glue should not add to the thickness and if it does you have used too much glue.

 (sorry, I just couldn't resist it, Mate!)
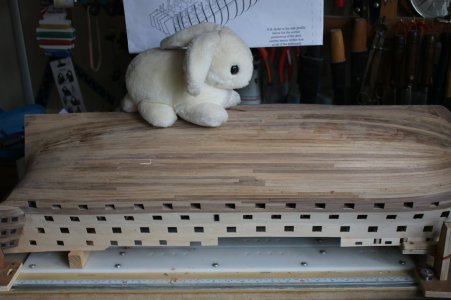
Perfect!G'Day, here's a rabbit on the keel of my Victory(sorry, I just couldn't resist it, Mate!)
View attachment 494590


