• Win a Free Custom Engraved Brass Coin!!!
    As a way to introduce our brass coins to the community, we will raffle off a free coin during the month of August. Follow link ABOVE for instructions for entering.

The Norske Love" by Noël Luc Build log

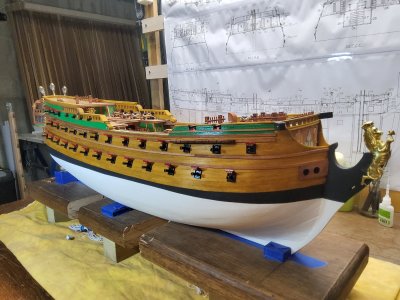
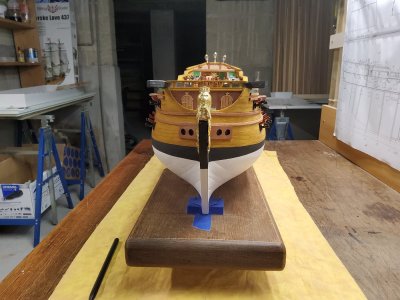
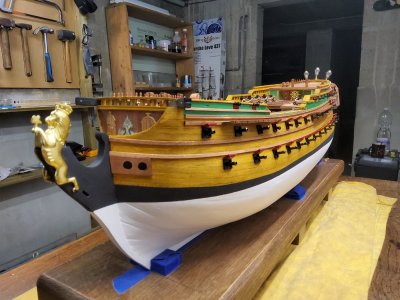
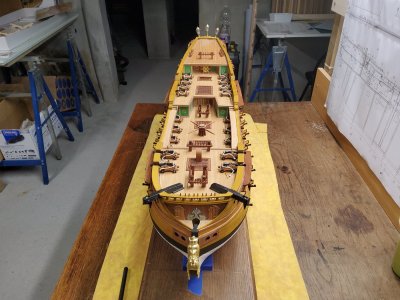
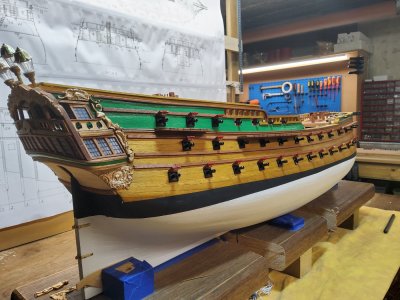
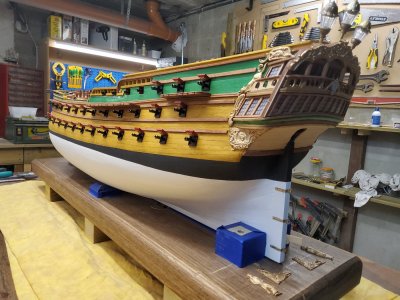
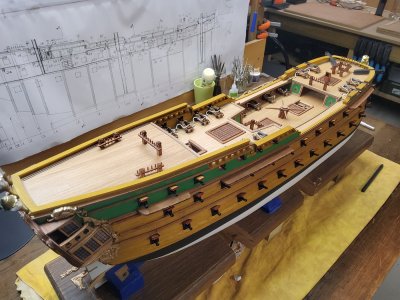
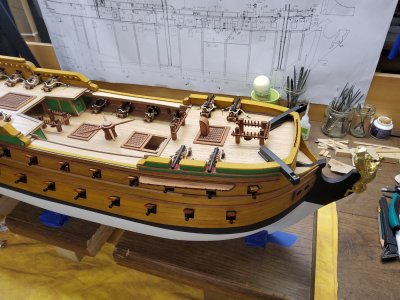
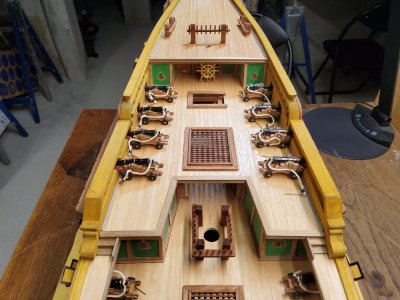
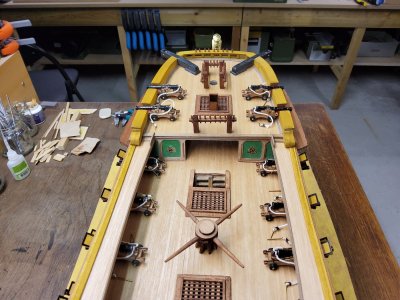
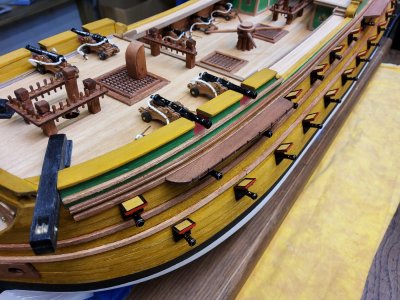
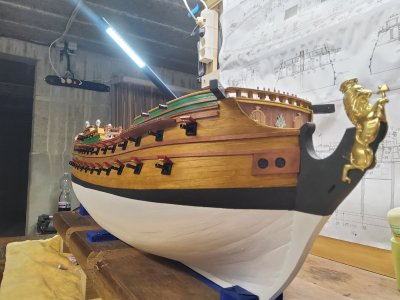
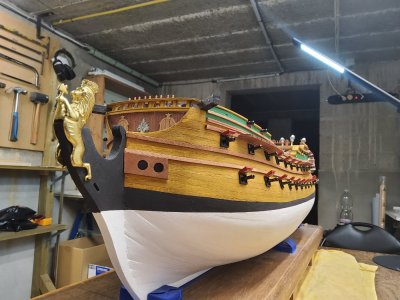
Another step closer to ship construction! I've installed all the guns on both sides of the hull! The next step is finishing the back of the boat. Two more hatches need to be installed there for two more guns, and then I can install the rudder. It's starting to look like a warship! All the deck parts haven't been glued down yet!

View attachment 538851
View attachment 538852
View attachment 538855
View attachment 538853
View attachment 538856
View attachment 538857
View attachment 538858
View attachment 538859
View attachment 538860
View attachment 538861
View attachment 538862
View attachment 538863
View attachment 538864
She looks great, Noël
 
Two months ago I started building my first boat "The Norske Love". Probably too ambitious! In the basement of my house I set up a working environment to build the boat.
View attachment 465915
Then I installed all the ribs.

View attachment 465917

View attachment 465918Assembly of the first deck with underlying space and stairs.

View attachment 465930

View attachment 465932

View attachment 465933

View attachment 465935

Assembly of the next two decks.
View attachment 465936
View attachment 465937
View attachment 465938
View attachment 465939
View attachment 465940
Planking and preparation for gluing the decks.
View attachment 465941
View attachment 465942
View attachment 465943View attachment 465944View attachment 465945
View attachment 465946
View attachment 465947
View attachment 465948
View attachment 465949
I saw the decoration in the next photo in a post from another built Norske Love in the forum. Hopefully I was allowed to use it.
View attachment 465950
View attachment 465951

View attachment 465919

View attachment 465920
I think it's not at all too ambitious to start with this ship, I see that you have "the sacred fire" or the passion, bravo! You will go far, beyond the oceans my dear Luc ♥ From Philippe (BE)
 
Another step closer to ship construction! I've installed all the guns on both sides of the hull! The next step is finishing the back of the boat. Two more hatches need to be installed there for two more guns, and then I can install the rudder. It's starting to look like a warship! All the deck parts haven't been glued down yet!

View attachment 538851
View attachment 538852
View attachment 538855
View attachment 538853
View attachment 538856
View attachment 538857
View attachment 538858
View attachment 538859
View attachment 538860
View attachment 538861
View attachment 538862
View attachment 538863
View attachment 538864
Great quality
 
In the previous post of my Norske Love I was able to show 25 photos, therefore this sequel. Is this the right way to show the further progress of the construction? I don't know how to use the forum properly yet!!!

View attachment 465952
View attachment 465953View attachment 465954View attachment 465955View attachment 465956View attachment 465957View attachment 465959

What scares me most is the hull planking for my first boat. I hope I started on the right foot and I can finish it on the right foot. I have done a lot of research and read a lot of tips and information on the internet and on this forum. Constructive criticism is always welcome if I do something wrong because I can use your experience!!

View attachment 465962
View attachment 465963
View attachment 465964
View attachment 465966
View attachment 465970
my first planks!

View attachment 465975
View attachment 465976
View attachment 465977
View attachment 465978
View attachment 465979
View attachment 465980
View attachment 465981
View attachment 465982
View attachment 465983
View attachment 465984
View attachment 465985
View attachment 465986
This is the place in the construction of my Norske Love so far!
I think the place in the planking where I am now is the most difficult. I'm having trouble continuing to make turns this way.
Good advice is welcome
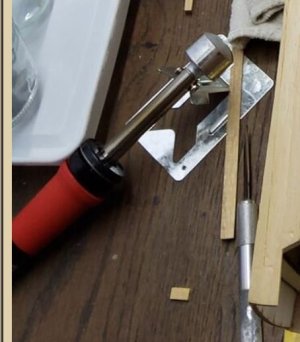
Thanks for following these posts!! I was wondering what this tool was?

Luc ship boat.JPG
 
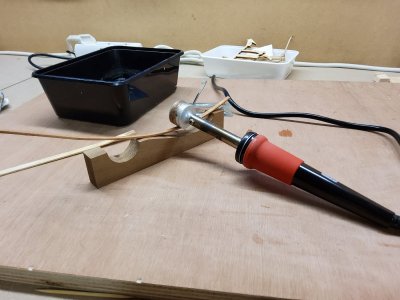
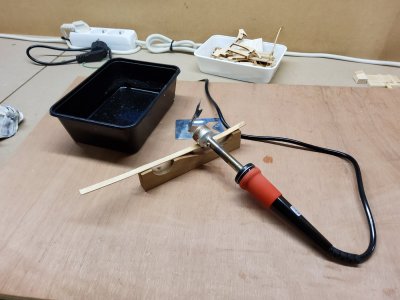
Good evening, OldPabe. This little tool is a device that heats up at the round ball on the front when you plug it in. It comes with a wooden template with two curves. If you place a piece of wood on the curve after wetting it, you can gently press the ball on the front into the curve to bend it. This way, you can adjust the wooden strips to the curves of the ship's interior! Hopefully, the two photos will make it a little clearer! Best regards!
NL 0998.jpgNL 0999.jpg
 
Good evening, OldPabe. This little tool is a device that heats up at the round ball on the front when you plug it in. It comes with a wooden template with two curves. If you place a piece of wood on the curve after wetting it, you can gently press the ball on the front into the curve to bend it. This way, you can adjust the wooden strips to the curves of the ship's interior! Hopefully, the two photos will make it a little clearer! Best regards!
View attachment 539967View attachment 539968
Honestly, you are the strongest, you will go far... I congratulate you.
 
In the previous post of my Norske Love I was able to show 25 photos, therefore this sequel. Is this the right way to show the further progress of the construction? I don't know how to use the forum properly yet!!!

View attachment 465952
View attachment 465953View attachment 465954View attachment 465955View attachment 465956View attachment 465957View attachment 465959

What scares me most is the hull planking for my first boat. I hope I started on the right foot and I can finish it on the right foot. I have done a lot of research and read a lot of tips and information on the internet and on this forum. Constructive criticism is always welcome if I do something wrong because I can use your experience!!

View attachment 465962
View attachment 465963
View attachment 465964
View attachment 465966
View attachment 465970
my first planks!

View attachment 465975
View attachment 465976
View attachment 465977
View attachment 465978
View attachment 465979
View attachment 465980
View attachment 465981
View attachment 465982
View attachment 465983
View attachment 465984
View attachment 465985
View attachment 465986
This is the place in the construction of my Norske Love so far!
I think the place in the planking where I am now is the most difficult. I'm having trouble continuing to make turns this way.
Good advice is welcome
Thanks for following these posts!!
You're way better than me and you have a wonderful workshop, keep it up. You're a Chef !
 
While I don't disagree with the usefulness of the French curve mold supplied with the heat bender kit as demonstrated here, having used this tool now for many years, I have ceased to use to bending mold, and have found that by wetting the plank to be bent, I can just lay it against a hard, flat, heat resistant surface and bend the plank to the desired shape, just sculpting it free hand with the hot bender against the hard, flat surface to any curve (and even twist) I desire. If I don't like the result, or want to "tweak' it, I just re-wet the plank and repeat the process as many times as I like in order to get it just right. If you find the French curve mold to be useful, all well and good. I, however, no longer find it necessary.I have found the free hand method to be liberating.
 
Back
Top