- Joined
- Jan 16, 2020
- Messages
- 4
- Points
- 53
Hi guys!
So, quick disclaimer; I originally registered here specifically to plunder the place for ships' plans. This is my first ever post (though I'm going to follow it up with a second in the "Introduce Yourself" forum) and I want to say right off the bat that I'm making it specifically to raise awareness of my own work. However I know firsthand how irritating it is when someone joins a community just to spam or advertise one of their products, so I thought I'd at least attempt to add some value and contribute something constructive by offering a tutorial. You can skip down below to the pictures, if you wish
As for what it is I'm promoting. In September I got started with modelling Age of Sail ships for printing in both resin and on FDM printers. So far I've produced a range of 16 Napoleonic vessels, which I sell on Wargaming3D, but my real dream has been to do justice to those incredible baroque ships of the 17th century. So, a month ago, I started a Kickstarter for "Gilded Sails," which aims to offer backers a selection of 8 1/600 vessels from the Anglo-Dutch wars intended for wargaming. At the time of writing, we've 32 hours left on the clock, so I'm doing my best to raise awareness before I get back to working on the ships (of which 3 are currently complete). If you're interested, please follow this link where you can read about the campaign, see some pictures and check out the updates.
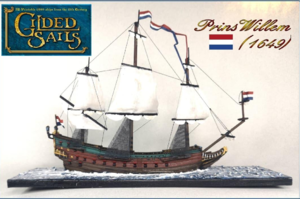
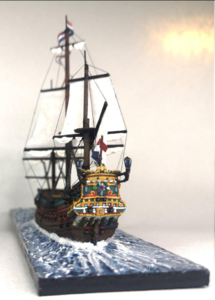
Anyway, here's a sample of the kind of work I'm cranking out - this is the Dutch Indiaman Prins Willem, which was the flagship at the Battle of Kentish Knock. It was printed at 1/600 on a resin printer and very generously painted for me by a fan:
RIGHT! Now that my shameless flogging of my own brand is over, let's get onto the tutorial shall we?
To sculpt an Age of Sail ship, you're obviously going to need plans. One invaluable resource, as I'm sure many of you know, is the archives of the Maritime Museum at Greenwich, where you can find thousands of plans.
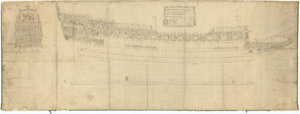
What we're looking for in particular, though, are line drawings. In this tutorial I'm going to show you how I began to sculpt the hull of the famous English ship HMS Royal Sovereign, which was one of the (fulfilled) stretch goals for the Kickstarter.
Here's a line drawing for Royal Sovereign:
The first thing we want to do is open up the stern/bow lines in an image manipulation programme. First I cropped this big image to only show that. Then I opened it in GIMP, a piece of software for manipulating images.
Unfortunately the lines on this image are very faint, so I cheated a little and took my lines from another image showing the ship after a rebuild (that was more legible). Luckily the hull is still the same shape so I can use the lines from the clearer image while referring to the original when doing the later details.
At any rate, we're opening our image(s) in GIMP so as to trace the lines of the "ribs" that line the ship (sorry for calling them "ribs," my Age of Sail vocabulary isn't perfect ) so that they can be projected into our 3D software later (you'll see!).
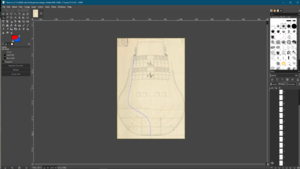
What you want to do is create "paths" to trace each line of the ship, starting with the stern and then moving to the bow.
Here's what it looks like when I'm finished:
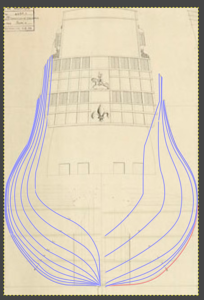
We then want to create a "layer" named after each line (from A-Z and 1-99). We then select our relevant layer, right click one of the paths from the menu and click "stroke" to draw an outline onto that layer. We then export it them each individually. I also like to colour-code so that the bow lines are red and the stern ones are blue.
Here's a layer with a line stroked onto it:
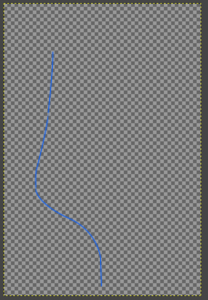
Once we've exported each layer, we end up with a nice folder full of lines on translucent backgrounds: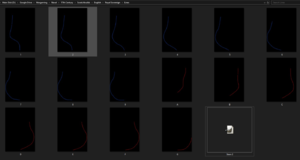
I hope you're following/can at least see the principles at work here I'll be happy to clarify just how each step works later; it took me a bit to get a hang of it.
Right, now we're opening up Blender, which is the software I happen to use (but by no means the best - far from it!).
In Blender you can enter an "orthographic view" which allows you to view your work from "flat" angles. Hit numpad 3 to enter the "right profile" view.
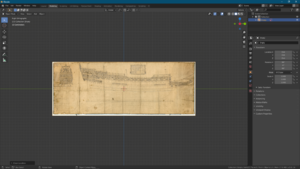
While in this view, drag your profile image from the folder you saved it to. It'll then render in Blender:
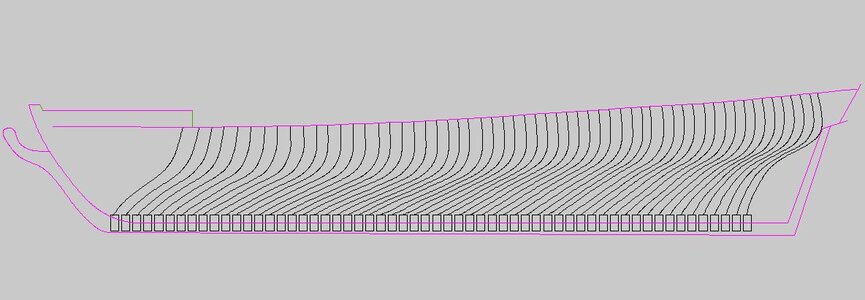
Staying in this view, go ahead and drag each of your "ribs" that you exported from GIMP into the programme. Once you're done, reposition each rib to sit on its corresponding line on the profile (each "rib" is represented by a vertical line within the ship). Remember to rotate stern lines so that all of your lines are facing right together. When correctly positioned, it should look like this: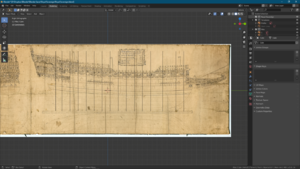
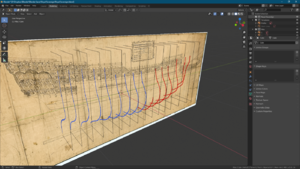
You now have the skeleton along which we'll trace our 3D model!
To start a 3D model, we're going to insert a cube into blender (shift+A, meshes, cube)
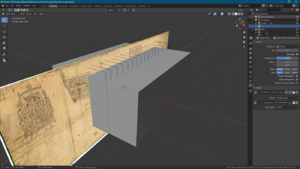
I then delete half of the cube and use a mirror modifier so we just have one face projected on two sides... really I could've just inserted a 2D plane instead of a cube, but I find this slightly faster. With a mirror modifier active, we only need to manipulate one side of the ship and the other side will automatically mimic it.
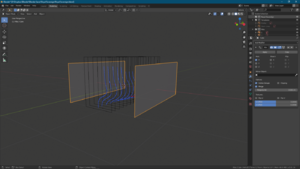
Now we divide the face so that there is a division corresponding to ever rib (when viewed from the side, they should be located exactly where the ribs are):
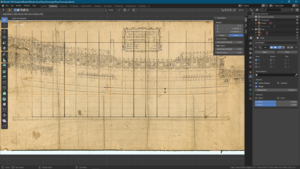
Now we need to add horizontal divisions to the model corresponding with the curved horizontal lines on the profile.

Eventually it should look something like this. Notice that I lowered the top of the side so it's only as high as the lowest deck level (be aware that the top line hasn't yet been manipulated to follow the ship's curvature):
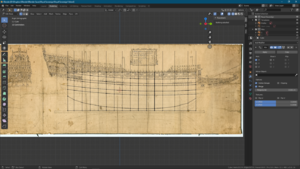
(At this point I have to confess I made a mistake when prepping the images for this tutorial that will become apparent in the next steps; the above picture of the profile is a corrected image... I was in such a hurry to get this written that, on my first try, I forgot to map the big lower curved line, so it'll be missing from the next pictures. Had I not noticed my mistake, the model's shape would've looked a bit off with regards to the curvature of the lower hull!)
Now for the fun part! We hide the profile image and get our first rib back; we're going to manipulate all of the vertices of the model to correspond to that rib's curvature:
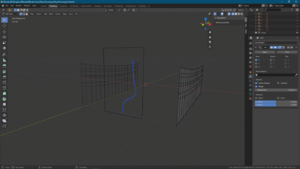
First I bring the whole "wall" to be in-line with the widest part of the rib. I then start manipulating the vertices one row at a time so as to correspond to the rib:
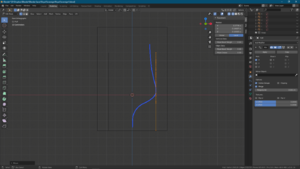
Again, please remember that the bottom of the model is missing a line!
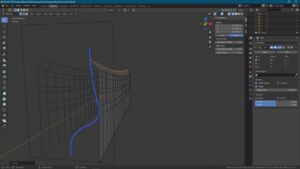
Eventually you will reach a point where you've moved every row, but the shape still doesn't match the rib:
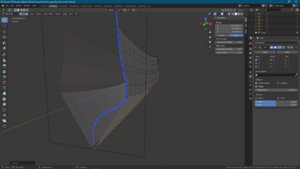
In this case, you need to add more divisions to the model until you've enough vertices that you're able to track the rib exactly:
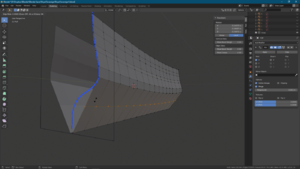
A finished rib (even if the curvature is wrong)!
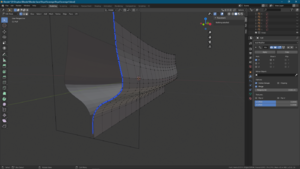
Then, we hide both the template for that rib, as well as the aftmost vertices we just worked on, and move on to the next "column" of vertices and the next rib... and the next... and the next...
As you move further forward, you'll notice that your vertices are generally always moving right, outward.
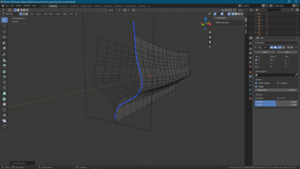
Second rib done, notice the transition:
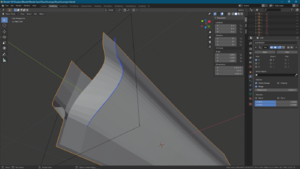
Now I'm afraid I didn't have time to finish the model today, so I'm going to use my hull model for HMS Surprise as an example. But, after you've moved from the aft to the middle of the ship (and hidden the completed side) and then moved from the bow to the same point, this is roughly what you end up with:
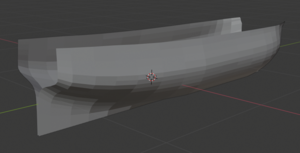
From here it's just a question of closing up the bow and the stern (using deck plans or rough guesswork to help you out!) and then adding the outside details. I hope that, in the future, I can show you how I go about all that
Now, to close, I'll use my 25th image to show you a (mostly) completed ship, HMS Resolution:
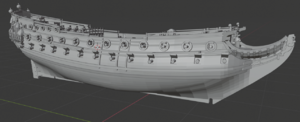
Thank you very much for reading! If there's any interest, I'd be happy to go ahead and show some steps for continuing work on your ship. If you're interested in 3D printing or the Anglo-Dutch Wars, please do check out my Kickstarter!
So, quick disclaimer; I originally registered here specifically to plunder the place for ships' plans. This is my first ever post (though I'm going to follow it up with a second in the "Introduce Yourself" forum) and I want to say right off the bat that I'm making it specifically to raise awareness of my own work. However I know firsthand how irritating it is when someone joins a community just to spam or advertise one of their products, so I thought I'd at least attempt to add some value and contribute something constructive by offering a tutorial. You can skip down below to the pictures, if you wish
As for what it is I'm promoting. In September I got started with modelling Age of Sail ships for printing in both resin and on FDM printers. So far I've produced a range of 16 Napoleonic vessels, which I sell on Wargaming3D, but my real dream has been to do justice to those incredible baroque ships of the 17th century. So, a month ago, I started a Kickstarter for "Gilded Sails," which aims to offer backers a selection of 8 1/600 vessels from the Anglo-Dutch wars intended for wargaming. At the time of writing, we've 32 hours left on the clock, so I'm doing my best to raise awareness before I get back to working on the ships (of which 3 are currently complete). If you're interested, please follow this link where you can read about the campaign, see some pictures and check out the updates.
Anyway, here's a sample of the kind of work I'm cranking out - this is the Dutch Indiaman Prins Willem, which was the flagship at the Battle of Kentish Knock. It was printed at 1/600 on a resin printer and very generously painted for me by a fan:
RIGHT! Now that my shameless flogging of my own brand is over, let's get onto the tutorial shall we?
To sculpt an Age of Sail ship, you're obviously going to need plans. One invaluable resource, as I'm sure many of you know, is the archives of the Maritime Museum at Greenwich, where you can find thousands of plans.
What we're looking for in particular, though, are line drawings. In this tutorial I'm going to show you how I began to sculpt the hull of the famous English ship HMS Royal Sovereign, which was one of the (fulfilled) stretch goals for the Kickstarter.
Here's a line drawing for Royal Sovereign:

The first thing we want to do is open up the stern/bow lines in an image manipulation programme. First I cropped this big image to only show that. Then I opened it in GIMP, a piece of software for manipulating images.
Unfortunately the lines on this image are very faint, so I cheated a little and took my lines from another image showing the ship after a rebuild (that was more legible). Luckily the hull is still the same shape so I can use the lines from the clearer image while referring to the original when doing the later details.
At any rate, we're opening our image(s) in GIMP so as to trace the lines of the "ribs" that line the ship (sorry for calling them "ribs," my Age of Sail vocabulary isn't perfect

What you want to do is create "paths" to trace each line of the ship, starting with the stern and then moving to the bow.
Here's what it looks like when I'm finished:

We then want to create a "layer" named after each line (from A-Z and 1-99). We then select our relevant layer, right click one of the paths from the menu and click "stroke" to draw an outline onto that layer. We then export it them each individually. I also like to colour-code so that the bow lines are red and the stern ones are blue.
Here's a layer with a line stroked onto it:

Once we've exported each layer, we end up with a nice folder full of lines on translucent backgrounds:

I hope you're following/can at least see the principles at work here
Right, now we're opening up Blender, which is the software I happen to use (but by no means the best - far from it!).
In Blender you can enter an "orthographic view" which allows you to view your work from "flat" angles. Hit numpad 3 to enter the "right profile" view.
While in this view, drag your profile image from the folder you saved it to. It'll then render in Blender:

Staying in this view, go ahead and drag each of your "ribs" that you exported from GIMP into the programme. Once you're done, reposition each rib to sit on its corresponding line on the profile (each "rib" is represented by a vertical line within the ship). Remember to rotate stern lines so that all of your lines are facing right together. When correctly positioned, it should look like this:


You now have the skeleton along which we'll trace our 3D model!
To start a 3D model, we're going to insert a cube into blender (shift+A, meshes, cube)

I then delete half of the cube and use a mirror modifier so we just have one face projected on two sides... really I could've just inserted a 2D plane instead of a cube, but I find this slightly faster. With a mirror modifier active, we only need to manipulate one side of the ship and the other side will automatically mimic it.

Now we divide the face so that there is a division corresponding to ever rib (when viewed from the side, they should be located exactly where the ribs are):

Now we need to add horizontal divisions to the model corresponding with the curved horizontal lines on the profile.

Eventually it should look something like this. Notice that I lowered the top of the side so it's only as high as the lowest deck level (be aware that the top line hasn't yet been manipulated to follow the ship's curvature):

(At this point I have to confess I made a mistake when prepping the images for this tutorial that will become apparent in the next steps; the above picture of the profile is a corrected image... I was in such a hurry to get this written that, on my first try, I forgot to map the big lower curved line, so it'll be missing from the next pictures. Had I not noticed my mistake, the model's shape would've looked a bit off with regards to the curvature of the lower hull!)
Now for the fun part! We hide the profile image and get our first rib back; we're going to manipulate all of the vertices of the model to correspond to that rib's curvature:

First I bring the whole "wall" to be in-line with the widest part of the rib. I then start manipulating the vertices one row at a time so as to correspond to the rib:

Again, please remember that the bottom of the model is missing a line!

Eventually you will reach a point where you've moved every row, but the shape still doesn't match the rib:

In this case, you need to add more divisions to the model until you've enough vertices that you're able to track the rib exactly:

A finished rib (even if the curvature is wrong)!

Then, we hide both the template for that rib, as well as the aftmost vertices we just worked on, and move on to the next "column" of vertices and the next rib... and the next... and the next...
As you move further forward, you'll notice that your vertices are generally always moving right, outward.

Second rib done, notice the transition:

Now I'm afraid I didn't have time to finish the model today, so I'm going to use my hull model for HMS Surprise as an example. But, after you've moved from the aft to the middle of the ship (and hidden the completed side) and then moved from the bow to the same point, this is roughly what you end up with:

From here it's just a question of closing up the bow and the stern (using deck plans or rough guesswork to help you out!) and then adding the outside details. I hope that, in the future, I can show you how I go about all that
Now, to close, I'll use my 25th image to show you a (mostly) completed ship, HMS Resolution:

Thank you very much for reading! If there's any interest, I'd be happy to go ahead and show some steps for continuing work on your ship. If you're interested in 3D printing or the Anglo-Dutch Wars, please do check out my Kickstarter!

