Very nice work, beautiful result, congratulations !I am a bit disappointed, I set you up for the perfect comeback with the rum joke, but not one person took the bait. You guy's really need to brush up on your pop culture jokes. There has to be one Pirates of the Caribbean fan in here.
Onward! I have made some progress! The next step call for planking the two lower decks, the aft end of gun deck 1 and the whole of gun deck 2. The designer didn't really mean for you to detail out the aft areas because the windows in the galleries are just for show, there isn't anything inside the aft cabins. I intend to change that, but I don't know to what level, yet. I do know I wanted more experience planking a deck before I started on the big main deck. The decks themselves are 2mm plywood that you are supposed to plank with pear strips that are provided. I decided to use Alaskan Cedar instead for the contrast. The decks come in 2 parts for the lower deck and 4 parts for the upper. I used masking tape to tape them together for planking.
View attachment 369367View attachment 369368
I bought some 5/32" and 1/4" billets from Dave. These came thicknessed to the proper deck plank width I wanted, but I needed to make my own planks from them. I cut them on the Byrnes saw, but I think I need more practice because my plank thickness repeatability is dreadful. At the very least I might need a Byrnes thickness sander to boot. I was able to use one of my Veritas mini tools, an end planer to clean up the rough sawn edges of the billets from Dave.
View attachment 369371View attachment 369369View attachment 369370
The results were some nibbing strake width planks and some regular planks.
View attachment 369372
He is where I need practice. I started the nibbing strake from the end, but I soon found out I should start them from midships and work aft. The geometry doesn't wrok the other way around.
View attachment 369373View attachment 369374
View attachment 369375View attachment 369376
But with that figured out, I moved on to planking from the center out. Because this has to remain two parts until it is installed, it took some doing but I was able to glue the two strakes just outside the centerline like this:
View attachment 369378View attachment 369379View attachment 369377
I went back and glued the center one to one side of the deck later on. Then I worked my way form the center out, planking as I went. Here you can start to see the board thickness problem really stand out.
View attachment 369380View attachment 369381
Next I started cutting in the nibbed planks. This was quite enjoyable for me.
View attachment 369382View attachment 369383
View attachment 369384View attachment 369385
View attachment 369386View attachment 369387
View attachment 369388
You might see a couple spots where I practiced with the mini cabinet scraper to even out the boards midway through. When I finished planking the first thing I did was to scrape the whole thing down to a uniform thickness.
View attachment 369389
Here is the finished scraping. Because of the scale and the multiple directions of the wood grain, you might see a couple spots where I scraped against the grain, but unfortunately, I had little choice at this point.
View attachment 369390
Only thing left is to sand it et, voila! I would give it a personal 7 out of 10 for a first time doing my own planks and doing nibbing. I am unsure if I want to do trennels at this point, but I might. I still have that whole main deck to do, so it might be something I distract myself from that with.
View attachment 369391
-

Win a Free Custom Engraved Brass Coin!!!
As a way to introduce our brass coins to the community, we will raffle off a free coin during the month of August. Follow link ABOVE for instructions for entering.
-

PRE-ORDER SHIPS IN SCALE TODAY!
The beloved Ships in Scale Magazine is back and charting a new course for 2026!
Discover new skills, new techniques, and new inspirations in every issue.
NOTE THAT OUR FIRST ISSUE WILL BE JAN/FEB 2026
You are using an out of date browser. It may not display this or other websites correctly.
You should upgrade or use an alternative browser.
You should upgrade or use an alternative browser.
Very good work - the cedar is a real good solution
Kurt Konrath
Kurt Konrath
Placing the trennels can be simple or complex depending on location and desired outcome.
For simple representation, I use a fine point awl, or needle and make holes using a ruler to keep lines across the deck straight. Then come back with a sharp pencil and just twist in the dimple to darken the hole.
For larger scale ships or top deck in plain view you can get more realistic with toothpicks or other methods folks have used.
Hallo @rtwpsom2So this won't be a build log for a little while, I am working on a couple other things to improve my skills before I tackle these big ones, but I thought I'd do an unboxing of the kit to get things started. Here's box 1, part 1:
we wish you all the BEST and a HAPPY BIRTHDAY

Enjoy your special day - are you still working on the Bonhomme?
Happy Birthday
- Joined
- Jan 25, 2023
- Messages
- 542
- Points
- 308

 , that was a pretty good nap. I am working on the main deck again.
 Before I go into any of the small progress I've made, I would like to address something that was said regarding this kit on MSW. I was told it was made using the ANCRE plans and was thus not paying/attributing ANCRE for their work, which is one of the reasons you can't post the kit on MSW. Now, having the ANCRE set of drawings and the Unicorn kit, and having spent a great deal of time going over both, I can categorically state that, in my opinion, the Unicorn kit has taken NOTHING from the ANCRE plans. To whit, I have spent a month or so laying out the gun deck structure on the kit substrate parts.
I scanned some sections of the ANCRE plans and put them into Solidworks so I can get dimensions off them.
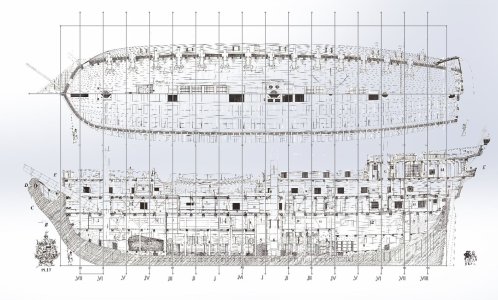
As you can see in the pictures below, not a lot of the structure is accurate. The fore and main masts will need to move back, and all the little mid deck opening and grates will also need to move, the four grate cutouts are a little undersized and very far forward.
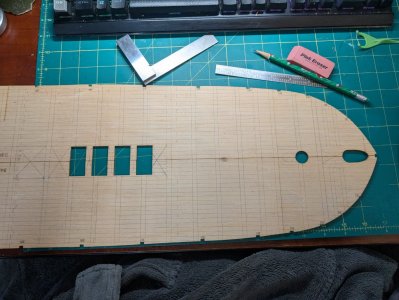
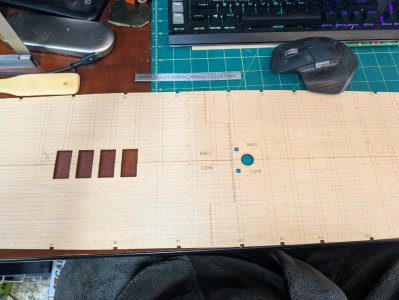
The kit has a giant hole in the floor of the rear of the gun deck. It is meant for you to use to insert the guns for the lower gun deck after the main gun deck is installed. I don't intend to do things like that, so I am going to plank over this, but I need some structure so that some of the plank ends aren't hanging out in midair. But I also need to be able to separate the right and left halves of the deck in order to insert them into the hull. So here I am adding "nailers" to one side using the middle plank as support.
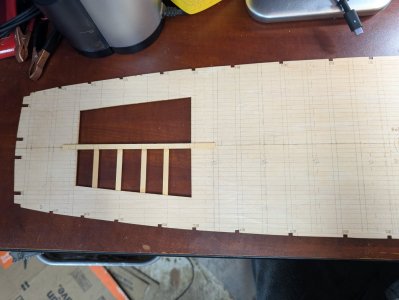
I figured out halfway through that I wouldn't be able to use the first nailer or the first section of middle plank, so I cut them short, and started adding in some staggered planks.
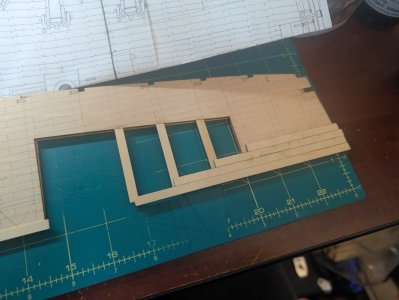
I then unfolded it and added some on the other side, making sure they were snug against the middle plank while still being able to fold.
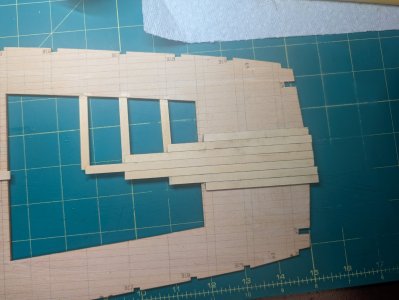
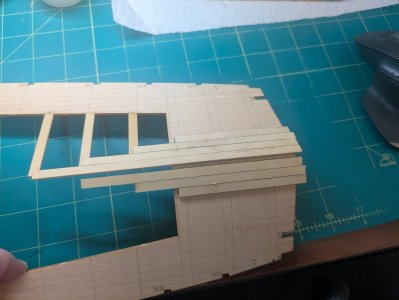
And then went back and added some nailers for the other side, now that I had something in there to support them.
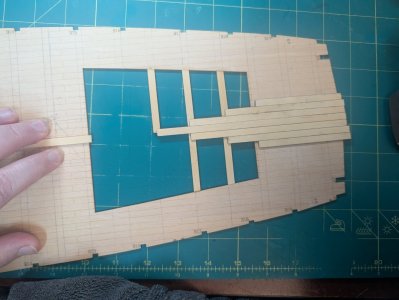
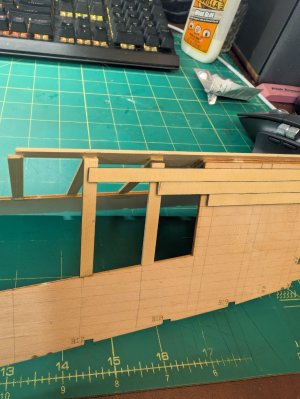
And that's about as much as I have gotten done now. I plan to try and get some major sections planked tonight and tomorrow, now that the groundworks is laid. Thanks for reading, just wanted you all to know I hadn't died yet.
Welcome back. A very thoughtful approach to the decking.
- Joined
- Oct 12, 2022
- Messages
- 64
- Points
- 88

Thank you for your fair comments with evidence., that was a pretty good nap. I am working on the main deck again.
Before I go into any of the small progress I've made, I would like to address something that was said regarding this kit on MSW. I was told it was made using the ANCRE plans and was thus not paying/attributing ANCRE for their work, which is one of the reasons you can't post the kit on MSW. Now, having the ANCRE set of drawings and the Unicorn kit, and having spent a great deal of time going over both, I can categorically state that, in my opinion, the Unicorn kit has taken NOTHING from the ANCRE plans. To whit, I have spent a month or so laying out the gun deck structure on the kit substrate parts.
I scanned some sections of the ANCRE plans and put them into Solidworks so I can get dimensions off them.
View attachment 493451
As you can see in the pictures below, not a lot of the structure is accurate. The fore and main masts will need to move back, and all the little mid deck opening and grates will also need to move, the four grate cutouts are a little undersized and very far forward.
View attachment 493445View attachment 493446
The kit has a giant hole in the floor of the rear of the gun deck. It is meant for you to use to insert the guns for the lower gun deck after the main gun deck is installed. I don't intend to do things like that, so I am going to plank over this, but I need some structure so that some of the plank ends aren't hanging out in midair. But I also need to be able to separate the right and left halves of the deck in order to insert them into the hull. So here I am adding "nailers" to one side using the middle plank as support.
View attachment 493447
I figured out halfway through that I wouldn't be able to use the first nailer or the first section of middle plank, so I cut them short, and started adding in some staggered planks.
View attachment 493448
I then unfolded it and added some on the other side, making sure they were snug against the middle plank while still being able to fold.
View attachment 493449View attachment 493450
And then went back and added some nailers for the other side, now that I had something in there to support them.
View attachment 493452View attachment 493453
And that's about as much as I have gotten done now. I plan to try and get some major sections planked tonight and tomorrow, now that the groundworks is laid. Thanks for reading, just wanted you all to know I hadn't died yet.
Now they can only rage with non-sense because those "pirate" manufacturers came products that surpass theirs. These “old” shareholders are attempting to hinder players from obtaining better products through rumors and proof less accusations.
Do not buy this model. I needed replacement parts and I haven’t heard back from the seller. They’ve gone dark. I even offered to pay for the pieces, shipping, and time the seller would spend to replace the parts, but no response. This model is $1000 and I’m completely blocked. I implore people NOT to purchase this kit. If you mess up you will never get a replacement. Stick with UK models that have customer service and can replace parts.
First of all what model kit you are talking about? This is your third warning message but it is not clear what are talking about. Also, why should we stick to UK models?Do not buy this model. I needed replacement parts and I haven’t heard back from the seller. They’ve gone dark. I even offered to pay for the pieces, shipping, and time the seller would spend to replace the parts, but no response. This model is $1000 and I’m completely blocked. I implore people NOT to purchase this kit. If you mess up you will never get a replacement. Stick with UK models that have customer service and can replace parts.
Things happened, and unfortunately for you, you had a bad experience. But if you will tell us what kit and what model this kit assembles we will try to help you.
- Joined
- Jan 25, 2023
- Messages
- 542
- Points
- 308

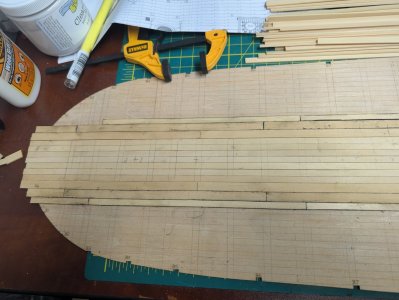
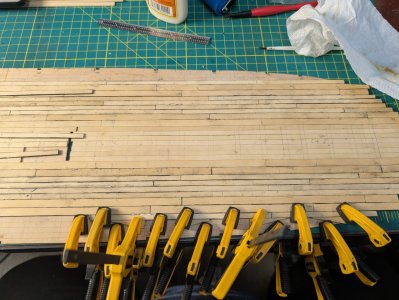
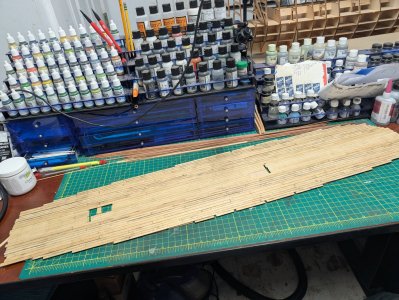
Progress! I have finally finished laying the decking on the main gun deck substrates.

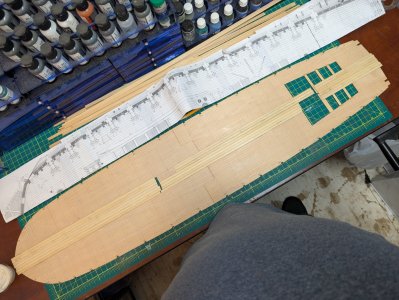
I stole this edge blackening idea from Dave at Dave's Lumber Yard. I have high hopes for the result once it's scraped and sanded.
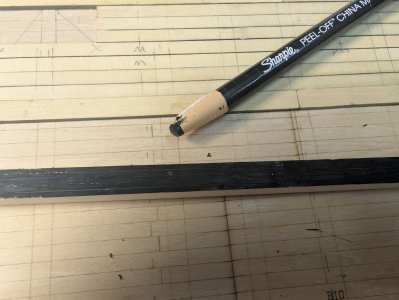
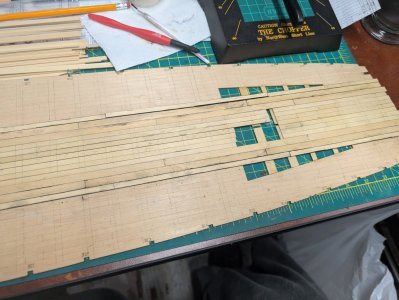
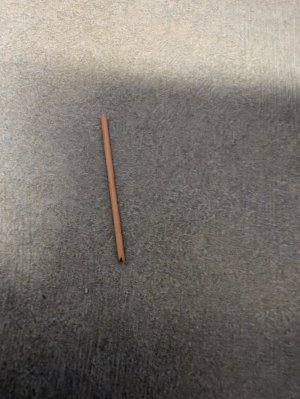
First successful treenail.
This is a technique I picked up from a youtuber named broinwood, he holds down his cutting board blanks on his router table this way.

Add some more clamp and you make some really tight planking joints.
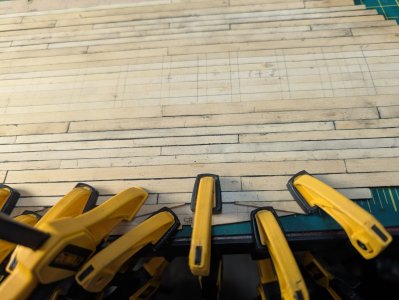
Here's me using all my dewalt mini-clamps:
total progress:
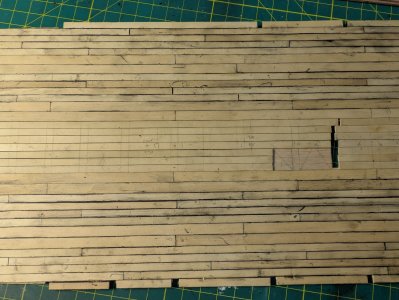
Bonus deck grating test:
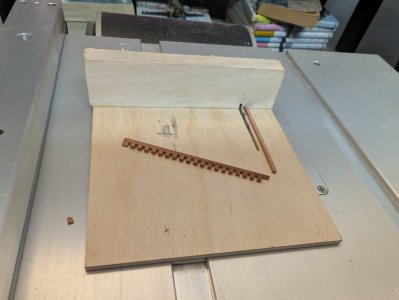
Next I am thinking of separating the two halves and putting each half through the thickness sander to clean up the upper surface. I need to remove the decking where the deck grates will be, I left it unglued in those areas to make that easier. Then the next question will be to treenail or not to treenail.


I stole this edge blackening idea from Dave at Dave's Lumber Yard. I have high hopes for the result once it's scraped and sanded.


First successful treenail.

This is a technique I picked up from a youtuber named broinwood, he holds down his cutting board blanks on his router table this way.

Add some more clamp and you make some really tight planking joints.

Here's me using all my dewalt mini-clamps:

total progress:


Bonus deck grating test:

Next I am thinking of separating the two halves and putting each half through the thickness sander to clean up the upper surface. I need to remove the decking where the deck grates will be, I left it unglued in those areas to make that easier. Then the next question will be to treenail or not to treenail.
- Joined
- Sep 10, 2024
- Messages
- 1,018
- Points
- 393

Nice tight joints on your deck! I hope the china marker smudges haven't penetrated too deeply into the grain. Also known as "grease pencils", they are made with a waxy base. Most any finish you put on there will likely fish-eye anywhere there is residual wax.
Might I also suggest that if you are going to run your entire deck through your thickness sander, that you wait until after treenailing? It will save you another sanding step. Actually with the deck off the ship like that, a well sharpened and properly burnished cabinet scraper will give you a smoother finish than any sandpaper.
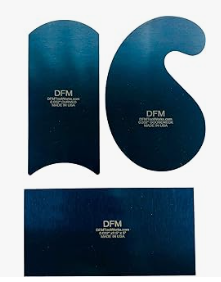
Might I also suggest that if you are going to run your entire deck through your thickness sander, that you wait until after treenailing? It will save you another sanding step. Actually with the deck off the ship like that, a well sharpened and properly burnished cabinet scraper will give you a smoother finish than any sandpaper.

Last edited:
- Joined
- Jan 25, 2023
- Messages
- 542
- Points
- 308

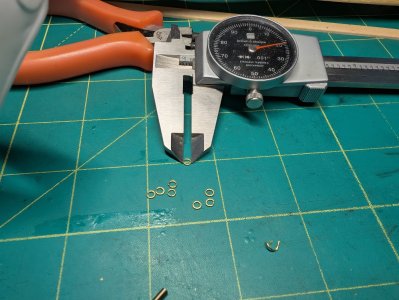
Just 92 more to go.
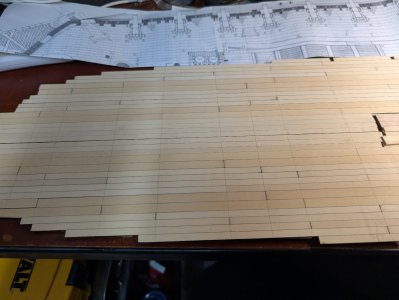
After the thickness sander:
Lessons learned: Check for plank movement before you clamp it down. Close enough, is not, in fact, close enough all the time.
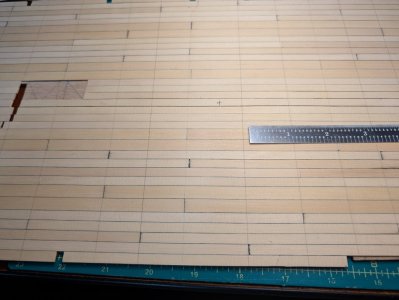
Russ, regarding using the thickness sander before I tree-nailed or scraped, this was just to even out the surface. I had actually used planks that were not uniformly thick. The strakes that are a little wider than most of the strakes were also about a 32nd thicker, too. Even now, there are still a handful of slightly lower spots I will need to get down to in the end.
On a bright note, my office smells like cedar now.

After the thickness sander:

Lessons learned: Check for plank movement before you clamp it down. Close enough, is not, in fact, close enough all the time.

Russ, regarding using the thickness sander before I tree-nailed or scraped, this was just to even out the surface. I had actually used planks that were not uniformly thick. The strakes that are a little wider than most of the strakes were also about a 32nd thicker, too. Even now, there are still a handful of slightly lower spots I will need to get down to in the end.
On a bright note, my office smells like cedar now.
Last edited:
At least twice as much as called for!So, the ANCRE booklet tells me what size of rope I need, how do I figure out how much rope I need?
- Joined
- Jan 25, 2023
- Messages
- 542
- Points
- 308

I wish there was a word for advice that is both helpful but also not very helpful at the same time.At least twice as much as called for!
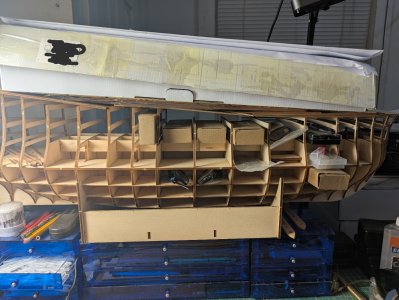
Rob I just finished going thru your Bonhomme Richard. I love your methodical common-sense approach to building this ship. Judging from the bulkhead skeleton
in post 47, she will dominate as the center of attention in any room you place her in. I see your last post was from the end of June, you must be taking a break.
in post 47, she will dominate as the center of attention in any room you place her in. I see your last post was from the end of June, you must be taking a break.
- Joined
- Jan 25, 2023
- Messages
- 542
- Points
- 308

The thing about a ship model the size of the Bonnie Dick, there are times it is very easy to get bogged down for months on part of it with little to show in the way of progress. The main deck is one of them and I grew bored. So I am working on the French Longboat to distract myself from it for a while.
Last edited:


