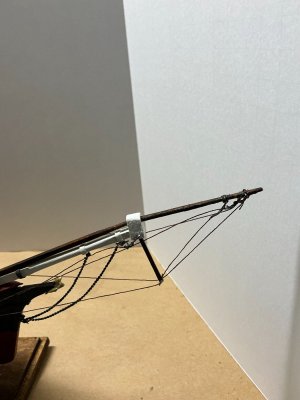
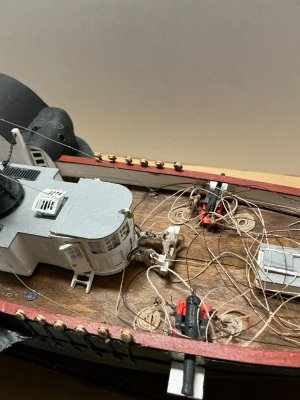
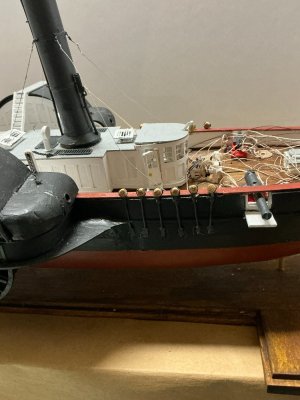
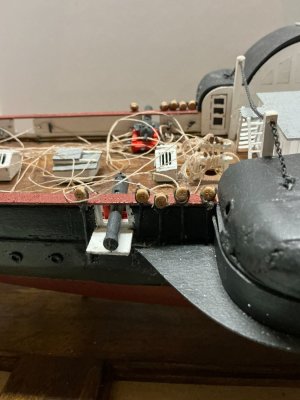
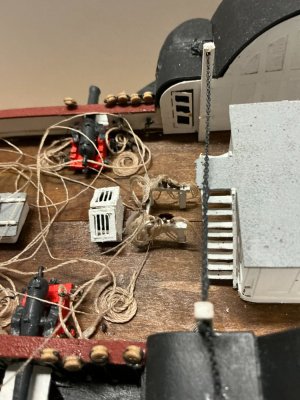
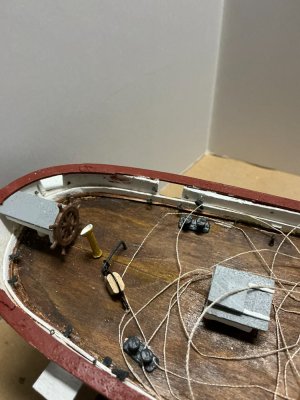
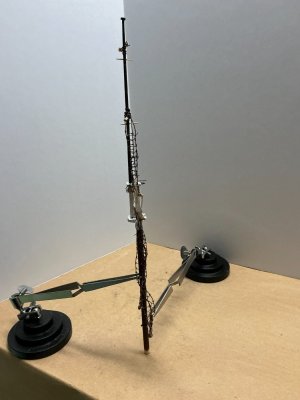
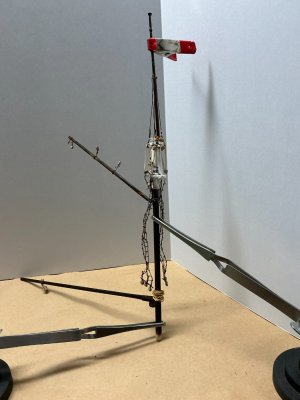
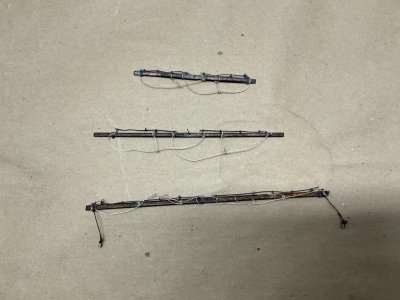
Since my last posting, the jibboom and striker/martingale are in position. The two masts and the fore mast yards/spars have been made but not yet put together. I have also attached the boom and gaff to the main mast. The ratlines, shrouds and sheerpoles have been added to both masts. The jackstays have been added to the three fore mast yards. I have added the martingale stays and bowsprit shrouds. I also added standing and running rigging where it was attached to the belay pins as it was easier to do so prior to starting the rigging. The other ends of this rigging will be put in place when I do the rest of the standing and running rigging. I also did the foot ropes and the traveler.
In working on the masts, yards/spars, rigging blocks and rigging rope, I used a couple of hints I found in a video on these items while working on the Mamoli USS Constitution kit which I would like to pass along as they have been helpful to me.
The first advice was to attach as much as you can to the masts and yards/spars prior to joining them together and then to the deck. For this kit, that included eyebolts to the masts, rigging blocks to the masts and to the eyebolts attached to the masts, the shrouds and ratlines, sheerpoles, main mast boom saddle, boom and gaff. For the yards, it included the jackstays, foot ropes, rigging blocks, and cloth sails (the sails are not yet on the jackstays which will be for my next posting).
The second advice was to do the rigging from the bottom to the top and from the inside to the outside. Thus, I attached the standing and running rigging ropes that tie off on a belaying pin first as I mentioned above. By working from the inside to the outside, you, for the most part, do not run into the ropes you have already secured in place. I will also be using this second advice when I do the rest of the standing and running rigging.
I used OcCre beeswax on all the ropes to preserve them and make it easier to use them.
The kit did not contain the main mast boom saddle, mentioned in Step 92 of the Instruction Manual. I contacted Model Shipways and they said that yes, it was missing from the laser-cut board and to make a size I thought appropriate, so I made my own from the Sheet 9 scrap wood. It was a half-circle, ¾” in diameter with a ¼” diameter hole to go halfway around the main mast.
The laser-cut jibboom was too short (not sure if I did something wrong but do not think so). So, I test fitted the jibboom to the bow fairlead and cut off the other end of the jibboom so the cut end would be in the middle of the bowsprit cap. I then cut out the rest of the jibboom from the scrap board that had the laser-cut jibboom using the Rigging Plan (Sheet 2) as a guide. I used a 1/2 mm drill bit in my mini drill press to make a hole in the ends of my two jibboom pieces where the pieces would meet. Then glued a 1/2 mm Beadalon brass rod in the holes and then glued the two jibboom pieces together.
The stems of the belaying pins were not long enough for me to do the usual figure 8 pattern for tying off rigging ropes to the pin, so I just looped the rope 3 1/2 times around the pommel of the pin like was shown in Step 125 of the Instruction Manual.
I made a jig for looping the rigging ropes around the pommel of the belaying pins. I drilled a 1 mm diameter hole in a piece of scrap wood and placed a 0.8 mm brass rod in the hole. I then pushed a piece of masking tape with the sticky side up over the rod and marked 10 mm on the tape from the rod. I then looped the rigging rope 3 ½ times around the rod and down to the 10 mm line, with the rope loops on top/beside each other. Once the circles were made, I used my Evergreen White Wood Glue on the rope to keep the circles together. The next day I carefully removed the masking tape and glued the ropes to the belaying pins and the front edge of the fife rack.
To make the upper main mast hoops, the smaller ones, I used the provided 3/16” diameter dowel and placed painter’s tape around it (the instructions said to use either wax paper or masking tape, but I found the painter’s tape easier to use). I then curled the appropriate cardboard strips around the dowel on top of the tape and glued the strip to itself. If any glue got on the tape, that was why it was on the dowel. Once dry, I slid off the hoops and cut away the extra strip paper.
To make the lower main mast hoops, the larger ones, I was supposed to use a 5/16” diameter dowel, but no such dowel was provided. Before I looked in my supply bin to see if I had such a diameter dowel, I happened to see my set of 12 wooden handled flat paint brushes. So, I measured them. Turns out the #6 brush as its widest area, was approximately 5/16” in diameter. Thus, I repeated the same method that I used on the smaller hoops on this area of the paint brush. Because of the limited area of 5/16” diameter. I could only do 3 hoops at a time.
Although the Instruction Manual did not say to place the cardboard strips as stops on the yards, the plans seemed to show them in place, so I did so.
For the jackstays, I used my Beadalon 24-gauge (0.5 mm) craft wire instead of the supplied 24-gauge copper wire. That way I did not have to paint the wire.
Rather than use a piece of paper marked with 4 mm spacing behind the shroud to assist placing the ratlines, I used a 4 mm wide wood strip left over from another kit (I always keep left over materials if I think that might come in handy for a future project). I first glued the sheerpole in place and then placed the 4 mm strip against the top of it to verify my lowermost ratline was in the correct location, as I attached it to the shroudlines. I repeated this by placing the strip against the top of the uppermost ratline to adjust the next one going upward. I used a clove hitch to attach the ratlines to the shroudlines. I discovered this technique (both the clove hitch and the wood strip spacer) online in a video about attaching ratlines to shroudlines.
The clip on the main mast is to prevent the small mast hoops from coming off the mast, which happened twice, prior to adding the clip.
The masts have one coat of Model Expo Primer and two coats of Model Expo White paint where painted. The non-paint portion of the masts and the entire surface of the yards/spars, jibboom, striker/martingale, main mast boom saddle, boom and gaff had one coat of Model Expo Pre-Stain Wood Conditioner, three coats of OcCre Walnut Dye and two coats of OcCre Sating Varnish.
All the eyebolts, mast stops, yard stops, jibboom stops, mast fids and the traveler have one coat of Vallejo Black Primer and two coats of Model Expo Iron/Cannon Black paint.
The main mast hoops have two coats of Model Expo Deck House Buff paint. These hoops will eventually be attached to the boom and gaff cloth sails.
The sheerpoles have one coat of Model Expo Primer and two coats of Model Expo Hull Bottom Copper Red paint.
The belaying pins have one coat of Model Expo Primer and two coats of Model Expo Deep Brown paint.
This posting covers Steps 87 through the second Step107 (but not the lanyards yet), Step 108 (but not the lanyards yet), Step 109, and Steps 112 through 114, Step 121, the belaying pin portion of Step 125, Step 126, Step 132, Step 138, Step 139 and Step 142 of the Instruction Manual.
Please enjoy the attached photos.
All comments or questions appreciated.