Kit review USS BONHOMME RICHARD - Full rib Cross Section (Pear version) - Scale 1:48 - Unicorn models

Uwek

Administrator
Staff member
Administrator
Forum Moderator
Joined
Dec 25, 2017
Messages
33,289
Points
1,238

Location
Vienna, Austria
Based on the extreme good quality I could see in the building log of @OlegM with his USS Bonhomme Richard from the same manufacturer


I was convinced, that this section model will be also a very good smaler project in between, so I ordered from Max (ZHL) the kit.
The kit is available in different versions of wood and furniture / fittings. I ordered the best wood available in pear and also the add-ons, like the internal furniture plus barrels as well the handrail in boxwood.

Finally the finished built kit model can and should look like the model shown in advertisement photos - try so

USS Bonhomme Richard 9_zpsebr2jkf6.jpg

USS Bonhomme Richard 8_zpspojztatn.jpg

USS Bonhomme Richard 5_zpsmmf1c93j.jpg

These photos, together with the great model by Oleg influenced very much my decision for the order.


A video made by ZHL showing the parts and un-boxing you can find in the topic

 
Last edited:
Now the un-boxing of the kit

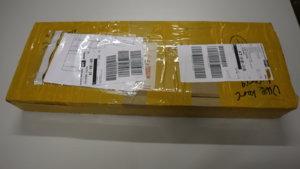
well packed by Max - absolutely no damage of the parcel - delivery time from China to Vienna in 3 days - This is good service
IMG_3484.JPG

IMG_3485.JPG

IMG_3486.JPG

IMG_3487.JPG

also inside clear and safe packed
IMG_3488.JPG

The base kit
IMG_3490.JPG

and the add ons like barrels, inside furniture and handrail in boxwood
IMG_3489.JPG

But first of all the paper documents, manuals and drawings, in the next post I will show the wooden parts and fittings

These are the small drawings for the add-ons
IMG_3518.JPG

and the main drawing for the structure of the section
IMG_3519.JPG

The manual in chinese language, but illustrated more or less every working step with clear photo. Shown there is a kit with lower quality timber
IMG_3520.JPG

IMG_3521.JPG

IMG_3522.JPG

IMG_3523.JPG

IMG_3524.JPG

IMG_3525.JPG

IMG_3526.JPG

IMG_3527.JPG

And the parts list - usual way in the chinese kits - Will be the first thing to do - to compare the content of the kit with these sketches
IMG_3528.JPG
 
Now I will show the content of the kit

the temporary jig(s)
IMG_3491.JPG

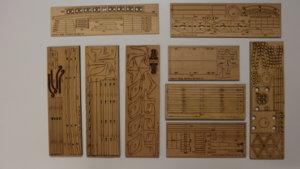
The frames / ribs
IMG_3492.JPG

IMG_3493.JPG

beams etc (on the right side the simple stand)
IMG_3494.JPG

IMG_3495.JPG

beams, knees carriages for guns, ladder etc.
IMG_3496.JPG

IMG_3497.JPG

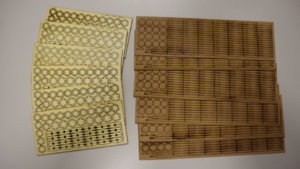
here in detail the handrail in pear in laser cut (part of the base kit)
IMG_3498.JPG

details of the carriage
IMG_3499.JPG

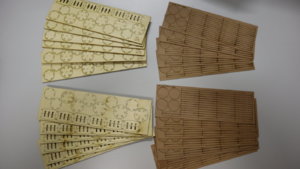
Highest quality timber for the planking etc.
IMG_3500.JPG

IMG_3501.JPG

the fittings
IMG_3502.JPG

IMG_3503.JPG

IMG_3504.JPG

IMG_3505.JPG

IMG_3506.JPG

IMG_3507.JPG

The first set of the bigger size barrels (part of add on)
IMG_3508.JPG

IMG_3509.JPG

and the smaller size barrels
IMG_3512.JPG

Inside structure (part of add on)
IMG_3510.JPG

IMG_3511.JPG

IMG_3514.JPG

and the add on of the Handrail cnc-carved in boxwood - great !!!
IMG_3515.JPG

IMG_3517.JPG

First impressions of the parts is very good - best timber, high quality with only very small differences in color

In the next time I will describe maybe more some details - definitely I will start a building log and show during the construction more details

Up to now I am very happy with this kit Thumbs-Up Thumbs-Up Thumbs-Up
 
UWE, BEAUTIFUL KIT, ONE QUICK QUESTION HOW DO YOU NFINISH THE FRAMES IF YOU WERE TO USE OIL AND LEFT MORE OF THE PLANKING OFF, BEFORE OR AFTER INSTALLATION IF AFTER HOW DO YOU GET THE OIL BETWEEN THE FRAMES WITH SUCH SMALL SPACING. THANKS Don
 
They make a very nice kit Uwe, the only thing that puzzled me about the rail and belfry upgrade was that they are only carved on one side, are yours the same, I look forward to your build, I'm tempted to start one as well, will think about it,

best regards John,
 
I just been out in my hobby room going through all the styff in the kit, and one of the things I noticed that I had missed before was the piece of the craft knife blade that had three profiles filed into it, just goes to show their attention to details,

best regards john,

IMG_3507.JPG
you can just make out the profiles on the bottom of the blade,

.
 
I just been out in my hobby room going through all the styff in the kit, and one of the things I noticed that I had missed before was the piece of the craft knife blade that had three profiles filed into it, just goes to show their attention to details,

best regards john,

View attachment 111447
you can just make out the profiles on the bottom of the blade,

.
Yes, i realized this small Tool in the bag. They did not forget the Detail.
 
UWE, BEAUTIFUL KIT, ONE QUICK QUESTION HOW DO YOU NFINISH THE FRAMES IF YOU WERE TO USE OIL AND LEFT MORE OF THE PLANKING OFF, BEFORE OR AFTER INSTALLATION IF AFTER HOW DO YOU GET THE OIL BETWEEN THE FRAMES WITH SUCH SMALL SPACING. THANKS Don

Good question, but too early to answer now in detail. Will clarify this during the work on the section
 
They make a very nice kit Uwe, the only thing that puzzled me about the rail and belfry upgrade was that they are only carved on one side, are yours the same, I look forward to your build, I'm tempted to start one as well, will think about it,

best regards John,

Have to Check it out......good Point. Maybe we Need two and reduce the thickness, but i have to Check also the drawings and the planset of boudriot.
 
THIS QUESTION HAS BEEN BUGGING ME FOR A LONG TIME, have messed up some good POF BUILDS AND STARTING SOME MORE, OILING IT BEFORE IS NO GOOD BECAUSE YOU NEED MORE SANDING, CAN NOT GET A RAG IN TO RUB DOWN THE OIL, A DILEMA. Don
 
Great review Uwe and a great kit Thumbsup
Would the reverse of the rail not be plain anyway because the far side has the pillars on it?

Kind Regards

Nigel


Thats a good point Nigel, the rails may well hide the other side, but I imagine you could still see the other side of the belfry, anyway these are little things that can be overcome with a little ingenuity, :):):),

best regards John,
 
I forgot to ask about the instruction manual, is there any English translations or just pictures with Chinese annotations? I am wondering if there are little 'gotchas' you may need to know besides the photos. Since you are already building CAF models how you can compare both manuals?
 
I forgot to ask about the instruction manual, is there any English translations or just pictures with Chinese annotations? I am wondering if there are little 'gotchas' you may need to know besides the photos. Since you are already building CAF models how you can compare both manuals?
Hallo Jim,
there is no english translation included, but I think it is not necessary, because also very limited chinese text printed. They work more with relatively good photos of the different working steps, which are saying often more words than too much text.
And I think, that the planset of Boudriot will also help a lot


Compared to the manual of the Salamandre from CAF, this one is better, due to the fact that the small sketches from CAF are not every time helping a lot, they show too less information. But you should take into account, that the Salamandre is already an older POF kit, and the chinese are learning very fast to make these drawings and manuals kit by kit better and better - a good example is here the manual from Trident, which is already much better......
 
Seeing as Uwe has done a review on the Pear kit I thought you might like to see the Cherry version, I bought the Cherry version as it was a lot cheaper than the Pear version, all the fittings and upgrades are the same as in Uwe's kit so I am just showing the cherry wood sheets and the upgrade Pear rail and Belfry,

1.jpg


2.jpg
The pear upgrade rail laying over the cherry sheet, I will have to darken it a little to blend in, it will be the same
with the pear wood belfry,


3.jpg
Prar wood belfry,


4.jpg


5.jpg


6.jpg

7.jpg

all the wood is looking great and free from blemishes,
 
Back
Top