-

Win a Free Custom Engraved Brass Coin!!!
As a way to introduce our brass coins to the community, we will raffle off a free coin during the month of August. Follow link ABOVE for instructions for entering.
-

PRE-ORDER SHIPS IN SCALE TODAY!
The beloved Ships in Scale Magazine is back and charting a new course for 2026!
Discover new skills, new techniques, and new inspirations in every issue.
NOTE THAT OUR FIRST ISSUE WILL BE JAN/FEB 2026
You are using an out of date browser. It may not display this or other websites correctly.
You should upgrade or use an alternative browser.
You should upgrade or use an alternative browser.
From my personal experience, diamond sharpeners are tools killer. It is advisable to use either water stones to oil stones, maybe I am an oldE school?. Propper sharpening the tool is a science and requires knowledge and practice. Technically, once the tool sharpened it will require only honing.
The fine one put a good edge on them, though. Eventually I’ll probably have to use my grinder, but I’ll need to get some attachments before then. I’ll try my stone next time. I’m pretty sure it will take some more time. I’m just using the paddle to hone between uses. Thanks for the advice.
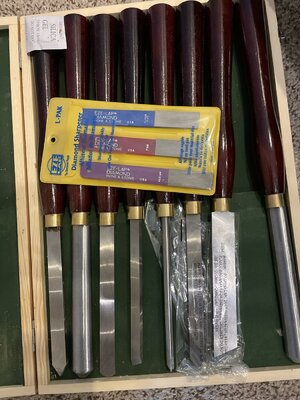
Looks like the lathe is getting plenty of use, your learning quickly, I need to get some more toys for my mancave would like to start with a sander.I tapered and sanded all my yards on my new lathe. I’m starting to get a feel for the lathe and have purchased some diamond sharpening paddles to help keep the chisels ready to cut. They cost about $18 on Amazon. View attachment 235948View attachment 235949
Tony, for me it appears that experience is the best teacher. I can read about it and watch it on YouTube, but I need the hands on. After that, the reading and videos all of a sudden make sense.Looks like the lathe is getting plenty of use, your learning quickly, I need to get some more toys for my mancave would like to start with a sander.
I just turned my gaff and boom for my spanker sail. I’d like to see some pictures or discussion on how to rig spankers. I found some things online, but it was pretty sparse.
Here's how I did mine. This is actually from Mamoli's instructions. For the upper boom there's a triple block on the mast end. Study this a bit and hopefully it'll make sense. The lines going up from the end of the upper boom aren't really part of the spanker rigging. Four go to the spars above to turn them. The 5th Is just a line I added to have somewhere to put the flag.
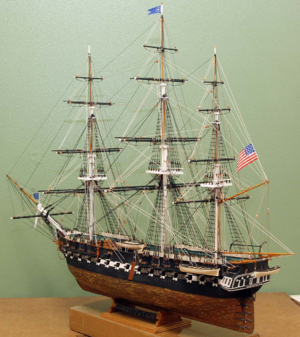

So, are the braces connected to the gaff? And did you make the rings for the spanker?Here's how I did mine. This is actually from Mamoli's instructions. For the upper boom there's a triple block on the mast end. Study this a bit and hopefully it'll make sense. The lines going up from the end of the upper boom aren't really part of the spanker rigging. Four go to the spars above to turn them. The 5th Is just a line I added to have somewhere to put the flag.
View attachment 236839
And thanks, Jodie.
Not entirely sure what you mean but I'll try.
On the end of the gaff what I think you are calling the braces are connected to the gaff and go down to the double blocks which go to another double block attached to the arms sticking out at the corners, the line then goes forward and ties off near the cleat for the boat hanger. There are also 4 single blocks on the end of the gaff that the four lines for turning the yards go through. There is a similar arrangement on the end of the boom to each corner of the ship. From the end of the boom there are also 2 lines that go up to single blocks under the platform and then go down and tie to the end of the pin rain at the bottom of the mast.
I'm not sure what you mean by the rings for the spanker. If you mean the rings to hold the sails on the answer is no. The gaff and boom do have rings so they can slide up and down they are held on by the rigging not glued in place.
Here's another photo that shows the side a little better.
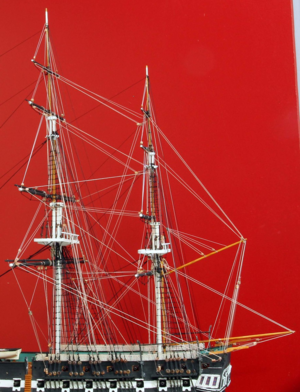

 , so they are for turning the yards. I see how they go down and are tied off. My instructions are soooo simplified. I keep getting the urge to tear up all the rigging and to start over. Did you use the plans that came with the kit?
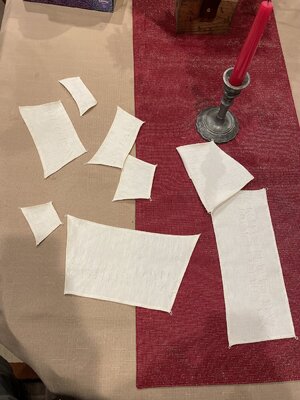
The Admiral steam ironed the sails before stitching. I wish she had waited until the edges were sewn up. Now the edges are frayed. A string walked into a bar and the bartender said, “We don’t serve strings!” The string walked out, tied himself, and missed up the end and then walked back into the bar. The bartender asked, “Aren’t you that string I just threw out of here?” The string answered, “No, I’m a frayed knot!”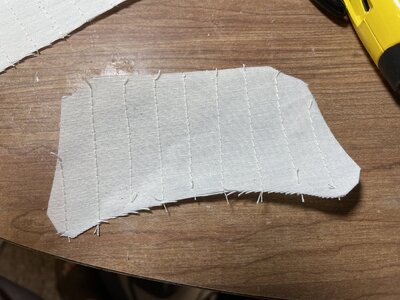

I should have touched up the edges with CVA before handing the sails over to the Admiral.
My rigging matches the plans I got with the Mamoli Kit. It's not exact to the current ship but it's very close. The Mamoli rigging instructions take a lot to decode but they're really pretty good once you understand the codes and a tiny bit of italian.
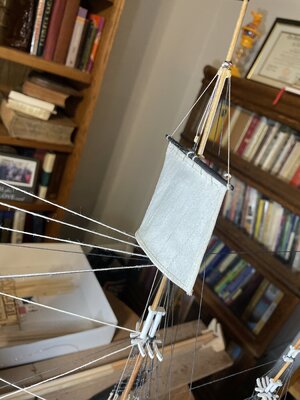
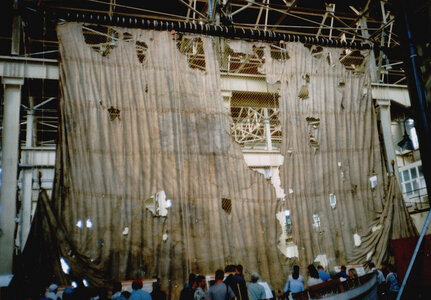
Attached sails to main and mizzenmast yards/gaff with robands. When I started with the foremast robands, I used this spacing. I had also seen others using this spacing between the robands holding the sails to the yard. On my Black Pearl, the spacing was much closer together. I later saw a picture of a sail of the Victory hanging on a yardarm in a museum. They were a lot closer in it. I’m not going to change it on this model. I want it to be consistent with the foremast. 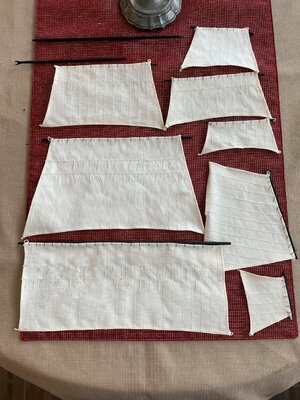


Last edited:
The sail above was taken from the ship after the Battle of Trafalgar, I believe.
Again, this is a simplistic build. The plans don’t incorporate clues and buntlines. There are no braces for the mizzenmast sails. I’m adding a few things not in the kit, but not many considering I started it as my first build. I’m not going to tear it all up and start over. I do like it, though. It’s an elegant ship even in its simplicity.


