






Curses! This phone app is annoying..
So let's try this again. Repeating:
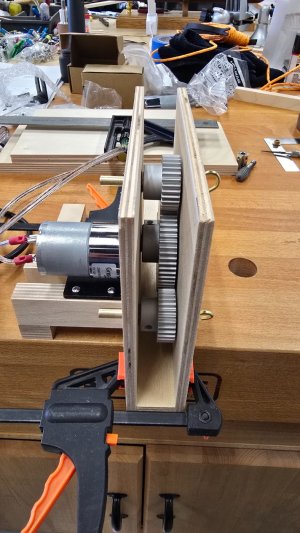
I finally got the rope walk head assembly sorted out. It took several passes to get the spacing of the flange bushings correct. It wasn't that I didn't have the correct dimension. I did. From Center to Center was 45 mm. But no matter how carefully I marked the plywood and positioned the centering holes, there was just enough slop in the drill press to render the early attempts useless.
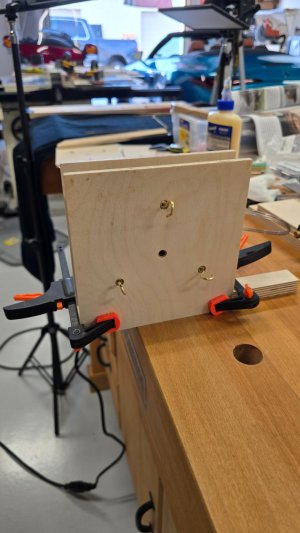
Long story short, I tested the yet to be completed assembly and everything looks fairly good. Here are photos and a short video demonstration.
Note: I'm not sure I need a 4th hook at the front of the drive. But I left material on the three orbital gears to allow me to push everything forward to allow a connector between the motor's shaft and the central gear. I'll connect the fourth hook assembly to the forward end of that connector, passing it through the central gear.
View attachment compressed_demo_final.mp4
So let's try this again. Repeating:
I finally got the rope walk head assembly sorted out. It took several passes to get the spacing of the flange bushings correct. It wasn't that I didn't have the correct dimension. I did. From Center to Center was 45 mm. But no matter how carefully I marked the plywood and positioned the centering holes, there was just enough slop in the drill press to render the early attempts useless.
Long story short, I tested the yet to be completed assembly and everything looks fairly good. Here are photos and a short video demonstration.
Note: I'm not sure I need a 4th hook at the front of the drive. But I left material on the three orbital gears to allow me to push everything forward to allow a connector between the motor's shaft and the central gear. I'll connect the fourth hook assembly to the forward end of that connector, passing it through the central gear.
View attachment compressed_demo_final.mp4
Last edited:






