A review of the Swan-class sloop model, Pegasus, designed by Chris Watton and produced by Amati under their Victory brand.

Part 1
Inside the reasonably stout box, the larger laser-cut items are all contained and protected inside plastic bags. There are separate bags for the copper plates and the photo-etched items. Three subdivided plastic trays contain all the small things.


The Paperwork.
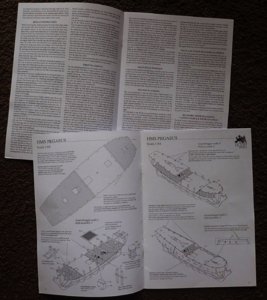
There is an eight page text-only instruction booklet, which looks to be adequate rather than being comprehensive and a nine page illustrated guide that supplements the instructions. This also includes a three page listing of all parts. There is also a listing of recommended tools, paints, adhesives and stains in the instructions.
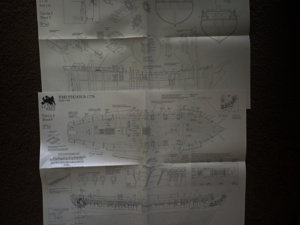
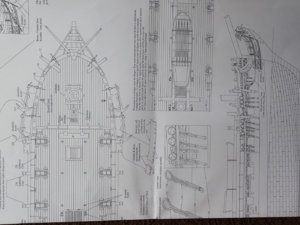
There are three plan sheets showing, at full-size, the various laser-cut parts and the PE sheets. A fourth sheet shows the position of all the PE decorations on the hull. Sheets five and six show the deck plan, an inboard profile and a side elevation, all drawn full size. There are also some detailed exploded views of various parts. Sheets seven to twelve deal with the rigging – a mix of full size, reduced and detailed exploded views.




The Laser-cut sheets.
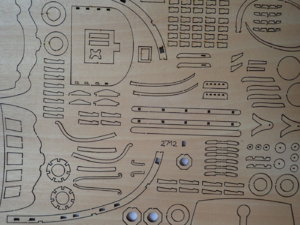
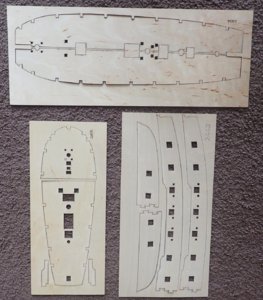
There are a total of twelve laser-cut sheets. All are clean cut with no burns. There are no part numbers anywhere, so identification must be made (eg for the bulkheads) before separating individual parts from the sheets. There are two large sheets of 5mm MDF that contain the false keel, all the bulkheads and a few other parts. One small sheet that in the parts list is 3mm MDF, is now 3mm ply, presumably because the MDF was too weak for these pieces. There are two sheets of walnut, one 5mm the other 3mm. There are three sheets of 1.5mm walnut ply, the false decks and the gunport patterns are all 1mm ply and there are several other small ply pieces.


The solid walnut is quite dark while the walnut ply is significantly lighter in colour.

The false gun deck is in two lengthwise halves, to make installation easy.
The Strip wood.
Limewood for the first hull planking, walnut for the second and the main wale. There are some slight colour variations in the latter but this should not be a problem. The deck planking is Tanganyika, though the grain is a little bit obvious. There is a selection of other strips to use where required. Ramin dowels are supplied for the spars, fairly dark in colour, but not warped.
Limewood, walnut, Tanganyika and ramin.

Walnut, showing colour variations.
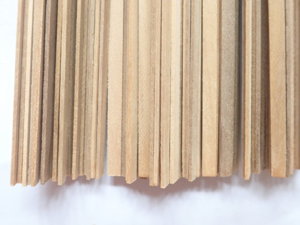
Tanganyika showing the visible grain.
The wood is generally of good quality.
The Photo-etched brass.
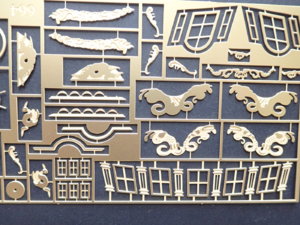
There are 820 PE brass fittings on nine frets, of 0.25mm, 0.50mm and 0.70mm thicknesses. The PE includes decorations, chain plates, deadeye strops, rigging hooks, stanchions, gun port hinges, ship’s wheel, window fascias, etc etc.

Chain plates.

Euphroe blocks and fittings for the deadeyes.
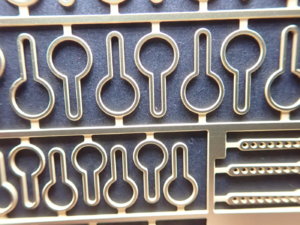
There are 1000 copper plates in two groups, one for the starboard side and the other for the port. The pattern is slightly different port/starboard to allow for the fixing of the plates from the keel upwards and forwards from the stern. The pattern of the nails is quite subdued and the plates should look very good on the ship. They are however very bright fresh out of the box.
The copper plates, what look like holes are the heads of the nails. They are flush with the surface of the plate.

End of Part 1.

Part 1
Inside the reasonably stout box, the larger laser-cut items are all contained and protected inside plastic bags. There are separate bags for the copper plates and the photo-etched items. Three subdivided plastic trays contain all the small things.


The Paperwork.
There is an eight page text-only instruction booklet, which looks to be adequate rather than being comprehensive and a nine page illustrated guide that supplements the instructions. This also includes a three page listing of all parts. There is also a listing of recommended tools, paints, adhesives and stains in the instructions.

There are three plan sheets showing, at full-size, the various laser-cut parts and the PE sheets. A fourth sheet shows the position of all the PE decorations on the hull. Sheets five and six show the deck plan, an inboard profile and a side elevation, all drawn full size. There are also some detailed exploded views of various parts. Sheets seven to twelve deal with the rigging – a mix of full size, reduced and detailed exploded views.


The Laser-cut sheets.
There are a total of twelve laser-cut sheets. All are clean cut with no burns. There are no part numbers anywhere, so identification must be made (eg for the bulkheads) before separating individual parts from the sheets. There are two large sheets of 5mm MDF that contain the false keel, all the bulkheads and a few other parts. One small sheet that in the parts list is 3mm MDF, is now 3mm ply, presumably because the MDF was too weak for these pieces. There are two sheets of walnut, one 5mm the other 3mm. There are three sheets of 1.5mm walnut ply, the false decks and the gunport patterns are all 1mm ply and there are several other small ply pieces.


The solid walnut is quite dark while the walnut ply is significantly lighter in colour.

The false gun deck is in two lengthwise halves, to make installation easy.

The Strip wood.
Limewood for the first hull planking, walnut for the second and the main wale. There are some slight colour variations in the latter but this should not be a problem. The deck planking is Tanganyika, though the grain is a little bit obvious. There is a selection of other strips to use where required. Ramin dowels are supplied for the spars, fairly dark in colour, but not warped.
Limewood, walnut, Tanganyika and ramin.

Walnut, showing colour variations.

Tanganyika showing the visible grain.

The wood is generally of good quality.
The Photo-etched brass.
There are 820 PE brass fittings on nine frets, of 0.25mm, 0.50mm and 0.70mm thicknesses. The PE includes decorations, chain plates, deadeye strops, rigging hooks, stanchions, gun port hinges, ship’s wheel, window fascias, etc etc.

Chain plates.

Euphroe blocks and fittings for the deadeyes.


There are 1000 copper plates in two groups, one for the starboard side and the other for the port. The pattern is slightly different port/starboard to allow for the fixing of the plates from the keel upwards and forwards from the stern. The pattern of the nails is quite subdued and the plates should look very good on the ship. They are however very bright fresh out of the box.
The copper plates, what look like holes are the heads of the nails. They are flush with the surface of the plate.

End of Part 1.


