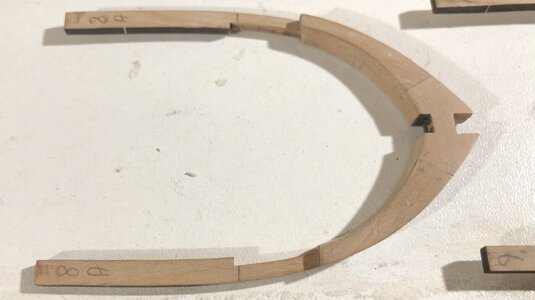
If your bottomed out and sure that frame is in the right location, then the only thing I see is a little too much sanding at the frame tip.This is my first attempt to seat a frame into the keel. Have I got the depth set properly?View attachment 434897no
-

Win a Free Custom Engraved Brass Coin!!!
As a way to introduce our brass coins to the community, we will raffle off a free coin during the month of August. Follow link ABOVE for instructions for entering.
- Home
- Forums
- Ships of Scale Group Builds and Projects
- Bluenose PoF Group Build
- Bluenose Group Build Logs
You are using an out of date browser. It may not display this or other websites correctly.
You should upgrade or use an alternative browser.
You should upgrade or use an alternative browser.
YQ Bluenose Ted R [COMPLETED]
- Thread starter Ted Robinson
- Start date
- Watchers 20
-
- Tags
- bluenose
- Joined
- Oct 1, 2023
- Messages
- 1,961
- Points
- 488

Thank you for your response.
Ok. I'm aware that the assembly of the initial frames leave a lot to be desired. I requested information on getting replacements for the first eight frames. (Even purchase the first package of twenty.) But can't find a way to contact the manufacturer. Pressing on.
Ok. I'm aware that the assembly of the initial frames leave a lot to be desired. I requested information on getting replacements for the first eight frames. (Even purchase the first package of twenty.) But can't find a way to contact the manufacturer. Pressing on.
- Joined
- Oct 1, 2023
- Messages
- 1,961
- Points
- 488

I was trying to align the frame parts after glueing and press the between two plates of glass. Then I was putting the parts on top of a glass plate but getting movement I was unaware of after clamping.Thank you for your response.
Ok. I'm aware that the assembly of the initial frames leave a lot to be desired. I requested information on getting replacements for the first eight frames. (Even purchase the first package of twenty.) But can't find a way to contact the manufacturer. Pressing on.
On the next set of frames I'm going to glue the parts to the paper plan and sand away the residue.
- Joined
- Oct 1, 2023
- Messages
- 1,961
- Points
- 488

Could someone give me a hint on the sequence of sandpaper grits used from rough to finish.
Thanks
Ted
Thanks
Ted
- Joined
- Sep 3, 2021
- Messages
- 5,139
- Points
- 738

From rough to fine: say from 120 to 320, 600 or even finer. This depends on your personal taste in finish roughness.Could someone give me a hint on the sequence of sandpaper grits used from rough to finish.
Thanks
Ted
- Joined
- Oct 1, 2023
- Messages
- 1,961
- Points
- 488

Thank you RDN1954.From rough to fine: say from 120 to 320, 600 or even finer. This depends on your personal taste in finish roughness.
I want a pretty polished finish.
I'll use your recommended sequence and then check it out. I bought a sanding block online that came all the way up to 1500.
Ted
- Joined
- Oct 1, 2023
- Messages
- 1,961
- Points
- 488

I have sanded the first ten frames Using 180, 240, 400 and 600 grit sandpaper.
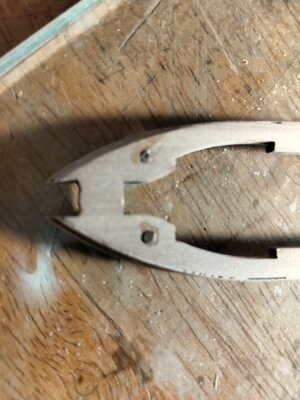
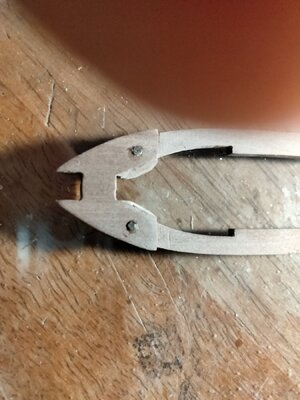
I made my initial attempt to use brass nails as bolts. It didn't go well. The front side came out ok but the backside didn't. I believe it would be better to omit the treenails rather than them not being perfectly aligned.
What method are you guys using to do the layout.
I'm reluctant to try marking them with a pencil as it would leave marks unless it sanded them away. That would also sand the nail head. I thought of making a fixture but would need one for each frame as the parts change. I'm at a loss.
Still having fun.
TedBy


If you look at post #73 of my build log you will see an explanation of my technique.
- Joined
- Oct 1, 2023
- Messages
- 1,961
- Points
- 488

Thank you, looking it up now
- Joined
- Oct 1, 2023
- Messages
- 1,961
- Points
- 488

I went to your post #73 and admired your work. I considered using the wood filler prior to deciding on the brass nails. I'm trying to figure out how to mark the drilling locations. I want to keep the treenails aligned in the longitudinal axis and symmetrical from side to side. Please see photos from previous post.Thank you, looking it up now
Are you just estimating where they go visually or using some sort of locating fixture.
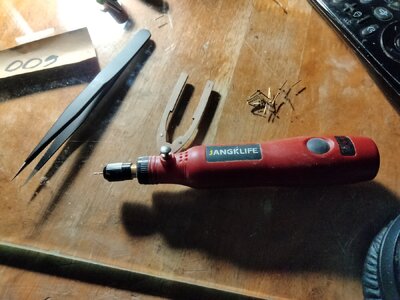
Ps, I'm drilling by hand with a small battery operated rotary tool. See attached
Look at post # 86 in this (your) build log for my explanation of how I chose the drilling alignment. Good luck my friend.Are you just estimating where they go visually
- Joined
- Oct 1, 2023
- Messages
- 1,961
- Points
- 488

Thank you
- Joined
- Sep 3, 2021
- Messages
- 5,139
- Points
- 738

As I wrote before, I used toothpicks the simulate treenails. I didn't drill through, but applied treenails from both sides of the frames. See also https://shipsofscale.com/sosforums/...johan-completed-build.8304/page-6#post-218015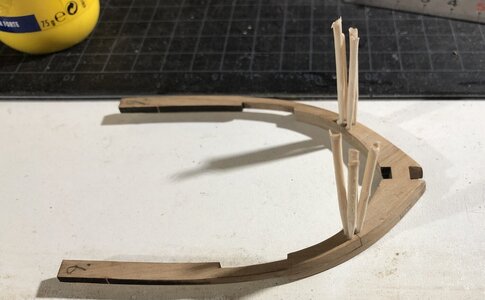
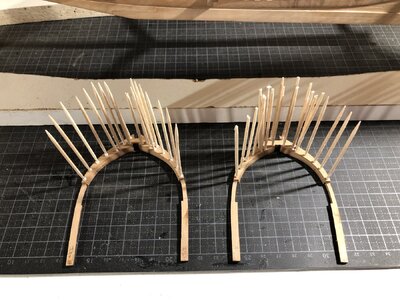
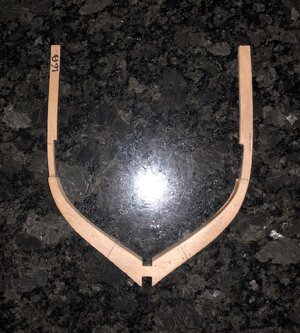
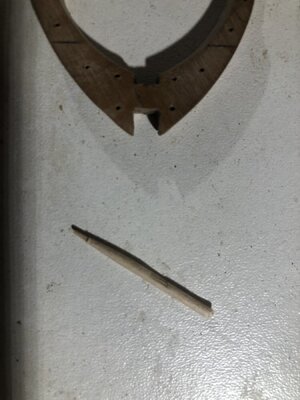


Last edited:
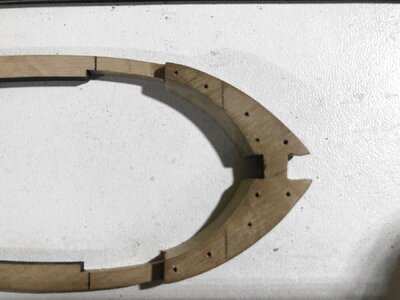
Hi Ted. To figure out the locations of the nails and where to drill, perhaps this picture will helps:I'm trying to figure out how to mark the drilling locations.
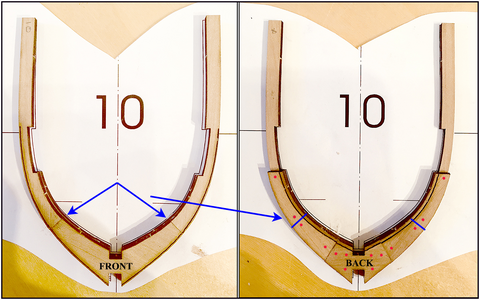
The nails are intended to strengthen the construction. Then they are on either side of a connection.
On this picture I transferred the connections of the parts of the front frame in blue lines to the rear part of the frame. You can mark them with a tiny lines of a pencil on the wood and rub them out later.
Now you can position a nail on both sides of all connections. Like the red dots. At the distance of the connection that you finds visually the most attractive.
At the foot of the fork it is up to you to determine where and how many nails you want to place.
Do you like to put extra nails in-between, no problem. You are the captain, it's your BN.
You can drill all through, but you can also make the marks on both side and drill small holes on both sides.
Hope this will help you.
Regards, Peter
Last edited:
- Joined
- Oct 1, 2023
- Messages
- 1,961
- Points
- 488

Hi Ted. To figure out the locations of the nails and where to drill, perhaps this picture will helps:
View attachment 435242
The nails are intended to strengthen the construction. Then they are on either side of a connection.
On this picture I transferred the connections of the parts of the front frame in blue lines to the rear part of the frame. You can mark them with a tiny lines of a pencil on the wood and rub them out later.
Now you can position a nail on both sides of all connections. At the distance of the connection that you finds visually the most attractive.
At the foot of the fork it is up to you to determine where and how many nails you want to place.
Do you like to put extra nails in-between, no problem. You are the captain, it's your BN.
You can drill all through, but you can also make the marks on both side and drill small holes on both sides.
Hope this will help you.
Regards, Peter
Thanks, these photos really cleared the issue up for me.As I wrote before, I used toothpicks the simulate treenails. I didn't drill through, but applied treenails from both sides of the frames. See also https://shipsofscale.com/sosforums/...johan-completed-build.8304/page-6#post-218015View attachment 435219View attachment 435220View attachment 435221
View attachment 435222View attachment 435223
View attachment 435224
I now see I have been trying to be more precise than us necessary. When looking at your photos of the installed frames all of the treenails appear to be exactly at the same elevation. The close ups show a slight deviation similar to what I'm experiencing. I guess I'm seeing a problem where one doesn't actually exist.
Ted
- Joined
- Oct 1, 2023
- Messages
- 1,961
- Points
- 488

Thank you Peter,Hi Ted. To figure out the locations of the nails and where to drill, perhaps this picture will helps:
View attachment 435242
The nails are intended to strengthen the construction. Then they are on either side of a connection.
On this picture I transferred the connections of the parts of the front frame in blue lines to the rear part of the frame. You can mark them with a tiny lines of a pencil on the wood and rub them out later.
Now you can position a nail on both sides of all connections. At the distance of the connection that you finds visually the most attractive.
At the foot of the fork it is up to you to determine where and how many nails you want to place.
Do you like to put extra nails in-between, no problem. You are the captain, it's your BN.
You can drill all through, but you can also make the marks on both side and drill small holes on both sides.
Hope this will help you.
Regards, Peter
The thee of your have made me understand. Thank you for the close up marked photos.
Ted
That’s correct, Ted. The notches for the later to install bearing beam for the deck beams, follows the sheer. (That’s the curved flow of the deck lenght wise.) Those notches are on top of the back-frame half, and correspond with the notch on the front part. Therefore the other connections of the parts of the frames also follows that sheer flow.…… all of the treenails appear to be exactly at the same elevation. The close ups show a slight deviation …….
Regards, Peter
- Joined
- Oct 1, 2023
- Messages
- 1,961
- Points
- 488

I haven't looked that far ahead yet. After installing the .6mm brass nails as treenails on three frames I'm thinking the heads of the nails look to large. They looked ok on my sample. I tried one location where I drilled all the way through the frame and cut off the excess on the back side.
I'm going to the dollar store later today and buying a few packs of toothpicks. I'm going to try them on a frame where I removed the brass nails. If I don't like it I will have a few months worth of toothpicks.
Thank you for guiding me through this process.
Ted
I'm going to the dollar store later today and buying a few packs of toothpicks. I'm going to try them on a frame where I removed the brass nails. If I don't like it I will have a few months worth of toothpicks.
Thank you for guiding me through this process.
Ted
- Joined
- Oct 1, 2023
- Messages
- 1,961
- Points
- 488

I just went back and looked at the brass treenails done by Dean62 and they look great.
Maybe it's because I have only done the three first smallest frames. I'm confused. Still going to d the toothpick exercise.
I can always drill the toothpicks out and go back to brass.
Maybe it's because I have only done the three first smallest frames. I'm confused. Still going to d the toothpick exercise.
I can always drill the toothpicks out and go back to brass.
Hello Ted, if I remember correctly, I think Dean @Dean62, mixed epoxy with some silver paint and daubed the bolt heads onto his frames with the head of a pin. This gave the effect of the head of a bolt. Dean's been away from the forum for a while, I'll see if I can PM him and find out for sure.

