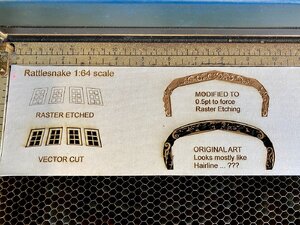
In this thread we will experiment and explore how to create scale 3D decorations for the stern of several famous ships. I have several requests to create parts for SoS members and their outstanding models so I figured I should show how it is done. I have been granted access to use some original Hahn drawings for the development of various prototypes of stern decorations. Through this series, we will all learn while I improve my skills so that I can provide SoS members the quality of parts they deserve for their models. With the collaboration of other members with CAD, 3D drawing, modeling, and other skills we can work to create objects that you will never see in production kits (with the exception of perhaps CAF and Trident). I also hope to add innovations never before used in scale modeling to push the technology forward. But I will need your help, critique and feedback along the way!!!
When we speak of fabrication technologies in general, there are two overall types: subtractive fabrication and additive fabrication. Subtractive fabrication is the process where material is removed from a larger raw stock to create the final object. Methods include: hand carving, sanding/shaping, CNC machining, and laser cutting. Additive fabrication is a more modern and expensive technology that involves adding material in layers to build up the final object. Methods include: 3D printing, Selective Laser Melting (SLM), extrusion, and injection moulding. Since my shop is equipped with traditional CO2 lasers and CNC machine, all of my discussions will center around subtractive fabrication.
Let us begin... our first series will focus on using a combination of laser etching and laser cutting to build up small parts in the creation of 3D decoration. The first example will be the stern of the USF Confederacy in 1:64 scale beginning with Harold Hahn drawings.
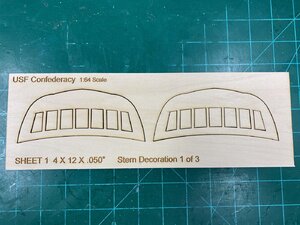
We want to build the parts in layers. Remember this is a prototype so we don't care to use good hardwoods. For the first sheet, we simply cut out the outline of the stern and windows from Hahn's drawings in 1:64 scale onto some 0.05" milled basswood. The sheet below took about 50 seconds on my laser.
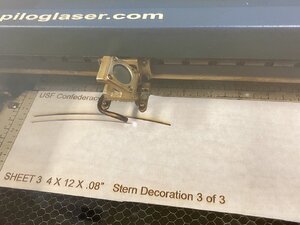
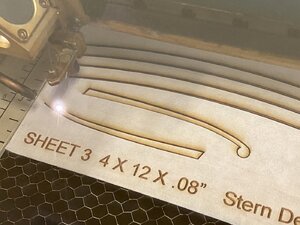
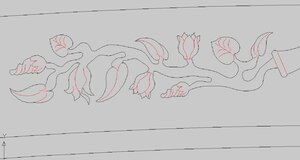
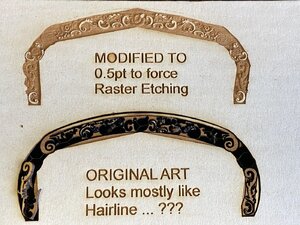
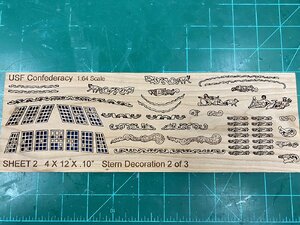
The second sheet took more work inside my CAD software. Since we are just doing 2D laser cutting, I used CorelDRawX8 64-bit. My laser performs two functions. Raster Engraving - the head sweeps back and forth very rapidly just lightly etching the surface with fine details. And, Vector Cutting - the head moves slowly with a pinpoint beam of 60watt energy to cut right through the wood. Inside the software I differentiate the etching and cutting by the width of the drawing lines. Everything that gets vector cut has a width of "hairline" (less than 0.5pt pixel), while everything that gets raster engraved will have a width wider than "hairline". I spent several hours tediously going through the drawing to edit these differences. But once done, it is done. I then placed a sheet of 0.10" milled Alder onto the laser and sent the job. I apply a mask to the wood to reduce the char. In the picture below you can see the laser performing the Raster engraving function.

Once the engraving is complete, the laser performs the Vector Cutting. My laser uses a jet of compressed air at 30psi directed at the point of the laser to immediately cool the surface of the wood. This prevents flame blow through on the backside greatly reducing burn on the back of the part. The completion of this entire sheet took about 10 minutes. My new laser is about 4 times faster than this one.
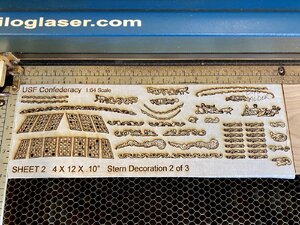
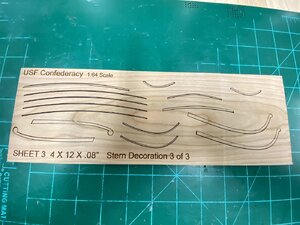
Once completed, I carefully remove the billet from the laser, apply masking tape to the back-side of the billet to keep the parts in place. Then, I carefully remove the mask from the front of the billet revealing the parts.
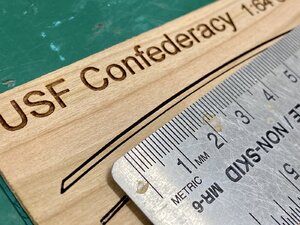
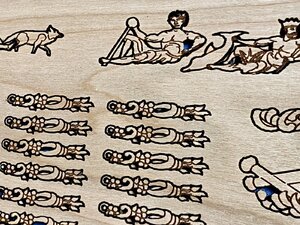
On closer inspection, you can see the detail is very good. However, this is only the very first prototype. We can do much, much better than this. You will also notice there are no tabs on the part. Upon removing the tape from the back-side of the billet the parts will easily fall right out.
This is only the beginning my friends. I also have stern drawings for Druid, Cromwell, and Rattlesnake. In addition, we will also be doing similar work but with 3D CNC carvings.
I welcome your feedback and questions. This is a huge topic.
When we speak of fabrication technologies in general, there are two overall types: subtractive fabrication and additive fabrication. Subtractive fabrication is the process where material is removed from a larger raw stock to create the final object. Methods include: hand carving, sanding/shaping, CNC machining, and laser cutting. Additive fabrication is a more modern and expensive technology that involves adding material in layers to build up the final object. Methods include: 3D printing, Selective Laser Melting (SLM), extrusion, and injection moulding. Since my shop is equipped with traditional CO2 lasers and CNC machine, all of my discussions will center around subtractive fabrication.
Let us begin... our first series will focus on using a combination of laser etching and laser cutting to build up small parts in the creation of 3D decoration. The first example will be the stern of the USF Confederacy in 1:64 scale beginning with Harold Hahn drawings.
We want to build the parts in layers. Remember this is a prototype so we don't care to use good hardwoods. For the first sheet, we simply cut out the outline of the stern and windows from Hahn's drawings in 1:64 scale onto some 0.05" milled basswood. The sheet below took about 50 seconds on my laser.

The second sheet took more work inside my CAD software. Since we are just doing 2D laser cutting, I used CorelDRawX8 64-bit. My laser performs two functions. Raster Engraving - the head sweeps back and forth very rapidly just lightly etching the surface with fine details. And, Vector Cutting - the head moves slowly with a pinpoint beam of 60watt energy to cut right through the wood. Inside the software I differentiate the etching and cutting by the width of the drawing lines. Everything that gets vector cut has a width of "hairline" (less than 0.5pt pixel), while everything that gets raster engraved will have a width wider than "hairline". I spent several hours tediously going through the drawing to edit these differences. But once done, it is done. I then placed a sheet of 0.10" milled Alder onto the laser and sent the job. I apply a mask to the wood to reduce the char. In the picture below you can see the laser performing the Raster engraving function.

Once the engraving is complete, the laser performs the Vector Cutting. My laser uses a jet of compressed air at 30psi directed at the point of the laser to immediately cool the surface of the wood. This prevents flame blow through on the backside greatly reducing burn on the back of the part. The completion of this entire sheet took about 10 minutes. My new laser is about 4 times faster than this one.

Once completed, I carefully remove the billet from the laser, apply masking tape to the back-side of the billet to keep the parts in place. Then, I carefully remove the mask from the front of the billet revealing the parts.

On closer inspection, you can see the detail is very good. However, this is only the very first prototype. We can do much, much better than this. You will also notice there are no tabs on the part. Upon removing the tape from the back-side of the billet the parts will easily fall right out.

This is only the beginning my friends. I also have stern drawings for Druid, Cromwell, and Rattlesnake. In addition, we will also be doing similar work but with 3D CNC carvings.
I welcome your feedback and questions. This is a huge topic.
Last edited:


