Gilles 17-inch canoe - Pear wood - Canoe #3 [COMPLETED BUILD]

Joined
Feb 18, 2019
Messages
684
Points
353

This canoe will be the one listed as the 17" model.
It will be built from milled Pear wood supplied by bibigon (Sergey)as mentioned here: https://shipsofscale.com/sosforums/...to-purchase-plans-materials.5302/#post-107811
Lumber alternative B in the lumber options available for this project .
Everything will be done following the construction guide and I will opt for the couple of upgrades: simulated fastenings and woven seats. Fastening is detailed in the manual: it is quite tedious but will get through it.
G
 
The first step for the construction of this 17-inch canoe was taking possession of the lumber (as mentioned in this log's opening post).
Well! With much anticipation, the PEAR WOOD has arrived.... The box is open and ... it looks beautiful: the lumber (and the box too) ...

G
 
Everything on this model will be pear wood, except for a couple of accent strips.
As indicated in the title, this is going to be a 17-inch canoe built from the shorter model design due to lumber length restriction. The ends will be as per the original patterns included in the construction guide.
Again, the brass fastening will be included in the construction: just because I want to test the capacity of drilling holes 1/16" deep and inserting corresponding nails, which I suspect will work very well considering the properties of pear wood.

The pear wood lumber for this canoe is very nice and precisely cut, within close tolerance: 2.5 x 2.5 mm strips seem to average 2.54 x 2.59 mm. The rest of the strips seem just as accurately cut.
I will not write a review on the lumber itself... as who am I to do that? But I will say this:
Sergey (@bibigon ) was a pleasure to deal with. and I am sure... "I will be back" for more.

So on with the construction of this model.

A few strip have been laid, including a main contrast strip (basswood - 2.5 mm x 2.5 mm) and a thinner secondary strip, 0.8 mm x 2.5 mm also cut from basswood. These 2 contrast strip are separated by a 0.8 mm thick pear strip,

_DSC1958 aa.jpg_DSC1964 aa.jpg

G.
 
Pear wood canoe as of tonight.
The hull is almost fulling planked. I have added a 1/32" basswood strip on the underside on both sides of the center-line to show some symmetry in the way the planks have been laid.
This canoe is not being closed with planks in "Herringbone" pattern at the center.
Instead, as it will be fitted with a keel, I have opted for a center strip: it will ease the process of laying it down, ensuring it will be straight from stem to stern.

20200825_205040 aa.jpg

The pear wood is working out beautifully.

G.
 
Pear wood canoe as of tonight.
The hull is almost fulling planked. I have added a 1/32" basswood strip on the underside on both sides of the center-line to show some symmetry in the way the planks have been laid.
This canoe is not being closed with planks in "Herringbone" pattern at the center.
Instead, as it will be fitted with a keel, I have opted for a center strip: it will ease the process of laying it down, ensuring it will be straight from stem to stern.

View attachment 175399

The pear wood is working out beautifully.

G.
I noticed on the Old Town Canoe 1950 video that they had a full length keel so the middle strip on this build seems to me to provide both a more accurate way to close the bottom than the herringbone method as well as the substrate for the outer keel. It seems to be a decision of when to install the center strip along the bottom. I would guess that it might be where the stem station terminates and becomes abandoned as a visual component but then it seems to be a tapered strip beginning where the side strips more tightly come together when the stem is ending and more of the bottom is being formed. Seems to be a judgement call as the stripping progresses. PT-2
 
I noticed on the Old Town Canoe 1950 video that they had a full length keel so the middle strip on this build seems to me to provide both a more accurate way to close the bottom than the herringbone method as well as the substrate for the outer keel. It seems to be a decision of when to install the center strip along the bottom. I would guess that it might be where the stem station terminates and becomes abandoned as a visual component but then it seems to be a tapered strip beginning where the side strips more tightly come together when the stem is ending and more of the bottom is being formed. Seems to be a judgement call as the stripping progresses. PT-2

The center strip can be laid from the base of the stem piece, where it joins station 7, and run to the same spot at the other end.
But it could also be installed from the spot where the stem piece starts to curve up.

As far as closing the hull with the center strip in place? Well, instead of having 1 last strip to lay when using the "herring-bone pattern", you now have 2: one on each side of the center line. These are the most challenging to place as the taper is severe at both ends.
These last strip can be laid using a 1/32" x 1.8" strip (placed vertically) if you are lucky that the space allows it. But then again, you could double up and work with a couple such strips if need be.

G
This sounds like the center strip add a complexity that I can avoid with the herringbone which I will stick with. PT-2
 
The center strip can be laid from the base of the stem piece, where it joins station 7, and run to the same spot at the other end.
But it could also be installed from the spot where the stem piece starts to curve up.

As far as closing the hull with the center strip in place? Well, instead of having 1 last strip to lay when using the "herring-bone pattern", you now have 2: one on each side of the center line. These are the most challenging to place as the taper is severe at both ends.
These last strip can be laid using a 1/32" x 1.8" strip (placed vertically) if you are lucky that the space allows it. But then again, you could double up and work with a couple such strips if need be.

G
Gilles, As usual, more great hints on what can be done, but also the extra time and work involved.

Kurt
 
The model as of tonight...

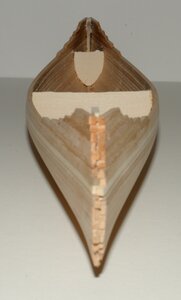
First, the center strip at the bottom of the hull, which is now closed. There is still a bit of sanding to do to even out the surface but that will give you an idea as to what it looks like: note the 2 contrasting strips (1./32") shown yesterday.

_DSC1981 aa.jpg

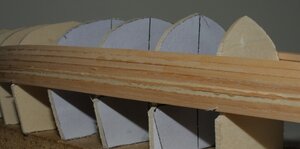
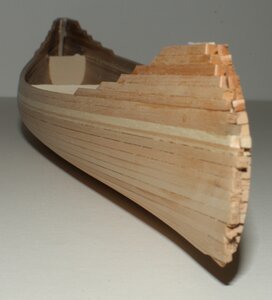
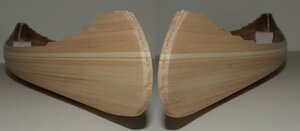
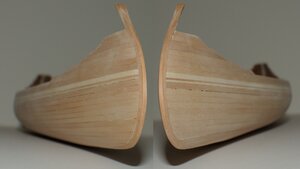
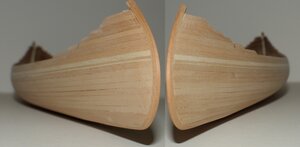
And then, some views of the planking from different angles.
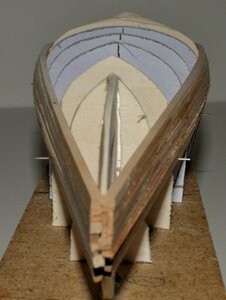
Again, still need to do quite a bit of sanding towards the stems as the thickness of the planking needs to be reduce by at least half in these areas: it will be rough sanding until the stems take their final rounded shape. At this point I call both ends "stem" as either one could be: one end will become the stern when the seats are in place or when the yoke is installed (if it is done before the seats go in).
Anyways, I only apply a rough sanding towards the stems to ensure that the edge of the stems stays vertical and follows the center line at the top and bottom. Should the edge deviate from being vertical, the final sanding will compensate for that once the lamination of the outer stem takes place. I hope this make sense....

_DSC1972 aa.jpg

_DSC1975 aa.jpg

_DSC1978 aa.jpg

_DSC1979 aa.jpg

G.
 
The model as of tonight...

First, the center strip at the bottom of the hull, which is now closed. There is still a bit of sanding to do to even out the surface but that will give you an idea as to what it looks like: note the 2 contrasting strips (1./32") shown yesterday.

View attachment 175555

And then, some views of the planking from different angles.
Again, still need to do quite a bit of sanding towards the stems as the thickness of the planking needs to be reduce by at least half in these areas: it will be rough sanding until the stems take their final rounded shape. At this point I call both ends "stem" as either one could be: one end will become the stern when the seats are in place or when the yoke is installed (if it is done before the seats go in).
Anyways, I only apply a rough sanding towards the stems to ensure that the edge of the stems stays vertical and follows the center line at the top and bottom. Should the edge deviate from being vertical, the final sanding will compensate for that once the lamination of the outer stem takes place. I hope this make sense....

View attachment 175556

View attachment 175557

View attachment 175558

View attachment 175559

G.
I appreciate seeing your planking with the strips as it gives me a comparison with my own, in my first canoe now over a week ago but useful for my second canoe as a standard to work toward. For my own I had to do a lot of strips closure with the glue and sanding procedure which overall reduced the thickness of the hull planking at a course sanding/repair stage which I have decided precludes trying the faux nails for this one. That finish can be again considered with a better planking, less course sanding, and thicker substrates for the nails penetration. Thanks for your continuing guidance. PT-2
 
I appreciate seeing your planking with the strips as it gives me a comparison with my own, in my first canoe now over a week ago but useful for my second canoe as a standard to work toward. For my own I had to do a lot of strips closure with the glue and sanding procedure which overall reduced the thickness of the hull planking at a course sanding/repair stage which I have decided precludes trying the faux nails for this one. That finish can be again considered with a better planking, less course sanding, and thicker substrates for the nails penetration. Thanks for your continuing guidance. PT-2
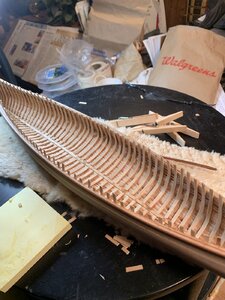
OK, as of tonight the ribs are installed, such as my big fingers will permit. I'll let things dry tonight and tomorrow while I am at the rifle range as a safety officer and trim off the tops of the ribs Thursday evening and look at prepping the first innerwale and the inside keel pieces before gluing those in place.

Without my trying an experiment, do you know if instant CV adhesive can be put into a syringe/needle (like Tightbond works OK) to be able to administer it in very small localized places and amounts???? That is now my present method of applying adhesive instead of my prior toothpick method. I have a few extra syringes to give the CV glue a try but thought that I would ask. PT-2
 
The model as of tonight...

First, the center strip at the bottom of the hull, which is now closed. There is still a bit of sanding to do to even out the surface but that will give you an idea as to what it looks like: note the 2 contrasting strips (1./32") shown yesterday.

View attachment 175555

And then, some views of the planking from different angles.
Again, still need to do quite a bit of sanding towards the stems as the thickness of the planking needs to be reduce by at least half in these areas: it will be rough sanding until the stems take their final rounded shape. At this point I call both ends "stem" as either one could be: one end will become the stern when the seats are in place or when the yoke is installed (if it is done before the seats go in).
Anyways, I only apply a rough sanding towards the stems to ensure that the edge of the stems stays vertical and follows the center line at the top and bottom. Should the edge deviate from being vertical, the final sanding will compensate for that once the lamination of the outer stem takes place. I hope this make sense....

View attachment 175556

View attachment 175557

View attachment 175558

View attachment 175559

G.
What are the small black marks on what I will call the port bow stem? PT-2
 
OK, as of tonight the ribs are installed, such as my big fingers will permit. I'll let things dry tonight and tomorrow while I am at the rifle range as a safety officer and trim off the tops of the ribs Thursday evening and look at prepping the first innerwale and the inside keel pieces before gluing those in place.

Without my trying an experiment, do you know if instant CV adhesive can be put into a syringe/needle (like Tightbond works OK) to be able to administer it in very small localized places and amounts???? That is now my present method of applying adhesive instead of my prior toothpick method. I have a few extra syringes to give the CV glue a try but thought that I would ask. PT-2
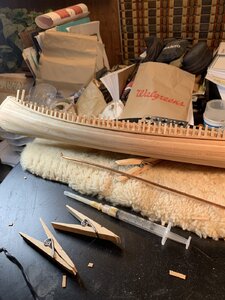
Crude photos of the ribs installed waiting upon further drying and trimming Thursday. Lower angle photo shows my copper wire sixth-finger probe and the Tightbond filled Ribs 8.26.jpgRibs and copper helper.jpgsyringe not used on the ribs which received their share of grog with a toothpick. PT-2
 
Without my trying an experiment, do you know if instant CV adhesive can be put into a syringe/needle (like Tightbond works OK) to be able to administer it in very small localized places and amounts???? That is now my present method of applying adhesive instead of my prior toothpick method. I have a few extra syringes to give the CV glue a try but thought that I would ask. PT-2

Sorry, I do not know and cannot say if it does as I never use a syringe for super glues. For the ribs and such, I normally apply the glue straight from the container: I do not squeeze hard on the the bottle, just enough to get the glue to the nozzle, and then, I just "tap" it lightly to apply. It works quite well for me. If I just need a tiny amount in one particular spot, then the toothpick is used. I did mention that the "CA" glue I use is medium viscosity.
G.
 
Aug 27th update...

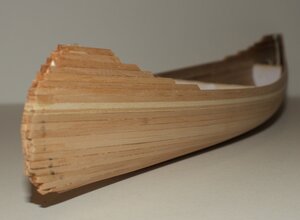
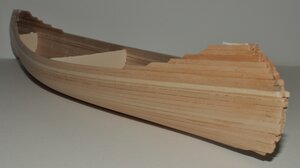
The ends were shaped to receive the outer stems. A t the same time the planking was sanded down to an even width in the stems area while ensuring the center line between the 2 planked sides is as straight and vertical as possible: it helps a bit in laying down and gluing the outer stems. This is all done by eye, no measuring: it is possible to compensate for any deviation after installation and during sanding and tapering the outer stems.

Untitled-1aa.jpg

And at the other end of the canoe, the outer stems were then laminated in place.
The tapering is done while sanding everything down to shape and size. The base of the lamination (edge is contact with the planking and / or stem pieces) is a about 3/32" to 1/8".

Untitled-2aa.jpg

Same view of the other end...

Untitled-3aa.jpg

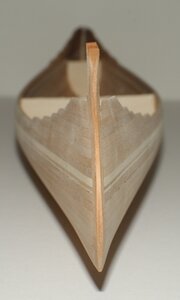
And here is a front view.
The outside edge (front) will be eventually brought down to about 1/32" wide. so there is a bit more sanding to do.

_DSC2013 aa.jpg

By the way.... working with this lumber is a pleasure.
Anyways... that is it for today's update.
G
 
Last edited:
Sorry, I do not know and cannot say if it does as I never use a syringe for super glues. For the ribs and such, I normally apply the glue straight from the container: I do not squeeze hard on the the bottle, just enough to get the glue to the nozzle, and then, I just "tap" it lightly to apply. It works quite well for me. If I just need a tiny amount in one particular spot, then the toothpick is used. I did mention that the "CA" glue I use is medium viscosity.
G.
I use a slower setting which may be the medium viscosity which sets in a couple of minutes but may take a good holding bond in less than a minute. I"ll stick with my drop on a sticky pad and then use the toothpick to spread it around. I did use some direct drops into the hull contact area for the end of some ribs where I was not sure if the applied glue film on the rib would be sufficient. It had mixed results. .. more problems of no adhesion came up along the sheer than at the keel. The sheer separation were an easy toothpick reapplication and clamp fix. PT-2
 
Aug 27th update...

The ends were shaped to receive the outer stems. A t the same time the planking was sanded down to an even width in the stems area while ensuring the center line between the 2 planked sides is as straight and vertical as possible: it helps a bit in laying down and gluing the outer stems. This is all done by eye, no measuring: it is possible to compensate for any deviation after installation and during sanding and tapering the outer stems.

View attachment 175722

And at the other end of the canoe, the outer stems were then laminated in place.
The tapering is done while sanding everything down to shape and size. The base of the lamination (edge is contact with the planking and / or stem pieces) is a about 3/32" to 1/8".

View attachment 175727

Same view of the other end...

View attachment 175734

And here is a front view.
The outside edge (front) will be eventually brought down to about 1/32" wide. so there is a bit more sanding to do.

View attachment 175728

By the way.... working with this lumber is a pleasure.
Anyways... that is it for today's update.
G
The precision of your planking is something that I can only strive to approximate, at least for this stage of my growing experience which is first time out of the starting blocks and approaching the hurdles ahead. PT-2
 
Back
Top