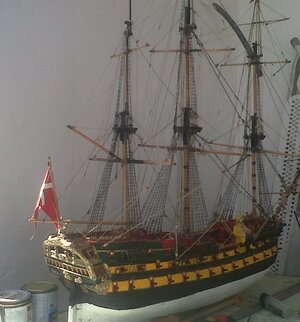
Yes, Apart from going to laser cut and before mentioned improvement of the keel, false keel, the instruction is the same. It is CLEAR to ME -that this kit is on the lower end in its class. price about €, whereas Montañes, San Juan Neposano is in the range of 350 to 450 € -from Spain-and the Manoli/ Amaty like Pegasus, Agemom over 600 € some up 1000 €. Frankly steaking I used nearly only Big Laser cuts part (I have no mechanical saws, and the rest scratch builds - Gun carriage on all Deck. Extra deck inserted, so NO DUMMY GUNS. The front part of the BOW is absolutely bad- out of scale too, so new ones were made and so on. If I should ever again with my nearly 80 Years, it would be like Pegasus, Agemon. I have been following the build of these ship with even the upper part of the bulkheads or frames with the right curves for water run of. I am sorry to say that about Billing, as as much in 1960 I was working in neighbour Town to Billing. I even new the BIG man, who started all -Mr Erling BIlling.