-

Win a Free Custom Engraved Brass Coin!!!
As a way to introduce our brass coins to the community, we will raffle off a free coin during the month of August. Follow link ABOVE for instructions for entering.
-

PRE-ORDER SHIPS IN SCALE TODAY!
The beloved Ships in Scale Magazine is back and charting a new course for 2026!
Discover new skills, new techniques, and new inspirations in every issue.
NOTE THAT OUR FIRST ISSUE WILL BE JAN/FEB 2026
- Home
- Forums
- Ships of Scale Build Logs
- Super Detailing Static Models / Other Genres
- Super Detailing Static Models
You are using an out of date browser. It may not display this or other websites correctly.
You should upgrade or use an alternative browser.
You should upgrade or use an alternative browser.
just a fast idea and it depends on the material of the hull.
maybe with a fine but strong line submerged in glue........
maybe with a fine but strong line submerged in glue........
- Joined
- Dec 1, 2016
- Messages
- 6,407
- Points
- 728

you could try super glue and baking soda
run a bead of glue where you want the seam the sprinkle a little backing soda on the glue depends on how big you want the seam you can apply more glue on the backing soda.
if the seam is to big you san lightly sand it
run a bead of glue where you want the seam the sprinkle a little backing soda on the glue depends on how big you want the seam you can apply more glue on the backing soda.
if the seam is to big you san lightly sand it
Last edited:
Use a syringe, with the proper size needle, and run a bead of pva glue along your weld line. Let dry.
If you use my idea I want a ride in that boat!!
If you use my idea I want a ride in that boat!!
Thanks guys for nice suggestions. Superglue and baking soda might work, but problem would be how to apply it so that the seam has even width and it would build a nice curve along the entire hull. I am still open for more suggestions.
After having thought of this problem intensively, I finally tried the method suggested by Uwe.
The hull is made of wooden planks in the common way, smoothed with filler and sanded and then covered with thin glassfibre fabric & epoxy. So I spreaded one more thin layer of epoxy on the hull and applied very thin sewing thread wetted with epoxy on still wet surface. When pulling the thread straight it located itself very nicely on the hull, and after curing simulates perfectly welding seams. So the problem seems to be solved.
Thank you very much guys for your suggestions, and especially Uwe, whose method proved this time to be the best!
- Joined
- Jun 17, 2021
- Messages
- 134
- Points
- 113

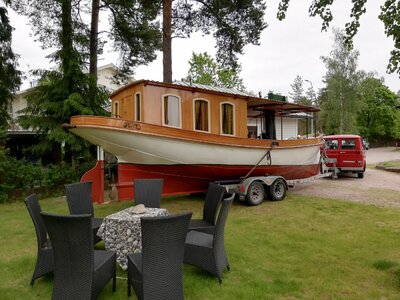
Just saw your post - brings back memories of my time sailing on a vessel with a 'Triple Expansion' steam engine. Just an idea; soak some thread in PVA, then lay it where you want to simulate the weld.I am building a model of an open steam launch. The original hull has been made of steel by welding, leaving the seams of steel plates visible. I wonder how can I simulate these horizontal welds at my hull like in attached photo?View attachment 220957
Lloyd
In plastic modeling you would lay a length of styrene rod or stretched sprue in the seam and soften it with Tamiya Extra thin or any MEK plastic welder then work the bead with a knife to simulate the bead. Id use putty of some kind that can be worked. Mask the bead thickness so the putty stays exactly where you want the bead to be then work it with whatever tool you can to simulate the bead.
- Joined
- Jun 17, 2021
- Messages
- 134
- Points
- 113

This is worth making a note of for future reference.In plastic modeling you would lay a length of styrene rod or stretched sprue in the seam and soften it with Tamiya Extra thin or any MEK plastic welder then work the bead with a knife to simulate the bead. Id use putty of some kind that can be worked. Mask the bead thickness so the putty stays exactly where you want the bead to be then work it with whatever tool you can to simulate the bead.
You might check out Archer Transfers. They have a variety of surface detail transfers including weld beads. I've used some of their rivet transfers on my model RR
- Joined
- Jun 17, 2021
- Messages
- 134
- Points
- 113

Thank you for the information.You might check out Archer Transfers. They have a variety of surface detail transfers including weld beads. I've used some of their rivet transfers on my model RR
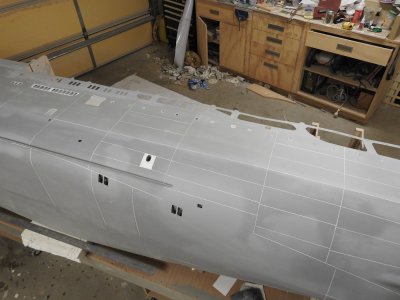
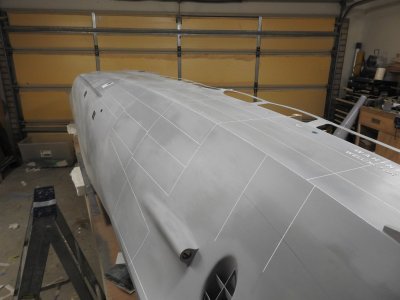
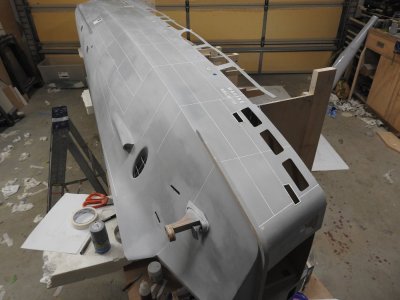
The way I do it at 1/35 is as follows.
Prep the hull with primer to 400 grit, this is Tamiya fine surface primer, a lot of it!.
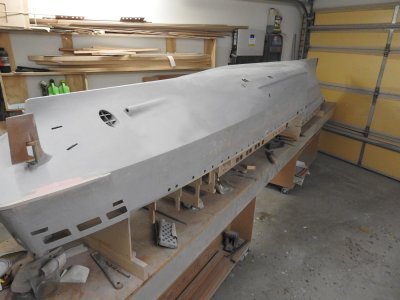
You want the final pre paint surface
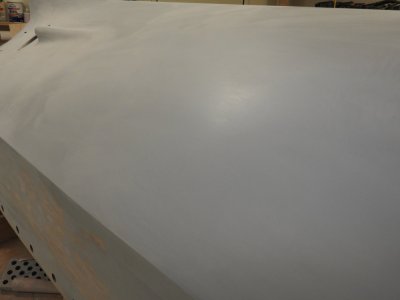
Mark out the hull with a soft tip pen according to your shell expansion.
Start masking these lines about .5mm wide (carefully), this equates to 18mm or 3/4 inch wide beads which is about right on ships.
With a brush build up the area with high build primer, something hard like Mr Surfacer its actually pretty resilient and you have the added fact that if you stuff up and are not happy with it you can sand it off! and do it again., I prefer to use white for the beads on Grey, as a guide stop when you can no longer see the paint sag down into the groove between the tape.
I had tried Epoxy putty or even using Cyano or epoxy for these but the downside is IF you have to redo one, sanding it off is that much harder and you will sand through all the primer around the area as well and in most cases the bead will pull away taking all the primer with it leaving a long indentation/tear in the surface which now needs repairing.
Then give it a very light scuff with 400 to knock off the corners and then it's done.
I start with transverse seals then do longitudinal.
Note the bead at the back, this was with tape too close together, You must work in 200mm long section and remove the tape straight away or it will pull off the bead, once its dry its very strong.
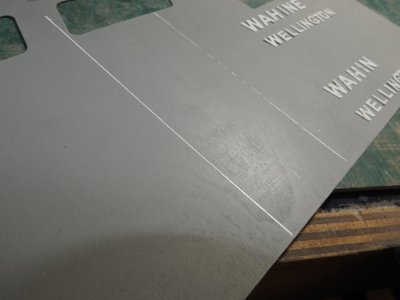
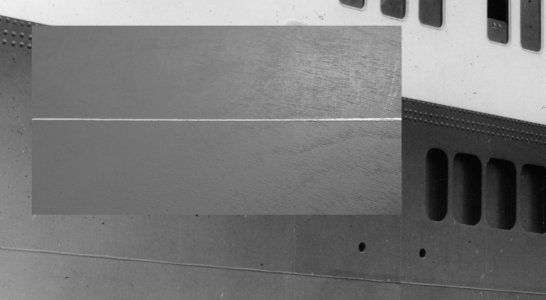
The result compared to a photo on same ship. Please ignore wood grain, this was a test piece and not grain filled.
Notice the very fine undulations in the edge and very slight width variation exactly like the real one, this is a free thing you get using masking tape, not pinstripe tape but masking tape.
Prep the hull with primer to 400 grit, this is Tamiya fine surface primer, a lot of it!.

You want the final pre paint surface

Mark out the hull with a soft tip pen according to your shell expansion.
Start masking these lines about .5mm wide (carefully), this equates to 18mm or 3/4 inch wide beads which is about right on ships.
With a brush build up the area with high build primer, something hard like Mr Surfacer its actually pretty resilient and you have the added fact that if you stuff up and are not happy with it you can sand it off! and do it again., I prefer to use white for the beads on Grey, as a guide stop when you can no longer see the paint sag down into the groove between the tape.
I had tried Epoxy putty or even using Cyano or epoxy for these but the downside is IF you have to redo one, sanding it off is that much harder and you will sand through all the primer around the area as well and in most cases the bead will pull away taking all the primer with it leaving a long indentation/tear in the surface which now needs repairing.
Then give it a very light scuff with 400 to knock off the corners and then it's done.
I start with transverse seals then do longitudinal.
Note the bead at the back, this was with tape too close together, You must work in 200mm long section and remove the tape straight away or it will pull off the bead, once its dry its very strong.

The result compared to a photo on same ship. Please ignore wood grain, this was a test piece and not grain filled.
Notice the very fine undulations in the edge and very slight width variation exactly like the real one, this is a free thing you get using masking tape, not pinstripe tape but masking tape.

Last edited:
use a syringe like a cake piping bag. id probably go with epoxy since its more resistant to water plus its tougher once cured.Thanks guys for nice suggestions. Superglue and baking soda might work, but problem would be how to apply it so that the seam has even width and it would build a nice curve along the entire hull. I am still open for more suggestions.


