Greeting everyone!
I've been spying on you all for a while now, I suppose it's time to come out of hiding.
I have enjoyed watching the fine craftsmen here from around the world share their amazing skills so kindly and graciously. Very uplifting to see a diverse group of people come together for a common interest to share their passion.
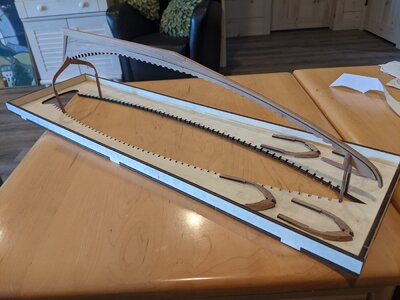
I'm going to give this Bluenose the best effort I can and I'm sure to be asking many questions along the way.
Ron - Boyne City, MI
I've been spying on you all for a while now, I suppose it's time to come out of hiding.
I have enjoyed watching the fine craftsmen here from around the world share their amazing skills so kindly and graciously. Very uplifting to see a diverse group of people come together for a common interest to share their passion.
I'm going to give this Bluenose the best effort I can and I'm sure to be asking many questions along the way.
Ron - Boyne City, MI