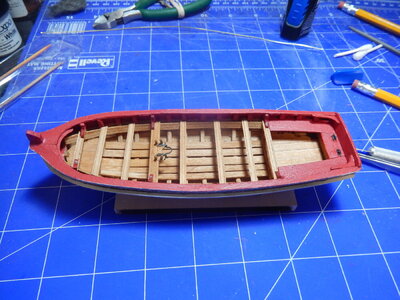
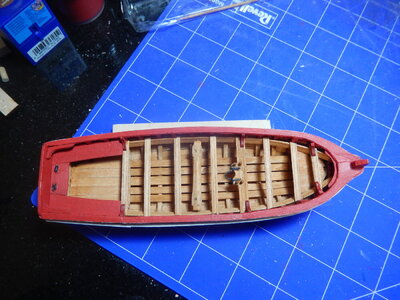
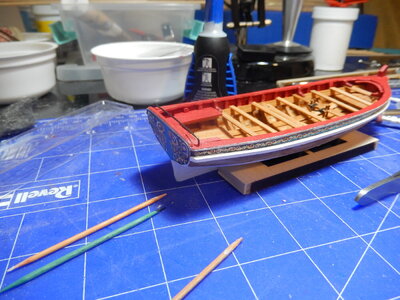
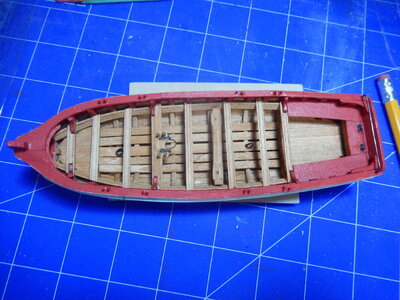
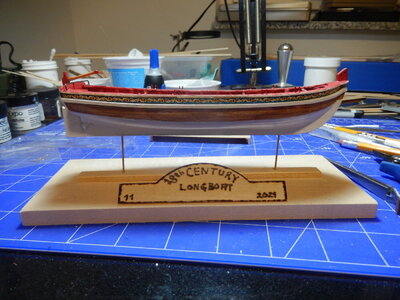
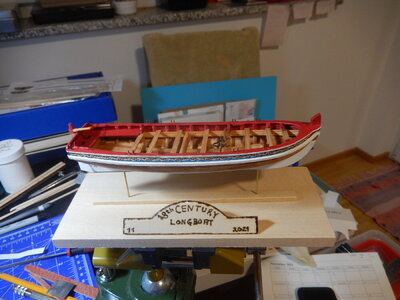
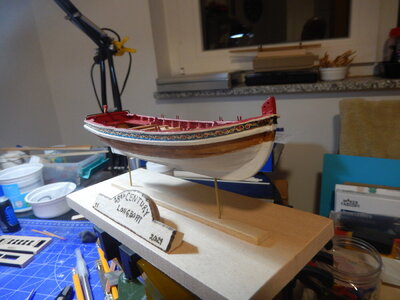
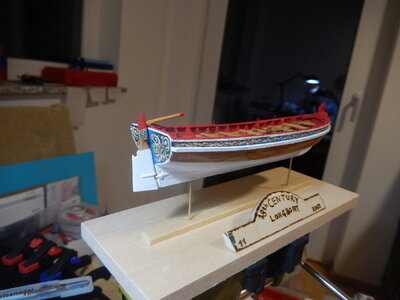
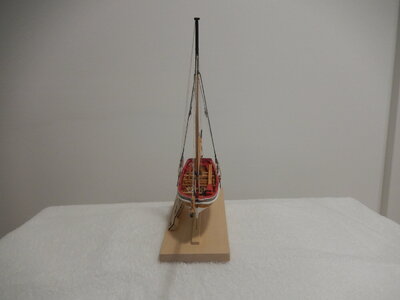
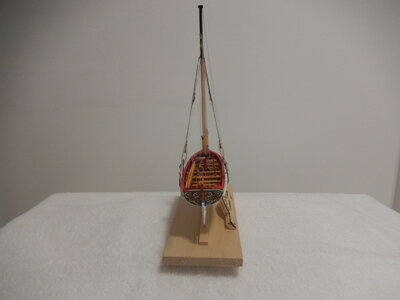
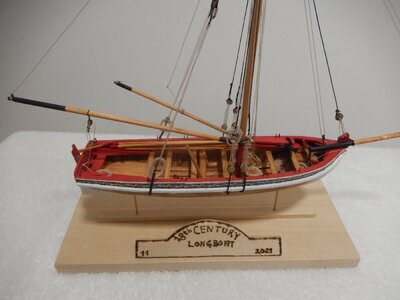
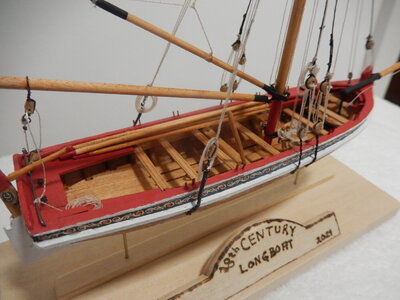
18th Century Longboat (Model Shipways; 1:48) [COMPLETED BUILD]

Joined
Aug 1, 2020
Messages
727
Points
298

20210912

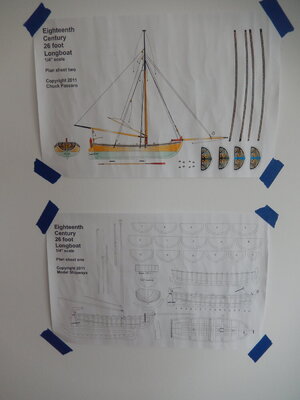
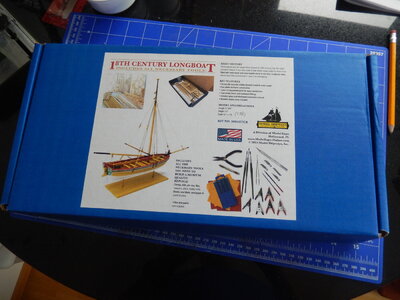
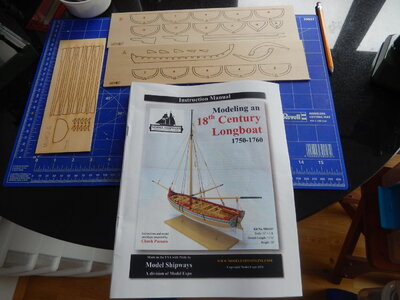
Before leaving for my work trip a week ago, I opened the box, taped the plan sheets to my wall, grabbed the instruction book and started reading. After reading it through I knew this build would be different from the previous ones - the instructions are definitely not step-by-step by-the-numbers like several I've done and the plans are not as detailed as others. Also, most of the wood will need to be cut to shape/fit along with various metal fixtures. At first I was not sure I was up to the 'make the pieces' challenge but after some reflection (and a beer) I decided the only way to meet the challenge is head on. The next day I left for my travels.

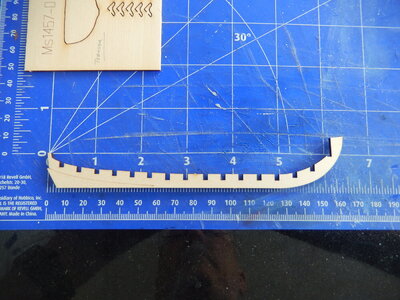
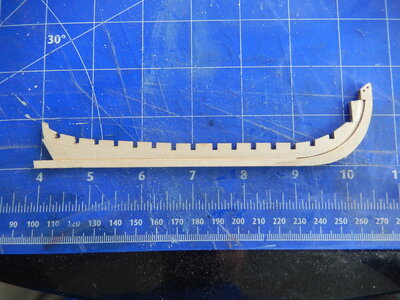
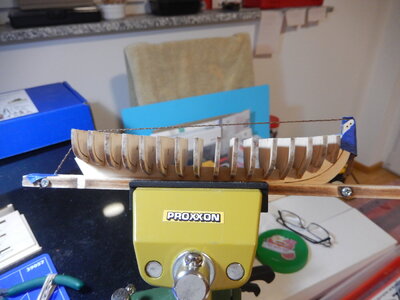
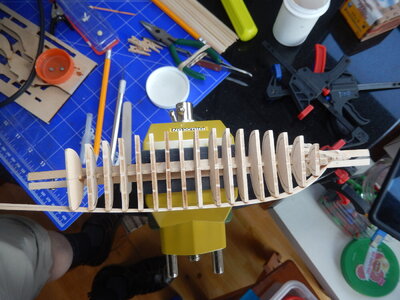
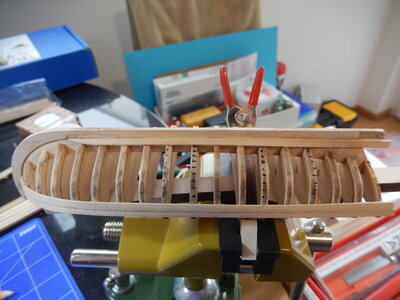
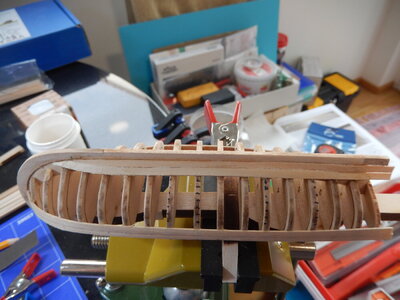
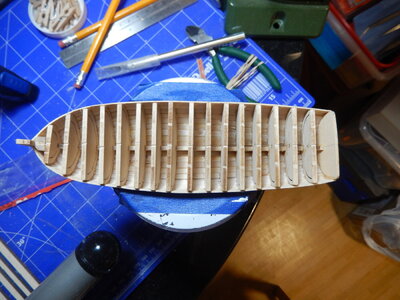
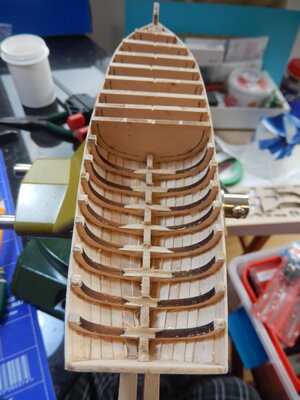
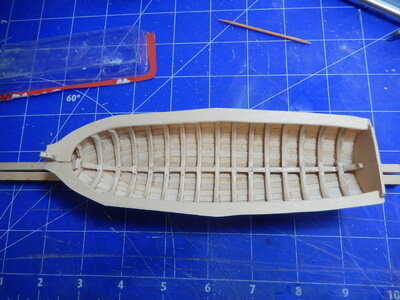
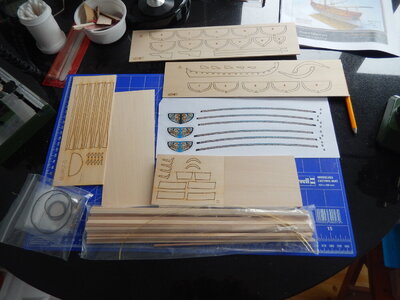
Arriving back yesterday, I picked the instructions back up, re-read the first couple of pages and started in by cutting the false keel, keel, stem, and frame pieces out of the supplied sheets (there is not much left to cut out; a few knees and miscellaneous pieces - the rest of what I need will be manufactured by yours truly [hopefully without any spillage of blood]). Cleaned off the char from the various pieces, sanded the false keel from the bearding line downwards and then forward to the stem to create the rabbet along the keel, and glued false keel/keel and stem together (I figured the additional keel and stem pieces were extras and not needed; same for the extra rudder) . This morning I glued a couple of frames in working hard with a small machinist's square and a line stretched from stem post to stern post to keep them plumb and square. Since the weather was beautiful today I ceased work after about 30 minutes and went out for a bit of a bike ride. Upon returning, I realized I'd screwed up the frames I'd glued in (started in backwards order; no excuse!) so out came the acetone and the frames were gently removed. No harm; no foul at this point.

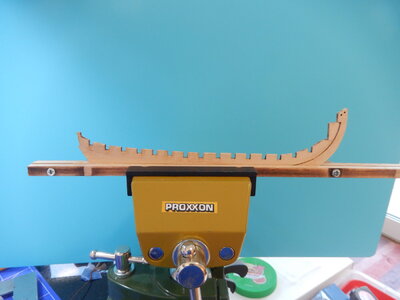
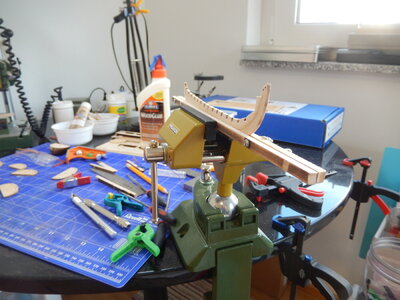
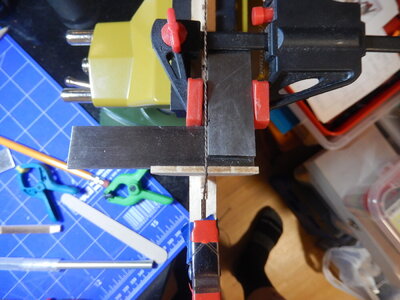
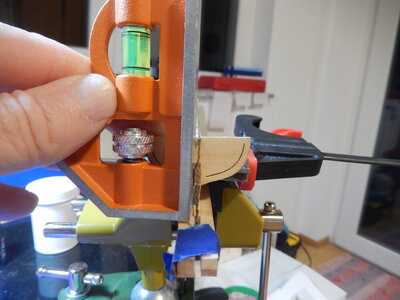
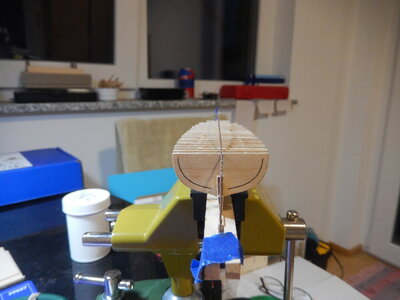
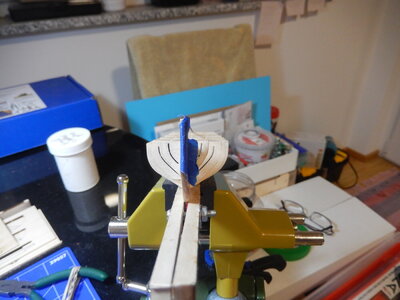
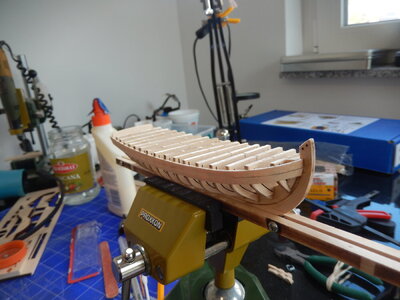
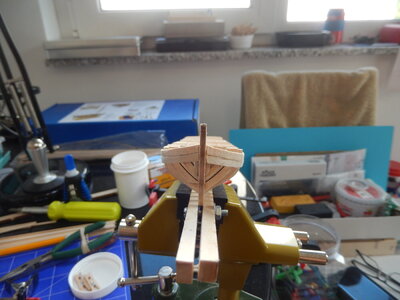
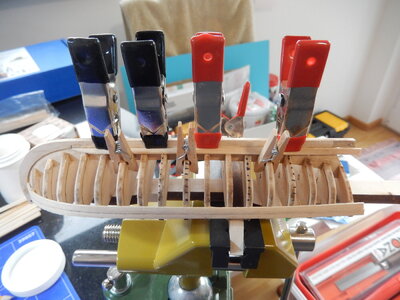
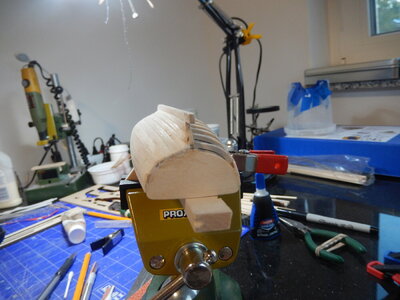
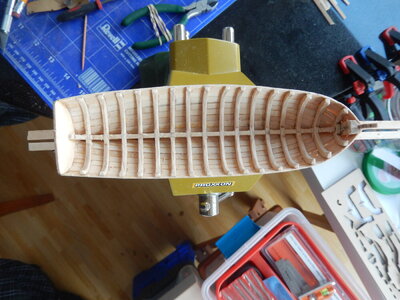
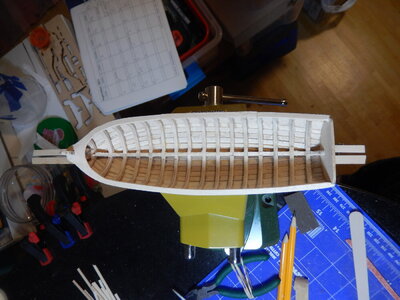
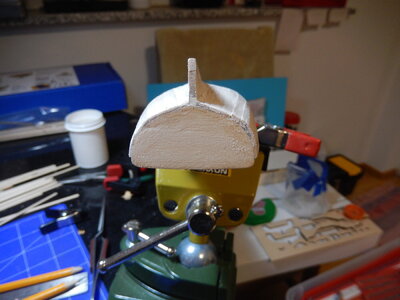
I decided to take a break to let the wood dry up. Put together a simple 2 piece wooden frame from scraps that holds the keel; the frame is then held in my vice and the top of the vice jaws gives me a flat surface to use with the machinist's square for making sure the frames are plumb. I'm using the false frame as my reference for square and the string stretched stem to stern lets me see if the frames are all aligned properly down the keel. So I now have a plan for moving forward with the frames.

While waiting for the wood to dry I've spent some time looking at SoS build logs for this model. All interesting to read and the pictures definitely help explain what is in the instructions. I'll be returning to these as I progress. I also realize that I have some more reading to do before I start on the the planking. I've printed off the references mentioned in a couple of the logs; will also be ordering the planking book from Model Expo.

Not much accomplished on the model so far and there will be no additional work done until next weekend as I'm travelling for work again this week. Nice to be able to get out of the office and on the road a bit.
DSCN8034.JPGDSCN8033.JPGDSCN8035.JPGDSCN8036.JPGDSCN8037.JPGDSCN8040.JPGDSCN8050.JPGDSCN8051.JPG
 
20210913

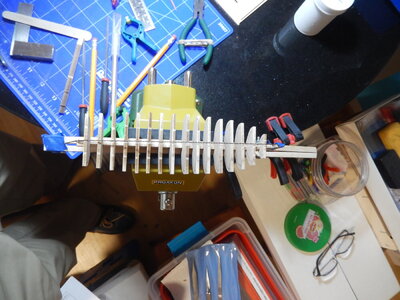
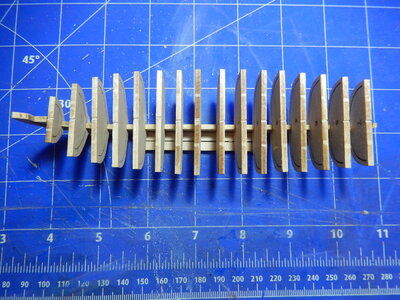
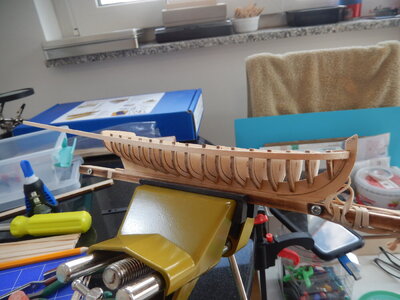
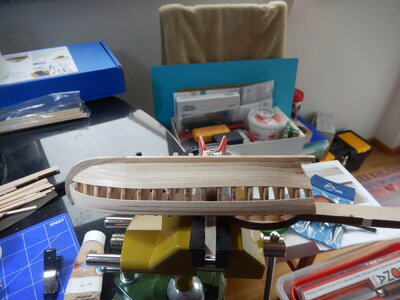
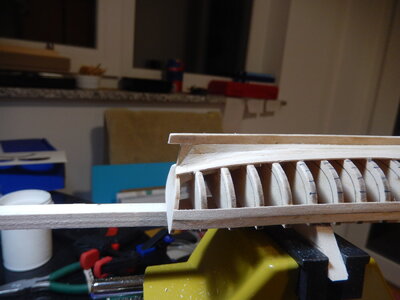
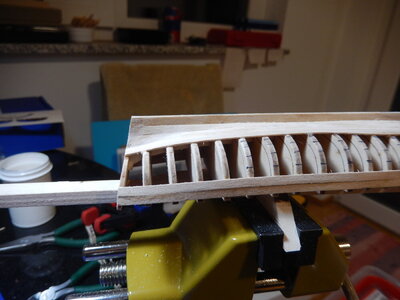
I had about an hour and a half available this evening so I decided to finish gluing the frames to the keel assembly. I actually started last night with the stern-most frame taking the needed time to make sure it was properly in place. With that as a reference to sight over, I was ready to start on the other frames. Looking at the assembled frames from several angles, the shape of what will (with luck!) become the longboat can be seen. Next post will be in a week as the skeleton will now sit awaiting my return.

DSCN8052.JPGDSCN8053.JPGDSCN8059.JPGDSCN8060.JPGDSCN8061.JPGDSCN8062.JPG
 
20210919

Cleaned up, faired and glued in the small pieces that go just in front of the forward most frame. Faired the frames forward and aft of the 3 center ones. Bent and installed the shear and one other plank port and starboard. Starting to mark the frames for the rest of the planking. Taking it slowly.

DSCN8063.JPGDSCN8064.JPGDSCN8065.JPGDSCN8066.JPGDSCN8067.JPGDSCN8068.JPGDSCN8072.JPGDSCN8073.JPG
 
20210922

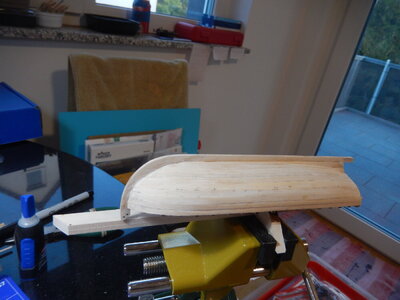
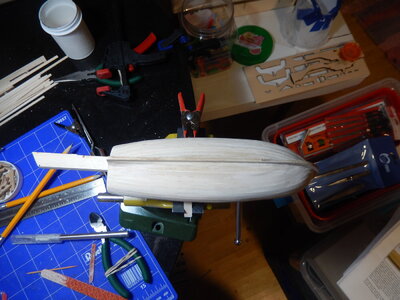
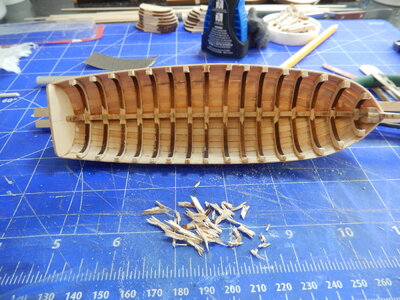
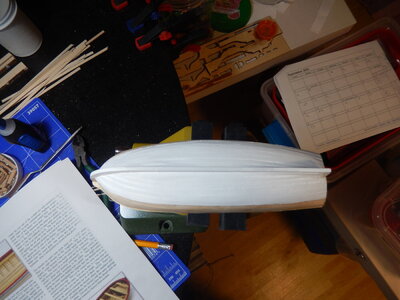
Starboard side planking complete. Should have alternately planked both sides but had issues getting this side the way I wanted it so decided to concentrate on doing one side first. Did not start tapering planks until I had the garboard and 3 others installed; definitely a mistake that I won’t make on the other side. Needed a couple of thin filler strips near the end but the final outside looks OK. I’ll deal with a bit of sanding on the inside once I remove the frame centers. Port side planking is next.

DSCN8074.JPGDSCN8075.JPGDSCN8076.JPGDSCN8081.JPGDSCN8085.JPGDSCN8086.JPG
 
20210912

Before leaving for my work trip a week ago, I opened the box, taped the plan sheets to my wall, grabbed the instruction book and started reading. After reading it through I knew this build would be different from the previous ones - the instructions are definitely not step-by-step by-the-numbers like several I've done and the plans are not as detailed as others. Also, most of the wood will need to be cut to shape/fit along with various metal fixtures. At first I was not sure I was up to the 'make the pieces' challenge but after some reflection (and a beer) I decided the only way to meet the challenge is head on. The next day I left for my travels.

Arriving back yesterday, I picked the instructions back up, re-read the first couple of pages and started in by cutting the false keel, keel, stem, and frame pieces out of the supplied sheets (there is not much left to cut out; a few knees and miscellaneous pieces - the rest of what I need will be manufactured by yours truly [hopefully without any spillage of blood]). Cleaned off the char from the various pieces, sanded the false keel from the bearding line downwards and then forward to the stem to create the rabbet along the keel, and glued false keel/keel and stem together (I figured the additional keel and stem pieces were extras and not needed; same for the extra rudder) . This morning I glued a couple of frames in working hard with a small machinist's square and a line stretched from stem post to stern post to keep them plumb and square. Since the weather was beautiful today I ceased work after about 30 minutes and went out for a bit of a bike ride. Upon returning, I realized I'd screwed up the frames I'd glued in (started in backwards order; no excuse!) so out came the acetone and the frames were gently removed. No harm; no foul at this point.

I decided to take a break to let the wood dry up. Put together a simple 2 piece wooden frame from scraps that holds the keel; the frame is then held in my vice and the top of the vice jaws gives me a flat surface to use with the machinist's square for making sure the frames are plumb. I'm using the false frame as my reference for square and the string stretched stem to stern lets me see if the frames are all aligned properly down the keel. So I now have a plan for moving forward with the frames.

While waiting for the wood to dry I've spent some time looking at SoS build logs for this model. All interesting to read and the pictures definitely help explain what is in the instructions. I'll be returning to these as I progress. I also realize that I have some more reading to do before I start on the the planking. I've printed off the references mentioned in a couple of the logs; will also be ordering the planking book from Model Expo.

Not much accomplished on the model so far and there will be no additional work done until next weekend as I'm travelling for work again this week. Nice to be able to get out of the office and on the road a bit.
View attachment 255783View attachment 255784View attachment 255785View attachment 255790View attachment 255791View attachment 255792View attachment 255794View attachment 255795
Your color coordinated kit box and cutting mat guarantee a successful voyage. Good start. Rich (PT-2)
 
20210926

Completed planking the hull and installing the stern board yesterday. I’m still learning how to do this on boats where the planks are not pre-cut. The advice on the SOS site has been helpful and I read over the David Antscherl planking primer and another set of planking instructions for a different longboat (can’t remember who the author is) before starting. Still have lots of learning to do in this area of ship modeling. Time to purchase another book….
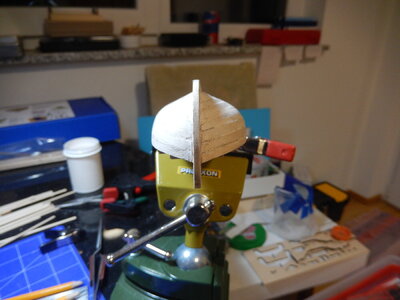
Will start removing the center parts of the frame today. Am hoping to get the interior sanding and prep work finished this week before leaving for a few weeks of vacation.

DSCN8087.JPGDSCN8089.JPGDSCN8092.JPGDSCN8093.JPGDSCN8094.JPGDSCN8095.JPG
 
20211001

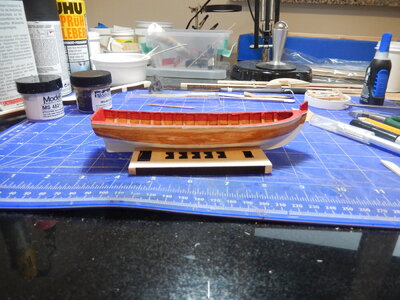
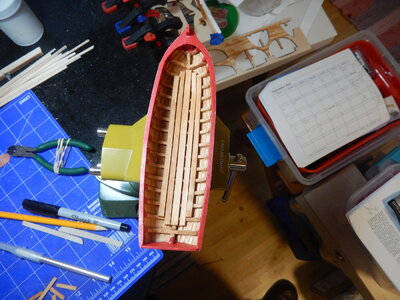
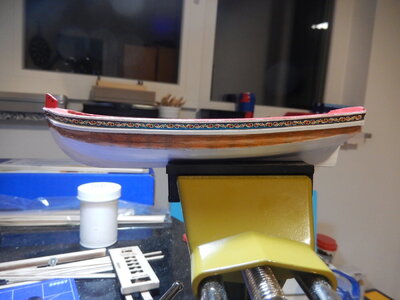
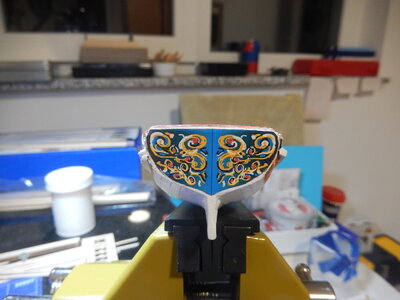
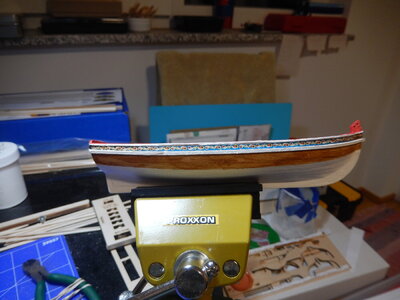
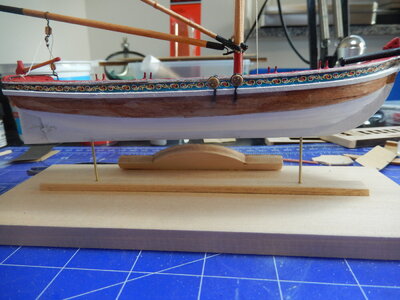
Center of the frames removed and interior sanded – a bit of a tight space to work but between the rotary sander and some patience, managed to get it done. Cap rail finished. Painted the lower part of the hull white; cap rail and part of the interior red. Couldn’t find a stain color I liked at the building store so mixed my own up – a teak stain thinned with shellac. Played around with the mix preparing test strips to find something suitable. Decided on a 2 part shellac to 1 part stain mix. Like the way it turned out. Stained the interior, exterior and floor boards. Glued the decorative friezes on the top of the hull sides and transom; added the moldings on the sides. Have some touch up to do to some of the paint work in spots but setting it aside for now and heading out on vacation. Will get back to the boat in about a month.

DSCN8097.JPGDSCN8099.JPGDSCN8101.JPGDSCN8103.JPGDSCN8105.JPGDSCN8106.JPGDSCN8107.JPGDSCN8110.JPGDSCN8111.JPGDSCN8112.JPGDSCN8113.JPG
 
20211001

Center of the frames removed and interior sanded – a bit of a tight space to work but between the rotary sander and some patience, managed to get it done. Cap rail finished. Painted the lower part of the hull white; cap rail and part of the interior red. Couldn’t find a stain color I liked at the building store so mixed my own up – a teak stain thinned with shellac. Played around with the mix preparing test strips to find something suitable. Decided on a 2 part shellac to 1 part stain mix. Like the way it turned out. Stained the interior, exterior and floor boards. Glued the decorative friezes on the top of the hull sides and transom; added the moldings on the sides. Have some touch up to do to some of the paint work in spots but setting it aside for now and heading out on vacation. Will get back to the boat in about a month.

View attachment 259048View attachment 259049View attachment 259050View attachment 259051View attachment 259052View attachment 259053View attachment 259054View attachment 259055View attachment 259056View attachment 259057View attachment 259058This is very nice progress and fine finishing work for a sharp looking boat. Well done! Rich (PT-2)
 
20211031

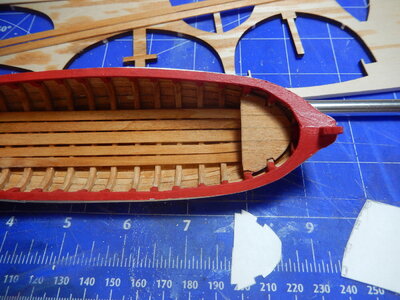
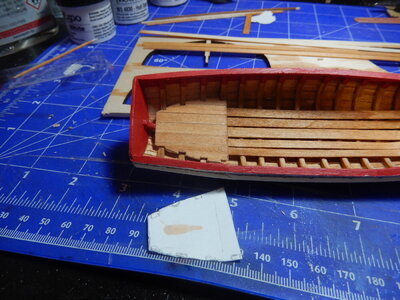
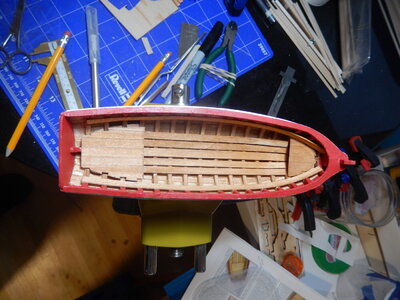
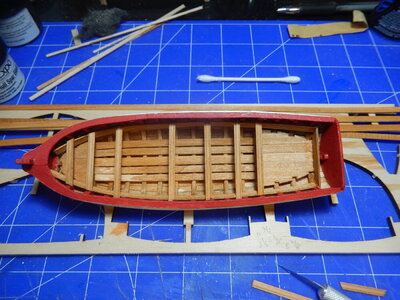
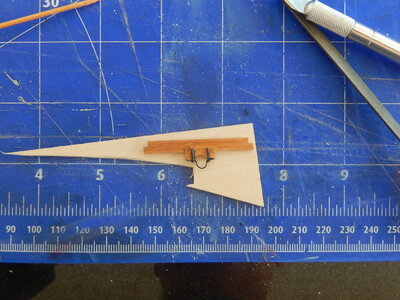
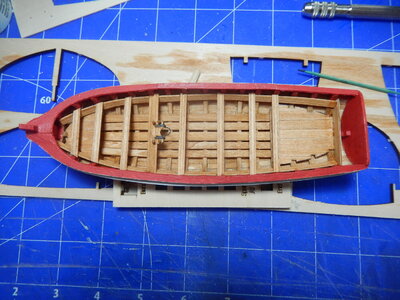
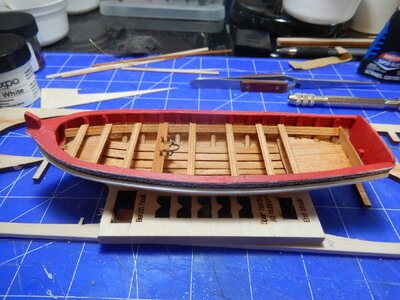
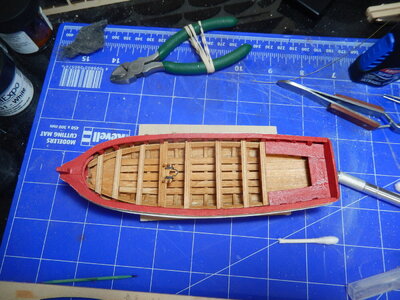
Back from vacation and back to work on the longboat. Bow and stern platforms installed, risers installed, rear locker front installed and thwarts installed. Mast support and belaying pins installed on large thwart about 1/3 distance from the bow to the stern.

DSCN8156.JPGDSCN8157.JPGDSCN8161.JPGDSCN8162.JPGDSCN8163.JPGDSCN8164.JPGDSCN8165.JPG
 
20211031

Back from vacation and back to work on the longboat. Bow and stern platforms installed, risers installed, rear locker front installed and thwarts installed. Mast support and belaying pins installed on large thwart about 1/3 distance from the bow to the stern.

View attachment 266231View attachment 266232View attachment 266233View attachment 266234View attachment 266235View attachment 266236View attachment 266237
This is certainly a jolly looking colorful craft! Rich (PT-2)
 
20211104

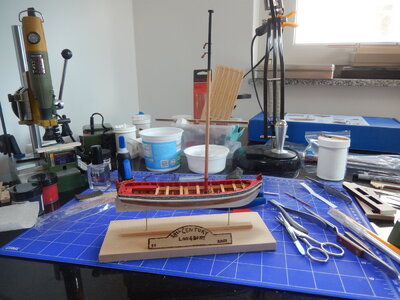
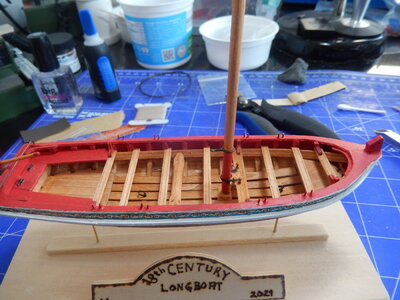
Windlass finished; seats & knees installed; tholes installed; rudder completed and mounted. The split rings that came with the kit for installation in the floor of the boat were too big (definitely out of scale). I made a couple from some links of chain left over from an earlier project. The hull, inside and out, is now finished. Temporarily mounted the longboat on the display base I made from the baseboard that came with the kit, some left-over brass rod and a piece of scrap wood for the sign (may need to make the holes in the keel a bit deeper). Work on the mast and rigging will be next. Goal is to have it completely finished by the end of November (will only be able to work on weekends the rest of the month due to work travel). Have been having fun with this little boat.

DSCN8167.JPGDSCN8169.JPGDSCN8170.JPGDSCN8173.JPGDSCN8174.JPGDSCN8175.JPGDSCN8176.JPGDSCN8177.JPGDSCN8178.JPG
 
Nice work JohnR. I'm at about the same point with the Longboat, with the locker hinges, seat knees and rudder to install. I'm looking forward to the rigging and really enjoying this build. I will attempt a build log later and at least post some photos. After doing three Asian sub $20 kits; the Harvey, the America and the Naxos fishing boat, the quality of this Model Shipways 18th c Longboat kit encourages me to more care and accuracy with the experience gained from the earlier crafts.
Best,
Mel R
 
20211104

Windlass finished; seats & knees installed; tholes installed; rudder completed and mounted. The split rings that came with the kit for installation in the floor of the boat were too big (definitely out of scale). I made a couple from some links of chain left over from an earlier project. The hull, inside and out, is now finished. Temporarily mounted the longboat on the display base I made from the baseboard that came with the kit, some left-over brass rod and a piece of scrap wood for the sign (may need to make the holes in the keel a bit deeper). Work on the mast and rigging will be next. Goal is to have it completely finished by the end of November (will only be able to work on weekends the rest of the month due to work travel). Have been having fun with this little boat.

View attachment 267466View attachment 267467View attachment 267468View attachment 267469View attachment 267470View attachment 267471View attachment 267472View attachment 267473View attachment 267474
Very nicely finished and appointed boat. The strong crisp and precise colors really stand out. Well done. Rich (PT-2)
 
I have this kit on my shelf waiting for time and place in line.

Its nice to see build log and see what others have done and what problems to look out for.

Keep up the great work and enjoy the build.
 
20211107

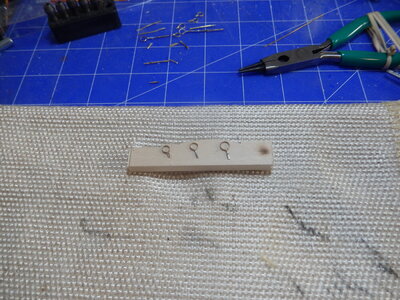
Have been working on the mast, boom, gaff, bowsprit and rigging the last couple of days. Working the brass strip to create the iron work was interesting. I tried working it cold, bending and gluing with CA, and then drilling the necessary small holes (used # 70 & #71 for the holes – nothing smaller would stay in the collet of my Proxxon drill). I wasn’t pleased with the bands I formed cold – the glue didn’t hold when drilling the holes or when I clipped the ends of the bands to length – so I decided to anneal the brass strip and solder things together before drilling the holes and cutting to final length. The end result looks OK. The picture shows the 3 bands made for the mast (along with the initial work).

Installing the mast, bowsprit, boom and gaff was straight forward. No issues; just slow, meticulous work. The two pulleys on the mast were installed with rope; the ones on the boom and horse were installed with wire (the one on the boom needed an eye on the bottom created with the wire & the one on the horse slides better created with wire instead of rope).

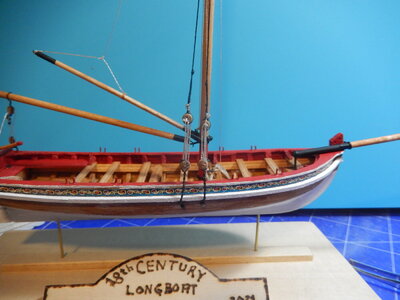
Creating the chainplates for the deadeyes that are installed near the mast was a bit of a challenge. I made the first set according to the dimensions on the plans and they looked OK – until I installed them. As you can see on the photo they were too short ending just at gunwale level; no way to really rig it easily. Back to the workbench to create a longer set. I wasn’t happy following the directions to create the chainplates - working with steel wire and CA was a pain and messy. I ended up twisting the wire together below and above the deadeyes; I could get the deadeyes tight in the chainplates doing this and after painting the end result looks reasonable.

This is my first time using deadeyes so it took some trial-and-error (lots!) to get comfortable with the rigging required. I opened up the eyes in the deadeyes just a bit so I could get my smallest needle rig through them (I have a small needle with a length of looped thread on it that I use to pull rigging through blocks – it goes through 0.8 mm or larger holes with ease; won’t go through anything smaller so I open them up to 0.8 mm). I’m pleased with the way the starboard shrouds turned out – even if the deadeyes are not perfectly even. When I work the port shrouds I’ll see if I can get them closer to the same height.

DSCN8181.JPGDSCN8182.JPGDSCN8185.JPGDSCN8188.JPGDSCN8190.JPGDSCN8193.JPGDSCN8196.JPGDSCN8197.JPG
 
Nice work JohnR. I'm at about the same point with the Longboat, with the locker hinges, seat knees and rudder to install. I'm looking forward to the rigging and really enjoying this build. I will attempt a build log later and at least post some photos. After doing three Asian sub $20 kits; the Harvey, the America and the Naxos fishing boat, the quality of this Model Shipways 18th c Longboat kit encourages me to more care and accuracy with the experience gained from the earlier crafts.
Best,
Mel R
Mel - Thanks for the note. Metal working this week has been interesting. The directions cover it as if its a simple thing to do. 8 bands later I finally managed one I was happy with. I chose this kit as the next learning experience as I work up to eventually doing a major ship project. It's a bit smaller than some I've done but has required a bit more thought along the way as I read ad re-read the instructions. I'm glad for the opportunity to have to do a little bit of scratch work on some of the parts (bands for mast and bowsprit; mast top; jaws for the gaff; mast step; chainplates). Hope to finish the rigging in a couple of weeks; have to fit model work in-between my work schedule for the next couple of weeks.

Have fun working on yours.

Best,

John
 
20211113

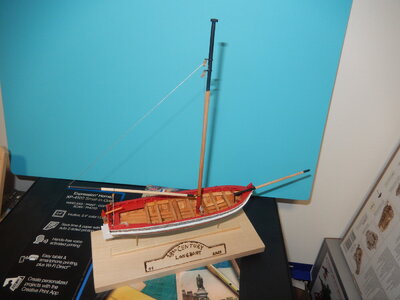
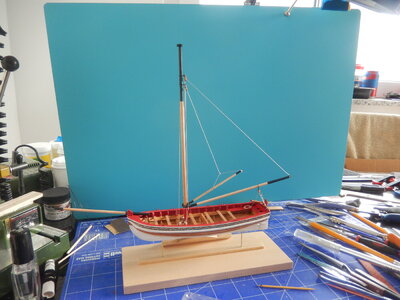
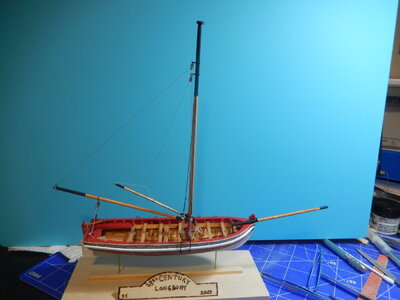
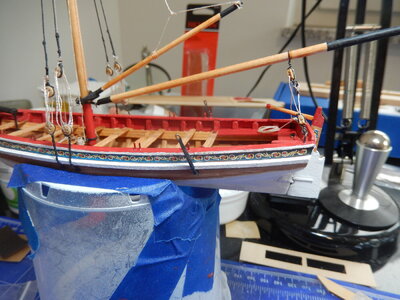
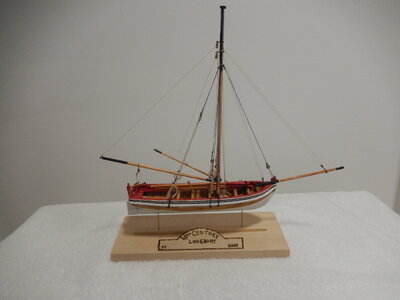
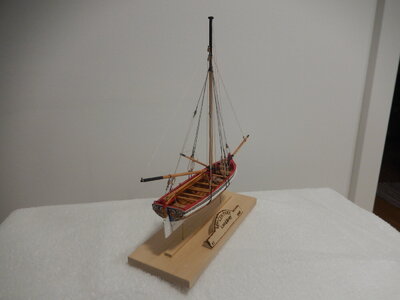
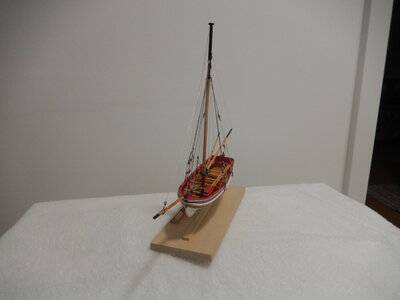
Finished all remaining rigging, anchor and oars today. The longboat is now complete, mounted and on display.

Instructions say to use #28 steel wire to form the two aft backstay chainplates. I had no reasonable way to do this without twisting the wire (I didn’t have a suitable adhesive) so I decided to use some sections of the brass strip that was used to simulate the other iron work. I formed the chainplates using a small jig to get the length right and then soldered the free ends to the body. A little filing and some blac paint and the chainplates looked OK. (Hindsight thought: This would have worked with the midship’s chainplates but I would have needed more of the brass strip and would have had to be careful not to burn the deadeyes.)

The two lower aft pulleys and the two pulleys on the jib and staysail halyards all required hooks on their bottoms. Rather than try and form hooks from the #28 wire and then strop them to the pulleys with rigging twine, I formed each strop and pulley out of a piece of wire.

The oars were straight-forward. Just smaller versions of the ones I’ve made for the dory and pram models.

Next? I have a model of one of Da Vinci’s machines and a small metal model of a gatling gun on the shelf. Won’t take too long to do either one. A visit to the websites and catalogs will be needed to find the next multi-weeks/months project.

DSCN8198.JPGDSCN8201.JPGDSCN8202.JPGDSCN8203.JPGDSCN8204.JPGDSCN8205.JPGDSCN8206.JPGDSCN8207.JPG
 
Mel - Thanks for the note. Metal working this week has been interesting. The directions cover it as if its a simple thing to do. 8 bands later I finally managed one I was happy with. I chose this kit as the next learning experience as I work up to eventually doing a major ship project. It's a bit smaller than some I've done but has required a bit more thought along the way as I read ad re-read the instructions. I'm glad for the opportunity to have to do a little bit of scratch work on some of the parts (bands for mast and bowsprit; mast top; jaws for the gaff; mast step; chainplates). Hope to finish the rigging in a couple of weeks; have to fit model work in-between my work schedule for the next couple of weeks.

Have fun working on yours.

Best,

John
John, thank you for the encouraging remark. I am enjoying the Longboat build and as you say the scratch work is satisfying along with the research to find out what and how things should look and work.
Your boat looks very well done and congratulations for it's completion. I hope to do as well. I am retired so can work at any pace or time the trivialities of daily life allow.
Regards,
Mel
 
Congratulations for finishing this small and fine model Thumbsup
 
Back
Top