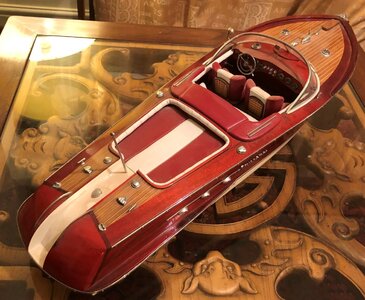
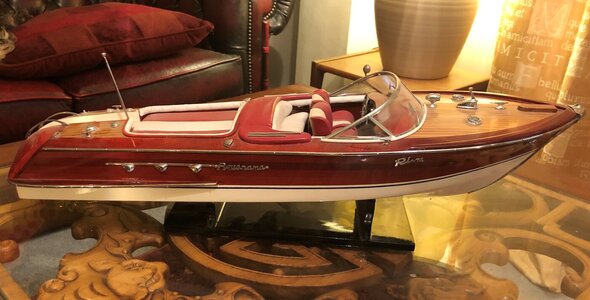
Amati Riva Aquarama for use on water.

I believe 2 ounce is the lightest available, that is what I used. I actually had a kit for rc use that included resin, mixing cups etc.

I discarded the polyester resin and used some 30 or 60 minute (can't remember which) that I thinned with denatured alcohol. I wouldn't recommend this as better Marine type epoxies are now available.

You want an epoxy with ample working time to work out the wrinkles that will initially appear. Watch some YouTube videos on fiberglass various items and you'll see how they can be smoothed out.

More on the cloth, be sure to get woven fabric/cloth, not mat. There is a difference, mat fibers are random and I think more likely to be visible.

Expect to apply multiple coats to achieve a smooth finish. The cloth texture will be obvious on the first coat and smooth out with subsequent coats.
 
Last edited:
I'd also recommend getting an extra yard/meter of cloth to practice on. Something round like and old football or rugby ball or the like.
 
Hi Duncan,

IMHO the fiberglass matt is not absolutely essential it is there to provide extra strength and rigidity, if you are worried about the strength (which I wouldn't be because your boats structure looks very strong and heavy), maybe the fiberglass could go on the first layer of planking the use the marine varnish on the outer.

Personally I wouldn't bother, thinned varnish on the outside will pernitrate well into the wood and seal things up. Or you could put the epoxy on then the varnish over the top to provide UV protection.

There is nothing wrong with any of the suggestions that have been made by everyone else, there is more than one way to do things.

Cheers,
Stephen.
 
I think I misunderstood what he is doing. I thought he was asking about finishing the exterior of the hull, but after re-reading his posts I see he wants to seal the interior pieces. I agree fiberglass would be more troublesome than beneficial.

I still think it would be a good option for the exterior of the hull to help keep it intact with any movement of the wood.

Glenn
 
Thanks Glenn. The thought of getting creases in it scares me a bit! It is a very curvy hull in multiple directions! How do you deal with applying it at the corners? Do you ask for a particle ounce for the fibreglass matting?
Cheers Duncan
Hi, Like Glenn I’ve used cloth and resin on model aircraft to be fuel resistant and it works very well. I would recommend caution though as fuselages and wings tend to be straighter and would be easier to apply than the very flaired hull and unusual stern on the Riva. The corner folds in the cloth can’t be seen once once you’ve sanded the resin to a smooth finish but it does take rather a lot of sanding, you really need to initially use an electric sander or you’ll be doing it forever. It’s all a very messy process that you should try out first before you attack that beautiful hull. With regards to using yacht varnish, I found that for larger projects it’s ok but it’s too thick to get that perfect smooth finish on smaller models and it has a sort of pale amber finished colour, and is more difficult to sand, much better to use several thin coats of poly gloss sanded between coats. Just my thoughts.
 
Here is a good article on fiberglassing a full size kayak: Fiberglassing a Wood Strip Boat

Reading through it might help you decide if it's worth the effort. Process would be the same but obviously on a much smaller scale.

Definitely heed the advice of not using creased or wrinkled material, it's impossible to get it to lay flat when you wet it out.
 
Hi, Like Glenn I’ve used cloth and resin on model aircraft to be fuel resistant and it works very well. I would recommend caution though as fuselages and wings tend to be straighter and would be easier to apply than the very flaired hull and unusual stern on the Riva. The corner folds in the cloth can’t be seen once once you’ve sanded the resin to a smooth finish but it does take rather a lot of sanding, you really need to initially use an electric sander or you’ll be doing it forever. It’s all a very messy process that you should try out first before you attack that beautiful hull. With regards to using yacht varnish, I found that for larger projects it’s ok but it’s too thick to get that perfect smooth finish on smaller models and it has a sort of pale amber finished colour, and is more difficult to sand, much better to use several thin coats of poly gloss sanded between coats. Just my thoughts.
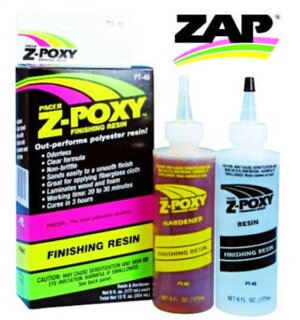
Hi Ken, I agree with you that applying fibreglass to such a curvy hull will be extremely difficult and I think after reviewing all the comments (and my limited skills) I don't feel confident to use that method. You mentioned poly gloss in your comment. What is this product please and can you give me an example make. I'm new to all of this! I've been planning to initially cover the outside of the mahogany planking with ' Z-poxy' epoxy resin in order to seal the wood and make it waterproof
(someone in the local boat club recommended this method but they hadn't built a mahogany boat). Do you know if poly gloss or varnish would be OK over the epoxy resin or do you feel that I don't really need to use epoxy resin on the outside of the hull? If I use poly gloss as the first coat on the planking would I need to water it down and if so with what liquid please? I want to achieve the superb finish that you achieved on your Riva but of course with the added proviso that it is completely waterproof. It is all rather confusing (confused.com!!) and I don't want to spoil this wonderful model that my wife bought me for my 70th.
Thank you to everyone for your input.
 

Attachments

  • Z-Poxy Finishing Resin.JPG
    Z-Poxy Finishing Resin.JPG
    47.9 KB · Views: 3
Regarding the concern about wrinkles in the glass cloth. I have built several very curvy round bilge hulls and sheathed them with epoxy. You don't necessarily need the strength of glass cloth. I have used stretch nylon fabric to provide a matrix to reinforce the epoxy. For example a heavy denier nylon stocking pulled over the whole boat so that there are no wrinkles (use clamps or clothes pegs to hold the stretched fabric at deck level). After the resin has cured just trim off at the gunwale position with a razor blade and cover the edge with a gunwale strip.

............................ however you should not sheathe over any of the fine mahogany planking on the Riva Aquarama - the finish is everything and conventional varnish is the way to go. Any epoxy coating should be done on the first layer of planking before applying the mahogany planking. You will need to abrade the intermediate epoxy coating to get a good key for the adhesive used for the mahogany layer. I would use epoxy to fix the mahogany to ensure good bonding.
 
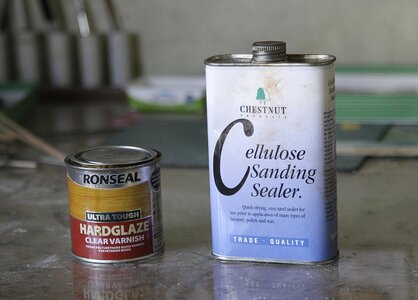
Hi DP, First I would agree with Chris that the finish on the Riva is the essential element for it to be a good looking model and I’m glad that you’re not going to epoxy the surface I had visions of a disaster, just keep it as easy for yourself as possible, you’ll have enough difficulty as it is. The poly that I mentioned is polyurethane gloss varnish, I did four coats, the first three thinned but the final coat as it came in the tin. Before I did anything to the planked hull I gave it a couple of coats of cellulous sanding sealer this penetrates the wood and sands back leaving a smooth hard surface eliminating the fine fibres from the surface that spoil a painted or varnished finish, especially needed for the mahogany deck, I do this on all my wooden surfaces and I think that it’s a must. Speaking of the mahogany sheets beware, they are not mahogany all the way through but a sort of ply with a yellow resin centre, if you sand too much the yellow shows through and it won’t take stain, you will be left with unsightly yellow streaks. You need to be as accurate as you can fitting this stuff as unlike other wood you really can’t sand it into shape, try it out on a bit of off cut so that you know what you’ll get away with.

Ken

_M0W3978.JPG
 
Last edited:
Thanks Ken, your information is invaluable especially about the mahogany strips being a ply type sandwich with a yellowish core! Without this valuable information from you I could easily have ruined the model by over sanding. Did you use white spirit to thin down the varnish and in what proportion did you thin it - 50/50 or what? For further coats did you thin it down less or still same proportion? I'm sorry to keep asking you all these questions but I don't want to mess up as I'm new to this type of construction and I don't want to disappoint either my wife or myself! I've always drooled over the beauty of these boats so that is why my wife treated me to this kit for my 70th. Originally my wife had thought of taking me on a real Aquarama but a half a day trip on Lake Garda seems to be around £900! This is a good affordable alternative!
 
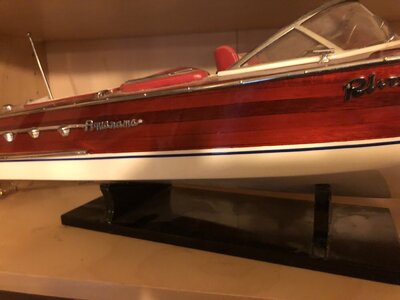
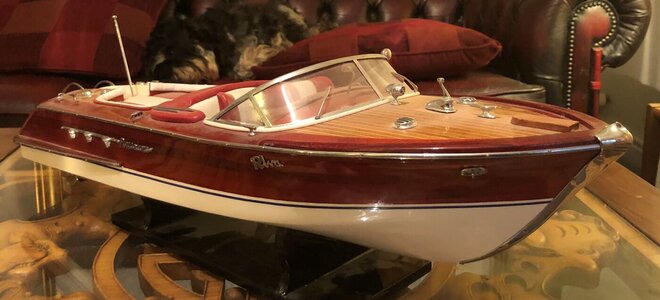
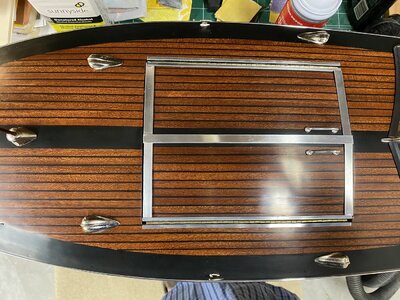
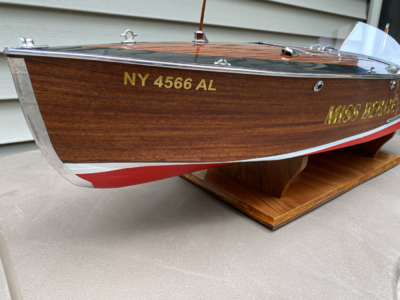
I hate to admit it but I bought a relatively cheap Aquarama model 1/16 scale that was presumably made in the Far East and intended as a desk decoration. Less than $100 !! photos below.

I have always admired the original boat and realised that I could never match the faultless quality of the finish and fittings if I built Amati's model.

A boatyard on the River Thames near here restores classic speedboats and has done several Aquaramas. Amazing work. https://www.peterfreebody.com/the-boatyard.php (check the photos on their workshop webpage).


riva4.JPGriva3.JPGriva2.JPGriva1.JPG
 
Last edited:
Thanks Ken, your information is invaluable especially about the mahogany strips being a ply type sandwich with a yellowish core! Without this valuable information from you I could easily have ruined the model by over sanding. Did you use white spirit to thin down the varnish and in what proportion did you thin it - 50/50 or what? For further coats did you thin it down less or still same proportion? I'm sorry to keep asking you all these questions but I don't want to mess up as I'm new to this type of construction and I don't want to disappoint either my wife or myself! I've always drooled over the beauty of these boats so that is why my wife treated me to this kit for my 70th. Originally my wife had thought of taking me on a real Aquarama but a half a day trip on Lake Garda seems to be around £900! This is a good affordable alternative!
Hi Duncan,

Possibly consider replacing the kits "Mahogany" for some real stuff or wood veneer that is a similar colour.

Stick to a process that you feel comfortable with.

Cheers,
Stephen.
 
Thanks Ken, your information is invaluable especially about the mahogany strips being a ply type sandwich with a yellowish core! Without this valuable information from you I could easily have ruined the model by over sanding. Did you use white spirit to thin down the varnish and in what proportion did you thin it - 50/50 or what? For further coats did you thin it down less or still same proportion? I'm sorry to keep asking you all these questions but I don't want to mess up as I'm new to this type of construction and I don't want to disappoint either my wife or myself! I've always drooled over the beauty of these boats so that is why my wife treated me to this kit for my 70th. Originally my wife had thought of taking me on a real Aquarama but a half a day trip on Lake Garda seems to be around £900! This is a good affordable alternative!
Hi, yes I used white spirit for thinning, nothing measured just a splash to make it the consistancy that felt right, about 10 to 15%, I said four coats but it was only three. Don’t worry at this stage just concentrate on that first planking, make a good job of that and the rest will work out. Let these planks follow their natural line, no twisting to try and get them to fit better, where gaps appear at the bow don’t worry just use fillets (stealers) to fill them in. Nail them down putting the pins only halfway in so that they can be removed easily and use plenty of glue making sure that the edges are all well stuck to each other this is important as later you won’t be able to sand smoothly If there not, (sprung planks). Fill all the gaps and seams with a good helping of filler, I used Brummer, it will look messy but once well sanded it will start looking better than you expected. At first I used a mouse sander as this is quicker, then use a longish piece of wood faced with sandpaper, look along the hull with light at an angle to spot any irregularity, it’s even a good idea to lightly spray a light colour from a can, this will show up any seams that need a bit of glueing or extra sanding. Don’t think that as it’s only the first planking and won’t be seen that you shouldn’t make the surface as best as you can, it’s this foundation that will go a long way towards the final finish. Good luck. Ken
 
Last edited:
Thank you for your help and advice which I'm finding invaluable. My Brummer filler arrived today but it was too cold in my garage workshop area. We had snow on the ground yesterday and today and I'm being careful with the electric heating in the workshop as the price of electricity has gone through the roof! I will wait until it is a bit warmer to do some more work so it doesn't cost a fortune to heat the workshop area. Thanks again Duncan.
 
You have received lots of good advice for your project. Here's mine. First, I definitely would fiberglass the lower hull to insure that it is waterproof. I also apply epoxy resin to the inner hull. I use 3/4 oz fiberglass cloth and West System marine epoxy resin for the exterior. This is an American brand but I'm sure you can find an equivalent in your area. I bought their pumps to insure the right proportions of resin and hardener. I dilute the mixed resin (approximately 6:1 with ethanol or xylene. I have built several boats with compound curvature of the hull with no problems, although it does take some experience to get it right. Just make sure the cloth has no wrinkles and don't try to do the entire hull at once. The first time I tried fiberglassing I was scared silly! You can fiberglass the interior planking or the exterior mahogany. I usually use 3 coats and the weave of the cloth disappears. CF80CBBB-5016-407D-B4AB-F8BE331DC49A_1_201_a.jpegtempImageb5CB7n.pngI have had excellent results varnishing the exterior fiberglass planking with spar urethane followed by clear urethane (3 coats of each). See the final finish of my Garwood Speedster. I have never had any leaks in my model boats.

Second, I have used medium CA for all planking. The beauty of this adhesive is that it will bind on dry or damp wood. Planking often must be wetted to bend around a curve, so binding the wood when it is damp is very useful.

Good luck with your project. I am sure you will enjoy seeing your boat on the water.
 
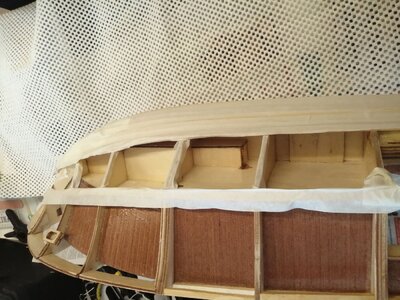
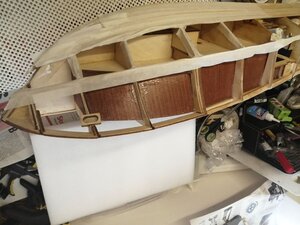
Haven't done much since my last post as it has been too cold in my garage workshop. Trying to be careful with the electric radiator with the high cost of electricity!! I've put masking tape on the planks and frames to stop any varnish getting on them and then possibly causing problems later when gluing more planks on. As you can see from the photos I soon won't be able to get into protecting the inside of these bottom planks from any ingress of water. Hopefully that won't happen but just in case I have put 2 coats of quick drying satin varnish on the inside of these bottom planks. In order to do this I've put a PVC glove on and applied it with a bent finger!! A brush wouldn't touch the inside of the planks. Next stage will be to continue with the planking when it gets warmer! By the way Happy New Year everyone and happy constructing and sailing! Cheers DuncanVarnishing underside of planking-2.jpgVarnishing underside of planking-1.jpg
 
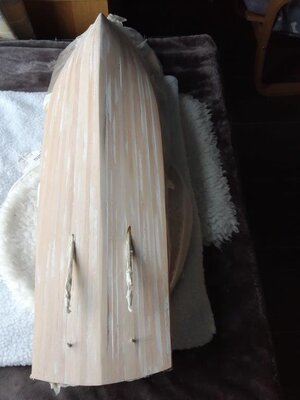
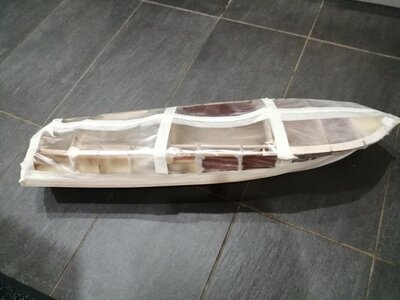
Riva Aquarama slowly coming along. First layer of a planking on the bottom of the hull nearly finished. Needs some filler in places and yet more sanding- ugh! Going to do the 2nd mahogany planking on the bottom so I can get access through the sides of the hull in order to assemble the rudders and linkages. Once the side planks are in place this job will be difficult if not impossible!
This is not as per instructions though but I think they are bias towards a display model. I've protected the rudder tubes with greased BBQ skewer sticks - a perfect
fit for these tubes in the motorisation kit

Awaiting more filler and sanding.jpg

There is masking tape on the prop shafts to protect them. During sanding I've protected the inside of the hull with A4 plastic pockets taped together.
Happy sailing and building everyone.

Protected for sanding.jpg!
 
Hi Ken, From your comments earlier, I'm going to order some syringe needles for use with the superglue. Having looked on Ebay there are many different gauges of blunt needles. What size do you recommend please? Also when you applied the superglue to the mahogany planks did you just run a line of glue roughly down the middle and did you also apply any to the next planks side face? I know your model was a static version so do you think cyno will be OK for a water based working model? I'm using the Brummer Filler on the first layer of planking - but the exterior version - it has rather toxic smelling fumes though! I'm also going to order the cellulose sanding sealer you recommended. Does this also have smelly fumes? Thanks for your help. cheers Duncan
 
Hi, I use 1.2x40mm blunt needles, they use colour coding and these are red. Cyno is activated by moisture and doesn’t un bond when wet so should be ok. Just use a thin line where the plank will lay, and only a couple of inches at a time, if the first layer is well glued it’s not necessary to glue the edges, you’ll only get stuck fingers and marked planks which discolour when varnished. Looking at your planking I think that you’ll need to sand it back much more to get all the planks level and even, if you don’t you won’t be able to get your final planking smooth, and with the finish that your looking for. I know that it’s a pain to do but it’s a must, you can’t correct it with the second planking, look at my first planking, it needs to be as smooth as that as it’s all about the finish, use more filler if needed, don’t be frightened of being aggressive at this stage. As to the smell of the sealer, it smells of dope, I love it and could get high on the stuff but my wife doesn’t.
 
Hi, I use 1.2x40mm blunt needles, they use colour coding and these are red. Cyno is activated by moisture and doesn’t un bond when wet so should be ok. Just use a thin line where the plank will lay, and only a couple of inches at a time, if the first layer is well glued it’s not necessary to glue the edges, you’ll only get stuck fingers and marked planks which discolour when varnished. Looking at your planking I think that you’ll need to sand it back much more to get all the planks level and even, if you don’t you won’t be able to get your final planking smooth, and with the finish that your looking for. I know that it’s a pain to do but it’s a must, you can’t correct it with the second planking, look at my first planking, it needs to be as smooth as that as it’s all about the finish, use more filler if needed, don’t be frightened of being aggressive at this stage. As to the smell of the sealer, it smells of dope, I love it and could get high on the stuff but my wife doesn’t.
Thanks Ken. Your help and advice is much appreciated as I'm new to this type of build. I've been doing the planking in a room inside our house but I'll now have to wait until it gets a bit warmer to go out to my workshop. This is because the exterior Brummer filler is very smelly and I got complaints from my wife as the smell lasted for several days! I should have perhaps chosen the interior version of the filler like yourself which I presume is not pungent! Do you only give the mahogany planks a light sanding before applying the sealer? Thanks again Duncan.
 
Back
Top