• LUCZORAMA SHIPWRECK SCAVENGER HUNT GIVEAWAY. 4 Weeks of Fun • 1 Legendary Prize ((OcCre’s Fram Ship)) • Global Crew Welcome!
    **VIEW THREAD HERE**

HMS Enterprise 1774 POF 1:48.

Superb ! Congratulations. I love the rulers and "Grant Jig" The clamps look perfectly positioned.. Are those treenails ?
You sure are working fast.

Alex R
Thanks Alex. I’m only going to treenail things that can be easily seen. Those nails on the clamps are “real” as I used some to help me position them. I did place them in the actual position just in case I decide to nail these- unlikely tho. Cheers Grant
PS your first 4 frames look so cool. I love the MD jig- it seems so much more accessible than the CAF one.
 
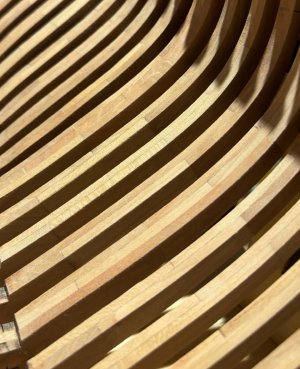
Good morning Gentlemen. I fixed the deck clamps to the inside of the frames. I decided not to bash the kit and include the lower decks and details. The way the kit frames are designed and presented I prefer the look through appearance than having this cluttered with internal details. So only the upper deck clamps are fitted.
IMG_4910.jpeg

IMG_4911.jpeg
These have been the most tricky and consequential part worked on thus far…..eish I hope my measurements and placement is good.
IMG_4897.jpegIMG_4922.jpeg
Nailing: I’m only going to add nails and treenails to those parts which will be seen after completion. These nails seen on the clamps are for fitting purposes and will not be visible…e.g:
IMG_4923.jpeg
I have been slowly sanding the inside and added the keelson. I did nail this. The British ships used metal nails on the keelson and I have used 0.5mm brass. The nailing pattern is not 100% but pretty good.
IMG_4895.jpegIMG_5011.jpeg
Plenty more sanding to go. Cherry wood frustrates me a tad. It sands/scrapes up to a lovely colour but then darkens rather quickly. What you see after sanding is not what you get. Cheers Grant
 
Good morning Gentlemen. I fixed the deck clamps to the inside of the frames. I decided not to bash the kit and include the lower decks and details. The way the kit frames are designed and presented I prefer the look through appearance than having this cluttered with internal details. So only the upper deck clamps are fitted.
View attachment 515419

View attachment 515420
These have been the most tricky and consequential part worked on thus far…..eish I hope my measurements and placement is good.
View attachment 515421View attachment 515422
Nailing: I’m only going to add nails and treenails to those parts which will be seen after completion. These nails seen on the clamps are for fitting purposes and will not be visible…e.g:
View attachment 515423
I have been slowly sanding the inside and added the keelson. I did nail this. The British ships used metal nails on the keelson and I have used 0.5mm brass. The nailing pattern is not 100% but pretty good.
View attachment 515425View attachment 515424
Plenty more sanding to go. Cherry wood frustrates me a tad. It sands/scrapes up to a lovely colour but then darkens rather quickly. What you see after sanding is not what you get. Cheers Grant
That's looks fantastic Grant!:)Okay
 
Good morning Gentlemen. I fixed the deck clamps to the inside of the frames. I decided not to bash the kit and include the lower decks and details. The way the kit frames are designed and presented I prefer the look through appearance than having this cluttered with internal details. So only the upper deck clamps are fitted.
View attachment 515419

View attachment 515420
These have been the most tricky and consequential part worked on thus far…..eish I hope my measurements and placement is good.
View attachment 515421View attachment 515422
Nailing: I’m only going to add nails and treenails to those parts which will be seen after completion. These nails seen on the clamps are for fitting purposes and will not be visible…e.g:
View attachment 515423
I have been slowly sanding the inside and added the keelson. I did nail this. The British ships used metal nails on the keelson and I have used 0.5mm brass. The nailing pattern is not 100% but pretty good.
View attachment 515425View attachment 515424
Plenty more sanding to go. Cherry wood frustrates me a tad. It sands/scrapes up to a lovely colour but then darkens rather quickly. What you see after sanding is not what you get. Cheers Grant
Sanding, nailing, more sanding …… the lovely life of a PoF-builder. Nice work, Grant. She shows here lines more and more.
Regards, Peter
 
Good morning Gentlemen. I fixed the deck clamps to the inside of the frames. I decided not to bash the kit and include the lower decks and details. The way the kit frames are designed and presented I prefer the look through appearance than having this cluttered with internal details. So only the upper deck clamps are fitted.
View attachment 515419

View attachment 515420
These have been the most tricky and consequential part worked on thus far…..eish I hope my measurements and placement is good.
View attachment 515421View attachment 515422
Nailing: I’m only going to add nails and treenails to those parts which will be seen after completion. These nails seen on the clamps are for fitting purposes and will not be visible…e.g:
View attachment 515423
I have been slowly sanding the inside and added the keelson. I did nail this. The British ships used metal nails on the keelson and I have used 0.5mm brass. The nailing pattern is not 100% but pretty good.
View attachment 515425View attachment 515424
Plenty more sanding to go. Cherry wood frustrates me a tad. It sands/scrapes up to a lovely colour but then darkens rather quickly. What you see after sanding is not what you get. Cheers Grant
For some reason, again, I seem to be missing out on a lot of updates, including yours on the Enterprise.
While you may have some misgivings on the kit, seeing a POF kit coming together is always a pleasure to behold. That includes your interpretation of this model. Your work is, as we've come to expect, a pleasure to follow.
 
Wow Grant. I have been following your build log quietly in the background, but I think that has caused me to miss some updates. I am now fully caught up and very impressed with your rapid progress. What a great kit and a beautiful piece of work again.
 
That's looks fantastic Grant!:)Okay
Thank you very much Shota. I’m learning a lot and one day I hopefully will join you in scratch building one of these….may take a while yet :D
Sanding, nailing, more sanding …… the lovely life of a PoF-builder. Nice work, Grant. She shows here lines more and more.
Regards, Peter
Hi Peter. Yep sand and more sand. I’m not planking the inside of the hull so once the frames follow the planking line from a presentation view I will have reach my objective here.
For some reason, again, I seem to be missing out on a lot of updates, including yours on the Enterprise.
While you may have some misgivings on the kit, seeing a POF kit coming together is always a pleasure to behold. That includes your interpretation of this model. Your work is, as we've come to expect, a pleasure to follow.
Good evening Johan. I have a similar issue with updates not being highlighted. Thanks for looking in. Once I accepted the design of this kit it has grown on me. The instructions are difficult in that I have to make a lot of guess work and assumptions however the kit is good quality. I will have to add and scratch build a lot to achieve a higher degree of accuracy but that is pretty standard with kits. Most importantly I’m having loads of fun. Cheers Grant
This is looking excellent, Grant. I remember feeling the same sort of dread when I installed deck clamps: is this thing in the right place? Only doing the upper deck will make this build much more efficient. Plus, I have all sorts of things 'down below' that are really difficult to see much less appreciate.
Thank you kindly Paul. We shall find out if mine are in the right place sometime in the near future ROTF. Yours were perfect as the completed masterpiece of a Kingfisher is evidence. I’m still thinking of how to display and build this model. I will definitely have it a lot more “open” than the kit suggests and with the wide framing keep the lower hull with the look through effect……it has to have a little bit of the “wow” factor if I can find it….… hmmm. The way you had half planked and half open definitely is conducive to all the detail you added……..it is the stuff of legends Dr Dockattner . Cheers Grant
Hey Grant, your progress is amazing, and your craftsmanship is outstanding. I'm not there yet but you now have me researching ahead to make sure I get my deck supports in the right location. Your ships looking good my friend.
Good evening Daniel . Thank you very much- it is appreciated. What I have found with this build, more so than my POB’s , is the forward thinking and the consequential knock on (good and bad) is significantly more. Makes for a load more head scratching…..I will be bald after thisROTF
Beautiful.
Thank you kindly Neil.
Wow Grant. I have been following your build log quietly in the background, but I think that has caused me to miss some updates. I am now fully caught up and very impressed with your rapid progress. What a great kit and a beautiful piece of work again.
Thank you Herman. As I said to Johan, it is a unique kit and will need a fair amount of bashing. The quality is excellent but it is vicious if you make an error. It has very Little wiggle room and I need someROTF. Cheers Grant
Looks like you are making great progress with a complicated build.

Jan
Good evening Jan. Thank you for the compliment. I think I sometimes have the tendency to make this a little more complicated than it really is.;)

Cheers Grant
 
Good morning Gentlemen. I fixed the deck clamps to the inside of the frames. I decided not to bash the kit and include the lower decks and details. The way the kit frames are designed and presented I prefer the look through appearance than having this cluttered with internal details. So only the upper deck clamps are fitted.
View attachment 515419

View attachment 515420
These have been the most tricky and consequential part worked on thus far…..eish I hope my measurements and placement is good.
View attachment 515421View attachment 515422
Nailing: I’m only going to add nails and treenails to those parts which will be seen after completion. These nails seen on the clamps are for fitting purposes and will not be visible…e.g:
View attachment 515423
I have been slowly sanding the inside and added the keelson. I did nail this. The British ships used metal nails on the keelson and I have used 0.5mm brass. The nailing pattern is not 100% but pretty good.
View attachment 515425View attachment 515424
Plenty more sanding to go. Cherry wood frustrates me a tad. It sands/scrapes up to a lovely colour but then darkens rather quickly. What you see after sanding is not what you get. Cheers Grant
The result is impressive. I like these ribs.
 
Hi Grant
Love the second drawing cross section:)

A rather minor point in the overall scheme of things but maybe interesting to you and others......I believe the waterway in the drawing is more in keeping with the shape used beginning sometime in 19th century, at least according to Goodwin. Looking at a number of cross sections on drawings at RMG it appears the convex top of the waterway versus a concave shape started after about 1810 or 1811.

Allan
 
Wow, that looks excellent. Now we know what Jonah saw from inside the whale!
Thank you kindly. True story ROTF
Hi Grant
Love the second drawing cross section:)

A rather minor point in the overall scheme of things but maybe interesting to you and others......I believe the waterway in the drawing is more in keeping with the shape used beginning sometime in 19th century, at least according to Goodwin. Looking at a number of cross sections on drawings at RMG it appears the convex top of the waterway versus a concave shape started after about 1810 or 1811.

Allan
Good morning Allan. You are absolutely correct. This came down to my laziness as I did not have a photo of the 18th century concave shaped waterway. :oops:. Was too lazy to find one. The pic does give a cool representation of the clamp tho. Thank for checking in and I absolutely love your contributions to mine and others posts. Cheers Grant
 
Hi Grant
Love the second drawing cross section:)

A rather minor point in the overall scheme of things but maybe interesting to you and others......I believe the waterway in the drawing is more in keeping with the shape used beginning sometime in 19th century, at least according to Goodwin. Looking at a number of cross sections on drawings at RMG it appears the convex top of the waterway versus a concave shape started after about 1810 or 1811.

Allan
Hey Allen,

Have you ever noticed that obscure bits of information about English ships just starts leaking out of you without notice. Do you keep a cloth handy to keep it from getting all over your clothes ROTF?
 
Hi Paul,
When I am out of the mood for making sawdust I still love to do research with reading, transcribing contracts, and drawing. Keeps the mind fresh but unfortunately probably annoys the heck out of some folks. No offense is ever intended, just throwing out information for anyone interested.:) I know I have learned SOOO much from you and others here and appreciate all the input.
Allan

Cheers
Allan
 
Good morning Gentlemen. I fixed the deck clamps to the inside of the frames. I decided not to bash the kit and include the lower decks and details. The way the kit frames are designed and presented I prefer the look through appearance than having this cluttered with internal details. So only the upper deck clamps are fitted.
View attachment 515419

View attachment 515420
These have been the most tricky and consequential part worked on thus far…..eish I hope my measurements and placement is good.
View attachment 515421View attachment 515422
Nailing: I’m only going to add nails and treenails to those parts which will be seen after completion. These nails seen on the clamps are for fitting purposes and will not be visible…e.g:
View attachment 515423
I have been slowly sanding the inside and added the keelson. I did nail this. The British ships used metal nails on the keelson and I have used 0.5mm brass. The nailing pattern is not 100% but pretty good.
View attachment 515425View attachment 515424
Plenty more sanding to go. Cherry wood frustrates me a tad. It sands/scrapes up to a lovely colour but then darkens rather quickly. What you see after sanding is not what you get. Cheers Grant
I see your point, but Cherry is sure a nice wood to look at. My smaller Enterprize is pearwood.
 
I see your point, but Cherry is sure a nice wood to look at. My smaller Enterprize is pearwood.
Hi Jack. Perhaps it will stabilise and look really good once it is oiled or treated. I have no idea how the wood will change with some oil or poly as this is my first venture with Cherry.Maybe it is time to find out:D. Cheers Grant
 
Back
Top