HMS Enterprise 1774 POF 1:48.

Good morning Gentlemen.
Eish I have relapsed into a terrible period of addiction…,Redface. The Admiral has been away for a 5 day hike, no kids anymore and I have not been to the office (I think the directors are going to fire me ). Paul’s sirens came up , sang and I gleefully plunged in. How many hrs - who knows….. but it has been badROTF.

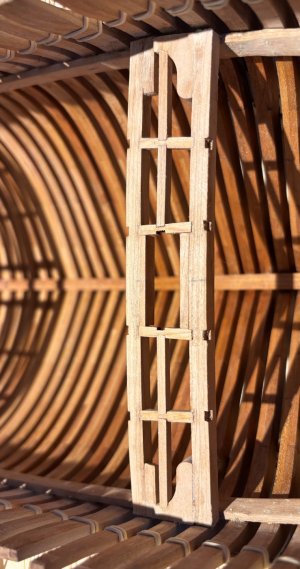
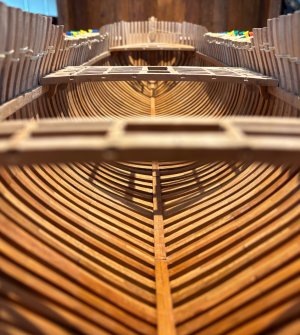
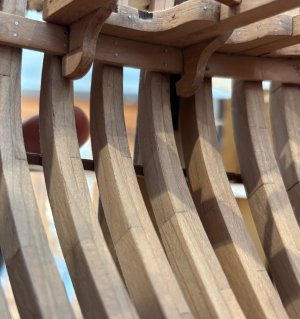
Deck beams and carlings. Many initial errors while I found out the best sequence of installation. The fore section I actually had to do a total redo. Gave up on the kit instructions (which are more like guess work) and went with “Grants logic” - we shall see if this works:cool:.

My hand cut notches while ok are not perfect and did create a little joinery issue once in a while….just a little one.

Still I’m very chuffed how it is going. I have left myself a lot of sanding, scraping and a little filling so hopefully it will pull together beautifully :p.
IMG_5289.jpegIMG_5274.jpegIMG_5292.jpegIMG_5294.jpeg
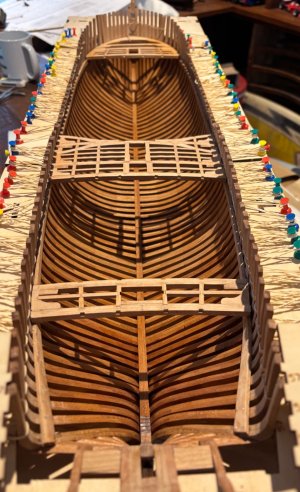
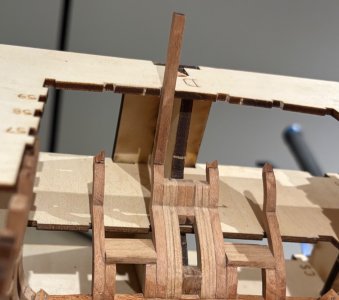
….and the inside. You cannot really see into here, so it did not get too much attention. Still I was rather pleasantly surprised with the outcome:
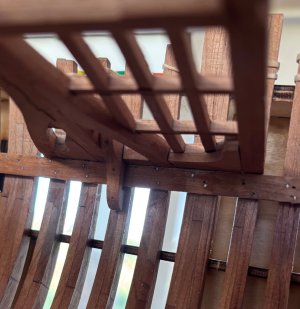
IMG_5190.jpegIMG_4948.jpeg
Ok time for rehab….
Cheers Grant

IMG_5277.jpeg
 
Good morning Gentlemen.
Eish I have relapsed into a terrible period of addiction…,Redface. The Admiral has been away for a 5 day hike, no kids anymore and I have not been to the office (I think the directors are going to fire me ). Paul’s sirens came up , sang and I gleefully plunged in. How many hrs - who knows….. but it has been badROTF.

Deck beams and carlings. Many initial errors while I found out the best sequence of installation. The fore section I actually had to do a total redo. Gave up on the kit instructions (which are more like guess work) and went with “Grants logic” - we shall see if this works:cool:.

My hand cut notches while ok are not perfect and did create a little joinery issue once in a while….just a little one.

Still I’m very chuffed how it is going. I have left myself a lot of sanding, scraping and a little filling so hopefully it will pull together beautifully :p.
View attachment 516905View attachment 516907View attachment 516904View attachment 516903
….and the inside. You cannot really see into here, so it did not get too much attention. Still I was rather pleasantly surprised with the outcome:
View attachment 516908View attachment 516909
Ok time for rehab….
Cheers Grant

View attachment 516906
The first step to recovery is knowing you need help...

Beautiful work, Grant! With some sanding that is going to turn out great.
 
Good morning Gentlemen.
Eish I have relapsed into a terrible period of addiction…,Redface. The Admiral has been away for a 5 day hike, no kids anymore and I have not been to the office (I think the directors are going to fire me ). Paul’s sirens came up , sang and I gleefully plunged in. How many hrs - who knows….. but it has been badROTF.

Deck beams and carlings. Many initial errors while I found out the best sequence of installation. The fore section I actually had to do a total redo. Gave up on the kit instructions (which are more like guess work) and went with “Grants logic” - we shall see if this works:cool:.

My hand cut notches while ok are not perfect and did create a little joinery issue once in a while….just a little one.

Still I’m very chuffed how it is going. I have left myself a lot of sanding, scraping and a little filling so hopefully it will pull together beautifully :p.
View attachment 516905View attachment 516907View attachment 516904View attachment 516903
….and the inside. You cannot really see into here, so it did not get too much attention. Still I was rather pleasantly surprised with the outcome:
View attachment 516908View attachment 516909
Ok time for rehab….
Cheers Grant

View attachment 516906
Very nice job Grant
Congrats
 
Good morning Gentlemen.
Eish I have relapsed into a terrible period of addiction…,Redface. The Admiral has been away for a 5 day hike, no kids anymore and I have not been to the office (I think the directors are going to fire me ). Paul’s sirens came up , sang and I gleefully plunged in. How many hrs - who knows….. but it has been badROTF.

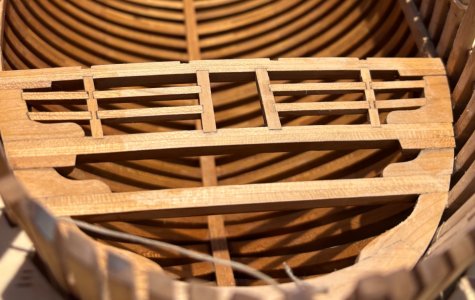
Deck beams and carlings. Many initial errors while I found out the best sequence of installation. The fore section I actually had to do a total redo. Gave up on the kit instructions (which are more like guess work) and went with “Grants logic” - we shall see if this works:cool:.

My hand cut notches while ok are not perfect and did create a little joinery issue once in a while….just a little one.

Still I’m very chuffed how it is going. I have left myself a lot of sanding, scraping and a little filling so hopefully it will pull together beautifully :p.
View attachment 516905View attachment 516907View attachment 516904View attachment 516903
….and the inside. You cannot really see into here, so it did not get too much attention. Still I was rather pleasantly surprised with the outcome:
View attachment 516908View attachment 516909
Ok time for rehab….
Cheers Grant

View attachment 516906
Home alone, choose your one music, volume on +++ ……..
That are complexed parts with all those notches on every side, Grant. But the outcome looks very nice.
Regards, Peter
 
Last edited:
Alone with a healthy addiction!!

Glad you sought no help because the results are a pleasure to view. The precision and attention to detail are impressive.

Thanks for sharing your progress and good luck with the withdrawal symptoms when the Admiral returns!!
 
Hello Grant, :)

good luck with your new build. I've only just come across your build report and I really like it. Please keep up the good work.
I will follow your progress with great interest and use your tips and experience for my first wooden ship ? I wish I had half as much talent as you.

Regards
Günter

Best regards
Günter Ship-1
 
Last edited:
Grant,
Sorry I haven't commented on your build for several days. You are building so fast, and it is looking great. I am glad that you got the clamp placement "nailed in", quite literally, so perfectly. Looks like you did not notch the beams on on to the clamps, but just lay them on. I think that was a good idea. Your process of building the beams around the mast areas and working towards the other areas is what I should have done ! If one makes, even a minor mistake, and builds starting from one end to the other, the error multiplies and changes the position of mast areas ( happened to me ! LOL. )
One thing that the CAF kit has a better design on than the Dockyards' is the stern section of the build jig. CAF's is quite good. Ours does not have a jig for that part, and getting the stern upper timbers' angles and turns is going to be a nightmare.....Your joinery is perfect...I am sooo impressed. Wonderful work.
Alex R
 
Good morning Gentlemen.
Eish I have relapsed into a terrible period of addiction…,Redface. The Admiral has been away for a 5 day hike, no kids anymore and I have not been to the office (I think the directors are going to fire me ). Paul’s sirens came up , sang and I gleefully plunged in. How many hrs - who knows….. but it has been badROTF.

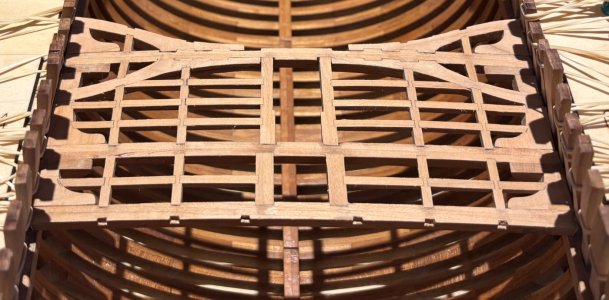
Deck beams and carlings. Many initial errors while I found out the best sequence of installation. The fore section I actually had to do a total redo. Gave up on the kit instructions (which are more like guess work) and went with “Grants logic” - we shall see if this works:cool:.

My hand cut notches while ok are not perfect and did create a little joinery issue once in a while….just a little one.

Still I’m very chuffed how it is going. I have left myself a lot of sanding, scraping and a little filling so hopefully it will pull together beautifully :p.
View attachment 516905View attachment 516907View attachment 516904View attachment 516903
….and the inside. You cannot really see into here, so it did not get too much attention. Still I was rather pleasantly surprised with the outcome:
View attachment 516908View attachment 516909
Ok time for rehab….
Cheers Grant

View attachment 516906
Beautiful work!!
 
Good morning Gentlemen
While I wait for the new parts I am going to deviate to deck beams and carlings etc.

Firstly I need to poly the internal frames below the clamp line. I was very happy, indeed, how the Cherry came out. It looks way better in real life and try as I may I couldn’t share this with you guys:
Some pics:
View attachment 516330View attachment 516332View attachment 516331View attachment 516333
Very chuffed and then ……
View attachment 516334
I knew this was going to happen just not while it is still in the cradle ROTF ROTF ROTF
Cheers Grant
yep.....did that about 5 times!
 
Precision, precision, precision. The precise fitting of pieces in your build is remarkable. Kudos on a fine job!
Allan
Good evening Allan. Thank you very much I appreciate this - very encouraging. Cheers Grant
She is coming along beautifully Grant. Your progress is remarkable!
Thank you kindly Daniel. I have been at “full throttle “ lately and a little too many hours playing with my ship is evident. Having fun tho. Cheers Grant
The first step to recovery is knowing you need help...

Beautiful work, Grant! With some sanding that is going to turn out great.
Good evening Paul. Thank you. I am very happy so far and while my joins are no where near perfect the look and feel is good enough to be unplanked if I want it to be. I’m still waiting for that wobbly or out of line carling to rear its ugly head though….
Yep I need plenty of help in life, luckily there is if I ask:D. Cheers Grant
Very nice job Grant
Congrats
Thank you Gilbert
Home alone, choose your one music, volume on +++ ……..
That are complexed parts with all those notches on every side, Grant. But the outcome looks very nice.
Regards, Peter
Thanks Peter. Normally I don’t enjoy an empty home, however these last few days have been very enjoyable. I’m happy with my outcome so far- not perfect but good enough :D.
Beautiful work and very precise. Enjoy looking at what you have done.
Thank you kindly
Beautiful work!!
yep.....did that about 5 times!
Good evening Paul. Thank you, it is much appreciated. I have read your log and picked up many pointers. You saved me some headaches for sure. Cheers Grant
 
One thing that the CAF kit has a better design on than the Dockyards' is the stern section of the build jig. CAF's is quite good. Ours does not have a jig for that part, and getting the stern upper timbers' angles and turns is going to be a nightmare.
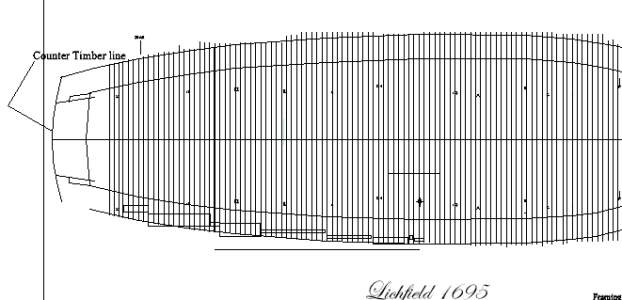
I have seen build boards that not only have the framing layout but also the counter timbers like the framing guide below. This allows the placement of a square on the line of the specific counter timber and this will show exactly how far out the timber itself has to be. It also serves as something for the timber to lean against until the glue dries.
Something like the below.
Allan
1746128883308.png
 
Alone with a healthy addiction!!

Glad you sought no help because the results are a pleasure to view. The precision and attention to detail are impressive.

Thanks for sharing your progress and good luck with the withdrawal symptoms when the Admiral returns!!
Good evening Brad. Yea this hobby- once you get going the hours just fly by. Thank you for your comments and encouragement. Withdrawals will be severe tomorrow ROTF
Beautiful work Grant! Those interior shots make you feel as if you're standing inside a full sized vessel.
Thank Russ. While I can get my phone into these positions I must take advantage. :D.
Hello Grant, :)

good luck with your new build. I've only just come across your build report and I really like it. Please keep up the good work.
I will follow your progress with great interest and use your tips and experience for my first wooden ship ? I wish I had half as much talent as you.

Regards
Günter

Best regards
Günter Ship-1
Good evening Gunter. Welcome aboard my journey with my Enterprise. It certainly has its ups and downs but fun is had. Thank you kindly for your kind words- I do appreciate this.
Grant,
Sorry I haven't commented on your build for several days. You are building so fast, and it is looking great. I am glad that you got the clamp placement "nailed in", quite literally, so perfectly. Looks like you did not notch the beams on on to the clamps, but just lay them on. I think that was a good idea. Your process of building the beams around the mast areas and working towards the other areas is what I should have done ! If one makes, even a minor mistake, and builds starting from one end to the other, the error multiplies and changes the position of mast areas ( happened to me ! LOL. )
One thing that the CAF kit has a better design on than the Dockyards' is the stern section of the build jig. CAF's is quite good. Ours does not have a jig for that part, and getting the stern upper timbers' angles and turns is going to be a nightmare.....Your joinery is perfect...I am sooo impressed. Wonderful work.
Alex R
Thank you for your compliment Alex. I have read your CAF Enterprise log a few times and I learnt plenty. I decided not to notch the beams to the clamps as these won’t been seen and just created extra work. (Easy option). It did mean getting that measurement right for the clamps. The stern jig is a big help (I’m surprised the MD kit doesn’t do this- some careful planning and measuring coming your wayThumbsup). Oh the jig hasn’t helped me I broke another oneROTF
IMG_5345.jpeg
Fantastic work and great skill Grant. Some very realistic shots there. The detail is amazing.
Be very proud !
Thank you Neil.
This looks great Grant! You’re making me want to build a ship with all the deck members. I would hate to cover them after all that work! ;)
Thanks Dean. It is surprisingly fun to build these. I thought it would be very monotonous but not. Yea, if I continue getting these reasonable I am not going to cover too much. Cheers Grant
 
Good evening Brad. Yea this hobby- once you get going the hours just fly by. Thank you for your comments and encouragement. Withdrawals will be severe tomorrow ROTF

Thank Russ. While I can get my phone into these positions I must take advantage. :D.

Good evening Gunter. Welcome aboard my journey with my Enterprise. It certainly has its ups and downs but fun is had. Thank you kindly for your kind words- I do appreciate this.

Thank you for your compliment Alex. I have read your CAF Enterprise log a few times and I learnt plenty. I decided not to notch the beams to the clamps as these won’t been seen and just created extra work. (Easy option). It did mean getting that measurement right for the clamps. The stern jig is a big help (I’m surprised the MD kit doesn’t do this- some careful planning and measuring coming your wayThumbsup). Oh the jig hasn’t helped me I broke another oneROTF
View attachment 517077

Thank you Neil.

Thanks Dean. It is surprisingly fun to build these. I thought it would be very monotonous but not. Yea, if I continue getting these reasonable I am not going to cover too much. Cheers Grant
Grant,
I remember breaking ALL of those timbers during my build, especially when I was trying to insert some horizontal frames to join the vertical timbers; they break so easily...I'm going to look at Goodwin's book and others to see how the stern vertical timbers were done in the full-size ships and also see how the MD kit differs from the CAF kit in the stern construction. I like the three vertical timbers on either side of the sternpost in the CAF kit; the MD doesn't show that construction seems more flimsy - I may end up doing some kit bashing looking for more stern rigidity. The MD kit's instructions regarding the stern have no written directions or order of assembly, but the 3-D drawings are really good. part of the fun ? I guess Victor assumes we are big boys and can figure this out on our own. Didn't it take around 20 years apprenticeship to become a Master shipbuilder ?
BTW, at the rate you are going, you will be finished with the CAF kit, way before me and can start on the MD kit- and still beat me to the finish ! (of course, I never really "finish" anything ).....LOL

Cheers Mate

Alex R
 
Back
Top