Or if Darius is willing to provide 2 or 3 small deco to owner of resin printer here to make à try?A long line of curious visitors is waiting.. but no pressure
-

Win a Free Custom Engraved Brass Coin!!!
As a way to introduce our brass coins to the community, we will raffle off a free coin during the month of August. Follow link ABOVE for instructions for entering.
-

PRE-ORDER SHIPS IN SCALE TODAY!
The beloved Ships in Scale Magazine is back and charting a new course for 2026!
Discover new skills, new techniques, and new inspirations in every issue.
NOTE THAT OUR FIRST ISSUE WILL BE JAN/FEB 2026
You are using an out of date browser. It may not display this or other websites correctly.
You should upgrade or use an alternative browser.
You should upgrade or use an alternative browser.
HMS Sovereign of the Seas - Bashing DeAgostini Beyond Believable Boundaries
- Thread starter DARIVS ARCHITECTVS
- Start date
- Watchers 105
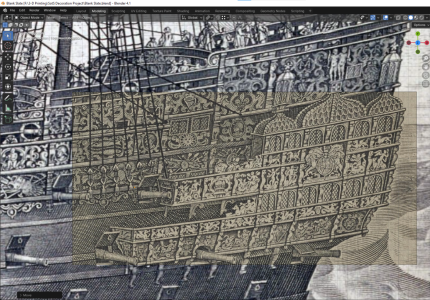
Come on, guys... I've said a dozen times that printing won't start until all the models are finished. Go back and read the build log. It takes a huge amount of time to learn Blender, and it only comes with time and practice. I'm just not comfortable opening another research project, learning the methods of supporting, slicing, scaling and printing when so much work is left in modeling. Besides, I'm on a roll and don't want to break stride. Yeah, it's been a roll lasting over a year, but still the pace is being maintained.
But if you STILL can't wait, please take the objects attached below, print them at 1:80 scale, such that each is approximately 15mm wide, and then post pictures of the printed part on this build log. Let us know how it went.
But if you STILL can't wait, please take the objects attached below, print them at 1:80 scale, such that each is approximately 15mm wide, and then post pictures of the printed part on this build log. Let us know how it went.
Attachments
Good evening Kurt, I'm following your build and due to what I've seen and the answers you gave to my questions enticed me to down load Blender. What my future son in law and other young people say, fully supports, your comments that Blender takes a huge amount of time and patience to learn. And that's just for the basics. So, as my ex teacher used to say "The long way is always the short way" and I now look forward to many many hours of "Blender for Dummies". When your work is finished I will take immense pleasure in seeing the printout(s) and not push for results before you are ready to do so. In the meantime I'll watch with eyes wide open and keep trying to learn this (mind) Blender/Blunder. Stay calm, Blender on and wonderful work you are doing. Cheers.Come on, guys... I've said a dozen times that printing won't start until all the models are finished. Go back and read the build log. It takes a huge amount of time to learn Blender, and it only comes with time and practice. I'm just not comfortable opening another research project, learning the methods of supporting, slicing, scaling and printing when so much work is left in modeling. Besides, I'm on a roll and don't want to break stride. Yeah, it's been a roll lasting over a year, but still the pace is being maintained.
But if you STILL can't wait, please take the objects attached below, print them at 1:80 scale, such that each is approximately 15mm wide, and then post pictures of the printed part on this build log. Let us know how it went.
Sorry Darius, Il did not remembered you said that. Thanks for the files. I only have plus not resin printer, Il Will try IT when Corning to homme after vacanciers.
- Joined
- Oct 15, 2017
- Messages
- 1,190
- Points
- 443

Yep, didn't mean to put any pressure on you. I just enjoy seeing new solutions to old problems. For me, it's the anticipation, kind of like Christmas Eve when you're a 6-year-old.  But, at 68, I'll dig deep and find some control. I can wait patiently.

 But, at 68, I'll dig deep and find some control. I can wait patiently.
No worries Hoss. All you have to remember that patience is the #1 material we build these ships with. You can imagine how patient I have to exercise making one 3-D model per week, with many hours of work, knowing that all the fun of this project is in the actual assembly of the parts and rigging, not the 3-D work. I'm not far behind you at age 60, and am also concerned about not having enough time left to complete the model.Yep, didn't mean to put any pressure on you. I just enjoy seeing new solutions to old problems. For me, it's the anticipation, kind of like Christmas Eve when you're a 6-year-old.But, at 68, I'll dig deep and find some control. I can wait patiently.

Last edited:
- Joined
- Jan 21, 2022
- Messages
- 855
- Points
- 403

I thought by this time somebody already tested your file. I don't know why you stick to not printing till I finish them all rule but..... in my opinion you should test print at least couple of them and make changes acordly.
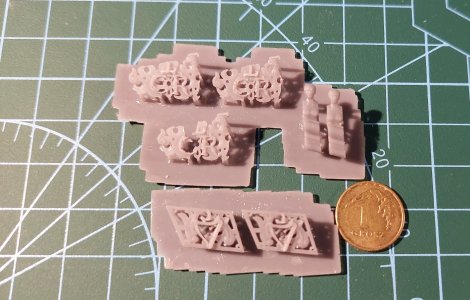
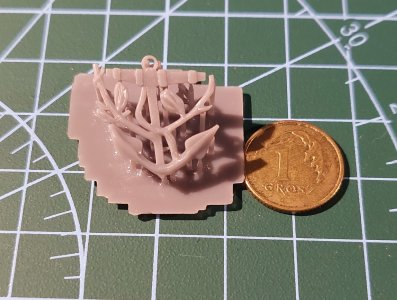
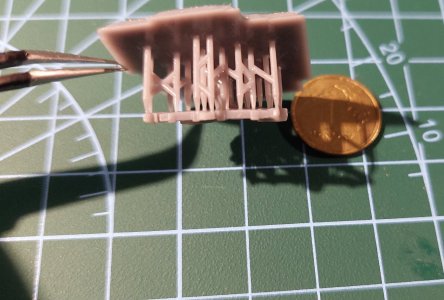
First things first. The're too thin. I was able to change that in chitubox,but this requires change in design. CHITU will resize whole model and this is not enough. The thickness must be add proportionally to the each element.
2mm-3mm would be ok. In CHITU (or any other slicer) thickness changes in relation to highest point on model which dosen't improve on for example crown or strings.
It's walls are too thinn which results in print fail. In your orginal blender file you need to grab it's faces to the bottom of model so you don't have empty space. It will be very hard to fix it by someon else as blender "remeshes" imported stl. Compare your original file with my import does the mesh looks the same?
I guess you only made one crown model and copy-pasted it, but in my blender file with your model imported I couldn't separte it.
Here I adde a little thicknes from bottom. It's printing right now.
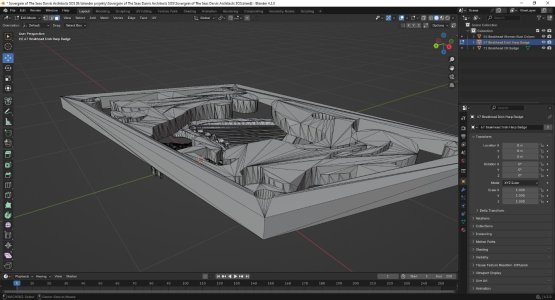
My model is about 3mm thick little wider but not much.


First things first. The're too thin. I was able to change that in chitubox,but this requires change in design. CHITU will resize whole model and this is not enough. The thickness must be add proportionally to the each element.
2mm-3mm would be ok. In CHITU (or any other slicer) thickness changes in relation to highest point on model which dosen't improve on for example crown or strings.


It's walls are too thinn which results in print fail. In your orginal blender file you need to grab it's faces to the bottom of model so you don't have empty space. It will be very hard to fix it by someon else as blender "remeshes" imported stl. Compare your original file with my import does the mesh looks the same?
I guess you only made one crown model and copy-pasted it, but in my blender file with your model imported I couldn't separte it.

Here I adde a little thicknes from bottom. It's printing right now.

My model is about 3mm thick little wider but not much.


This is really helpful, WojitasS. Your test prints show me how the first revisions of the decorations need to be changed. I can use booleans (union) to place blocks of material inside the crowns which are too thin in order to make them print correctly. Other parts can be scaled in the Z axis to thicken them until they will print. I knew that adjustments would need to be made and problems fixed, and your test prints show me what needs to be down. Most of the 3-D obect files are too large in file size to post on the forum for yourself and others to test print. The thinnest objects will obviously need to be thicker. The harp strings were just too fine to prints. What is the resolution of your resign printer? Which resin printer did you use? That would affect how small the details can be made. It appears that sharp edges were not printed as sharp as I hoped. Many thanks for posting the results of the first test pieces!I thought by this time somebody already tested your file. I don't know why you stick to not printing till I finish them all rule but..... in my opinion you should test print at least couple of them and make changes acordly.
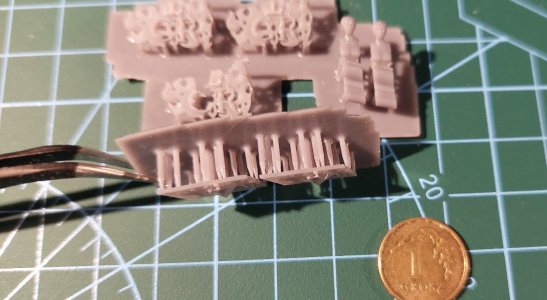
View attachment 528749View attachment 528750
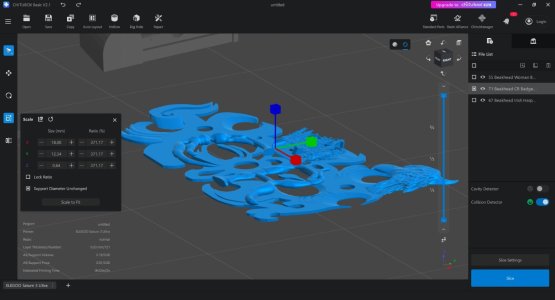
First things first. The're too thin. I was able to change that in chitubox,but this requires change in design. CHITU will resize whole model and this is not enough. The thickness must be add proportionally to the each element.
2mm-3mm would be ok. In CHITU (or any other slicer) thickness changes in relation to highest point on model which dosen't improve on for example crown or strings.
View attachment 528751
View attachment 528752
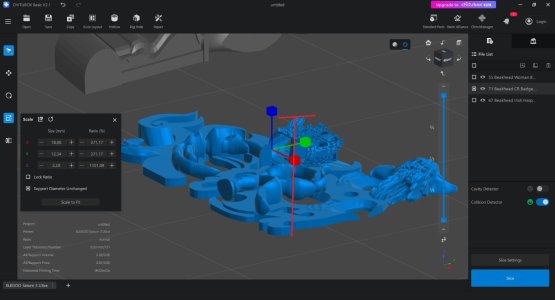
It's walls are too thinn which results in print fail. In your orginal blender file you need to grab it's faces to the bottom of model so you don't have empty space. It will be very hard to fix it by someon else as blender "remeshes" imported stl. Compare your original file with my import does the mesh looks the same?
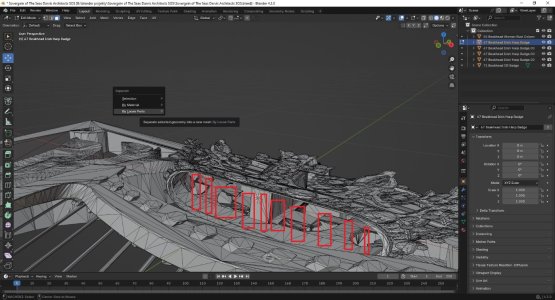
I guess you only made one crown model and copy-pasted it, but in my blender file with your model imported I couldn't separte it.
View attachment 528756
Here I adde a little thicknes from bottom. It's printing right now.
View attachment 528757
My model is about 3mm thick little wider but not much.
View attachment 528758View attachment 528759
Last edited:
- Joined
- Jan 21, 2022
- Messages
- 855
- Points
- 403

Saturn 3 Ultra 16K. 8K Elegoo gray waterwashable. Sometimes I use 8K space gray diffrence is minimal.
You don't have to use any booleans. You either pull down faces(in edit mode) bottom part of crown or just place a cube with top rounded to fit under.
Edges are sharp, but this is illusion of blender. We have very small ornaments and this parts are too tiny to expect them to be sharp, detaild and also small. In 1/36 maybe
Don't you have to eliminate all interior polygons?Saturn 3 Ultra 16K. 8K Elegoo gray waterwashable. Sometimes I use 8K space gray diffrence is minimal.
You don't have to use any booleans. You either pull down faces(in edit mode) bottom part of crown or just place a cube with top rounded to fit under.
Edges are sharp, but this is illusion of blender. We have very small ornaments and this parts are too tiny to expect them to be sharp, detaild and also small. In 1/36 maybe
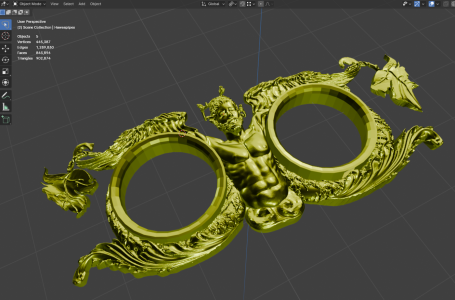
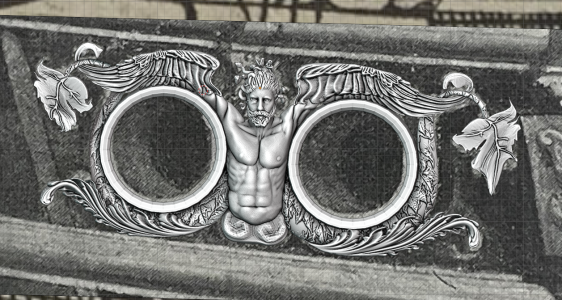
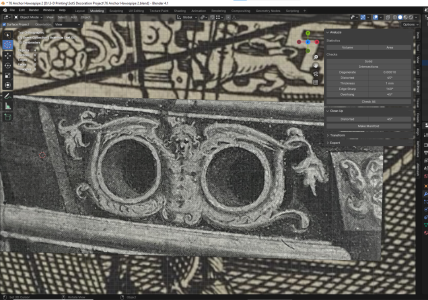
Work on the hawse pipe decoration continues. The 3-D model is about half completed. I'm happy with the results so far but think that most of the detail will be lost due to how small this part is on the model. The next steps are to add a scaled leaf texture to the lower vines and leaves to the ends of them, add snakes to the man's hair, and add the bottom section of the man's torso at the bottom.
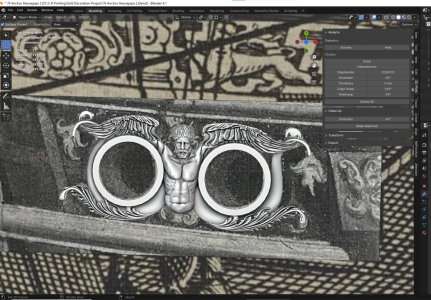
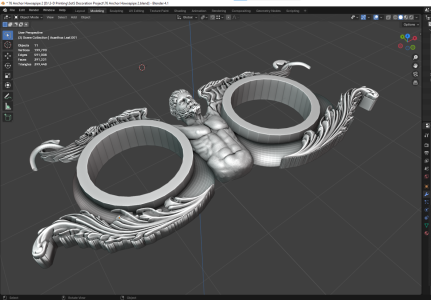


This looks to my inexpert eye to be one of your best renderings yet!Work on the hawse pipe decoration continues. The 3-D model is about half completed. I'm happy with the results so far but think that most of the detail will be lost due to how small this part is on the model. The next steps are to add a scaled leaf texture to the lower vines and leaves to the ends of them, add snakes to the man's hair, and add the bottom section of the man's torso at the bottom.
View attachment 530666
View attachment 530665
View attachment 530667
It may make no difference at scale, but the drawing appears to have radiused ends on the hawse pipes, presumably to reduce chafing.
Last edited:
I will make a radiused edge as you said. It makes perfect sense!This looks to my inexpert eye to be one of your best renderings yet!
It may make no difference at scale, but the drawing appears to have radiused ends on the hawse pipes, presumably to reduce chafing.
Good evening Kurt. Brilliant contributions and tutorials on blender and 3D work. Cheers Grant
It's getting there and as it is your skill set is still climbing to much higher altitudes - well done indeed!!


