• Win a Free Custom Engraved Brass Coin!!!
    As a way to introduce our brass coins to the community, we will raffle off a free coin during the month of August. Follow link ABOVE for instructions for entering.

Le Requin-Zebec-1750 POF 1:48 (ZHL)

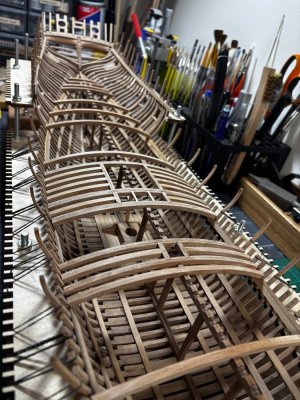
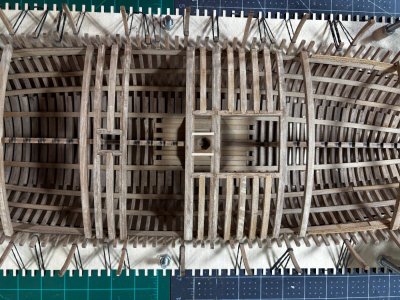
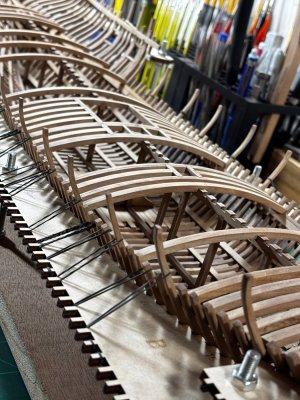
I'm on a roll with these deck support beams. I have concentrated on the multi piece beams which are nice because you can cut a clean notch to receive a carling piece prior to glue up.
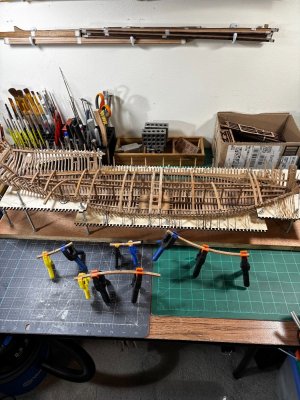
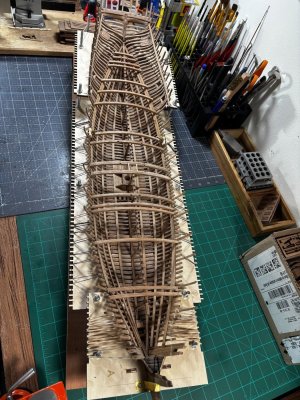
IMG_1386.jpegIMG_1387.jpeg

This disk sander is now my buddy! WOW, in a few seconds I can shape a multi angled deck beam to fit the hull shape saving me hours of hand sawing and filing.
I have the unit hooked up to my 2.5 gal. shop vac leaving no notable wood dust in my shipyard.
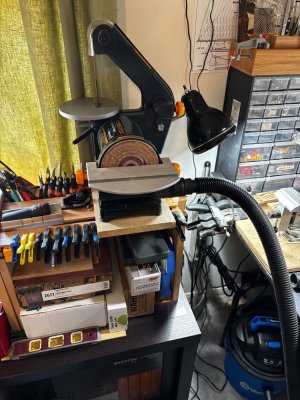
IMG_1388.jpeg

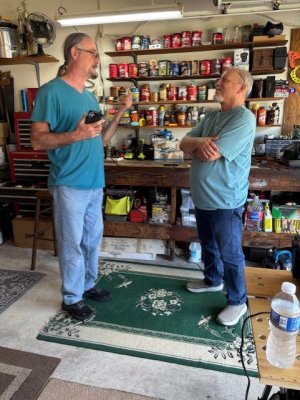
Oh and here is a picture of Dean giving me expert tips on modeling. I'm looking forward to featuring some of his blood wood strips on the upper portions of the deck.
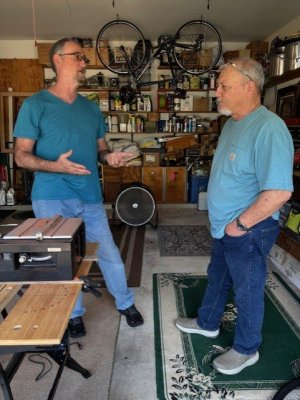
thumbnail_IMG_1995.jpg

Thanks for watching.

thumbnail_IMG_1992.jpg
 
I'm on a roll with these deck support beams. I have concentrated on the multi piece beams which are nice because you can cut a clean notch to receive a carling piece prior to glue up.

View attachment 547980View attachment 547981

This disk sander is now my buddy! WOW, in a few seconds I can shape a multi angled deck beam to fit the hull shape saving me hours of hand sawing and filing.
I have the unit hooked up to my 2.5 gal. shop vac leaving no notable wood dust in my shipyard.

View attachment 547982

Oh and here is a picture of Dean giving me expert tips on modeling. I'm looking forward to featuring some of his blood wood strips on the upper portions of the deck.

View attachment 547985

Thanks for watching.

View attachment 547983
Ship looks great…me not so much…ROTF
I must have been saying, “ …and if you organize those coffee cans by height…” ROTF
I enjoyed hanging out, getting some wood cut, and talking shop. ;)
 
Last edited:
I'm on a roll with these deck support beams. I have concentrated on the multi piece beams which are nice because you can cut a clean notch to receive a carling piece prior to glue up.

View attachment 547980View attachment 547981

This disk sander is now my buddy! WOW, in a few seconds I can shape a multi angled deck beam to fit the hull shape saving me hours of hand sawing and filing.
I have the unit hooked up to my 2.5 gal. shop vac leaving no notable wood dust in my shipyard.

View attachment 547982

Oh and here is a picture of Dean giving me expert tips on modeling. I'm looking forward to featuring some of his blood wood strips on the upper portions of the deck.

View attachment 547985

Thanks for watching.

View attachment 547983
Nice one Dean and Daniel. :D
 
I'm on a roll with these deck support beams. I have concentrated on the multi piece beams which are nice because you can cut a clean notch to receive a carling piece prior to glue up.

View attachment 547980View attachment 547981

This disk sander is now my buddy! WOW, in a few seconds I can shape a multi angled deck beam to fit the hull shape saving me hours of hand sawing and filing.
I have the unit hooked up to my 2.5 gal. shop vac leaving no notable wood dust in my shipyard.

View attachment 547982

Oh and here is a picture of Dean giving me expert tips on modeling. I'm looking forward to featuring some of his blood wood strips on the upper portions of the deck.

View attachment 547985

Thanks for watching.

View attachment 547983
Nice pictures of your:
-progress with the deck support beams;
-new power tool;
-meeting with Dean.
Always nice to visit another member!
Regards, Peter
 
I'm on a roll with these deck support beams. I have concentrated on the multi piece beams which are nice because you can cut a clean notch to receive a carling piece prior to glue up.

View attachment 547980View attachment 547981

This disk sander is now my buddy! WOW, in a few seconds I can shape a multi angled deck beam to fit the hull shape saving me hours of hand sawing and filing.
I have the unit hooked up to my 2.5 gal. shop vac leaving no notable wood dust in my shipyard.

View attachment 547982

Oh and here is a picture of Dean giving me expert tips on modeling. I'm looking forward to featuring some of his blood wood strips on the upper portions of the deck.

View attachment 547985

Thanks for watching.

View attachment 547983
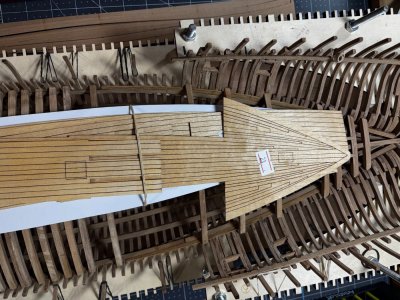
Never realized the strong convex curvature of the deck, still, she's looking great.

Good to see both you and Dean discussion the essentials; coffee!
 
Thanks Johan. I rarely need to go to the hardware store for nuts, bolts and washers. Coffee however at least twice a month :D.
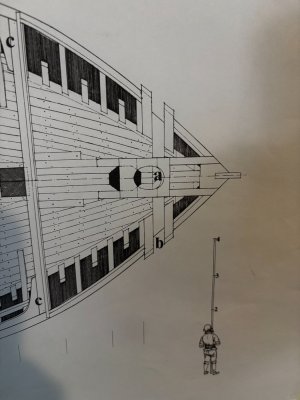
In my post #366 Rob had sent me a drawing of this ships deck. In figure #5 you can see where the gun deck overlays the main deck thus flatting out the overall deck giving much relief to the extreme curvature.
 
Last edited:
Thanks Johan. I rarely need to go to the hardware store for nuts, bolts and washers. Coffee however at least twice a month :D.
In my post #366 Rob had sent me a drawing of this ships deck. In figure #5 you can see where the gun deck overlays the main deck thus flatting out the overall deck giving much relief to the extreme curvature.
Wow, that's a complex deck structure. I'm looking forward how you're going to deal with that.
 
It's been a bumpy ride so far Johan. I hope things smooth out once I start planking. @RDN1954 (forgot to quote your post).
The Bluenose wasn't a ride in the park, nor are my subsequent scratch builds.
I found out there's no quick and dirty in modelling, you have to jump through all the hoops, when you're committed to turn out a presentable model.
Having said that, I have full confidence in your abilities and craftsmanship.
 
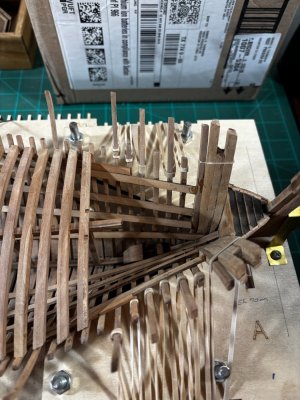
Here is a little more progress. I framed out the ships main access to its lower cargo hold.

IMG_1404.jpegIMG_1412.jpegIMG_1413.jpeg

The notched longitudinal backbone supporting the center of each deck beam stops about 6 cm from the stem post in the bow area. There is not much detail I can find related to the deck beams in this area so after filling in all the other deck beams, I will come back and concentrate at the bow.

IMG_1410.jpegIMG_1414.jpeg

Depending on the lighting this pearwood can look like it has been soaked in dirty water and sometimes it looks ok. It's all sanded smooth so far and it will all be covered. I'm grateful the decking pear looks pretty good. Each board in the decking is laser cut as shown in the last picture so they will all be separated and laid down individually.

IMG_1415.jpeg

Thanks for looking in, till next time hope you all have great success.
 
A very shapely ship happening here...

I've also wondered about the pear used for the framing. It certainly doesn't look that much like European pear. I'm wondering if there is a local wood (ZHL is in China?) that is called pear. Sort of like what happens with boxwood?

In any case, you are doing a fine job with the materials the kit provides (dance with the one who brung ya).
I also questioned whether that was pear. I don't want to second guess Daniel, it just looks very dark and grainy to me. I will try and pull out my kit tonight and see how it compares. Mine was supposedly pear, too, but I think it's actually cherry.
 
I also questioned whether that was pear.
Hi Rob, I'm no expert so I just have to go on what I'm told. I can pick oak, pine and a few other obvious wood types, I think this kit is pear but it's as if there is a stain of some kind present throughout the grain. With the frames I thought it might be from all the black char being sanded into the grain during de-charring, however the deck beams are CNC cut so it's not the char. Like I mentioned before I'm counting on all the planking to bring out the beauty this ship has to offer. As I get into the decking /planking phase and I see the same awful dark splotchy stain I will order beautiful walnut and cherry as a finish coverings.
 
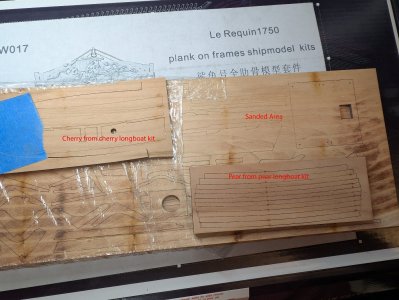
I got out a piece each of wood from the cherry longboat kit and the pear long boat kit. I then sanded the backs of both of those plus the back of one of the pieces in the Requin. When I compared them, it seems to me this kit is made of cherry. Now keep in mind it's the Shicheng kit, not the Luhaiqingkong one, which Daniel has. That said, it doesn't look like Daniel's is cherry, but I still am not sure if it's it's pear. The color of the grains doesn't seem as uniform. Daniel, I agree that they may have soaked in something. Well, it doesn't look bad, it's still a beautiful kit. Once you decide on how to finish it, I'm sure it'll pop.

PXL_20251015_233053547.jpg
 
Here is a little more progress. I framed out the ships main access to its lower cargo hold.

View attachment 550394View attachment 550397View attachment 550398

The notched longitudinal backbone supporting the center of each deck beam stops about 6 cm from the stem post in the bow area. There is not much detail I can find related to the deck beams in this area so after filling in all the other deck beams, I will come back and concentrate at the bow.

View attachment 550395View attachment 550399

Depending on the lighting this pearwood can look like it has been soaked in dirty water and sometimes it looks ok. It's all sanded smooth so far and it will all be covered. I'm grateful the decking pear looks pretty good. Each board in the decking is laser cut as shown in the last picture so they will all be separated and laid down individually.

View attachment 550410

Thanks for looking in, till next time hope you all have great success.
All those curved beams gives her a beautiful elegant appearance, Daniel. You lined them out very nice.
About the deck board with the ‘flames’. You wrote that after sanding it was covered. But what after giving it it’s coat, does it appear again? Maybe a test with a damp cloth. Perhaps change soms identical parts left-right so they lay with there backside upwards. Then the flame pattern is interrupted.
Regards, Peter
 
Back
Top