-

Win a Free Custom Engraved Brass Coin!!!
As a way to introduce our brass coins to the community, we will raffle off a free coin during the month of August. Follow link ABOVE for instructions for entering.
You are using an out of date browser. It may not display this or other websites correctly.
You should upgrade or use an alternative browser.
You should upgrade or use an alternative browser.
HMS Enterprise 1774 POF 1:48.
- Thread starter GrantTyler
- Start date
- Watchers 82
-
- Tags
- caf model enterprise
Good afternoon
I have now got the correct scale and gave these scratch cisterns a second go. I’m still struggling to get my Cherry wood to finish how I want. I applied a coat of poly to one to see the finish.
Both are still very much a WIP however I thought I should post my progress. I am yet to design the chain and wheel for the open chain pump - this is going to be interesting.
I did not taper mine and some other inaccuracies exist so they fit my ships design of the partners and wedges.
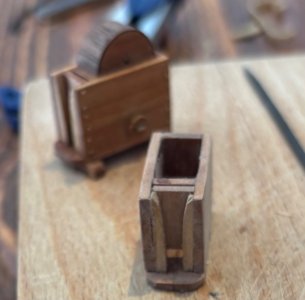
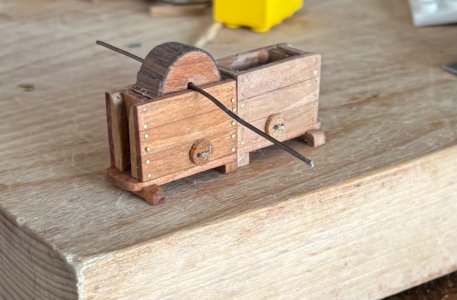
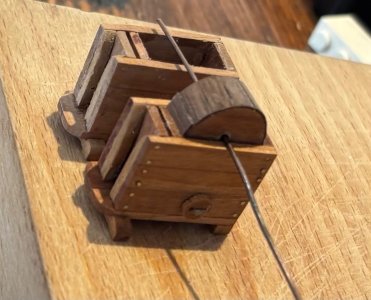
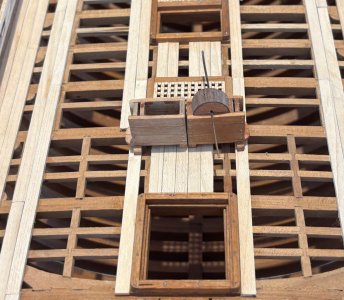
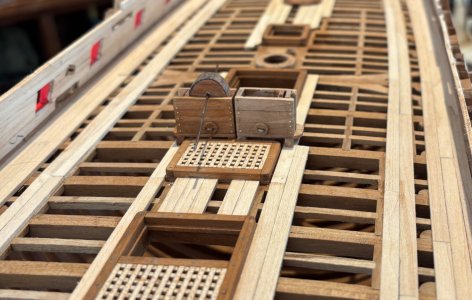
The placement on the ship is not where they will end up but my deck planking here is done.
Cheers Grant
I have now got the correct scale and gave these scratch cisterns a second go. I’m still struggling to get my Cherry wood to finish how I want. I applied a coat of poly to one to see the finish.
Both are still very much a WIP however I thought I should post my progress. I am yet to design the chain and wheel for the open chain pump - this is going to be interesting.
I did not taper mine and some other inaccuracies exist so they fit my ships design of the partners and wedges.


The placement on the ship is not where they will end up but my deck planking here is done.
Cheers Grant
Thanks Gunther. I am going to attempt to do a CAD design and 3D print it. I have seen guys make them from brass (Paul did it on his Kingfisher) however they are at ship builders University while I’m still at junior school.Hey Grant,
That looks really cool. I'm excited to see what it looks like when it's finished. I'm especially curious about the chain and what it will look like. May I ask where you buy one like that? You must be tiny too, right?
 Cheers Grant
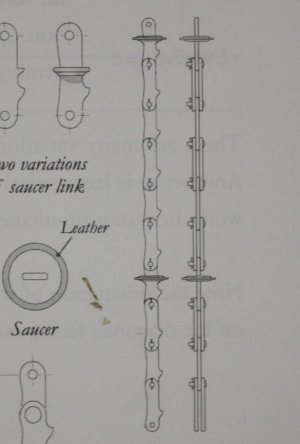
A long time ago, Greg Herbert made the metal parts out of brass by etching them for the Swan class model he built while working with David Antscherl on The Fully Framed Model series. I cannot think of any other way to make all the chain links and sprocket wheel assemblies. He gave me a set for 1:48 scale which I used and they worked out perfectly. There are tricks as well, such as running a string through the pump tubes so you can pull the chain with saucers (burrs) if you really want to go crazy. Way too much to copy here but Volume 2 pages 96 to 102 describes in detail every part from the cisterns to the sprocket wheels. If you really want to go into that much detail please feel free to PM me your email address and I'll try to help as much as I can.I am yet to design the chain and wheel for the open chain pump - this is going to be interesting.
Allan
Sprocket wheel assembled and soldered
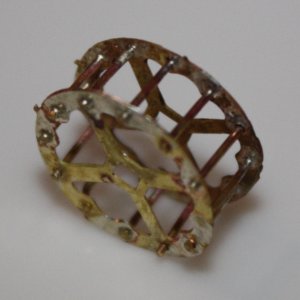
Completed sprocket and axle cleaned then blackened.
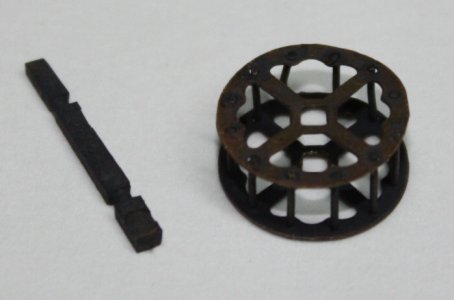
Last edited:
Grant,
As always super well detailed. Deck planking is spot on! AND regarding your quote "I am going to attempt to do a CAD design and 3D print it" I read more and more about builders now starting to work using these softwares, and 3D printers; Will certainly add great amount of super well detailed bits to ships, that would have been otherwise nearly impossible to replicate.
Parenthetically -- to this point -- the Pavel Oseberg, in both scales, includes a properly scaled 3D warrior. Very nice added bit to his kits. I have to imagine that kit manufacturers are catching on. How great, for example, if cannons where properly etched with historical accuracy, instead of same "part bin" generic brass bits included in the majority of kits. AND not having to "blacken" the brass would be great as well.
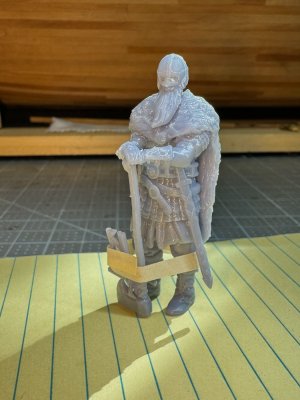
I removed some needed connecting resin veins... Now need to learn to paint haha....
Cheers,
As always super well detailed. Deck planking is spot on! AND regarding your quote "I am going to attempt to do a CAD design and 3D print it" I read more and more about builders now starting to work using these softwares, and 3D printers; Will certainly add great amount of super well detailed bits to ships, that would have been otherwise nearly impossible to replicate.
Parenthetically -- to this point -- the Pavel Oseberg, in both scales, includes a properly scaled 3D warrior. Very nice added bit to his kits. I have to imagine that kit manufacturers are catching on. How great, for example, if cannons where properly etched with historical accuracy, instead of same "part bin" generic brass bits included in the majority of kits. AND not having to "blacken" the brass would be great as well.

I removed some needed connecting resin veins... Now need to learn to paint haha....
Cheers,
Excelent detail Grant, the cisterns fit right in.Good afternoon
I have now got the correct scale and gave these scratch cisterns a second go. I’m still struggling to get my Cherry wood to finish how I want. I applied a coat of poly to one to see the finish.
Both are still very much a WIP however I thought I should post my progress. I am yet to design the chain and wheel for the open chain pump - this is going to be interesting.
I did not taper mine and some other inaccuracies exist so they fit my ships design of the partners and wedges.
View attachment 554491View attachment 554492View attachment 554493View attachment 554494View attachment 554495
The placement on the ship is not where they will end up but my deck planking here is done.
Cheers Grant
Some nice adjustments, Grant. Looking forward to the wheel and chain.Good afternoon
I have now got the correct scale and gave these scratch cisterns a second go. I’m still struggling to get my Cherry wood to finish how I want. I applied a coat of poly to one to see the finish.
Both are still very much a WIP however I thought I should post my progress. I am yet to design the chain and wheel for the open chain pump - this is going to be interesting.
I did not taper mine and some other inaccuracies exist so they fit my ships design of the partners and wedges.
View attachment 554491View attachment 554492View attachment 554493View attachment 554494View attachment 554495
The placement on the ship is not where they will end up but my deck planking here is done.
Cheers Grant
Regards, Peter
Good morning Allan. Thanks for this. My metal work leaves a lot to be desired as does my Cad design. Another issue (more of an excuseA long time ago, Greg Herbert made the metal parts out of brass by etching them for the Swan class model he built while working with David Antscherl on The Fully Framed Model series. I cannot think of any other way to make all the chain links and sprocket wheel assemblies. He gave me a set for 1:48 scale which I used and they worked out perfectly. There are tricks as well, such as running a string through the pump tubes so you can pull the chain with saucers (burrs) if you really want to go crazy. Way too much to copy here but Volume 2 pages 96 to 102 describes in detail every part from the cisterns to the sprocket wheels. If you really want to go into that much detail please feel free to PM me your email address and I'll try to help as much as I can.
Allan
Sprocket wheel assembled and soldered
View attachment 554618
Completed sprocket and axle cleaned then blackened.
View attachment 554619
 ) is getting stock of items and machine tools into SA is super expensive with rand/dollar exchange and up to 100% import duties so I often make do with what I have. I have a small resin printer so this has helped me in the past with metal work etc. One way or another I will make something which will look like the chain wheel…..let’s hold thumbs and see what comes out.
 Good morning John. Thank you for your compliment. I really enjoyed designing my open deck and so far so good. I still have to find the motivation to start some tree nails for this. I have to applaud Pavel. This is the first kit 3D printed item and he looks cool. Yep painting these is nerve racking as it is difficult with the detail although I have a feeling you will own it. Who knows in the near future we will get colour 3D printingGrant,
As always super well detailed. Deck planking is spot on! AND regarding your quote "I am going to attempt to do a CAD design and 3D print it" I read more and more about builders now starting to work using these softwares, and 3D printers; Will certainly add great amount of super well detailed bits to ships, that would have been otherwise nearly impossible to replicate.
Parenthetically -- to this point -- the Pavel Oseberg, in both scales, includes a properly scaled 3D warrior. Very nice added bit to his kits. I have to imagine that kit manufacturers are catching on. How great, for example, if cannons where properly etched with historical accuracy, instead of same "part bin" generic brass bits included in the majority of kits. AND not having to "blacken" the brass would be great as well.
View attachment 554620
I removed some needed connecting resin veins... Now need to learn to paint haha....
Cheers,
 …..but where the fun in that
 .
.Good morning Daniel. Thank you kindly. I do admit for something I thought would be fairly easy to make I struggled with these- took a minute.Excelent detail Grant, the cisterns fit right in.
Good morning Peter. Thank you for this. I always appreciate your encouragement. Don’t hold your breath for the wheel and chain….… I will however give them my best shot.Some nice adjustments, Grant. Looking forward to the wheel and chain.
Regards, Peter
Cheers Grant
- Joined
- Dec 5, 2022
- Messages
- 1,053
- Points
- 393

Hey Grant,Thanks Gunther. I am going to attempt to do a CAD design and 3D print it. I have seen guys make them from brass (Paul did it on his Kingfisher) however they are at ship builders University while I’m still at junior school.Cheers Grant
I understand. Your comment is wonderful!
 I'm still in model-making school and have a lot to learn. But you, to me, are in the model-making academy... Great work and great model, you have my respect!
Depending on how fine you want to make your chain, one option is to twist together two strands of brass wire and flatten them slightly with pliers.
Actually, I was thinking of ways for you to make the parts yourself as I don't know where you could buy the parts. Etching does not require any tools but I find it a mess and will not do it anymore unless absolutely necessary. If there had been choices when the parts for the wheel above were made such as 3D printing, it may have been a different route takenI have a small resin printer
Allan
Good morning Allan. You read my mind. I have designed the sprocket wheels and axel. I am going to blacken some brass rods to be inserted. I have no idea how to make the tiny "nuts" for these rods tho. I will try and make a plan or just leave the rod protuding a little. I have a small chain which I hope is the correct scale. Cheers GrantActually, I was thinking of ways for you to make the parts yourself as I don't know where you could buy the parts. Etching does not require any tools but I find it a mess and will not do it anymore unless absolutely necessary. If there had been choices when the parts for the wheel above were made such as 3D printing, it may have been a different route takenI can see the chain links and disks resin printed as well as the sprocket wheel sides. Brass rod could be used for the wheel assembly as well as connected the links. I look forward to your solution.
Allan
Thanks for this tip. A have a small chain, left over from my Victory. Hopefully the scale will be ok. Cheers GrantDepending on how fine you want to make your chain, one option is to twist together two strands of brass wire and flatten them slightly with pliers.
- Joined
- Aug 8, 2019
- Messages
- 5,500
- Points
- 738

I have no idea how to make the tiny "nuts" for these rods
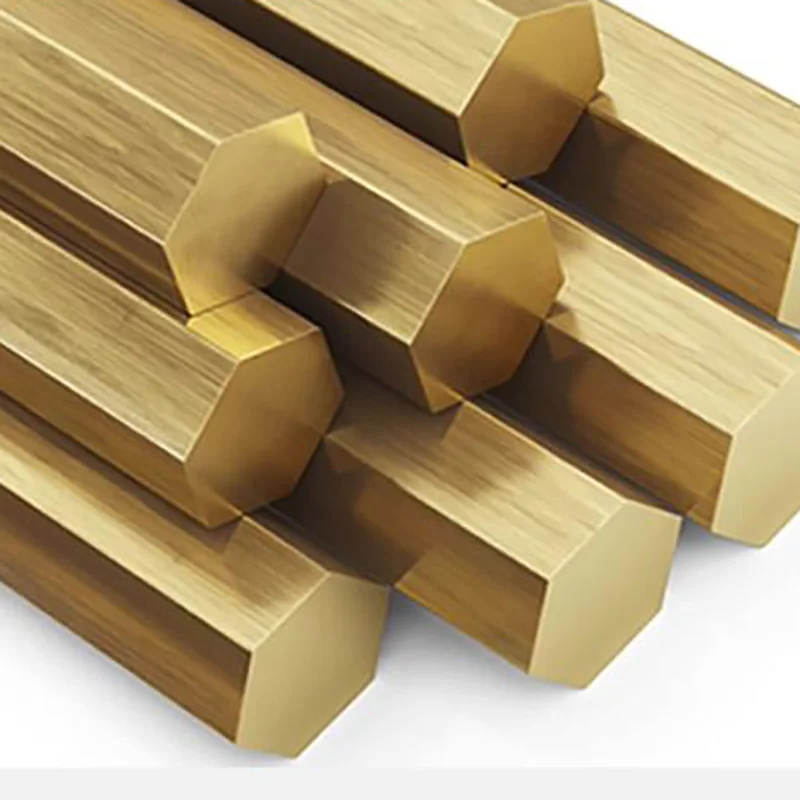
Brass Hex Rod 3mm 5mm 6mm 7mm 8mm 10mm 12mm 13mm 14mm 15mm 16mm 17mm 18mm 19mm 20mm 30mm 40mm 50mm 60mm - AliExpress 1420
Smarter Shopping, Better Living! Aliexpress.com
But I would make it from a piece of copperwire.
Thank you Stephan. The scale of these would be around 1mm. Copper wire may be my option. It is a bit of hit and miss at the moment but learning (hopefully
Brass Hex Rod 3mm 5mm 6mm 7mm 8mm 10mm 12mm 13mm 14mm 15mm 16mm 17mm 18mm 19mm 20mm 30mm 40mm 50mm 60mm - AliExpress 1420
Smarter Shopping, Better Living! Aliexpress.comnl.aliexpress.com
But I would make it from a piece of copperwire.
 ) all the time. Cheers Grant
1mm? No problem.Thank you Stephan. The scale of these would be around 1mm. Copper wire may be my option. It is a bit of hit and miss at the moment but learning (hopefully) all the time. Cheers Grant
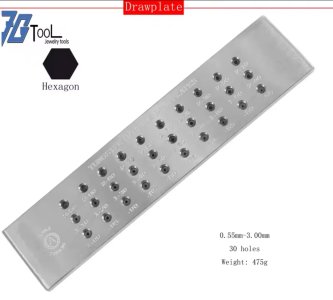
Jewelery hexagon drawplate, 30 holes.
You have round, half round, triangle, square, L shape, S shape...
Thanks1mm? No problem.
Jewelery hexagon drawplate, 30 holes.
You have round, half round, triangle, square, L shape, S shape...
View attachment 554853
Thanks for this Allan. Wow that makes it even more complicated...Thanks I thinkYou have far more patience than most of us
but if you want to go for it, the below is a picture from TFFM Volume 2, page 101 on the chain and saucers that might be helpful.
Allan
View attachment 554855
 . Cheers Grant


