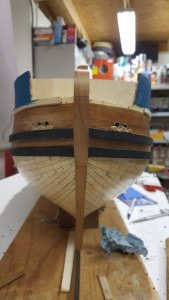
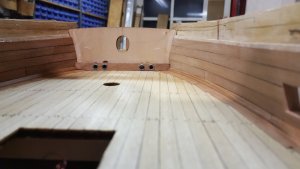
Excellent Maarten, I will be fitting spill pipes on my model too.
-

Win a Free Custom Engraved Brass Coin!!!
As a way to introduce our brass coins to the community, we will raffle off a free coin during the month of August. Follow link ABOVE for instructions for entering.
-

PRE-ORDER SHIPS IN SCALE TODAY!
The beloved Ships in Scale Magazine is back and charting a new course for 2026!
Discover new skills, new techniques, and new inspirations in every issue.
NOTE THAT OUR FIRST ISSUE WILL BE JAN/FEB 2026
You are using an out of date browser. It may not display this or other websites correctly.
You should upgrade or use an alternative browser.
You should upgrade or use an alternative browser.
HMS Royal Caroline kit ZHL 1/30
- Thread starter Maarten
- Start date
- Watchers 112
-
- Tags
- royal caroline zhl
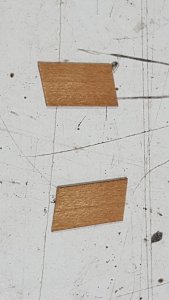
Again baby steps. I finished shaping the gun ports, now also on the SB side. To cover the inside of the gunports I used strip of veneer, this to get the same colour as the inner bulwark when I apply the red coloured varnish. Iff I apply this directly on the edges of the light coloured planks the appearance will be different then on the inside of the bullwark which also will be covered with veneer planks.
For this purpose I cut small strips and as the gun ports where all shaped accoring the same template they fit exactly in all of them.
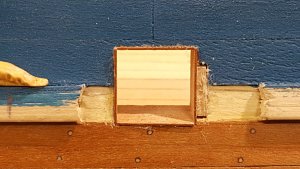
On the SB side I had to slightly move the gun port to match exactly the same fit as on the PS sid. You can see that in the picture above where I added a small piece into the previously cutted hole. Later the gun port will be covered with a carving so it will be part of the bulwark structure and not be visible. On the inside it is covered by the veneer planking.
After this it is cutting of the edges to have these flush with the hull.
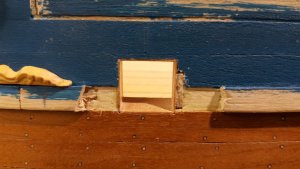
Dry fitting the carving.
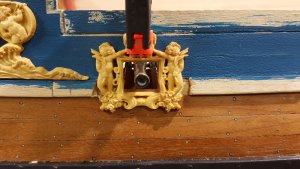
On the inside also the edges are cutted flush with the bullwark and the gunport is sanded.
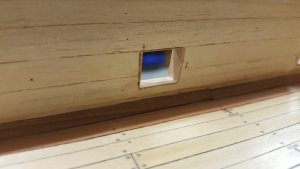
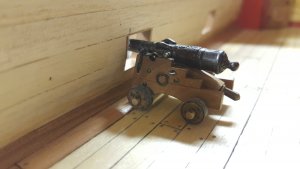
Just for fun dry fitting the gun.
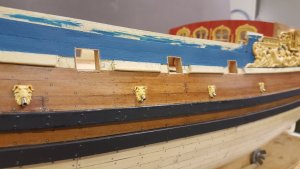
Also on SB I drilled the holes for the scuppers and I decided to age the silver spill pipes to darken them. On internet I found you can age silver with egg yoke. Just boil an egg for 10-15 minutes, cut it into pieces and put these still hot together with the silver in a small airtight plastic bag. The sulphur in the egg yoke will age the silver and within a few hours it is aged. See the result below, perfect as model lead.
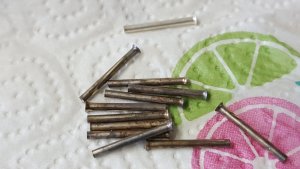
When fitted I think these look better then the bright and shiny silver ones.
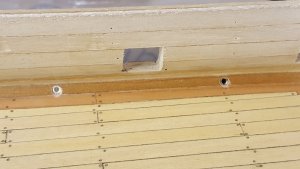
Left the silver and right the aged silver.
After I finished the outside gargoyles the pipes can be finally fitted, then the edges of the drilled holes will be oiled.
That is for next time.
For this purpose I cut small strips and as the gun ports where all shaped accoring the same template they fit exactly in all of them.


On the SB side I had to slightly move the gun port to match exactly the same fit as on the PS sid. You can see that in the picture above where I added a small piece into the previously cutted hole. Later the gun port will be covered with a carving so it will be part of the bulwark structure and not be visible. On the inside it is covered by the veneer planking.
After this it is cutting of the edges to have these flush with the hull.

Dry fitting the carving.

On the inside also the edges are cutted flush with the bullwark and the gunport is sanded.

Just for fun dry fitting the gun.

Also on SB I drilled the holes for the scuppers and I decided to age the silver spill pipes to darken them. On internet I found you can age silver with egg yoke. Just boil an egg for 10-15 minutes, cut it into pieces and put these still hot together with the silver in a small airtight plastic bag. The sulphur in the egg yoke will age the silver and within a few hours it is aged. See the result below, perfect as model lead.

When fitted I think these look better then the bright and shiny silver ones.

Left the silver and right the aged silver.
After I finished the outside gargoyles the pipes can be finally fitted, then the edges of the drilled holes will be oiled.
That is for next time.
WOW - "Großes Kino" - means: GREAT!
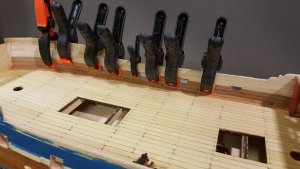
Finalizing the inner bullwarks. All planks of the bullwarks I have coloured black on one side only to represent some caulking. As toplayer these wil be a red coloured varnish like the bulkhead, this will be transparent so you will see the wood structure and the caulking.
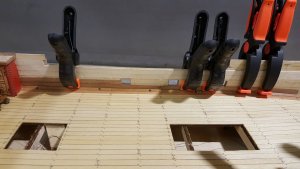
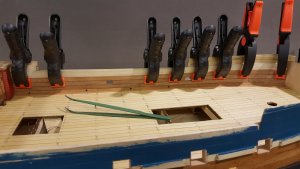
Followed by cutting and sanding the gun ports leading to this result.
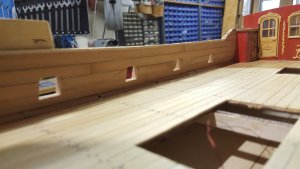
Finall finishing I will do before the varnishing.
First I started with the hawse holes. In the kit these parts were supplied as hawser bolsters and neede reworking and shaping to get the correct size.
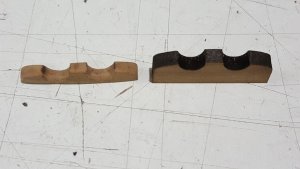
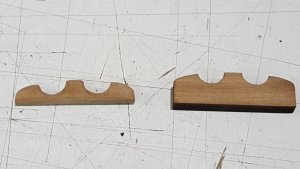
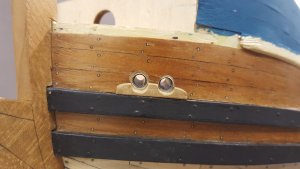
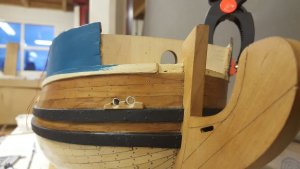
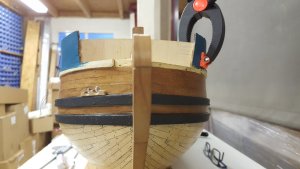
For the hawse holes I drilled 6 mm holes into the hull and in these I will use again corroded silver ferrules to simulate the lead liners for the hawse holes. In below pictures to none corroded ferrules dry fitted in place.
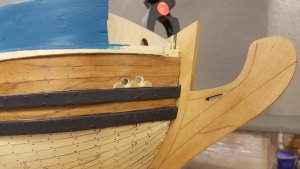
Next time the PS side and finishing the hawse holes.


Followed by cutting and sanding the gun ports leading to this result.

Finall finishing I will do before the varnishing.
First I started with the hawse holes. In the kit these parts were supplied as hawser bolsters and neede reworking and shaping to get the correct size.


For the hawse holes I drilled 6 mm holes into the hull and in these I will use again corroded silver ferrules to simulate the lead liners for the hawse holes. In below pictures to none corroded ferrules dry fitted in place.


Next time the PS side and finishing the hawse holes.
Very nice work Maarten, its amazing all the little bits and pieces that go into building her, enjoy,
best regards John.
best regards John.
I love your model and the latest updates.
G'day Maarten
Again Maarvelous work, and very tendious in your attention!
What size timber did you use on the inside of the bulwark? It looks fantastic mate.
Great job on the hawse holes aswell memattie.
Again Maarvelous work, and very tendious in your attention!
What size timber did you use on the inside of the bulwark? It looks fantastic mate.
Great job on the hawse holes aswell memattie.
All many thx for your comments again.
Hi Greg,
You did it again, a new slogan.
How is your project going? Nearly finished?
For the planking on the inside bullwark I used remaining strips from the outside, still plenty available. I am a little in doubt if I also add treenails on the inside but I think not.
In the partslist and manual I couldn't find anything about what planking to use, but as mentioned before I am just building with the material provided and as with every kit it is common sense mostly to use what & where.
I havta agree with you on this point. With every kit that I have built, I have never followed the instructions and order. The instructions are there for if I'm not too certain about something etc.I am just building with the material provided and as with every kit it is common sense mostly to use what & where.
My sons always tell me, you 'just follow your nose and you'll get there'. I think that they could be making fun of my big snoze, nose for the Non-Ozzies.
LOL... There are three ways to assemble Ikea furniture: 1. Start assembling solely relying on your own knowledge and experience. If something wrong and you have pieces left, here comes # 2. Calling a friend who just assembled similarly furniture. If there still pieces left, though, here comes # 3. Read the manual!!!!I have never followed the instructions and order. The instructions are there for if I'm not too certain about something etc.
4. Just accept that you have a billy bookcase with one hole in the wrong place.LOL... There are three ways to assemble Ikea furniture: 1. Start assembling solely relying on your own knowledge and experience. If something wrong and you have pieces left, here comes # 2. Calling a friend who just assembled similarly furniture. If there still pieces left, though, here comes # 3. Read the manual!!!!
5. return to Ikea (as is) and buy already assembled one,4. Just accept that you have a billy bookcase with one hole in the wrong place.
G'day Maarten
I just had a thought about my build and how was I'm going to make the lantern on the mask to have a LED light. The problem is to run the wires without being seen.
I think that I have came to correct answer to that problem.
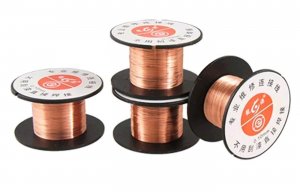
The photo below is a rope wire that can be run down to the decking.
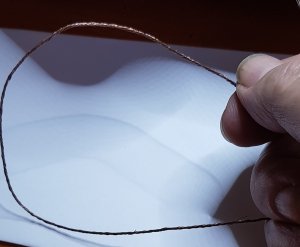
This photo does not show that the rope wire is made up of 3 tiny strands of copper which is twisted anti-clockwise.there . There are 4 strands of three wires, and they are twisted clockwise. To make this 'rope'.
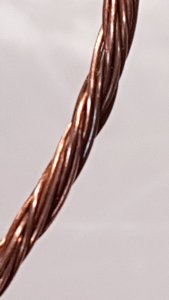
I'm going to buy tiny insulation wares, so the two poles can be twisted in the same rope.
This wire can be divided into 2 strands (when it reach the main top) and be hidden under the 'main top' platform and can connected to the lantern.
The rope wire can be blacked so is can be camouflaged among the other ropes.
I just had a thought about my build and how was I'm going to make the lantern on the mask to have a LED light. The problem is to run the wires without being seen.
I think that I have came to correct answer to that problem.
The photo below is a rope wire that can be run down to the decking.

This photo does not show that the rope wire is made up of 3 tiny strands of copper which is twisted anti-clockwise.there . There are 4 strands of three wires, and they are twisted clockwise. To make this 'rope'.

I'm going to buy tiny insulation wares, so the two poles can be twisted in the same rope.
This wire can be divided into 2 strands (when it reach the main top) and be hidden under the 'main top' platform and can connected to the lantern.
The rope wire can be blacked so is can be camouflaged among the other ropes.
Hi Greg,G'day Maarten
I just had a thought about my build and how was I'm going to make the lantern on the mask to have a LED light. The problem is to run the wires without being seen.
I think that I have came to correct answer to that problem.
The photo below is a rope wire that can be run down to the decking.
View attachment 72258
This photo does not show that the rope wire is made up of 3 tiny strands of copper which is twisted anti-clockwise.there . There are 4 strands of three wires, and they are twisted clockwise. To make this 'rope'.
View attachment 72257
I'm going to buy tiny insulation wares, so the two poles can be twisted in the same rope.
This wire can be divided into 2 strands (when it reach the main top) and be hidden under the 'main top' platform and can connected to the lantern.
The rope wire can be blacked so is can be camouflaged among the other ropes.
Great idea can I steal it? Didn't thought about the mast light yet but now is the time to do it.
Thats enough untill your retirement. .
.
The amount supplied with the kit is more then sufficient for this model, for future models I also have to shop.
The amount supplied with the kit is more then sufficient for this model, for future models I also have to shop.


