• Ships of Scale has incorportated an extra level of security when you log In. Please follow on-screen prompts to acknowledge that you are not a robot via a "Check Box" or a "Pictorial Check Box Puzzle". This is needed due to higher level of AI Activity Security.
  • SUBSCRIBE TO SHIPS IN SCALE TODAY!

    The beloved Ships in Scale Magazine is back and charting a new course for 2026!
    Discover new skills, new techniques, and new inspirations in every issue.

    NOTE THAT OUR NEXT ISSUE WILL BE July/August 2026
  • Win a Free Custom Engraved Brass Coin!!!
    As a way to introduce our brass coins to the community, we will raffle off a free coin during the month of August. Follow link ABOVE for instructions for entering.

Endurance - Occre Build Log

Joined
Jul 26, 2026
Messages
9
Points
8

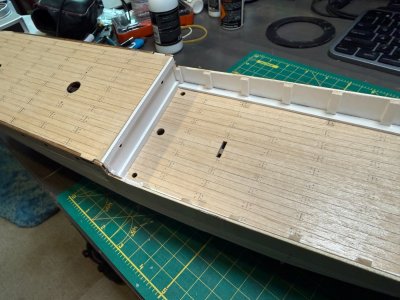
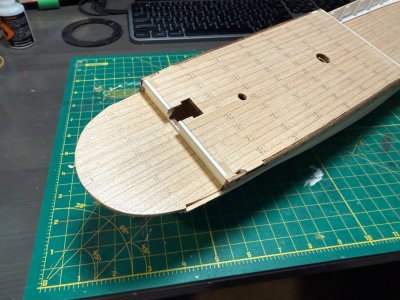
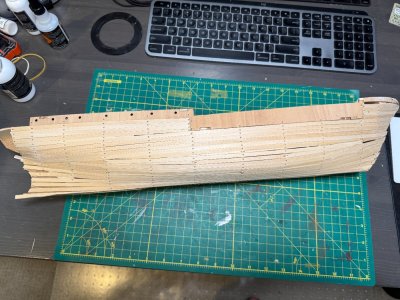
Hi all, this is my first wooden ship attempt and I've read through several of the other Occre Endurance build logs, so I thought I'd start documenting my own. Currently, I'm slogging through the very tedious hull planking stage and glad to be almost finished with this portion. Here's some lessons and challenges I've experienced so far:
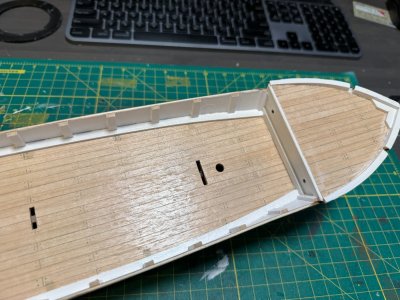
  • Those tiny brass nails are DELICATE. I've cussed so many times from bending them. I was worried I would run out towards the end so I've been saving the bent ones but it appears that they included plenty of extras in the kit
  • When driving in nails close to the deck, pay attention to the angle of attack, I had a couple go clean through the top of the deck
  • I did not pay close enough attention to the instructions and cut out a lot of those notches on the deck that you are supposed to leave un-cut. I was relieved to see that quite a few others did the same :). I use wood filler to fill these in and the color I found matches quite closely with the color of the wood: https://www.amazon.com/dp/B00GFYQKDG?th=1
  • I had a lot of trouble getting the varnish on the decking smooth, I had lots of brush strokes. I wonder if others a doing multiple coats and lightly sanding?
  • I cut the wood planks a little too short at the bow, I will end up using filler there when the times comes
So far I'm enjoying this build. No idea how long it will take me as I'm only putting in an hour or two each day.

IMG_1544.JPG

IMG_1548.JPG

IMG_1545.JPG

IMG_1546.JPG

IMG_1547.JPG
 
Hi all, this is my first wooden ship attempt and I've read through several of the other Occre Endurance build logs, so I thought I'd start documenting my own. Currently, I'm slogging through the very tedious hull planking stage and glad to be almost finished with this portion. Here's some lessons and challenges I've experienced so far:
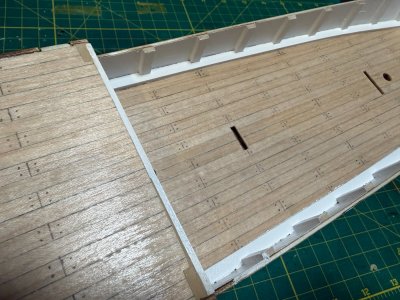
  • Those tiny brass nails are DELICATE. I've cussed so many times from bending them. I was worried I would run out towards the end so I've been saving the bent ones but it appears that they included plenty of extras in the kit
  • When driving in nails close to the deck, pay attention to the angle of attack, I had a couple go clean through the top of the deck
  • I did not pay close enough attention to the instructions and cut out a lot of those notches on the deck that you are supposed to leave un-cut. I was relieved to see that quite a few others did the same :). I use wood filler to fill these in and the color I found matches quite closely with the color of the wood: https://www.amazon.com/dp/B00GFYQKDG?th=1
  • I had a lot of trouble getting the varnish on the decking smooth, I had lots of brush strokes. I wonder if others a doing multiple coats and lightly sanding?
  • I cut the wood planks a little too short at the bow, I will end up using filler there when the times comes
So far I'm enjoying this build. No idea how long it will take me as I'm only putting in an hour or two each day.

View attachment 623455

View attachment 623456

View attachment 623457

View attachment 623458

View attachment 623459
Hi Delgrego. Your pictures bring back memories. My Endurance is almost finished. I can smell the finish line. It's just a matter of finding the time. The Endurance is a nice model and the fact that there is a good photographic record of the ship on the ice gives the builder the chance to enhance the kit and correct some Occre mistakes. Those little brass nails are better used as temporary pins while gluing with white glue. Just push in far enough to hold with a pair of small pliers then remove later. I'm not a fan of clear gloss. My preferred finish on timber is a coat of sanding sealer, light sand then a coat of Scandinavian teak oil brushed on and rubbed with a rag.
Sorry to be the barer of bad news but you have the bulkhead at the rear of the cabin area reversed. This seems to be a common error with this kit. The hatch should be on the right.
Save yourself the strife and throw away the rail stanchions supplied. They are plain awful. I got some better ones made by Caldercraft.
There is no photographic record of the steering mechanism having a cover over it.
The upper mainmast has three sets of ratlines. There are photos showing. There are no ratlines on the upper mizzen. Another common mistake. Enjoy your build.IMG_20260809_112059.jpg
 
Hi Delgrego. Your pictures bring back memories. My Endurance is almost finished. I can smell the finish line. It's just a matter of finding the time. The Endurance is a nice model and the fact that there is a good photographic record of the ship on the ice gives the builder the chance to enhance the kit and correct some Occre mistakes. Those little brass nails are better used as temporary pins while gluing with white glue. Just push in far enough to hold with a pair of small pliers then remove later. I'm not a fan of clear gloss. My preferred finish on timber is a coat of sanding sealer, light sand then a coat of Scandinavian teak oil brushed on and rubbed with a rag.
Sorry to be the barer of bad news but you have the bulkhead at the rear of the cabin area reversed. This seems to be a common error with this kit. The hatch should be on the right.
Save yourself the strife and throw away the rail stanchions supplied. They are plain awful. I got some better ones made by Caldercraft.
There is no photographic record of the steering mechanism having a cover over it.
The upper mainmast has three sets of ratlines. There are photos showing. There are no ratlines on the upper mizzen. Another common mistake. Enjoy your build.View attachment 625264
Thanks for these great tips and your build looks great! It must feel great being so near the finish line.

I have learned my lesson about the nails but it’s proving easy enough to drive them further in and sand the surface.

Regarding the hatch at the rear, believe me I am aware but I am at peace with it. Being my first build I am not stressing out too much over historical accuracy. I am learning to pay close attention to the instructions. I’m also planning on documenting my mistakes so hopefully others can learn from them.

Thanks again for your thoughtful response and I look forward to seeing your completed ship.
 
First rule is never stress. Everyone makes mistakes and most times the culprit is the only one aware of them.
 
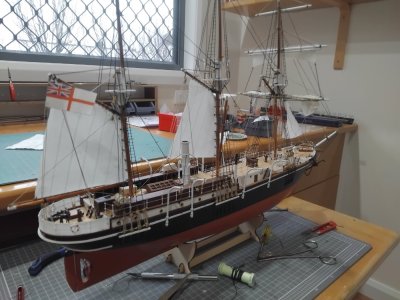
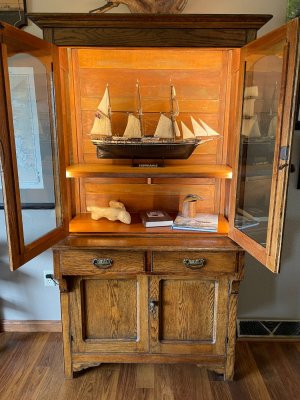
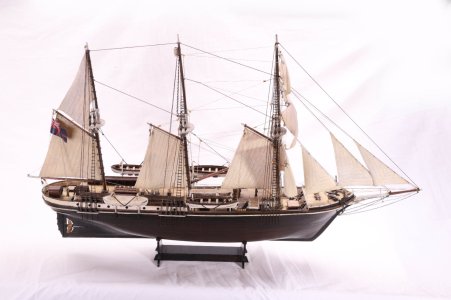
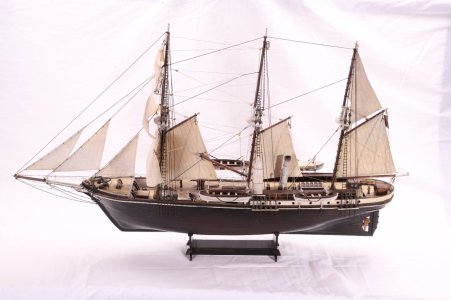
Welcome Delgrego... I'm new to this forum as well. Very nice and knowledgeable people here. Every time I walk by my model it gives me hope and focus in my daily concerns considering the circumstances the men on this ship faced and overcame. I especially love the recounting of the mysterious third person accompanying the two in the decent down the mountain. Gives me comfort the Lord accompanies everyone of us. You're doing a fine job! It always informative to see how others built theirs so I attached a few photos of mine for your reference. Enjoy your built!

display.jpg

port.jpg

starboard.jpg
 
Welcome Delgrego... I'm new to this forum as well. Very nice and knowledgeable people here. Every time I walk by my model it gives me hope and focus in my daily concerns considering the circumstances the men on this ship faced and overcame. I especially love the recounting of the mysterious third person accompanying the two in the decent down the mountain. Gives me comfort the Lord accompanies everyone of us. You're doing a fine job! It always informative to see how others built theirs so I attached a few photos of mine for your reference. Enjoy your built!

View attachment 625356

View attachment 625357

View attachment 625359
Thanks @Joe Welch and what a beautiful display!
 
Hello Delgrego,
A warm welcome to our forum.
And don't worry about the time you can spend.
The estimate building time of my ship is 1,000 hours, so I'm building at least a year. But when you have fun.....
 
Back
Top