• Ships of Scale has incorportated an extra level of security when you log In. Please follow on-screen prompts to acknowledge that you are not a robot via a "Check Box" or a "Pictorial Check Box Puzzle". This is needed due to higher level of AI Activity Security.
  • SUBSCRIBE TO SHIPS IN SCALE TODAY!

    The beloved Ships in Scale Magazine is back and charting a new course for 2026!
    Discover new skills, new techniques, and new inspirations in every issue.

    NOTE THAT OUR NEXT ISSUE WILL BE July/August 2026
  • Win a Free Custom Engraved Brass Coin!!!
    As a way to introduce our brass coins to the community, we will raffle off a free coin during the month of August. Follow link ABOVE for instructions for entering.

Older but not wise

I was pondering what I enjoy so much about ship modelling.

I have a keen interest in the Georgian Navy; there is also the 'making things with your hands' thing also, as well as the alluring beauty of Men O' War.

That said, I think the struggle of doing things slightly above my craftmanship pay grade is also a big part of it. The satisfaction of constructing something that I found really quite hard and challenging to do is for me, deeply rewarding.

Anyway, beware you get what you wish for..............

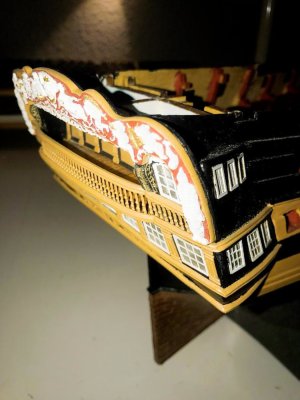
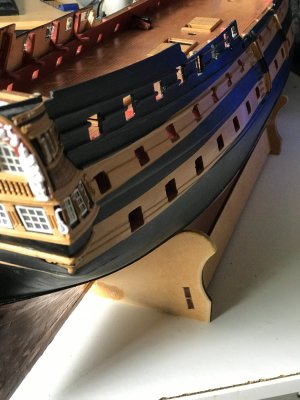
This is my first ever complex stern gallery and boy, did I find it difficult. Perhaps even as difficult as my first ever attempt at planking a hull!

It all began so well.......

There is a lovely diagram of the fully completed stern and side galleries with labelled part numbers; then there is a set of instructions which say "look at the diagram - stick the bits together - voila, completed stern and side galleries".

It will probably take me 4 or 5 days, I thought.................. So all in all, I have managed to get the stern and port side galleries more or less done and it has taken about 3 weeks and has been a steep learning curve.

So, for fellow novices like myself, here is a list of the bumps in the road that I encountered .............

First, is the EXTREME importance of putting everything together in the correct order (ask me how I know). So important, that the instructions did not mention the order of assembly and the plan only showed a completed or exploded view of the stern and side galleries.

Second is the fact that virtually every single element of the stern and side gallery decoration had to be 'significantly' finessed to fit.

Third is the fact that the soft white metal used for the decorative rails is a challenge to handle and use due to its malleability and readiness to deform. Paint only enhances every bump and bad curve. Bought a profile scraper the other day and will use wood in future.

Fourth is that the alignment of rails, railings, etc. across the stern and side galleries will have your inner autistic monkey ter-witching like a fiddlers elbow (possibly just me!).

Fifth is that it is really hard to keep every thing clean and tidy due to grubby fingers and lots of awkward handling - get ready to sand and re-paint (often) as required.

Sixth is side gallery decoration requires ALL the parts to be be dry fitted together to identify gaps and alignment issues. Putting them on one at a time without understanding how they all relate to each other will end in tears.

Seventh is the new depths of patience that you didn't know you had but will need to find and as Killick once said, " which it will be ready when it is ready".

Eighth is the fact that working at the back end of the ship is really quite awkward for non-yoga enthusiasts like myself (especially when painting and trying to get proper alignment of rails etc.) and often I had to contort myself and the hull to carry out a task. Wasn't sure whether it was the hull or me creaking half the time.

Ninth and perhaps, most importantly, you will need resilience to cope with setbacks (and yes, there will be setbacks) when it all goes horribly wrong and your galleries look like a Picasso painting. So keep calm and carry on....


Not quite Dante's 9 levels of hell, but the nine above certainly put me through the novice modeler's equivalent.

I did make the following changes partly based on the prototype photos on the box, and partly builder's preference;

  1. I added a lower decorative rail cross the stern (underneath VANGUARD letters) which is not in plans (I think omitted in error) but on prototype on box.
  2. I added an 'upper frame' with 1mm stock to the stern gallery lower main windows set (which I think frames the windows a little better). Not in plans.
  3. I created a 'shelf' rail for the side gallery upper windows (a little window ledge) on each side to add a very small architectural element to a fairly flat facade. Not in plans.
The above list of 'bumps' is mostly reflective of the fact that I had never done this before and had a few new things to figure out. All of it was fun and I have really enjoyed the challenge of the stern and side galleries so far. It constantly took me out of my comfort zone (but not too far) and it was really gratifying to figure out and put together. Given the overall complexity, I do marvel how model ship kit designers piece these things together at conception , it is quite an achievement.

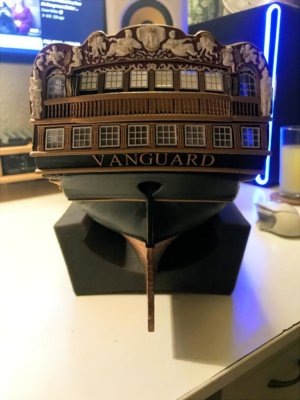
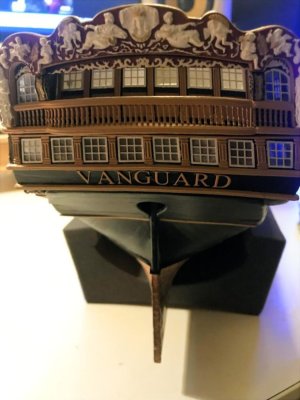
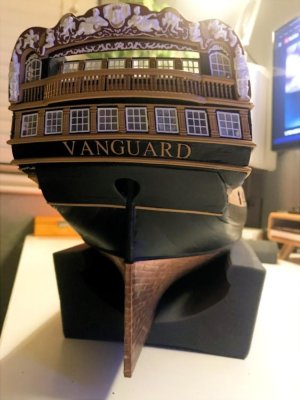
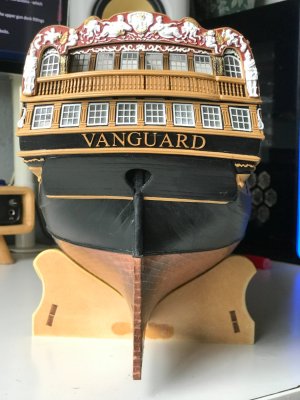
Here are a few pictures of the stern (nameplate required) and port side galleries.

Now to get on with the starboard gallery....

View attachment 628367

View attachment 628368

View attachment 628369

View attachment 628370

View attachment 628371

View attachment 628372

View attachment 628373

View attachment 628374

View attachment 628375

View attachment 628376

View attachment 628377

View attachment 628378
Very nicely done !
 
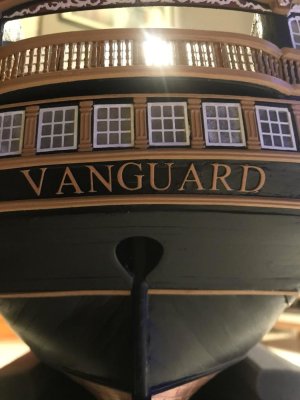
This evening was spent getting her nameplate on which was straightforward with the help of Tamiya masking tape.

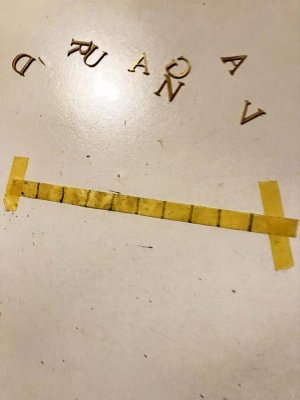
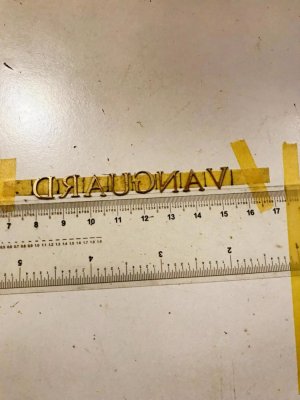
I measured the nameplate on the 1-1 plan and cut a strip of paper to compare it to the hull. I then cut a length of Tamiya 6mm masking tape and removed a lot of its tackiness by sticking it to my t-shirt until it was very low tack (don't go too far or your letters will not stick). I then marked the tape on the sticky side into equal sections for each letter. Using a steel ruler, I aligned the letters (back to front) very lightly in the centre of each box and made sure the bottom of each letter was touching the steel ruler underneath. Once I was happy with the alignment of each letter I pressed them onto the Tamiya tape.

I should say that I prepared the letters by priming, then painting and most importantly - varnishing well in advance. The varnish stops the tape from peeling the paint off when removing later. I also used an old pin vice with an old 0.4mm drill bit to apply tiny drops of superglue to the back of all the letters in one go (there was no squeeze-out whatsoever) and I applied all the lettering to the hull one by one carefully getting the alignment of each letter right (there is a very slight curvature towards the centre which doesn't look right if you go straight across). Also, as I applied the next letter, I removed the tape from the previous letter (before any superglue has a chance to fully bite and stick to the tape) in a rolling effect. Done correctly the Tamiya tape should never touch the hull, just the back of the varnished letter.

This left neat, evenly spaced lettering in about 30 mins.

I also added the arched stern gallery window support decorations which I had entirely overlooked. Was really hard to get my broken screen, no-sim, scratched and crappy iPhone 7 camera to focus on the detail, so used a flash to illuminate a little better.

d2.JPG

d3.JPG

d4.JPG

d5.JPG

d6.JPG

d7.JPG

d8.JPG
 
Wow! From whence did you source the letters? Those look vastly better than the press-on letters for decorating fingernails that I was forced to use on my Fair American
 
Wow! From whence did you source the letters? Those look vastly better than the press-on letters for decorating fingernails that I was forced to use on my Fair American

They came as standard as part of the kit. It helps that they are quite thick - 0.9mm brass etched.

The kit also has the brass etched lettering for ELEPHANT and BELLEROPHON which I am happy to send to you if you can use the individual lettering. I would also try https://www.woodysmodelworks.co.uk/#/

Contact Neil, he provides brass etched nameplates for HMS Victory as part of his upgrade kits and I am sure he is able to accomodate whatever your nameplate needs are. I can vouch for the quality, I have a couple of his HMS Victory upgrades already.
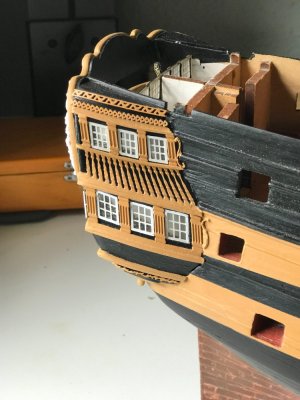
 
They came as standard as part of the kit. It helps that they are quite thick - 0.9mm brass etched.

The kit also has the brass etched lettering for ELEPHANT and BELLEROPHON which I am happy to send to you if you can use the individual lettering. I would also try https://www.woodysmodelworks.co.uk/#/

Contact Neil, he provides brass etched nameplates for HMS Victory as part of his upgrade kits and I am sure he is able to accomodate whatever your nameplate needs are. I can vouch for the quality, I have a couple of his HMS Victory upgrades already.
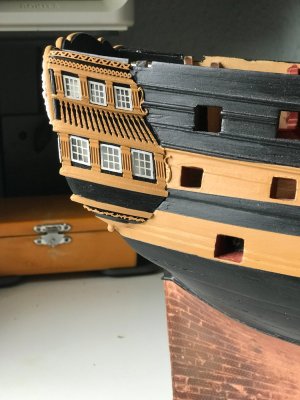
Thank you!
 
The starboard side gallery went together smoothly as I applied everything I learned from constructing the port side gallery. This generally meant fewer disasters.

The instructions are a bit flaky at this point as to the next logical steps in the build process and jump around to different parts of the build, showing things that could be done now and things that definitely should NOT be done now. Concomitantly, I have been giving a little thought as to how I want to tackle things.

Generally the aim is to ;
  1. Install upper gun deck cannons and all upper gun deck fittings
  2. Install deck beams and then forecastle, waist and quarterdeck
  3. Plank F,W,Q decks and install their respective deck fittings
  4. Install beakhead, roundhouses, pointy end stuff, etc.
  5. Install gunport covers (I want this to be the last thing to do on the hull before rigging/masting)
This should leave the poop deck, rails and then finally masting/rigging (I will construct the ships boats, lanterns and rudder whenever I need a break from the slog of rigging)

First up a disappointment. I was hoping to replace Victory models rather poor 'stock' white metal cast cannon carriages with some of Vanguard models rather lovely 1:72 carriages.

It turns out that Victory models idea of 1:72 is a little different to Vanguard models idea of 1:72 (I would rely on the latter) and the deck/floor height of the upper gun deck relative to the height of the gunports on the hull prevents the cannons (when sitting on a Vanguard models carriage) from being able to protrude though their respective gunports (the cannons sit about 2mm too high). The upper gun deck and gun port patterns sit at pre-determined heights; in pre-determined places and are pre-determined sizes so it was not bad alignment on my part.

My best guess is that Victory models probably wanted to use as many 'stock' parts in the kit as possible to keep the overall retail cost down (and it is really competitively priced for all that you get in the kit). There are 74 guns on this little dinghy and that must have chewed up a reasonable chunk of their production costs for the kit, so I can understand a commercial decision in wanting to use stock carriages/guns which lowers costs and retail price. The kit designer therefore had to make necessary compromises to the kit design to ensure that the overall design still fitted the stock parts, hence slight variations in sizing the gunports relative to the deck height at 1:72. That's my conspiracy theory.

So I am left with the rather horrible cast metal carriages but take solace from the fact that the quarterdeck, waist and forecastle entirely obscures all but 8 of the carriages (and they are mostly further obscured through the waist cutaway by four large ships boats). As I cannot muster much enthusiasm for these carriages and you cannot see much, if any of them, I probably will not rig them at all.

I have though, replaced the 18 x 9 pounder cannons for the forecastle and quarterdeck (also stock white metal castings) with 1:72 Vanguard models 9 pounder carriages which are lovely. Vanguard unfortunately do not make 9 pounder cannons at 1:72, so I tried one of their 6 - pounder guns at 1:64 sitting on their 1:72, 9- pounder cannon carriage. I am reliably informed by Professor AI :-; that, a 1:64, 6-pounder cannon is between 1 and 5% larger than a 1:72, 9-pounder cannon. I would love a set of eyes that could spot a 1-5% difference at this scale so it passes my 'does it look OK' eye test. The historians out there amongst us may be digging their toenails into the floorboards in outrage about now but I think it is a reasonable 'stunt double' for a 1:72 - long 9 pounder? What do you think, snog, marry, avoid?

All that said, this is a small gripe in what has been, so far, an excellent kit of excellent quality and value and I am having a boot load of fun (despite flaky instructions - which possibly may just be my ever diminishing world of synapses).

After canonising (perfect word for installing all the guns on a deck; no..........not you Vicar) the upper gun deck, I then need to complete and install the upper gun deck fittings (capstans x 2, stove, bits x 2, shot garlands, companionway stanchions and guide ropes).

At that point, I think I am ready to seal up the upper gun deck by installing the deck beams, skid beams and then quarterdeck, waist and forecastle decks.

Sounds like a plan..........

csg1.jpg

csg2.jpg

csg3.jpg

csg4.jpg

c1.jpg

c2.jpg

c3.jpg

c4.jpg

c5.jpg
 
Cannon Update.

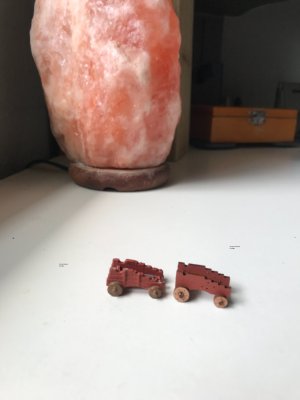
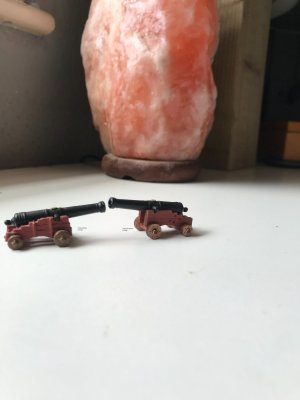
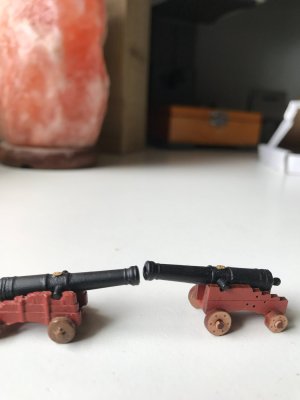
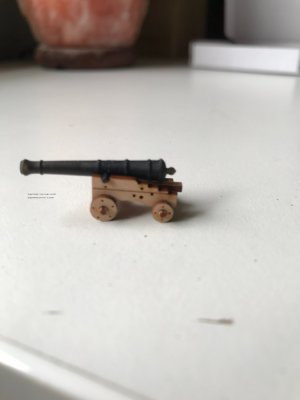
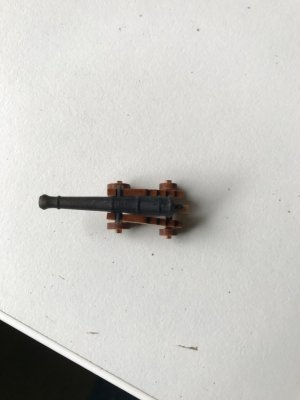
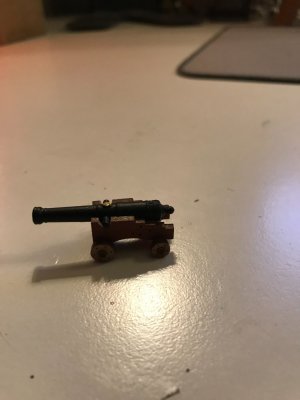
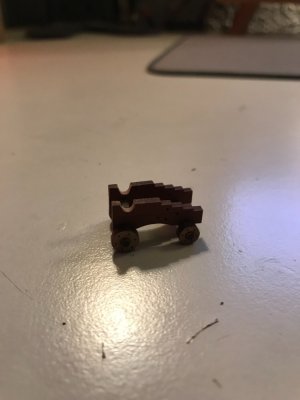
Not content to have to rely on the stock white metal 18-pounder carriages, I decided to whittle away at the Vanguard Models 1:72 18-pounder trunnion seats on the carriage sides. This lowered the overall sitting height of the cannon barrel and allowed me to squeeze it through the gunport. I could also give the carriage wheels a slight flat spot to lower by another mm if needed.

Whilst it does look a little like a LA gang lo-rider cannon from the side, it will only ever be viewed from above.

So, I will fully rig the 8 cannons slightly visible in the waist and partially rig the rest.

ud1.jpg

ud2.jpg
 
Back
Top