


Charles I had a typo in my comment above I meant to type SD not ND. We think western South Dakota is beautiful.Yeah, I am not the ONLY 'elderly' person here. Happy belated birthday, may you be blessed with many, many more.

-

SUBSCRIBE TO SHIPS IN SCALE TODAY!
The beloved Ships in Scale Magazine is back and charting a new course for 2026!
Discover new skills, new techniques, and new inspirations in every issue.
NOTE THAT OUR NEXT ISSUE WILL BE July/August 2026 -

Win a Free Custom Engraved Brass Coin!!!
As a way to introduce our brass coins to the community, we will raffle off a free coin during the month of August. Follow link ABOVE for instructions for entering.
You are using an out of date browser. It may not display this or other websites correctly.
You should upgrade or use an alternative browser.
You should upgrade or use an alternative browser.
Montanes - Occre by CharlesEdward
- Thread starter CharlesEdward
- Start date
- Watchers 7


It was time to install the cannon or to be precise the half-barrel cannon pieces included in the kit to simulate full can in the First and Second Battery. Typically the 1st Battery, (the lower gundeck) housed the BIG guns, and the 2nd Battery, (the next gundeck up), housed smaller bore cannon. The 3rd Battery, (the lower and main deck), were equipped with smaller and more mobile guns. Below is the starboard side aft section of the model.
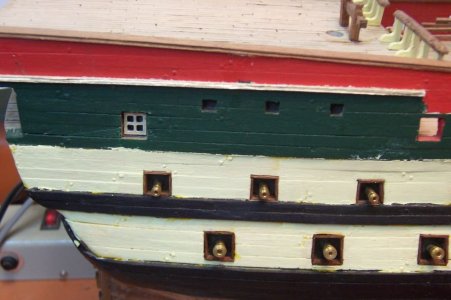
The Starboard 1st and 2nd Battery, just a little more forward closer to midship.
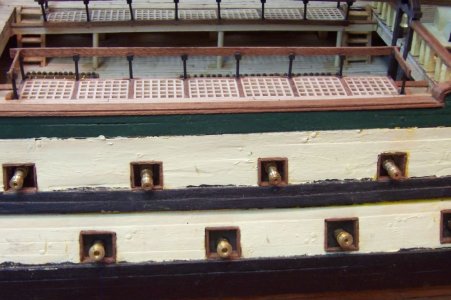
The 1st and 2nd Battery, at the Starboard bow.
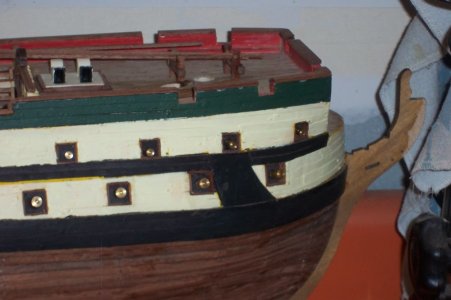
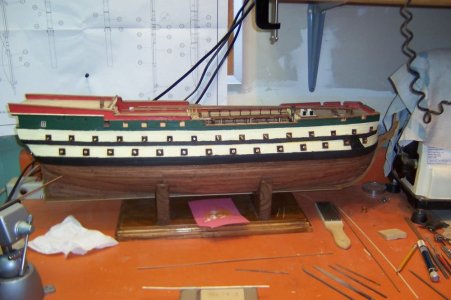
An overall photo of the complete Starboard side of the model with all guns installed.
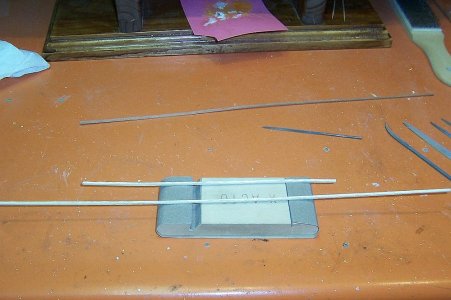
Now it was time to install a few more hull details onto the model, specifically starting the wale build and installation. These 2 x 2 mm square strips had to be worked a bit to add a small groove in them and painted gold I beilieve.
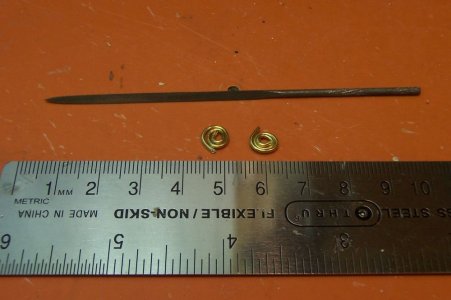
These small snail looking decorations where made by curling a brass strip around a suitable circle dowel.
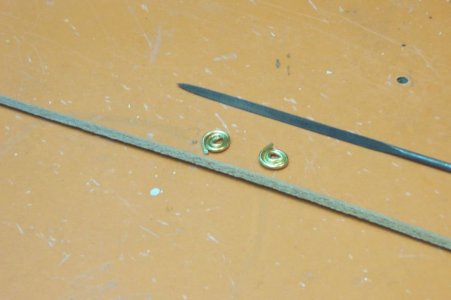
Two per side so a total of four had to be crafted.
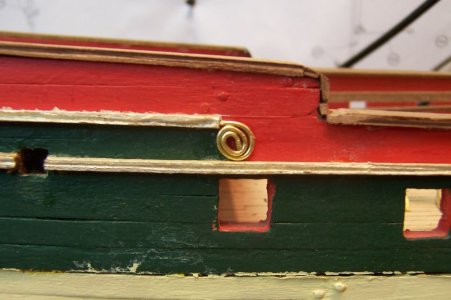
Installed decoration.
Many clamps were used to seat the wales properly onto the hull.
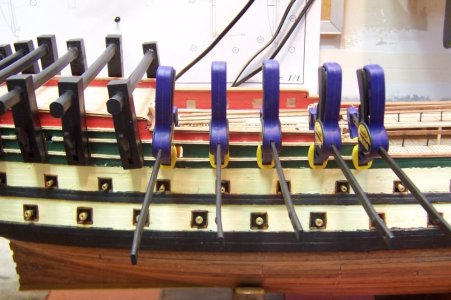
Waiting the 24 hours to allow glue to fully dry set.
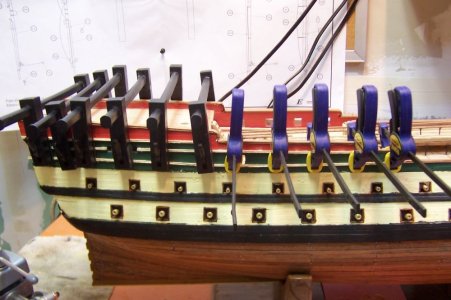
installing the first wale,
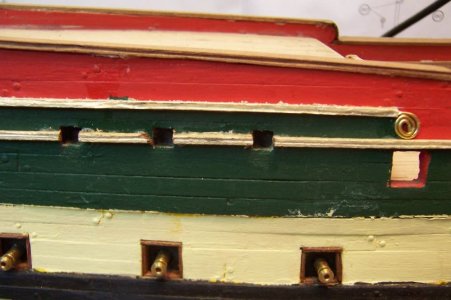
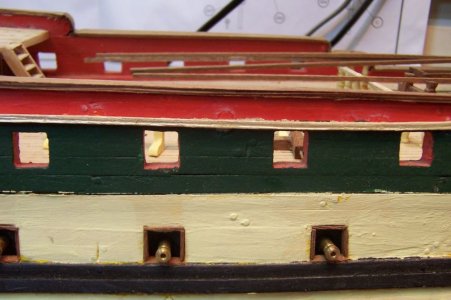
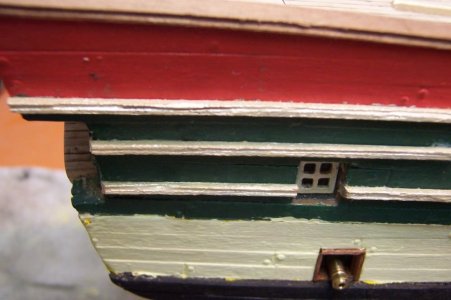
Most of the Wale has been in stalled unto the model in this photo.
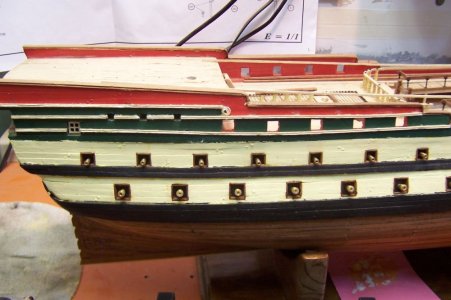
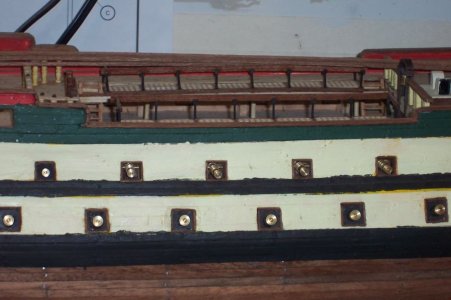
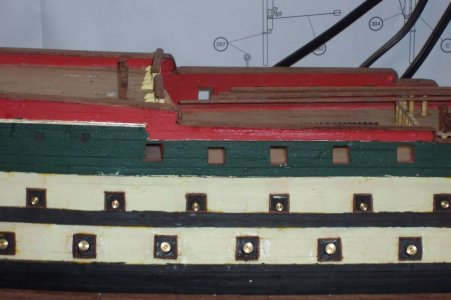
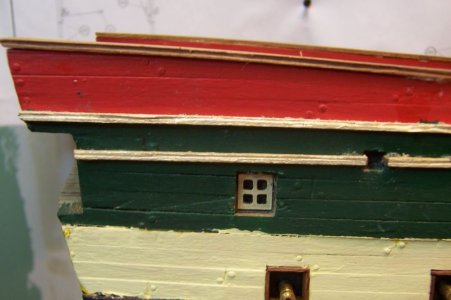
The Starboard 1st and 2nd Battery, just a little more forward closer to midship.
The 1st and 2nd Battery, at the Starboard bow.
An overall photo of the complete Starboard side of the model with all guns installed.
Now it was time to install a few more hull details onto the model, specifically starting the wale build and installation. These 2 x 2 mm square strips had to be worked a bit to add a small groove in them and painted gold I beilieve.
These small snail looking decorations where made by curling a brass strip around a suitable circle dowel.
Two per side so a total of four had to be crafted.
Installed decoration.
Many clamps were used to seat the wales properly onto the hull.
Waiting the 24 hours to allow glue to fully dry set.
installing the first wale,
Most of the Wale has been in stalled unto the model in this photo.


Nicely done Charles! Looking great! Magic Mike
Thank you much, these photos were all saved back in 2014, and I can hardly wait to get started on this kit again. Keep tuned.Nicely done Charles! Looking great! Magic Mike
It was time to add some additional hull details onto the Model. The bow area showing the Bowsprit installation opening for later on.
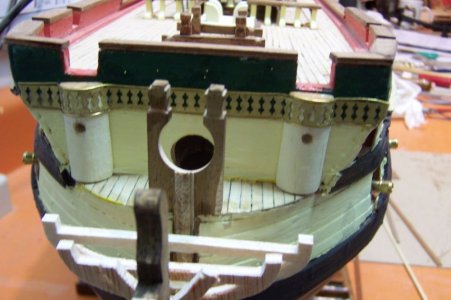
Installing the upper hull wales using tension lock clamps.
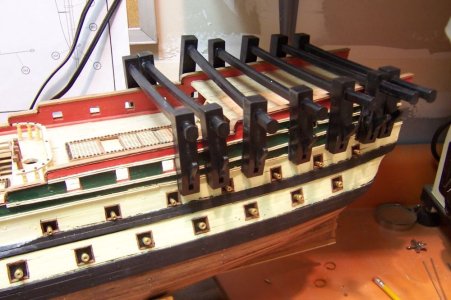
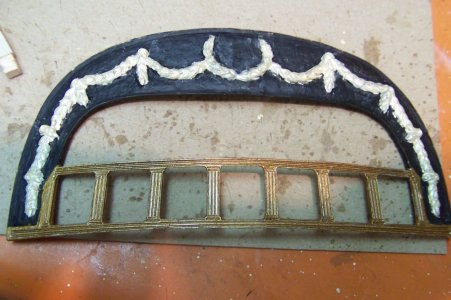
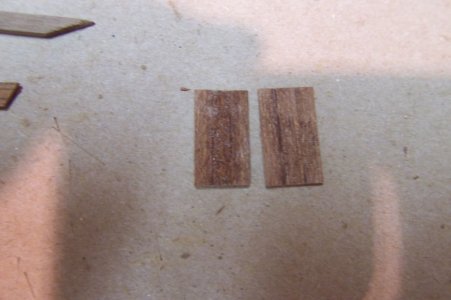
The stern transom balcony decorative metal part painted using colors I wanted, black, silver or white and gold. The pieces just above the transom balcony pieces are doors from the balcony into the stern cabins. The manufactured part was the normal kit included molded metal parts. The worked wooden pieces shown above the transom are the doors to add for entry into the stern cabins.
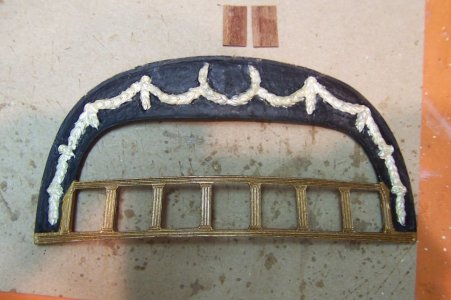
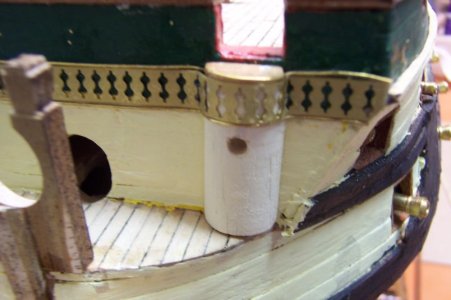
I can’t remember what this particular part is called, but it is positioned on either side of the Bowsprit, Maybe the heads? Port side head.
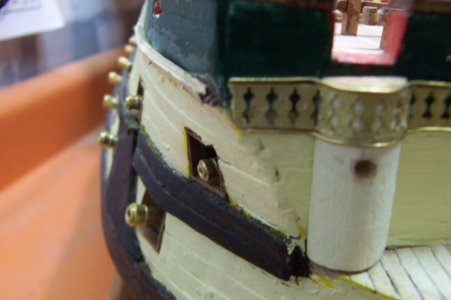
Starboard side head.
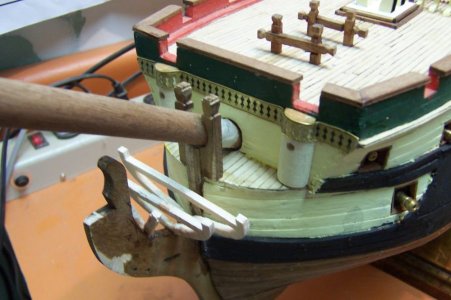
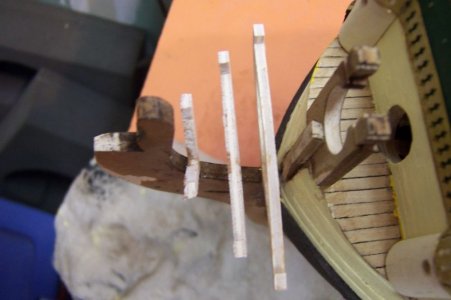
The grating deck supports for the shaped grating deck to be installed upon.
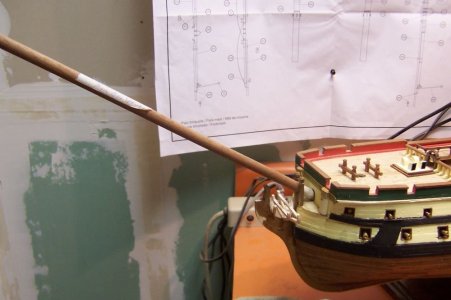
A longer shot of the dry fitted unworked walnut dowel showing the proper angle of the main Bowsprit.
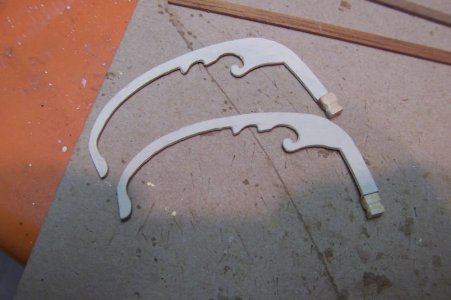
Bow decorative laser cut pieces both Port and Starboard, painted and ready to install.
Detailed photos of the transom decorative metal part and the hatch / door to the stern cabins.
Installing the upper hull wales using tension lock clamps.
The stern transom balcony decorative metal part painted using colors I wanted, black, silver or white and gold. The pieces just above the transom balcony pieces are doors from the balcony into the stern cabins. The manufactured part was the normal kit included molded metal parts. The worked wooden pieces shown above the transom are the doors to add for entry into the stern cabins.
I can’t remember what this particular part is called, but it is positioned on either side of the Bowsprit, Maybe the heads? Port side head.
Starboard side head.
The grating deck supports for the shaped grating deck to be installed upon.
A longer shot of the dry fitted unworked walnut dowel showing the proper angle of the main Bowsprit.
Bow decorative laser cut pieces both Port and Starboard, painted and ready to install.
Detailed photos of the transom decorative metal part and the hatch / door to the stern cabins.
This post will show the prow assembled and all of the Pin Rails installed onto the Main Deck. Plus I used a Window Glaze product that I found to simulate clear windows. You smear the liquid over any brass window frame that is about ¼ inch square, preferably on the back side. You use a toothpick to apply the white liquid which dries to look like glass, and it can be painted. I will show the stern lanterns assembled with this ‘glass’ painted red.
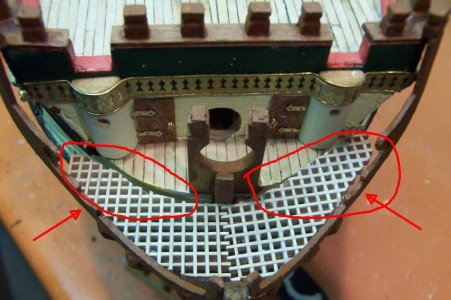
The Port view of the prow assembly with the deck and grating installed also the two fully worked doors to add on that forward bulkhead.
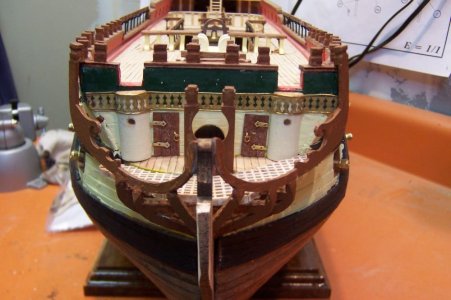
Note the foredeck mast pin railings installed.
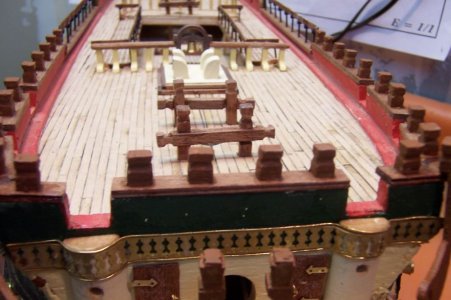
Looking from the starboard side at the Foremast pin rails.
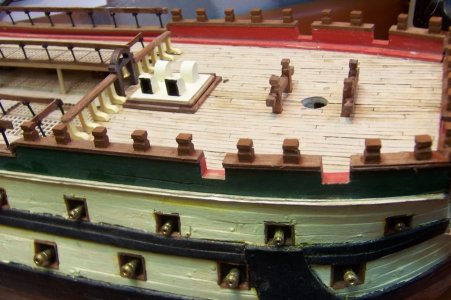
Looking from the port side at the Foremast pin rails.
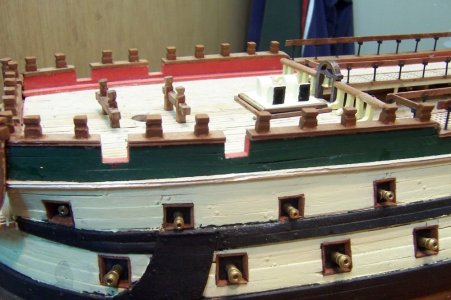
Looking from the starboard side at the Foremast pin rails.
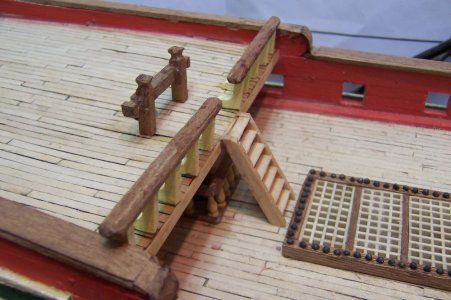
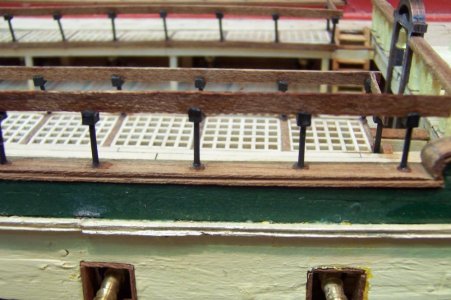
This is a view from the port side overlooking the lower deck opening with the outer railing piece installed.
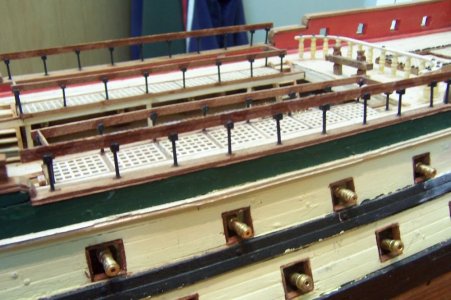
A closeup of the same view showing more details, from the starboard side.
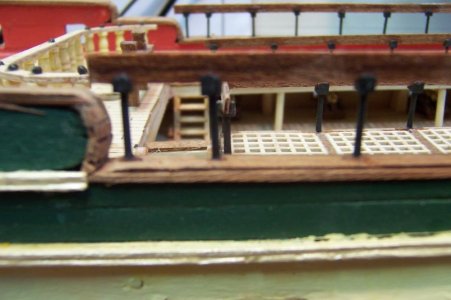
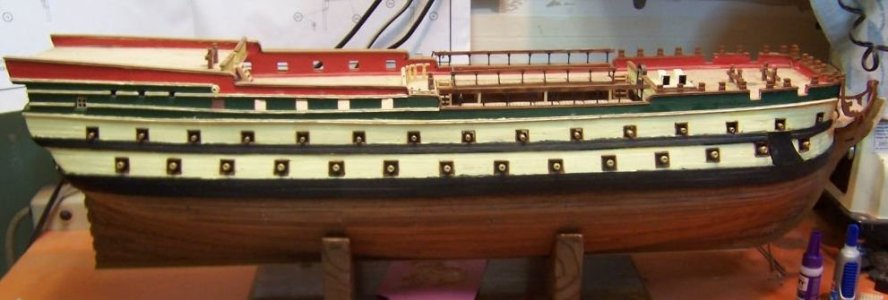
A Starboard overal side view of the model showing the pin railings installed and the outer railings installe onto the Main Deck.
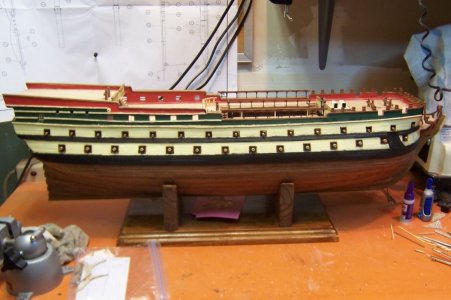
The foredeck or forecastle showing the pin railing installed for the foremast.
Here is a photo of the stern decoration with that window glaze product applied and dried.
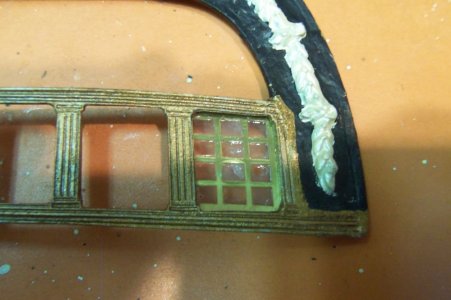
The glaze is best applied on the back of window frames as shown in this photo. I haven't decided what color to paint this transom balcony window yet, if any, maybe a baby blue? I can't find this product now, but there is some glaze products out there that I will try, when I run out of the small bottle I purchased several years ago.
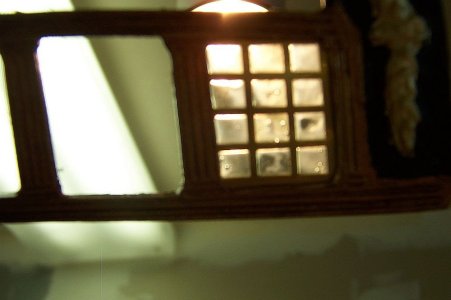
I was testing the window glaze with sunbeams shining through. Looks kind of nice, doesn't it?
Maybe a more clearer view of the starboard side of the model showing all of the mast pin railings installed.
The Port view of the prow assembly with the deck and grating installed also the two fully worked doors to add on that forward bulkhead.
Note the foredeck mast pin railings installed.
Looking from the starboard side at the Foremast pin rails.
Looking from the port side at the Foremast pin rails.
Looking from the starboard side at the Foremast pin rails.
This is a view from the port side overlooking the lower deck opening with the outer railing piece installed.
A closeup of the same view showing more details, from the starboard side.
A Starboard overal side view of the model showing the pin railings installed and the outer railings installe onto the Main Deck.
The foredeck or forecastle showing the pin railing installed for the foremast.
Here is a photo of the stern decoration with that window glaze product applied and dried.
The glaze is best applied on the back of window frames as shown in this photo. I haven't decided what color to paint this transom balcony window yet, if any, maybe a baby blue? I can't find this product now, but there is some glaze products out there that I will try, when I run out of the small bottle I purchased several years ago.
I was testing the window glaze with sunbeams shining through. Looks kind of nice, doesn't it?
Maybe a more clearer view of the starboard side of the model showing all of the mast pin railings installed.
I found my old digital camera, last used about 10 years ago, added new batteries and connected the camera to my PC. I found these next photos still on the memory card of this Kodak camera, I used this camera for all of the photos that you have been enjoying so it looks like I can still use it. They will show additional work that I did on the bow / prow that I didn't know I still had.
The first photo is of the detail work done on the starboard prow area, all parts included in kit as laser cut parts wood parts or brass dowels bent into the shape seen and then painted gold and glued in place. The figurehead depicted the Mountain Men in honor because of the amount of work those people did for the construction of the ship.


Another view of the details involved, the figurehead is only dry fitted here.

A wider shot of the location.

A look at the colored instruction sheet for comparison.


Thanks for looking in. More to follow as I get caught up with this amazing model.
The first photo is of the detail work done on the starboard prow area, all parts included in kit as laser cut parts wood parts or brass dowels bent into the shape seen and then painted gold and glued in place. The figurehead depicted the Mountain Men in honor because of the amount of work those people did for the construction of the ship.
Another view of the details involved, the figurehead is only dry fitted here.
A wider shot of the location.
A look at the colored instruction sheet for comparison.
Thanks for looking in. More to follow as I get caught up with this amazing model.
This next post will show some additional work done on the bow area / prow and stern gallery decorations in brass as well as the main Transom Decoration completed and ready for installation onto the model.
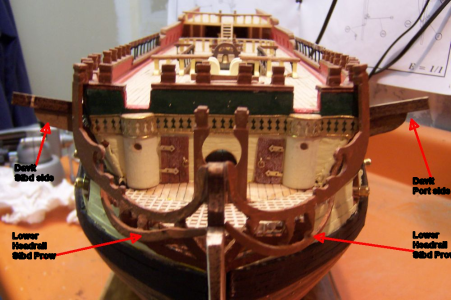
The first photo is a view of the prow with the Upper and Lower headrails installed onto both Port and Starboard sides. The lower headrail is labeled but not the upper headrail. Also the label on the lower left is mislabeled as STBD lower headrail and should be PORT.
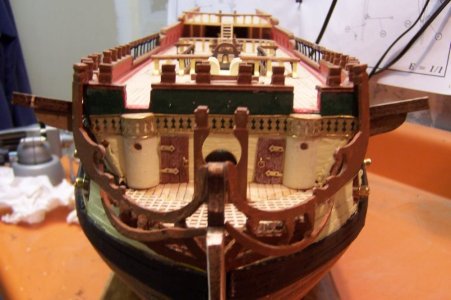
The same photo without the labels interfering with the view.
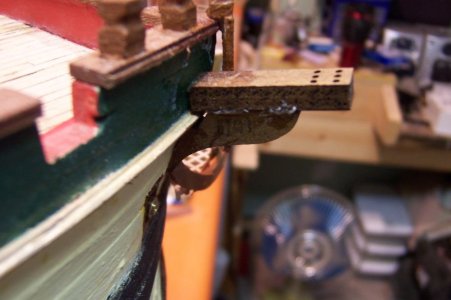
A closeup of the Port side Davit.
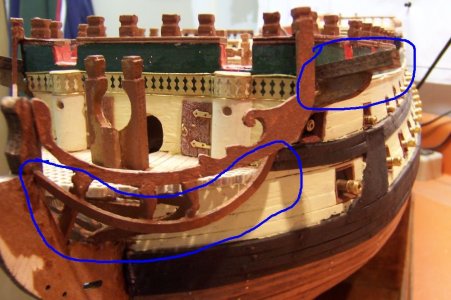
View of the Port bow with the Port Davit and Headrails circled, both upper and lower.
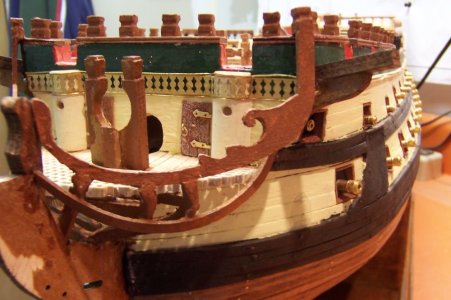
Same photo without the distracting circles.
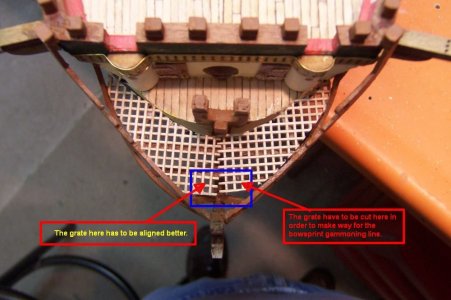
Overhead view of the first dry fitting of the shaped grate decking with labels. The final installation has been shown in an earlier post. I lined them up better before installing the deck onto the Prow.
The stern Transom decoration painted and with window glaze ready to be installed on the aft gallery.
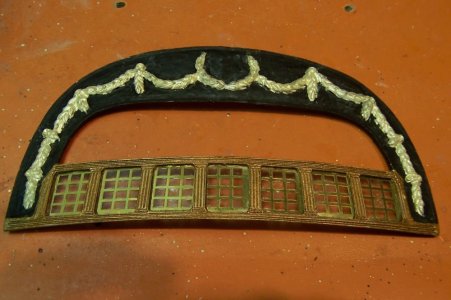
A closeup of the window glazing on first the Port side then the Starboard side of the transom.
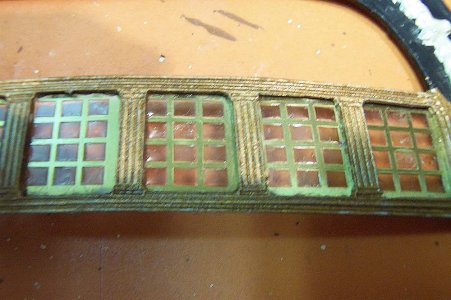
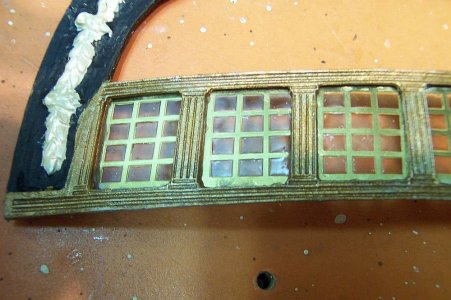
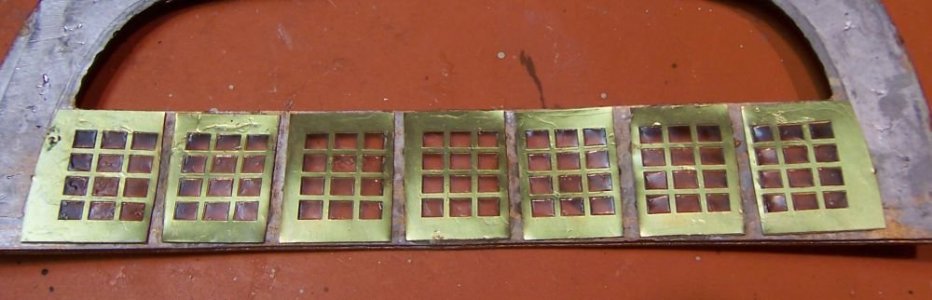
The back of the transom with the window glazing applied. A full view of the back of the transom focussing on the window glazing.
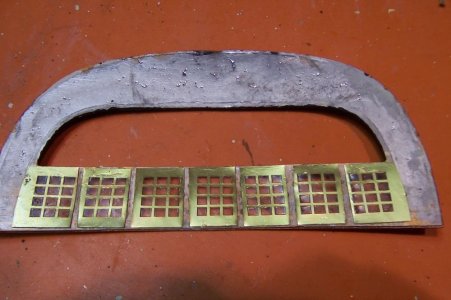
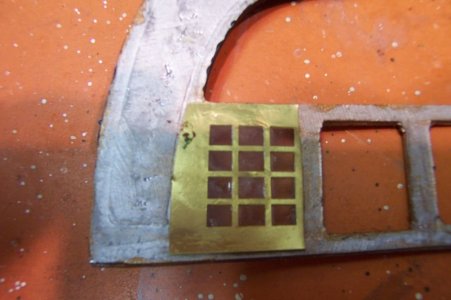
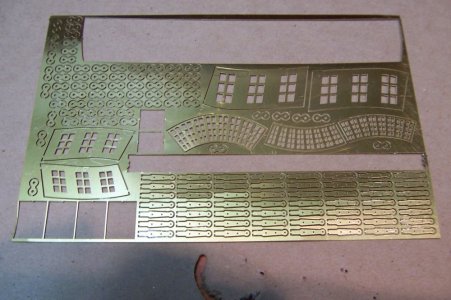
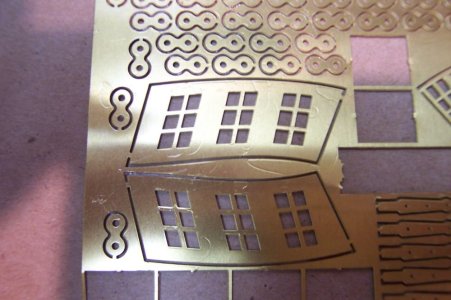
A photo of the included brass sheet with the ready to cut out gallery window frame details.
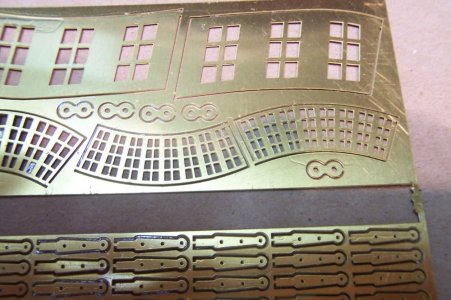
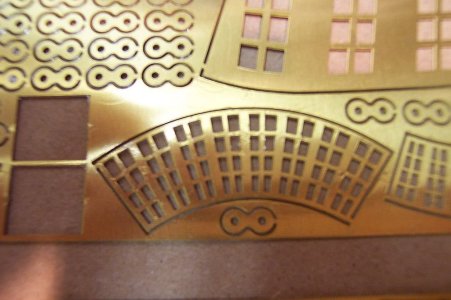
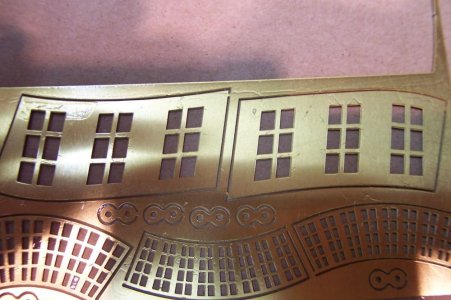
Next four photos are just closeups of the same parts for clarity if needed.
This final photo of the post is a brighter shot of that wood burned name plaque I received from OcCre Customer Service when I ordered the missing pieces.
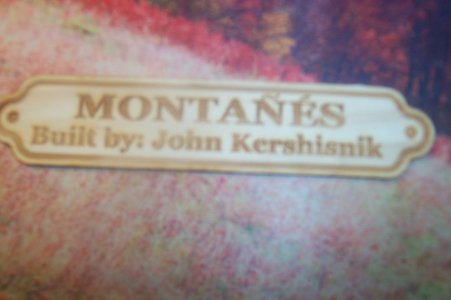
That is my RL name, Sir Charles Edward is the nom de plume I wanted should I ever write a book, heh heh. Thank you for looking in, until later.
Closeup of the back of the transom glazing applied.
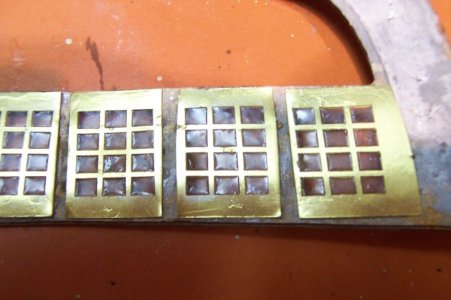
A photo focusing on the Transom window glazing applied.
The first photo is a view of the prow with the Upper and Lower headrails installed onto both Port and Starboard sides. The lower headrail is labeled but not the upper headrail. Also the label on the lower left is mislabeled as STBD lower headrail and should be PORT.
The same photo without the labels interfering with the view.
A closeup of the Port side Davit.
View of the Port bow with the Port Davit and Headrails circled, both upper and lower.
Same photo without the distracting circles.
Overhead view of the first dry fitting of the shaped grate decking with labels. The final installation has been shown in an earlier post. I lined them up better before installing the deck onto the Prow.
The stern Transom decoration painted and with window glaze ready to be installed on the aft gallery.
A closeup of the window glazing on first the Port side then the Starboard side of the transom.
The back of the transom with the window glazing applied. A full view of the back of the transom focussing on the window glazing.
A photo of the included brass sheet with the ready to cut out gallery window frame details.
Next four photos are just closeups of the same parts for clarity if needed.
This final photo of the post is a brighter shot of that wood burned name plaque I received from OcCre Customer Service when I ordered the missing pieces.
That is my RL name, Sir Charles Edward is the nom de plume I wanted should I ever write a book, heh heh. Thank you for looking in, until later.
Closeup of the back of the transom glazing applied.
A photo focusing on the Transom window glazing applied.
This post will finally catch me up on all the past photos of this build log. The next log should be new content for this kit. These photos are dated July 2014 and will show some main deck details being installed, including the ships boat, assembled earlier and posted on one of the starting logs. Also the finished Transom and initial gallery installation took place at this time. There is more details of the stern gallery assembly installation.
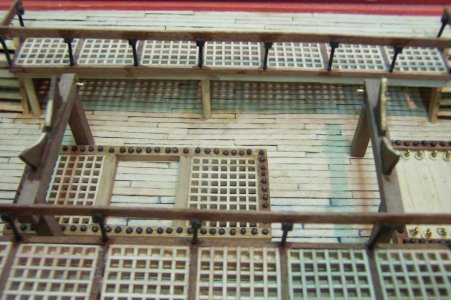
This first photo shows the ships boat cradle stanchions installed in the lower deck, which is why this area was open in the first place.
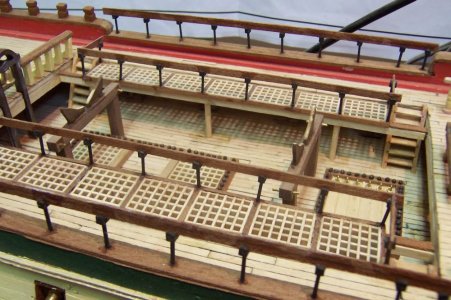
A Close up of the boat cradle stanchions set in place.
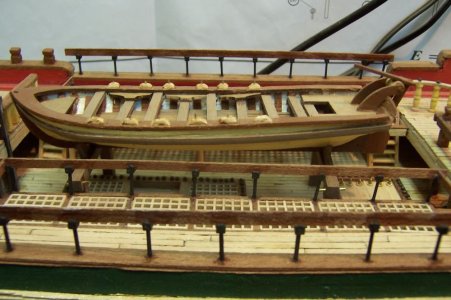
The dry fitted boat on the assembled cradle stanchions checking the fit. Followed by gluing the ships boat in place. I just checked and the ships boat is still not glued in place yet. Probably making sure that I won’t have any installation in that area before I permanently seat that boat. The ships boat is facing the same direction as the ship is, the ships boat bow is facing toward the bow of the Montanes.
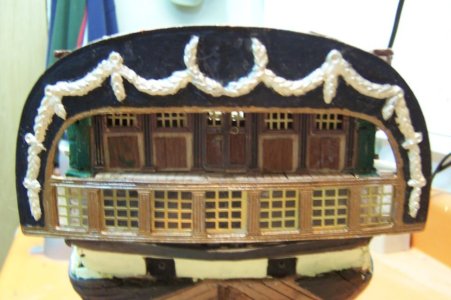
The prepared transom is just dry-fitted into place, note I hadn’t painted the window glaze in the windows yet.
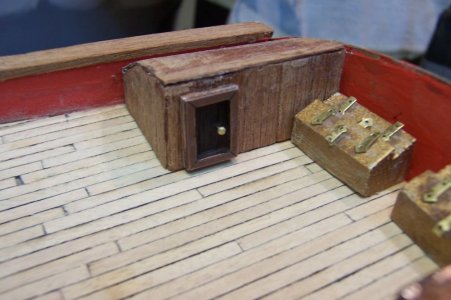
The ships aft lockers and tool boxes positioned aft of the quarterdeck against the bulwark and a closer view of the starboard locker and tool kit.
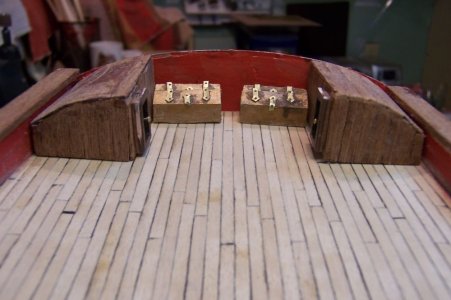
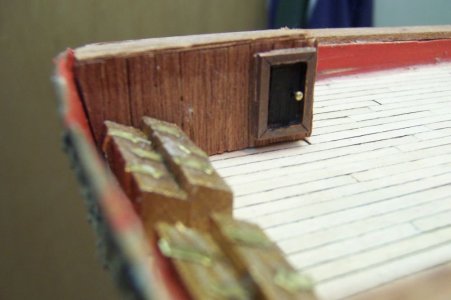
The ships aft lockers and tool boxes with a closer view of the port locker and tool kit.
The starboard gallery base looking toward the port side.
The starboard gallery base looking toward the port side.
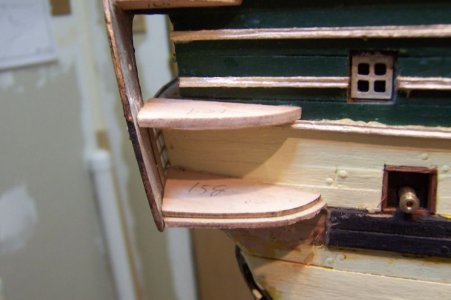
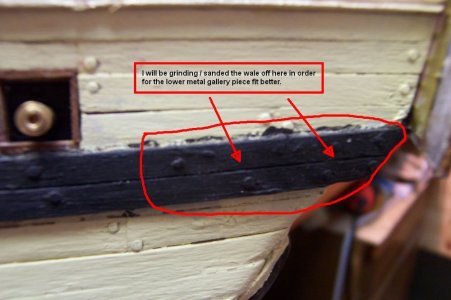
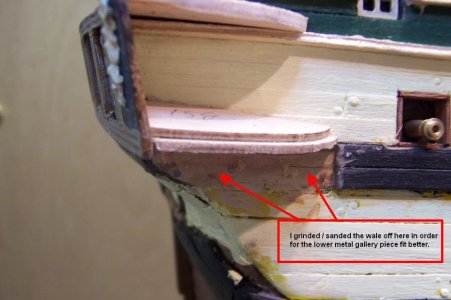
The same photo with a notation of what I had to do to make the included metal gallery heal.
Without the notation.
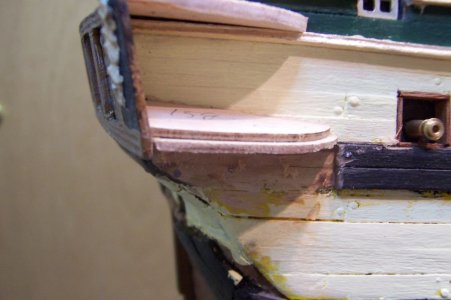
The port side gallery showing the same note regarding the grinding of the wale at the stern in order to fit the gallery base metal piece.
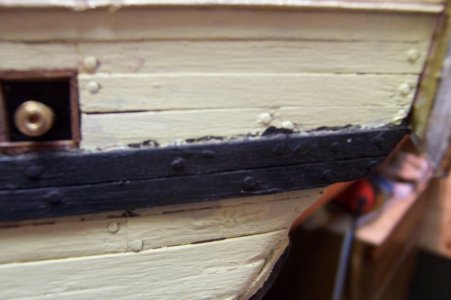
Photo without the note.
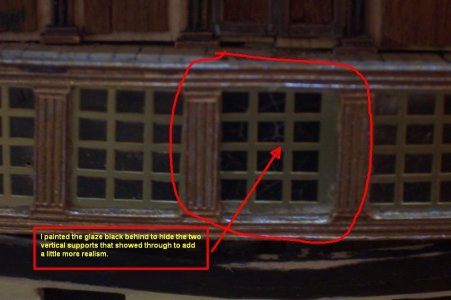
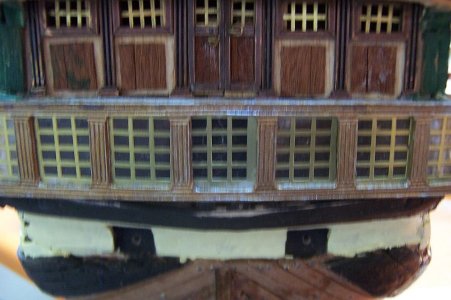
The transom gallery window glaze painted black.
Without the notation.
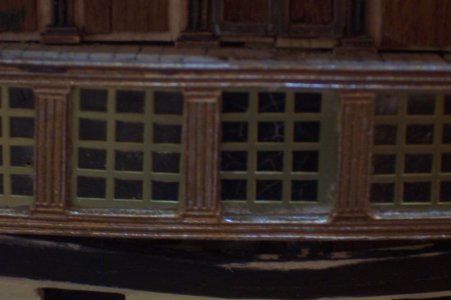
The transom gallery windows painted black.
Thanks for the interest and remember the next posting of this build will basically be live with new content.
This first photo shows the ships boat cradle stanchions installed in the lower deck, which is why this area was open in the first place.
A Close up of the boat cradle stanchions set in place.
The dry fitted boat on the assembled cradle stanchions checking the fit. Followed by gluing the ships boat in place. I just checked and the ships boat is still not glued in place yet. Probably making sure that I won’t have any installation in that area before I permanently seat that boat. The ships boat is facing the same direction as the ship is, the ships boat bow is facing toward the bow of the Montanes.
The prepared transom is just dry-fitted into place, note I hadn’t painted the window glaze in the windows yet.
The ships aft lockers and tool boxes positioned aft of the quarterdeck against the bulwark and a closer view of the starboard locker and tool kit.
The ships aft lockers and tool boxes with a closer view of the port locker and tool kit.
The starboard gallery base looking toward the port side.
The starboard gallery base looking toward the port side.
The same photo with a notation of what I had to do to make the included metal gallery heal.
Without the notation.
The port side gallery showing the same note regarding the grinding of the wale at the stern in order to fit the gallery base metal piece.
Photo without the note.
The transom gallery window glaze painted black.
Without the notation.
The transom gallery windows painted black.
Thanks for the interest and remember the next posting of this build will basically be live with new content.
Nicely done John! Magic Mike


Its good to see you back in the shipyard. Enjoy. Cheers Grant

- Joined
- Oct 9, 2020
- Messages
- 2,551
- Points
- 538

lots of work done!
looking great!
looking great!
Thanks Mike, I am starting new content on this model later today, watch for new posts.Nicely done John! Magic Mike
August 25 2026
I started this build again, this is new content for this post. Showing the finished paint job on the back side of the 30 gunport doors. Two have already been test installed so the count is only 28 Gunport hatches. the paint color I chose for the hull is Hull Tallow, which is too dry to use, so painting the outside of the gunports will have to wait until I recieve that order. Once painted I will install the hinges using the brass hinges and two small nails, bent in an "L" shape to wrap the hinges around then insert the nails into small holes drilled to match the locations.

The stern gallery brass window frames showing the micro-glaze being used on the rear of the pieces. This glaze is old so it might not work as well as when it was new a decade. We shall see if tomorrow they have dried clear or not. This is the upper port gallery window frames.

This is the stern Starboard lower window frames, partial covered.

I had completed two of the three stern lanterns back in 2014, this already have the glaze applied and painted red, note the small one and a large lantern.

This is the large one ready for installation along the stern aft deck.

This is the second smaller stern lantern, with the glaze dried back in 2014, Toda I painted the inside of the glaze red.
The brass part shown in the top left is the base of the lantern, the brass part in the top right is the top of the lantern You can see the red paint on the inside of the glaze.

The brass window frames for the upper port stern gallery, looking from the outside with the glaze applied, and drying.

Possibly a better shot of the lantern I just painted today from the photo above.

The two stern gun bases that yet to have the half-gunbarrels installed into them. You can see the drilled hole in the port side gun better than the starboard side gun.

Showing the two installed gunport doors / hatches on the port side.

You can partially close the gunport hatches but I will eventually install a black thread to simulate the rope line to open / close those hatches and assemble all of the gunport doors opened.
The remaining photos of the model is me experimenting with my old digital camera. I might try using my phone next time to see if they look any different / better / worse. The details of the starboard bulkhead details under the quarterdeck.

The middle section of the bulkheads under the quarter looking aft.

The details of the port bulkhead details under the quarterdeck.

Still experimenting with the old digital camera tryin out different modes to get the best closeups with these next three new photos of the main foc'sle deck; note the galley exhaust ports just forward of the Bell Tower. I believe that only two cannon on carriages will be installed on this deck in the forward gunports.

The main deck midships showing the dry fitted longboat on its cradle.

The longboat detail and I think this was its own small plank on frame / bulkhead mini-kit.

The longboat cradle deck without the longboat sitting on the cradle.
Thank you for visiting.
I started this build again, this is new content for this post. Showing the finished paint job on the back side of the 30 gunport doors. Two have already been test installed so the count is only 28 Gunport hatches. the paint color I chose for the hull is Hull Tallow, which is too dry to use, so painting the outside of the gunports will have to wait until I recieve that order. Once painted I will install the hinges using the brass hinges and two small nails, bent in an "L" shape to wrap the hinges around then insert the nails into small holes drilled to match the locations.
The stern gallery brass window frames showing the micro-glaze being used on the rear of the pieces. This glaze is old so it might not work as well as when it was new a decade. We shall see if tomorrow they have dried clear or not. This is the upper port gallery window frames.
This is the stern Starboard lower window frames, partial covered.
I had completed two of the three stern lanterns back in 2014, this already have the glaze applied and painted red, note the small one and a large lantern.
This is the large one ready for installation along the stern aft deck.
This is the second smaller stern lantern, with the glaze dried back in 2014, Toda I painted the inside of the glaze red.
The brass part shown in the top left is the base of the lantern, the brass part in the top right is the top of the lantern You can see the red paint on the inside of the glaze.
The brass window frames for the upper port stern gallery, looking from the outside with the glaze applied, and drying.
Possibly a better shot of the lantern I just painted today from the photo above.
The two stern gun bases that yet to have the half-gunbarrels installed into them. You can see the drilled hole in the port side gun better than the starboard side gun.
Showing the two installed gunport doors / hatches on the port side.
You can partially close the gunport hatches but I will eventually install a black thread to simulate the rope line to open / close those hatches and assemble all of the gunport doors opened.
The remaining photos of the model is me experimenting with my old digital camera. I might try using my phone next time to see if they look any different / better / worse. The details of the starboard bulkhead details under the quarterdeck.
The middle section of the bulkheads under the quarter looking aft.
The details of the port bulkhead details under the quarterdeck.
Still experimenting with the old digital camera tryin out different modes to get the best closeups with these next three new photos of the main foc'sle deck; note the galley exhaust ports just forward of the Bell Tower. I believe that only two cannon on carriages will be installed on this deck in the forward gunports.
The main deck midships showing the dry fitted longboat on its cradle.
The longboat detail and I think this was its own small plank on frame / bulkhead mini-kit.
The longboat cradle deck without the longboat sitting on the cradle.
Thank you for visiting.
Last edited:


You are working fast John, beautiful progress.
The lanterns and longboat looking good.
I am still busy planking the hull and cannot wait to start on the fine, detailed work…
The lanterns and longboat looking good.
I am still busy planking the hull and cannot wait to start on the fine, detailed work…
Thanks for checking in, Peter. I am still working on learning how to get better photos with that old Kodak digital camera, there is a mode for Close Up, but I may have to buy a tripod or unipod to help keep that camera still. I will try using my cell phone on the next post, still waiting for needed supplies, to be delivered such as paint, glue, both wood and super. Plus thinking seriously of getting a Router to help with making nice ship cradles for the models to be used in display cases. I also think I need a band saw or scroll saw for models to help cut out some of the parts from the plywood stock. Not to mention those bow fillers for the Royal William.You are working fast John, beautiful progress.
The lanterns and longboat looking good.
I am still busy planking the hull and cannot wait to start on the fine, detailed work…
August 26 2026
A small update on the experiment results of the window glaze and using the cell phone to take these photos.
Today I am posted the results of using the old Micro-Glaze product I had from ten years ago and testing my cell phone camera to use for these build logs. It looks like the old stuff still works after a decade of being sealed in a steady temperature hobby room. Also the cell phone camera photos work well also, and it may be easier for me to use the cell phone right now.
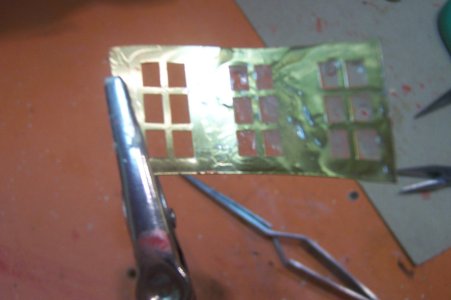
This first photo shows the dried glaze on the starboard lower brass stern window frames, and it looks like it worked just fine. I have not yet done the far left side of this brass piece. I wanted to show comparison of glaze on and glaze off.
Similar photos using the cell phone and the digital camera for comparison.
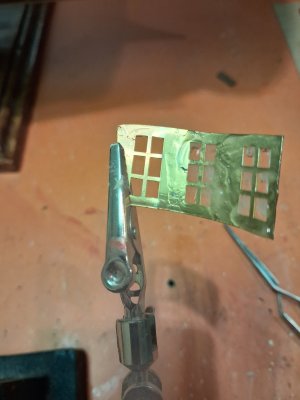
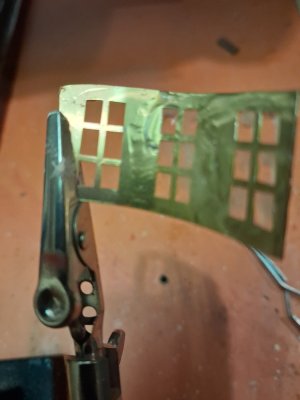
This photo shows the port upper stern brass windows frames with the dried window glaze, also looking not bad.
The last photo is a little blurry but you can still see the reults. I can continue to glaze the remaing brass stern window frames tomorrow.
A small update on the experiment results of the window glaze and using the cell phone to take these photos.
Today I am posted the results of using the old Micro-Glaze product I had from ten years ago and testing my cell phone camera to use for these build logs. It looks like the old stuff still works after a decade of being sealed in a steady temperature hobby room. Also the cell phone camera photos work well also, and it may be easier for me to use the cell phone right now.
This first photo shows the dried glaze on the starboard lower brass stern window frames, and it looks like it worked just fine. I have not yet done the far left side of this brass piece. I wanted to show comparison of glaze on and glaze off.
Similar photos using the cell phone and the digital camera for comparison.
This photo shows the port upper stern brass windows frames with the dried window glaze, also looking not bad.
The last photo is a little blurry but you can still see the reults. I can continue to glaze the remaing brass stern window frames tomorrow.
Last edited:
August 31 2026
Today I did a small bit of work on the stern galleries of the Montanes, I fastened the Port side upper and lower brass window frames and dry fitted the Starboard side upper and lower brass window frames. I found that I need three small strips glued to the lower upper wooden piece to better fit that window frame into place. Both sides of the Stern Gallery will require a bit of wooden strips to conform to the wooden frames of each window frames installed.
This first photo is of the Port stern gallery with the lower and upper brass window frames installed. Checking the window glaze of the previous work done on the stern gallery back in 2014 and it seems the current window glaze I am using, (which is over 10 years old), does not quite dry as clean as the windows done back in 2014 did. Ah, well the replacement glaze is arriving on Wednesday or Tuesday maybe. Although all of the Montanes windows are now completely glazed, so I won’t get see the result of the new stuff until I use it on the next kit, Sao Miguel, (Carracca Atlantica) in about six months or so.
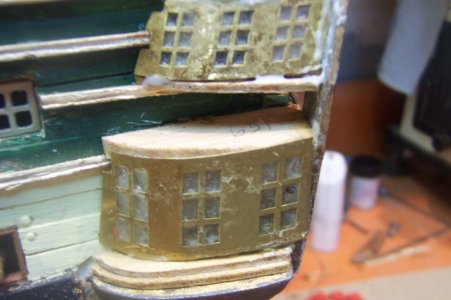
As the comments on the next photo state there is some cleanup work I have to do before I am finished with the stern gallery.
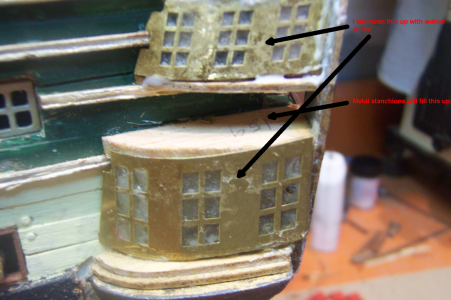
This pictures the Starboard stern gallery lower and upper brass window frames, dry fitted to show that a little strip of filler is needed in order to allow the lower brass window frame to seat into place securely.
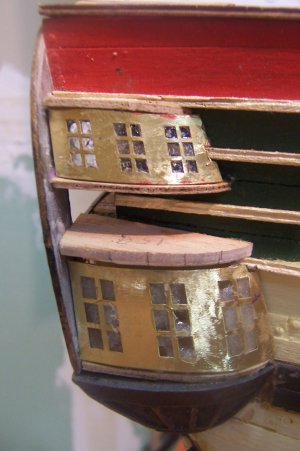
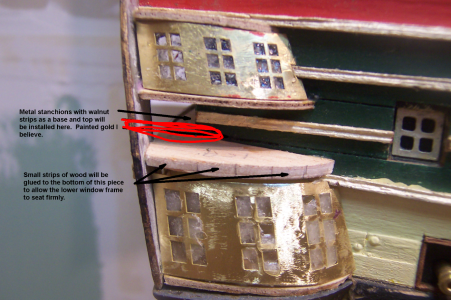
This pictures the Starboard stern gallery lower and upper brass window frames, dry fitted to show that a little strip of filler is needed in order to allow the lower brass window frame to seat into place securely. Metal balustrades will fit into the are marked in red, painted gold I think.
The next three photos show the port side again with different zooms and I also used the cell phone for these.
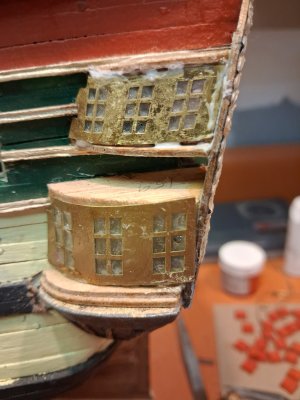
Seems very messy, doesn't it? Could be my impatience got the better of me a bit, I tride polishing the glaze than lightly sanding it with a very fine grit Dremel rotary tool, to get the majority of the thicker glaze more clean.
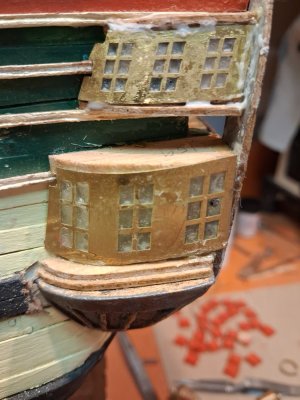
I can already see what kind of strips I will need to make this stern work shine a bit better.
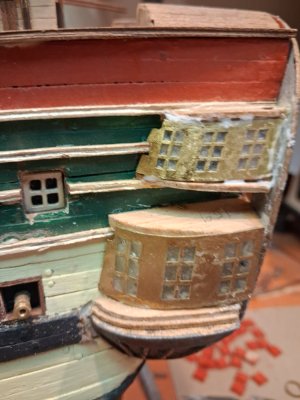
That is it for now, as I mentioned a small update, my new paints are arriving today, USPS says, so I will have more work to photgraph in the next couple of days. Thank you for checking in until next time.
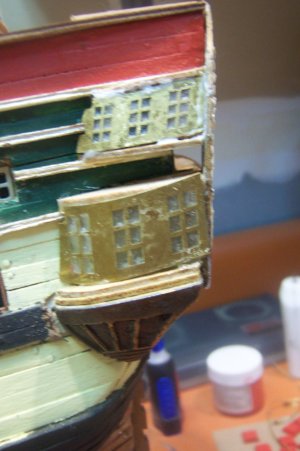
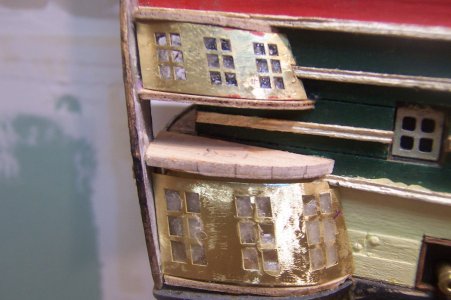
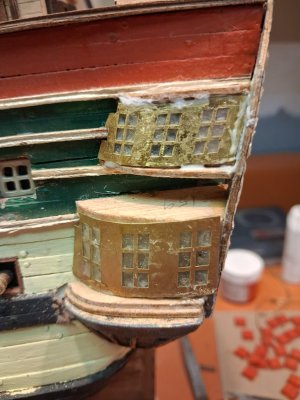
Today I did a small bit of work on the stern galleries of the Montanes, I fastened the Port side upper and lower brass window frames and dry fitted the Starboard side upper and lower brass window frames. I found that I need three small strips glued to the lower upper wooden piece to better fit that window frame into place. Both sides of the Stern Gallery will require a bit of wooden strips to conform to the wooden frames of each window frames installed.
This first photo is of the Port stern gallery with the lower and upper brass window frames installed. Checking the window glaze of the previous work done on the stern gallery back in 2014 and it seems the current window glaze I am using, (which is over 10 years old), does not quite dry as clean as the windows done back in 2014 did. Ah, well the replacement glaze is arriving on Wednesday or Tuesday maybe. Although all of the Montanes windows are now completely glazed, so I won’t get see the result of the new stuff until I use it on the next kit, Sao Miguel, (Carracca Atlantica) in about six months or so.
As the comments on the next photo state there is some cleanup work I have to do before I am finished with the stern gallery.
This pictures the Starboard stern gallery lower and upper brass window frames, dry fitted to show that a little strip of filler is needed in order to allow the lower brass window frame to seat into place securely.
This pictures the Starboard stern gallery lower and upper brass window frames, dry fitted to show that a little strip of filler is needed in order to allow the lower brass window frame to seat into place securely. Metal balustrades will fit into the are marked in red, painted gold I think.
The next three photos show the port side again with different zooms and I also used the cell phone for these.
Seems very messy, doesn't it? Could be my impatience got the better of me a bit, I tride polishing the glaze than lightly sanding it with a very fine grit Dremel rotary tool, to get the majority of the thicker glaze more clean.
I can already see what kind of strips I will need to make this stern work shine a bit better.
That is it for now, as I mentioned a small update, my new paints are arriving today, USPS says, so I will have more work to photgraph in the next couple of days. Thank you for checking in until next time.
Diasaster, (well could of been), I fumbled finger one of my parts container for most of the small metal parts and spilled the ENTIRE box everywhere in my garage hobby room. This is ALL of the metal columns for the stern gallery assembly, belaying pins, Parrel ribs, figurehead, four anchors, black metal cleats.
I spent one hour on hands and knees, (not easy for a 70-year old guy let me tell you), with tweezer picking up all that I could find. What a mess, but the final count seems to be I only lost some belaying pins and parrel ribs, used for the yard parrels to attach to each mast. I may need to check the black metal cleats, I will count them later to check if Part #249 count is still 95 pieces.
OcCre lifetime warranty to the rescue, apparently they REALLY MEAN IT that even "if the kit stays on your self for 20 years, we will replace missing or lost parts."
I sent them an email, which was SO VERY EASY to select the model kit and they list all of the parts in there. All I needed was a picture of the model, which I had of course or the actual invoice, I might have that still but I decided to send a picture of model instead.
Already received a confirmation email from thier customer service, verifying the request and a very easy way to track such requests. I may just buy that $3,750.00 limited edition kit of the le Soleil Royale, just because of this situation.
I spent one hour on hands and knees, (not easy for a 70-year old guy let me tell you), with tweezer picking up all that I could find. What a mess, but the final count seems to be I only lost some belaying pins and parrel ribs, used for the yard parrels to attach to each mast. I may need to check the black metal cleats, I will count them later to check if Part #249 count is still 95 pieces.
OcCre lifetime warranty to the rescue, apparently they REALLY MEAN IT that even "if the kit stays on your self for 20 years, we will replace missing or lost parts."
I sent them an email, which was SO VERY EASY to select the model kit and they list all of the parts in there. All I needed was a picture of the model, which I had of course or the actual invoice, I might have that still but I decided to send a picture of model instead.
Already received a confirmation email from thier customer service, verifying the request and a very easy way to track such requests. I may just buy that $3,750.00 limited edition kit of the le Soleil Royale, just because of this situation.
Last edited: