
-

SUBSCRIBE TO SHIPS IN SCALE TODAY!
The beloved Ships in Scale Magazine is back and charting a new course for 2026!
Discover new skills, new techniques, and new inspirations in every issue.
NOTE THAT OUR NEXT ISSUE WILL BE July/August 2026 -

Win a Free Custom Engraved Brass Coin!!!
As a way to introduce our brass coins to the community, we will raffle off a free coin during the month of August. Follow link ABOVE for instructions for entering.


You are using an out of date browser. It may not display this or other websites correctly.
You should upgrade or use an alternative browser.
You should upgrade or use an alternative browser.




Thank you Shota!

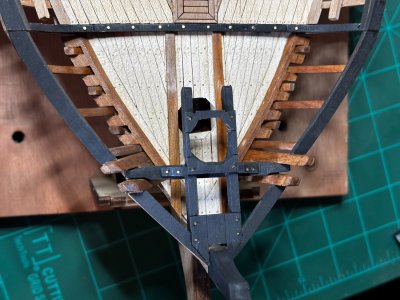
Every parts of this model is ‘special’! And it is great to see that you manage to turn every challenge into a nice result, Daniel.Good morning, all, I was always amused how the City of Houston always started their bridge specifications with "make several parts fit together". With these ships it would be "make several thousand parts fit together". Ha! This post focus is on the bow railing as I determined it should go together before I release the ship from its cradle for hull planking. The first pic's are my support scaffolding, I sort of felt like I built this part while trying to stand on my head.
View attachment 632206View attachment 632207
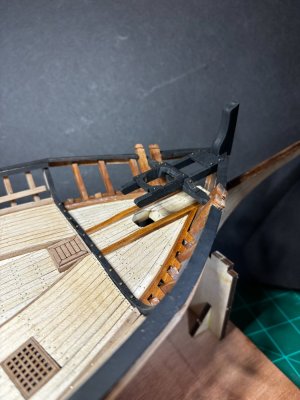
Next there is one short piece of black railing still to be set but I wanted to highlight the shaped support piece that goes in first.
View attachment 632208View attachment 632209
View attachment 632210
At the bow there is no inboard support piece like the rest of the ships railing.
These last pictures just show fitment and symmetry. I am rather pleased with the ship's symmetry, somehow, I seem to be accomplishing this in spite of myself
View attachment 632211View attachment 632212
I thank you all for taking the time to check this build out.
Till next time.
View attachment 632213

Regards, Peter
Thank you Peter, later today I'll be posting the ship free from its cradle and inverted resting upon a makeshift support system.Every parts of this model is ‘special’! And it is great to see that you manage to turn every challenge into a nice result, Daniel.
Regards, Peter
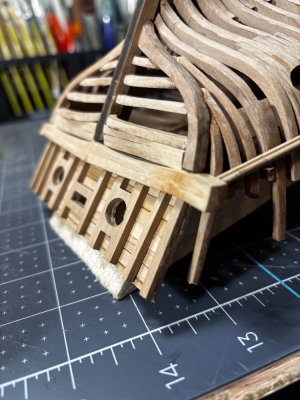
I have arrived at a major milestone today. After finishing the rail system at the bow, I was able to quickly fab a support system to hold the ship inverted, free from the building jig for hull planking. First a couple shots of the bow section with a coating of stain finish.
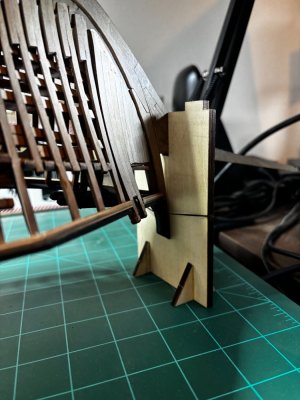
Next, I took a large block of balsa I had from a while back and a piece of the kits jig and repurposed them as shown.
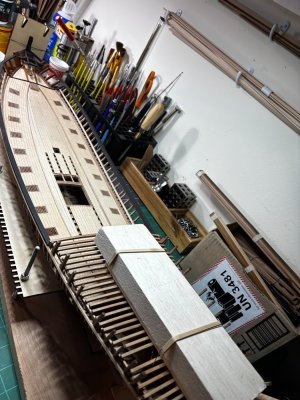
So now begins the hull fairing, there are going to be a few stubborn locations requiring a lot of elbow grease which most of us have experienced before.
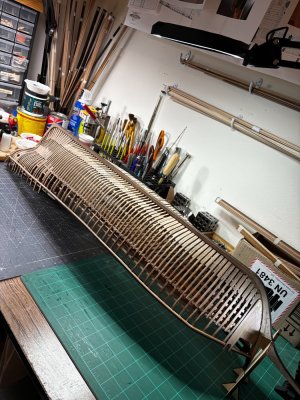
Here are a couple overall shots.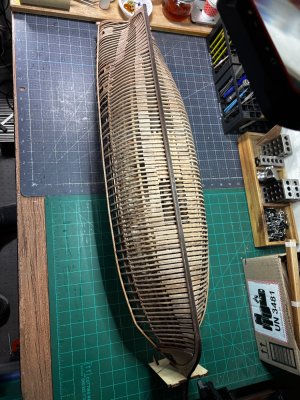
Thanks again for stopping by.
Till next time.
Next, I took a large block of balsa I had from a while back and a piece of the kits jig and repurposed them as shown.
So now begins the hull fairing, there are going to be a few stubborn locations requiring a lot of elbow grease which most of us have experienced before.
Here are a couple overall shots.
Thanks again for stopping by.
Till next time.
Congratulations with this milestone, Daniel. She looks impressive, showing her beautiful lines.I have arrived at a major milestone today. After finishing the rail system at the bow, I was able to quickly fab a support system to hold the ship inverted, free from the building jig for hull planking. First a couple shots of the bow section with a coating of stain finish.
View attachment 632533View attachment 632534
Next, I took a large block of balsa I had from a while back and a piece of the kits jig and repurposed them as shown.
View attachment 632535
View attachment 632539
View attachment 632538
So now begins the hull fairing, there are going to be a few stubborn locations requiring a lot of elbow grease which most of us have experienced before.
Here are a couple overall shots.View attachment 632536View attachment 632537
Thanks again for stopping by.
Till next time.
Regards, Peter
Thanks again Peter.Congratulations with this milestone, Daniel. She looks impressive, showing her beautiful lines.
Regards, Peter

That’s a big hull to sand by hand. I tried a small palm sander once and all that was good for was breaking things. But a random orbital sander might ease the burden in the more accessible places. Just thinking out loud though.
Yes, there is a lot of area fortunately the central area midship plus some each way is very close to faired as is. The hard part will be fore and aft where there are a few uglys that will take some time.That’s a big hull to sand by hand.

True story and Ditto. Bravo Daniel.Congratulations with this milestone, Daniel. She looks impressive, showing her beautiful lines.
Regards, Peter

Thank you C.Looks great Daniel - congrats on getting this far on a very challenging kit. My reco here would be good old fashioned hand sanding with gentle pressure and lots of elbow grease on those frames.


Daniel,
Per your quote "I have arrived at a major milestone", well yes kind of - the first real major milestone IMO is you deciding to purchase this
very complicated kit in the first place. I image that some of us, possibly many, are super interested in this ship, but resist... thinking that it would
be above their skill sets. I'm kinda there as well...
Well not your skill set issue I'm happy to see as I follow along. You are doing great work - all of your detailings are spot ON......
And this ship in-and-of-itself is a beauty.......good choice. And big kudos to ZHL's designers for creating this product.
Cheers
Per your quote "I have arrived at a major milestone", well yes kind of - the first real major milestone IMO is you deciding to purchase this
very complicated kit in the first place. I image that some of us, possibly many, are super interested in this ship, but resist... thinking that it would
be above their skill sets. I'm kinda there as well...
Well not your skill set issue I'm happy to see as I follow along. You are doing great work - all of your detailings are spot ON......
And this ship in-and-of-itself is a beauty.......good choice. And big kudos to ZHL's designers for creating this product.
Cheers
John, I sur thank you for your very kind post. To see others express approval of my work builds my confidence and creates enthusiasm which is a great motivater.Daniel,
Per your quote "I have arrived at a major milestone", well yes kind of - the first real major milestone IMO is you deciding to purchase this
very complicated kit in the first place. I image that some of us, possibly many, are super interested in this ship, but resist... thinking that it would
be above their skill sets. I'm kinda there as well...
Well not your skill set issue I'm happy to see as I follow along. You are doing great work - all of your detailings are spot ON......
And this ship in-and-of-itself is a beauty.......good choice. And big kudos to ZHL's designers for creating this product.
Cheers
When I occasionally think about my future Oseberg build your build instantly comes to mind and I think man I don't have the skills to even come close to John's ability to create a stunning weathered, antiqued look that you have mastered. So therein lies the challenge we modelers love.
Haha ---- Mutual Admiration societyJohn, I sur thank you for your very kind post. To see others express approval of my work builds my confidence and creates enthusiasm which is a great motivater.
When I occasionally think about my future Oseberg build your build instantly comes to mind and I think man I don't have the skills to even come close to John's ability to create a stunning weathered, antiqued look that you have mastered. So therein lies the challenge we modelers love.
Cheers,
Not much progress this last week and a half. I had just begun planking when my former boss sent me a set of plans for twin three span bridges to do a complete elevation workup. Here is a rather uninteresting picture just to show I'm still very much in this and will resume in the near future.
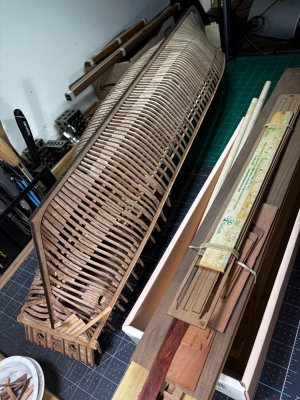
Thanks for watching.
Till next time.
Thanks for watching.
Till next time.
We will try to remain patient as you earn money for your next kit...
‘The hungrier you are, the better it tastes.’ You can’t wait to start sanding again, Daniel.Not much progress this last week and a half. I had just begun planking when my former boss sent me a set of plans for twin three span bridges to do a complete elevation workup. Here is a rather uninteresting picture just to show I'm still very much in this and will resume in the near future.
View attachment 637679
Thanks for watching.
Till next time.
Regards, Peter
If someone ever invents a oh, I don't know a 10 cm long x say 10 mm wide electric vibrating sander I'll be the first to buy it.You can’t wait to start sanding again, Daniel.

- Joined
- Sep 17, 2026
- Messages
- 4
- Points
- 3
Paper modeller here. Impressive build and skill so far. Congratulations @Daniel20 !!!
I could never do wooden models...
I am designing a paper xebec 1:250 scale.
I researched days over days for it on the web, especially regarding the lateen rigging.
BUT there remains one question I could not find an answer to:
Thanks to the low profile xebecs could be propelled by oars and that's why there are many wooden models containing oars stowed away on quarter deck or bundled up and hanging from the side of the hull.
But there are no benches between the cannons. Did they pulled the oars while standing? Is that even feasible?
I read through many xebec build threads here on SOS. All astonishing builds with expertise and good research. But there I couldn't find an answer to my question, too. The oars subject was never mentioned or I failed to notice.
What do you guys think?
I could never do wooden models...
I am designing a paper xebec 1:250 scale.
I researched days over days for it on the web, especially regarding the lateen rigging.
BUT there remains one question I could not find an answer to:
Thanks to the low profile xebecs could be propelled by oars and that's why there are many wooden models containing oars stowed away on quarter deck or bundled up and hanging from the side of the hull.
But there are no benches between the cannons. Did they pulled the oars while standing? Is that even feasible?
I read through many xebec build threads here on SOS. All astonishing builds with expertise and good research. But there I couldn't find an answer to my question, too. The oars subject was never mentioned or I failed to notice.
What do you guys think?