• Ships of Scale has incorportated an extra level of security when you log In. Please follow on-screen prompts to acknowledge that you are not a robot via a "Check Box" or a "Pictorial Check Box Puzzle". This is needed due to higher level of AI Activity Security.
  • SUBSCRIBE TO SHIPS IN SCALE TODAY!

    The beloved Ships in Scale Magazine is back and charting a new course for 2026!
    Discover new skills, new techniques, and new inspirations in every issue.

    NOTE THAT OUR NEXT ISSUE WILL BE July/August 2026
  • Win a Free Custom Engraved Brass Coin!!!
    As a way to introduce our brass coins to the community, we will raffle off a free coin during the month of August. Follow link ABOVE for instructions for entering.

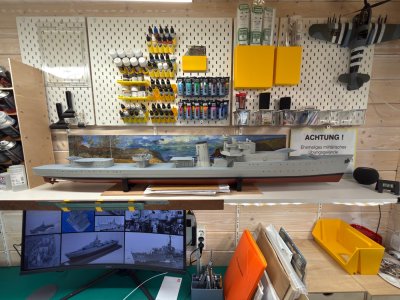
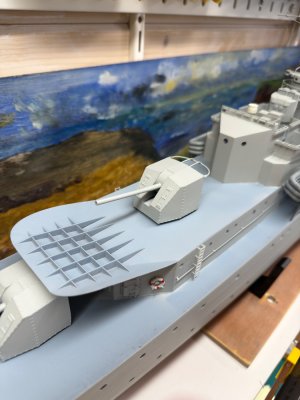
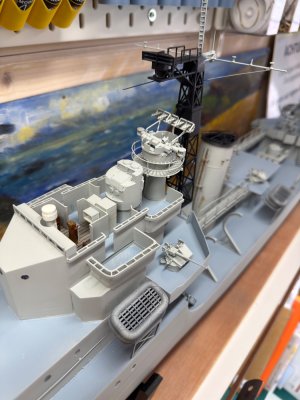
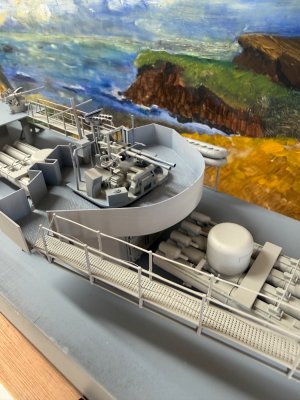
D805 Piet Hein, ex HMS Serapis, WW2 S class destroyer

A tip: if you are going to build Piet Hein (D805), be aware that there are plans with a flight deck. The sits over the torpedo decks. But this was only implemented as a test and never was successful. In fact only one helicopter landed on it, and to my knowledge not even a Navy one at that.

One of the main struggles I encountered, were the hull dimensions. Not one drawing, not one model, not even one single other ship had the exact same length. If it helps, this is what I derived from all the information I could find. The measurement is 1/72 scale, which in real life translates to this ship being 109 meters at that deck level. Close enough.

Have fun! I have a 'enough of this ship for a while moment', but surely will pick up the chores at some stage. Feel free to ask or discuss. Let me know when you start posting about your own ship and I'll be looking over your shoulder.
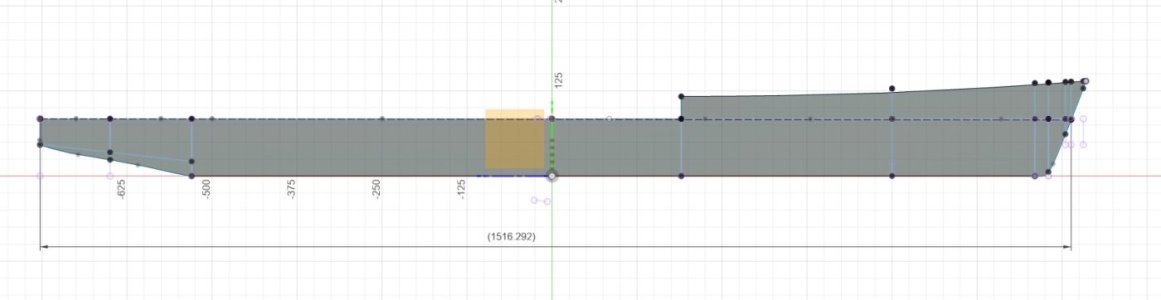
Screenshot 2026-04-27 at 17.50.44.JPG
 
Sometimes you need to take a step back and find new inspiration. This took so long that I had forgotten what paint numbers I was using on D805. But I tested best candidates and am on my way again. Thanks to all who kept me in mind. And a special thanks to JJ.

One of the things that kept me from building was the idea I still had so much to design and print. Cleaning up my work shed resulted in finding a box full of parts for the ship. Completely forgotten.

So I’m off again, now with enough energy to complete D805. It will not be a museum piece, but good enough.

Expect regular reports.

IMG_7499.jpeg

IMG_7498.jpeg
 
Progress. I really don’t understand why I thought it was an uphill struggle. Oh well. I’m back on it.

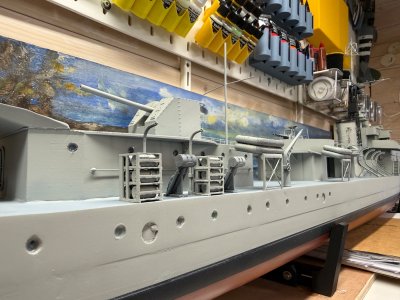
I repaired some of the paint, as even sitting on a shelf D805 looked a little worn. And I created a todo list, as I’m now drifting into detail work. Better tick box that, especially as some things can better be done first. Try fitting in and painting that small part sitting behind a latticework surface.

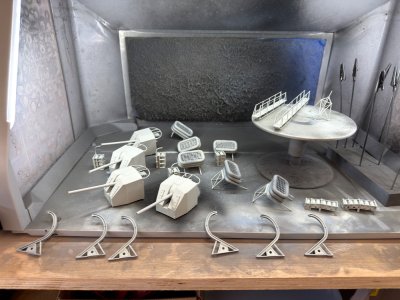
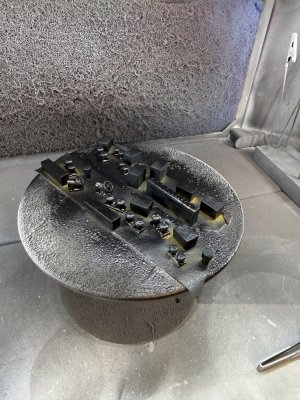
The 3D printer is running again and new parts can be fitted in and on the ship. Good oh. Lots to do, but having fun.

IMG_7500.jpeg
 
I was on a short trip (Drenthe, perfect B&B), but have picked up where I’d left. Small stuff, lots of work.

That background is actually painting my mother made for me to use as a backdrop playing with my Dinky Toys. Survived some 60 years.

Still weeks to go before I can start detail weathering and painting. Good fun.

IMG_7565.jpeg

IMG_7563.jpeg

IMG_7562.jpeg

IMG_7564.jpeg
 
Well impressed Marco, and boy you are going flat out with the detail bits, they look very professional,very nice indeed. I'll know where to turn to for top class parts. Looking at the gantry in front of the funnel are the safty cables printed, or added after? Cant wait until you get to the painting.

Have fun, best wishes JJ..
 
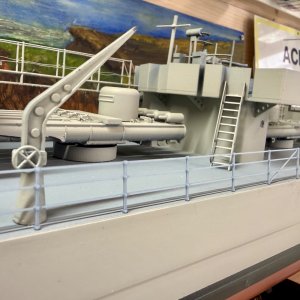
JJ, I had to cheat a little, as the safety cables were just too thin to print. So glued in some brass rod. Thinnest I could find.

That’s one of the things you constantly need to think about: scale reality vs printable reality.
 
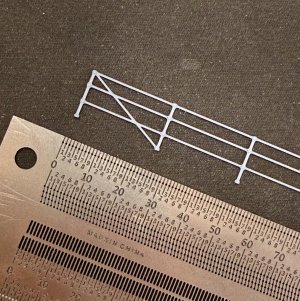
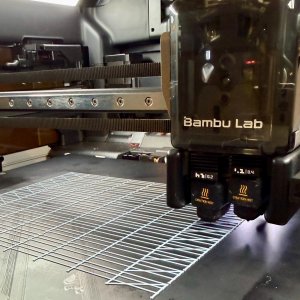
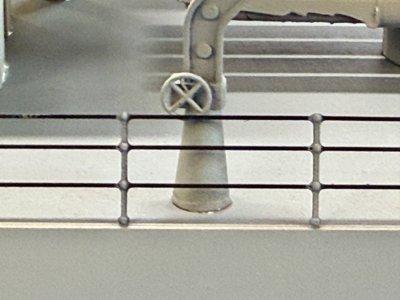
One of the more difficult parts to print: railings. Of course I could have bought a bucket of brass stanchions, but apart from the cost, I really wanted to try to 3D print.

Design was easy. You create one stanchion and three horizontals and then a pattern on a path.

I first tried 3D printing in resin, but the supports were a nightmare. Then tried filament, but that was rough. Until I remembered I also have a 0.2 mm nozzle. Then at 0.08mm layer height (slooooow going) and … perfect.

Two print beds full and I can glue in about 4 meters of railings.

IMG_7569.jpeg

IMG_7570.jpeg
 
One of the more difficult parts to print: railings. Of course I could have bought a bucket of brass stanchions, but apart from the cost, I really wanted to try to 3D print.

Design was easy. You create one stanchion and three horizontals and then a pattern on a path.

I first tried 3D printing in resin, but the supports were a nightmare. Then tried filament, but that was rough. Until I remembered I also have a 0.2 mm nozzle. Then at 0.08mm layer height (slooooow going) and … perfect.

Two print beds full and I can glue in about 4 meters of railings.

View attachment 635914

View attachment 635915
That’s a nice bunch of clean railing, Marco.
And it saves you at least 12 meters of brass …. ;)
Regards, Peter
 
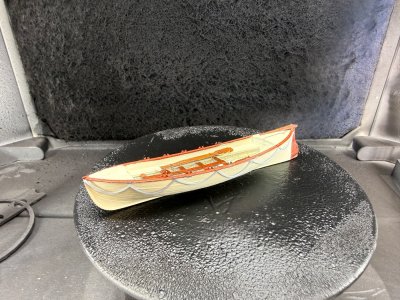
Whaler type life boat. About 100mm length, so some room for details. I will need to touch up some of the paint work, but it starts to look the thing. The real
life colours ranged from varnished wood to slapped on grey. Whatever they had. These emergency class destroyers were really a collection of weapons, boats, floats and whatever was available. Some even had mismatched main guns!

I am not an exact true detail person anyway.

The whaler is only partly my own design. Creating a good hull in Fusion is tough. But the details are mine, including the grab lines. These are 3D printed in 0.5mm

IMG_7577.jpeg
 
Back
Top