• Ships of Scale has incorportated an extra level of security when you log In. Please follow on-screen prompts to acknowledge that you are not a robot via a "Check Box" or a "Pictorial Check Box Puzzle". This is needed due to higher level of AI Activity Security.
  • SUBSCRIBE TO SHIPS IN SCALE TODAY!

    The beloved Ships in Scale Magazine is back and charting a new course for 2026!
    Discover new skills, new techniques, and new inspirations in every issue.

    NOTE THAT OUR NEXT ISSUE WILL BE July/August 2026
  • Win a Free Custom Engraved Brass Coin!!!
    As a way to introduce our brass coins to the community, we will raffle off a free coin during the month of August. Follow link ABOVE for instructions for entering.

Muscongus Bay Lobster Smack - Kitbashed from Model Shipways

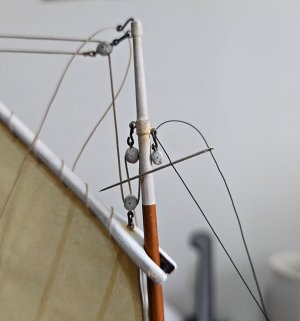
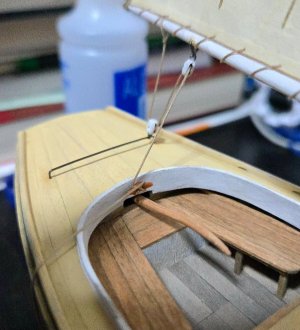
Getting the furled jib in place turned out to be pretty straightforward. First, I strung the forestay through the masthead eyebolt. I used a thin needle to do a false splice for this (photo below before pulling the needle through). It isn't trimmed or glued yet, so I can adjust the tension still.
20260912_154609(1).jpg

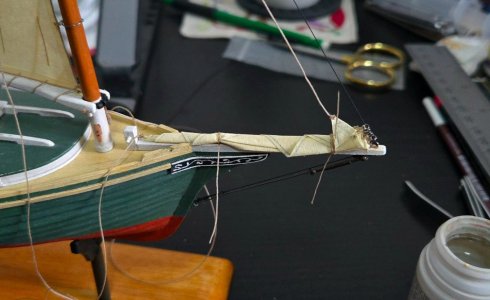
The jib was pretty easy to adjust after brushing some water on it. I tied it closed at two points. These lines will be adjusted and trimmed later once it's fully set.
20260912_160259(1).jpg

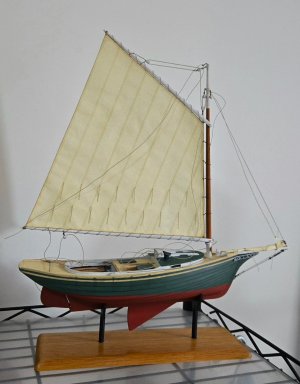
At this point, all the rigging is on and properly threaded, it's just not tightened, tied, shaped, or otherwise adjusted yet, so it's all a bit of a rat's nest.
20260912_161217(1)(1).jpg

Closing in on the finish line!
 
Thanks, @GrantTyler !

I'm closing in on the finish line, getting the rigging and final fittings squared away.

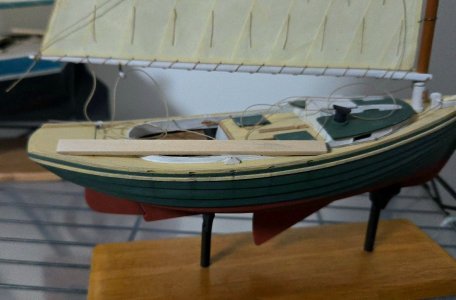
First up, this piece of scrap is just slightly longer than the oars would be. I tried placing it in various configurations and couldn't find a comfortable way to stow it, it always was protruding awkwardly somewhere. So, I think I will take a bit of artistic license and not include the oars.
20260912_213250(1).jpg

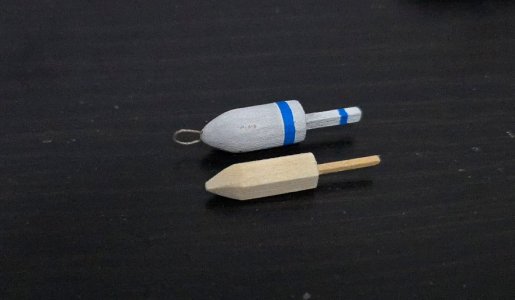
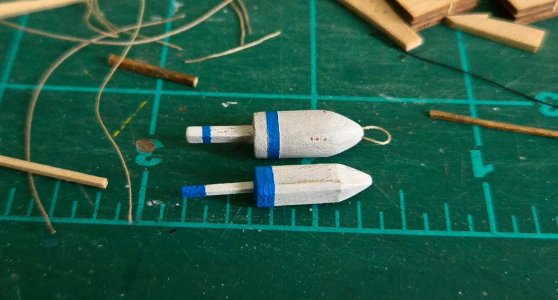
Following the discussion earlier, I decided to make a more squared-off buoy. I think it turned out well.
20260912_212816(1).jpg
20260913_112537(1).jpg

Next, rigging. I always find finalizing the lay and lashing of the lines tricky. I started with the jib halyard, starting off with a cleat hitch. In general, I've found these cleat locations awkward to work with, as the boom jaws interfere with them a bit, but I'm not going to change them now.
20260914_225533(1).jpg

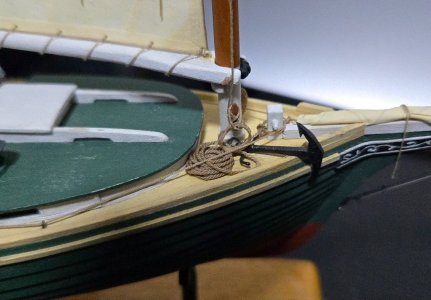
And then coiling and hanging the rest of the line. The coil is held together with shellac. I think it needs a bit more shaping to hang better, but I'll hold off on that until the anchor is in place.
20260915_085732(1).jpg

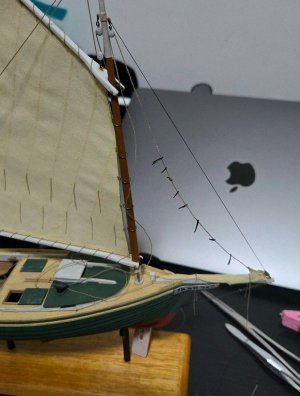
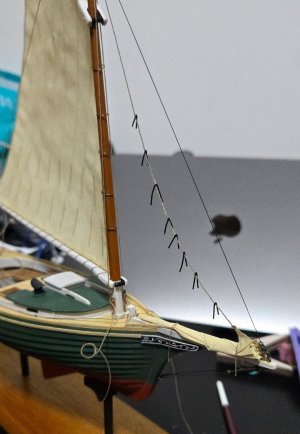
With the jib furled, there really isn't much pressure on its halyard, so I wanted to try for a catenary curve. The results are ok, not great. I first tried just running watered down glue over the line and shaping it by hand, but that didn't work. I have read that you can use small weights, but I don't have any clamps or the like in the appropriate size. So, I tried clamping bits of wire to the line.
20260914_222014(1).jpg

This kinda worked, but the clamping often put unwanted sideways pressures or twists in the line (plus it was hard to remove the wire lengths). You can see how a lot of wires are pointing off sideways or at weird angles. So, I tried again, this time opening the wires into a v-shape and securing them with a drop of varnish.
20260914_232746(1).jpg

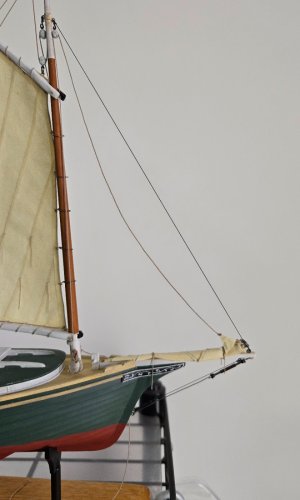
This worked a lot better. But the results aren't perfect. From the side, the line looks all right, but from ahead, it waves side to side a bit (a lot less than before, but still). I'll have to decide whether I want to keep this, or if I'll just trim out this line and replace it with one running straight, parallel to the forestay (gluing it in place at the block).
20260915_085742(1).jpg

In the photo above, you can see that I also trimmed the tie-downs for the jib.

There was a lot of discussion of making billowing sails. What I ended up doing was tightening the topping lift a bit so the sail curved, and using a tiny bit of water to shape the areas that weren't properly curved. This worked all right, although the sail is a bit wrinkly in parts. Let's just say that there are light winds and the sail is just about to luff.
20260915_085817(1).jpg

Still most of the lines to tie off, and I need to figure out the halyard catenary curve, but making progress!
20260915_085756(1).jpg
 
I got the anchor and anchor line squared away. The whole area's a bit of a mess with the halyard coil (which in hindsight could have been tighter) dangling onto everything and the jib sheet passing just over, but in theory nothing would snag if you pushed the anchor overboard or tugged on the sheet, so it'll do. It's a pretty cramped little fore deck up there.
20260920_220610(1).jpg

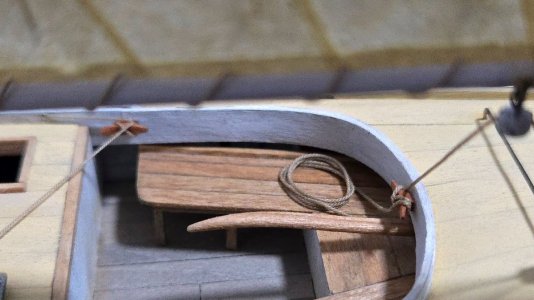
Lots of lines to handle in the cockpit. I started with the mainsheet, snugging it taught, tying a cleat hitch and securing with shellac.
20260917_224629(1).jpg

In the past, I've simply coiled the ends of each line, but I couldn't really do that here due to the limited space in the cockpit. So, I cut off the line, secured it to a point on the seat, and made a separate rope coil to shellac into place. This worked quite well.
20260920_220554(1).jpg

Belaying the jib sheets and adding coils was a little more challenging because the boom/sail really got in the way. Below, the port sheet is already done, while the starboard is being held under light tension while shellac secures it to the cleat prior to the final loop of the cleat hitch.
20260920_220521(1).jpg

And after belaying and coiling all the sheets:
20260920_225956(1).jpg

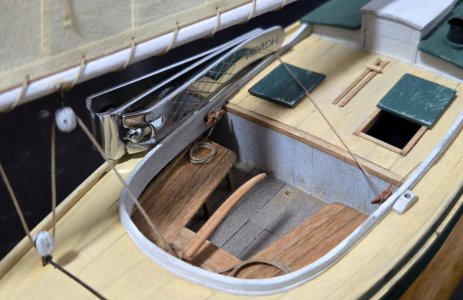
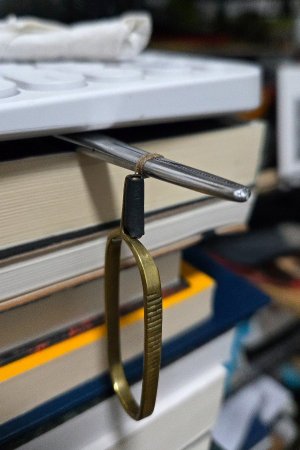
A lot of coils were made around pliers or hemostats, below, with a clamping tweezer holding the loose end while the shellac dried. The tapered jaws made it easy to remove. Below, the lobster pot buoy line.
20260920_224637(1).jpg

Finally, something I forgot to add earlier. I used painted card to add the leather strap "hinges" to the pot door.
20260920_234400(1).jpg

Nearly done!
 
Last edited:
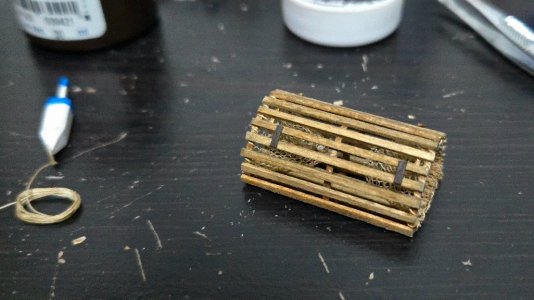
It was a fairly straightforward matter to add the lobster pot, with the buoy on top of the coiled line.
20260921_094953(1).jpg
I'm still fiddling with where to put the gaff hook, though. Just outside the coaming, as above, seems like it might get swept away easily (although I suppose the toe rail would protect it). Resting at an angle with the hook out seems like it's going to snag something.
20260921_095220(1).jpg
On the bench, below, really blends in too much.
20260921_095119(1).jpg
And on the decking next to the centerboard pull is a bit busy.
20260921_095138(1).jpg
It's not glued down yet, so I'm probably going to fiddle with it some more. Currently leaning to outside the coaming, or next to the centerboard pull.
 
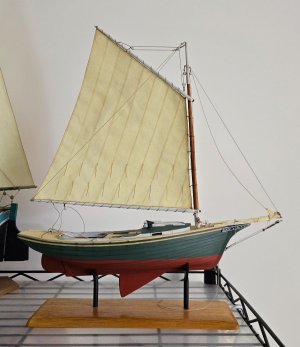
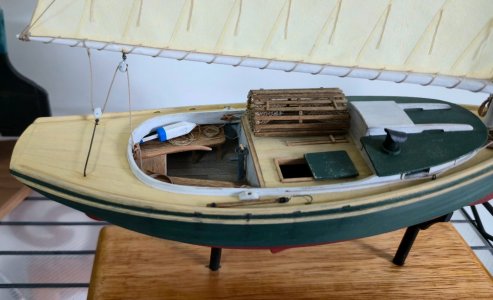
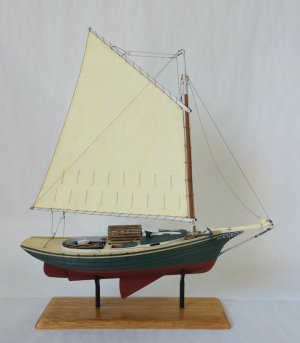
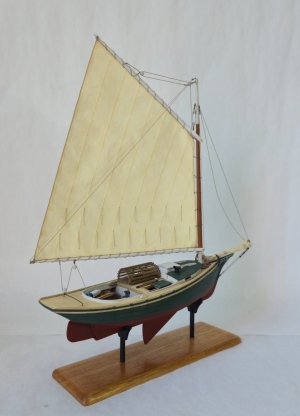
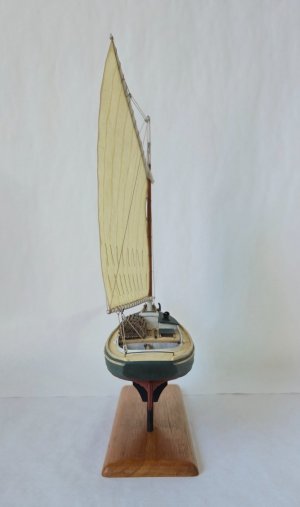
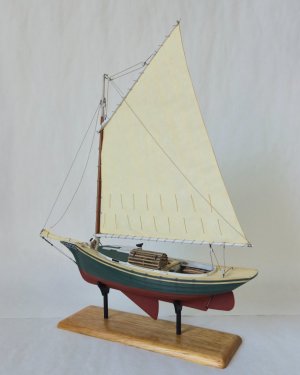
I started this model back in August 2025 thinking it would be a quick build, maybe done by Christmas. That proved very optimistic. But, after 13 months, the build is finally complete!

Although it took quite a while, this was a very fun build. The kit is designed as a beginner model, the third in a progressive series, and I have to say that I found it to be a very nicely-designed kit. That said, I made quite a few changes to the kit. It ended up being a good learning experience, but not necessarily in the ways that the kit was intended for.

The main changes I made from the kit were as follows:
1) Rescaling from 1:24 to 1:32 by scanning parts and laser-cutting new pieces.
2) Building out the cockpit with more accurate frames (which ended up nearly invisible), benches, and a pump.
3) Lapstrake planking instead of carvel, following especially Chapelle's description of these vessels, and planking the deck.
4) Opening a fish hatch.
5) Adding of a smokestack.
6) No backstays on the mast.
7) No reef bands on the mainsail.
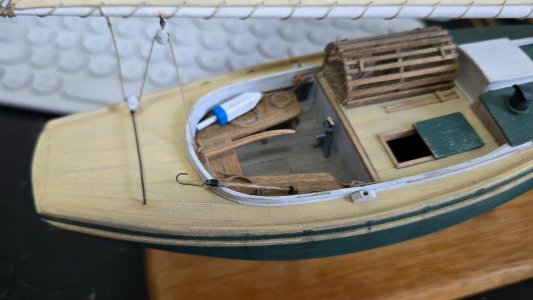
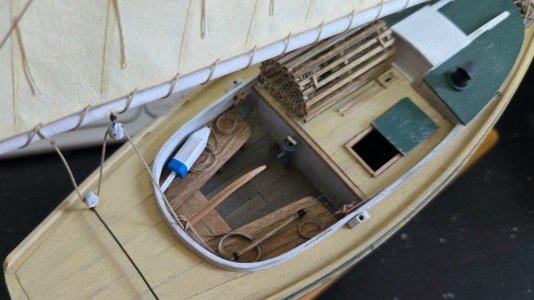
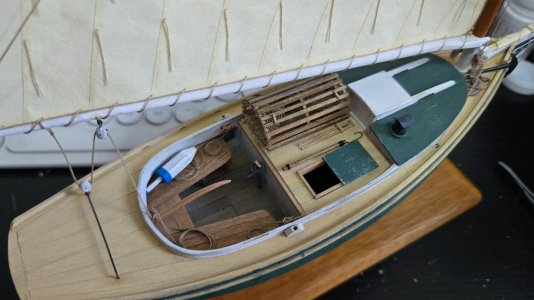
8) Adding several implements (lobster pot and buoy, gaff hook, anchor) typical of a working boat, and displaying with furled jib as though the vessel is working between traps.
As well as several smaller changes to rigging details and other aspects of the model.

These changes were generally intended to make a more accurate model, and one that gave a good impression of a working boat. That said, this is a somewhat artistic impression. Some details, like the oars and oarlocks, were left off as I couldn't figure out an elegant way to include them. However, I felt that a fully accurate working boat would be so cluttered that it would detract a bit from the model as a whole; I wanted to strike a good balance. I used a number of sources in this build, including works by Howard I Chapelle (especially American Small Sailing Craft, The National Watercraft Collection, and American Sailing Craft), Willits D Ansel's "The Boat as Record" (reconstructing the Muscongus Bay Sloop Ranger), fisheries reports from around the late 19th century, and books by Roger F Duncan and Lincoln Paine on Maine's maritime history, among other written sources. The Penobscot Marine Museum's digitized photo collections were invaluable, as well. Early on, I also learned a lot from build logs for this model on MSW, especially heavily kitbashed builds by DeeDee and TrevorK, although these were unfortunately lost with the big crash in May 2026.

Overall, this has been a very satisfying build. I learned a lot of new techniques, like lapstrake planking, making a catenary curve, and making more realistic sails. I feel like this is a step forward in work quality from my previous builds. I've also learned a lot about how a boat like this would be worked and built. This is particularly important to me, because one of the main reasons I am interested in modeling is to use model-making as a tool to better understand materially how people lived through the major socio-economic transformations of the past. The Muscongus Bay Sloop is an interesting vessel in this respect. Several times in the build, I noted that it was hard to pin down the vessel type, especially in comparison to the more well-known later Friendship Sloop that developed from it. It could be lapstrake or carvel planked, with a clipper or plumb bow, with or without a cuddy, with or without backstays, and in some cases possibly with a transom-mounted rudder instead of an overhanging stern. I don't think it makes sense to think of these differences as evolutionary "steps" leading inexorably to the Friendship Sloop, but they reflect how boatbuilders around Muscongus Bay began modifying open boats into larger sloops following market pressures for winter and further offshore fishing, producing a huge variety of local designs and transforming the conditions and practices of fishing work in the process.

Thank you to everyone who commented and liked my posts on this build! I've learned a lot from this community and really appreciate the helpful suggestions, comments, and encouragement I've received.

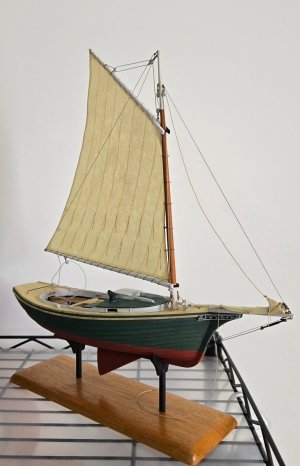
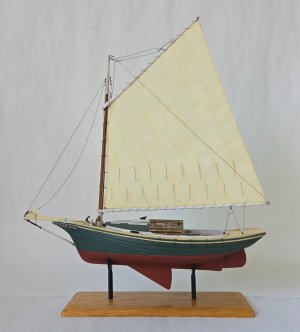
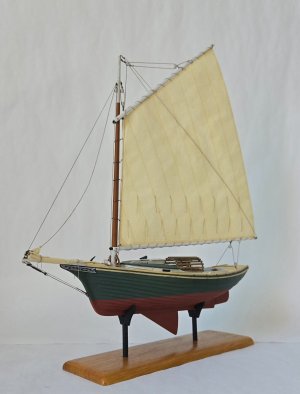
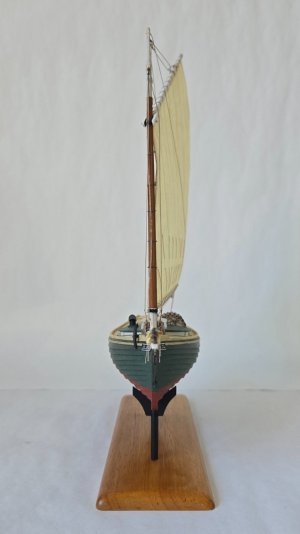
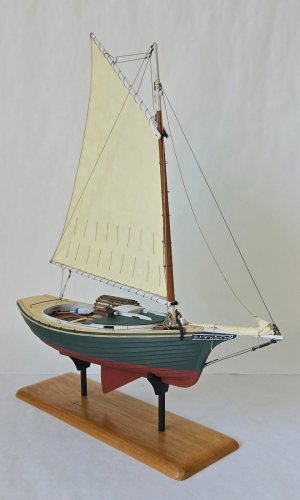
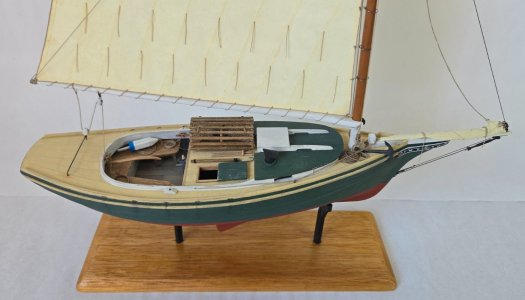
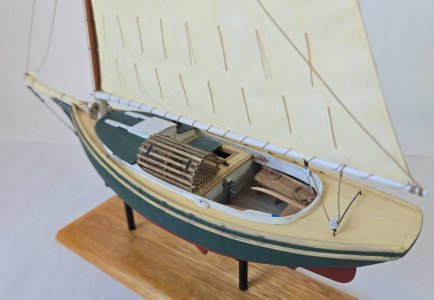
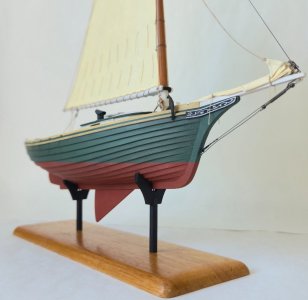
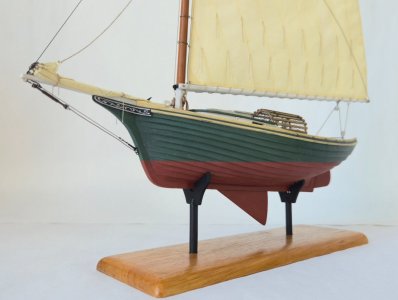
Here are some pictures rotating around the completed build.
20260922_104337(1).jpg
20260922_104354(1).jpg
20260922_104425(1).jpg
20260922_104440(1).jpg
20260922_104507(1).jpg
20260922_104548(1).jpg
20260922_104308(1).jpg
20260922_104318(1).jpg

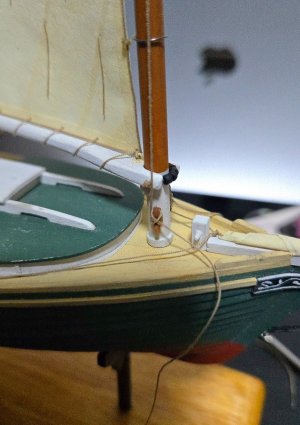
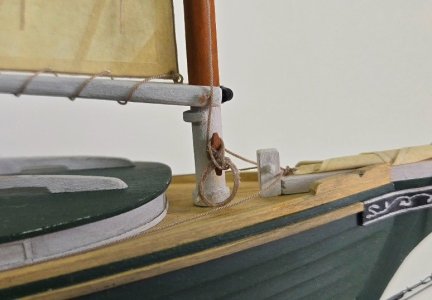
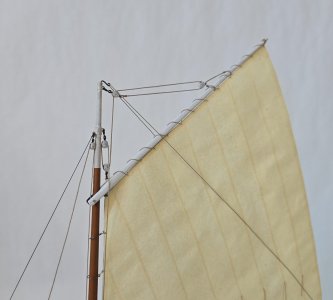
And some detail shots. The masthead/rigging:
20260922_104908(1).jpg

Cockpit and deck:
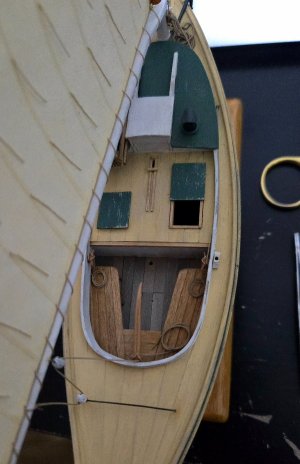
20260922_104655(1).jpg
20260922_104920(1).jpg

Hull planking:
20260922_104821(1).jpg
20260922_104858(1).jpg

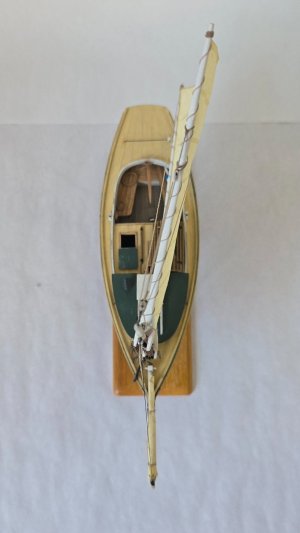
And from above:
20260922_104259(1).jpg

So, what next? Well, I'd like to be able to focus for a bit on the Bateau de Lanvéoc, which has also been delayed quite a bit, and to finish up the also-much-delayed NRG Capstan. But my next scratch-build will be another Latin American workboat, this time I think from Brazil. As much as I've been enjoying my current builds, I feel like Latin America offers so many interesting subjects.

 
I started this model back in August 2025 thinking it would be a quick build, maybe done by Christmas. That proved very optimistic. But, after 13 months, the build is finally complete!

Although it took quite a while, this was a very fun build. The kit is designed as a beginner model, the third in a progressive series, and I have to say that I found it to be a very nicely-designed kit. That said, I made quite a few changes to the kit. It ended up being a good learning experience, but not necessarily in the ways that the kit was intended for.

The main changes I made from the kit were as follows:
1) Rescaling from 1:24 to 1:32 by scanning parts and laser-cutting new pieces.
2) Building out the cockpit with more accurate frames (which ended up nearly invisible), benches, and a pump.
3) Lapstrake planking instead of carvel, following especially Chapelle's description of these vessels, and planking the deck.
4) Opening a fish hatch.
5) Adding of a smokestack.
6) No backstays on the mast.
7) No reef bands on the mainsail.
8) Adding several implements (lobster pot and buoy, gaff hook, anchor) typical of a working boat, and displaying with furled jib as though the vessel is working between traps.
As well as several smaller changes to rigging details and other aspects of the model.

These changes were generally intended to make a more accurate model, and one that gave a good impression of a working boat. That said, this is a somewhat artistic impression. Some details, like the oars and oarlocks, were left off as I couldn't figure out an elegant way to include them. However, I felt that a fully accurate working boat would be so cluttered that it would detract a bit from the model as a whole; I wanted to strike a good balance. I used a number of sources in this build, including works by Howard I Chapelle (especially American Small Sailing Craft, The National Watercraft Collection, and American Sailing Craft), Willits D Ansel's "The Boat as Record" (reconstructing the Muscongus Bay Sloop Ranger), fisheries reports from around the late 19th century, and books by Roger F Duncan and Lincoln Paine on Maine's maritime history, among other written sources. The Penobscot Marine Museum's digitized photo collections were invaluable, as well. Early on, I also learned a lot from build logs for this model on MSW, especially heavily kitbashed builds by DeeDee and TrevorK, although these were unfortunately lost with the big crash in May 2026.

Overall, this has been a very satisfying build. I learned a lot of new techniques, like lapstrake planking, making a catenary curve, and making more realistic sails. I feel like this is a step forward in work quality from my previous builds. I've also learned a lot about how a boat like this would be worked and built. This is particularly important to me, because one of the main reasons I am interested in modeling is to use model-making as a tool to better understand materially how people lived through the major socio-economic transformations of the past. The Muscongus Bay Sloop is an interesting vessel in this respect. Several times in the build, I noted that it was hard to pin down the vessel type, especially in comparison to the more well-known later Friendship Sloop that developed from it. It could be lapstrake or carvel planked, with a clipper or plumb bow, with or without a cuddy, with or without backstays, and in some cases possibly with a transom-mounted rudder instead of an overhanging stern. I don't think it makes sense to think of these differences as evolutionary "steps" leading inexorably to the Friendship Sloop, but they reflect how boatbuilders around Muscongus Bay began modifying open boats into larger sloops following market pressures for winter and further offshore fishing, producing a huge variety of local designs and transforming the conditions and practices of fishing work in the process.

Thank you to everyone who commented and liked my posts on this build! I've learned a lot from this community and really appreciate the helpful suggestions, comments, and encouragement I've received.

Here are some pictures rotating around the completed build.
View attachment 638418
View attachment 638419
View attachment 638420
View attachment 638421
View attachment 638422
View attachment 638423
View attachment 638424
View attachment 638425

And some detail shots. The masthead/rigging:
View attachment 638426

Cockpit and deck:
View attachment 638427
View attachment 638428

Hull planking:
View attachment 638429
View attachment 638430

And from above:
View attachment 638431

So, what next? Well, I'd like to be able to focus for a bit on the Bateau de Lanvéoc, which has also been delayed quite a bit, and to finish up the also-much-delayed NRG Capstan. But my next scratch-build will be another Latin American workboat, this time I think from Brazil. As much as I've been enjoying my current builds, I feel like Latin America offers so many interesting subjects.

Congratulations JC on a beautiful job! Always impressed by your depth of research and design choices. You are an inspiration to relatively new model builders like myself. I know it's probably covered in your build log, but what made you choose to furl the jib / staysail while flying the gaff rig?
 
Thanks, all! @Ignatius27 , I remember reading somewhere (maybe Chapelle?) that it was pretty common to work between pots under mainsail alone, possibly reefed. That way the minimal crew could focus mostly on tending to the pots while the boat still maintained its way. I considered reefing the mainsail, but decided that reefing one sail would be enough of an adventure. Plus I wasn't planning on putting that much of a billow in the sail, so I figured that they may not bother reefing it conditions were fairly calm.
 
Thanks, all! @Ignatius27 , I remember reading somewhere (maybe Chapelle?) that it was pretty common to work between pots under mainsail alone, possibly reefed. That way the minimal crew could focus mostly on tending to the pots while the boat still maintained its way. I considered reefing the mainsail, but decided that reefing one sail would be enough of an adventure. Plus I wasn't planning on putting that much of a billow in the sail, so I figured that they may not bother reefing it conditions were fairly calm.
Wow. You're thinking like the crew, not just the builder. Cool.
 
Back
Top