
-

SUBSCRIBE TO SHIPS IN SCALE TODAY!
The beloved Ships in Scale Magazine is back and charting a new course for 2026!
Discover new skills, new techniques, and new inspirations in every issue.
NOTE THAT OUR NEXT ISSUE WILL BE July/August 2026 -

Win a Free Custom Engraved Brass Coin!!!
As a way to introduce our brass coins to the community, we will raffle off a free coin during the month of August. Follow link ABOVE for instructions for entering.


You are using an out of date browser. It may not display this or other websites correctly.
You should upgrade or use an alternative browser.
You should upgrade or use an alternative browser.
La Belle - CAF Models 1/36 by Signet


- Joined
- Oct 1, 2023
- Messages
- 2,300
- Points
- 488

I bought a set of molding bladesContinuing on with making and installing the frames, there's something you need to watch out for, if you're using the pearwood 3-piece frames. The method I used to assemble the frames, as shown above, was to place the upper side portions of the frames in place, then add the bottom portion on top and aligned with these. I've been placing the "top" of all frame sheet pieces up, so that the bottom portion, which has a vertical centerline in it, can be used to center the frame in the jig, as shown below:
View attachment 638355
You will notice above that the pieces also have the lines used to bevel the edges to conform to the hull shape. The problem is, if you place the sides into the opening, then add the center/bottom piece, and glue up the assembly, when placed into the jig, the bevels will be on the wrong side (in this case, the back side), when they must be beveled on the fore side. The solution (or at least one of them) is to place the side pieces back-side-up, then the bottom atop them. Then, when placed properly into the jig (frames 1-6 have the outer side parts facing forwards, 7-15 aft:
View attachment 638356
I chose to keep the center piece facing upwards because I used the centerline to help center the frame. It won't really be visible, and the bevel lines on the center frame don't really apply, because that portion is no longer at the frame location.
This is where I am so far. Only 1 frame broken so far (#1), and that's because it stuck in the template sheet, and I was too anxious to properly un-stick it.
View attachment 638358
The last ribs go in place:
View attachment 638494
And, without the jig we have:
View attachment 638495
Now I have to making the surrounding 1.5 x 2.5mm strip into a moulding, using one of those razor-blade-type thingies I have left over from another build. One is not supplied with this kit; I guess they figure you'll use the one for the main boat. I haven't had much luck making these, in fact I've never been able to make one acceptable enough to use on a kit. Here's hoping for a first time.
- Joined
- Oct 1, 2023
- Messages
- 2,300
- Points
- 488
That should make life easier


Molding blades? To create moldings? Can you post what you got, because the ones included with models seem almost worthless.I bought a set of molding blades
- Joined
- Oct 1, 2023
- Messages
- 2,300
- Points
- 488
ArtesIana Latina Micro Moulding Blades
About $13.00
About $13.00
Thanks. Have you tried them out yet? I received ones with 3 different kits, 1 from Croatia, 2 from China, and they all looked nice, being photo-etched stainless, but they weren't hard, deformed easily and didn't cut well. Mine made from a thick razor blade cut really well. The AL ones look great, lots of neat profiles, but will they cut?ArtesIana Latina Micro Moulding Blades
About $13.00
- Joined
- Oct 1, 2023
- Messages
- 2,300
- Points
- 488
The ones I received from Artesiana Latina worked great and did not dull using Lime and Bass woods. I didnt.try them on any hardwoods yet but intend to use them on Pear on my next model.Thanks. Have you tried them out yet? I received ones with 3 different kits, 1 from Croatia, 2 from China, and they all looked nice, being photo-etched stainless, but they weren't hard, deformed easily and didn't cut well. Mine made from a thick razor blade cut really well. The AL ones look great, lots of neat profiles, but will they cut?

- Joined
- May 3, 2026
- Messages
- 169
- Points
- 78

Your log inspired me to take a look at the CAF catalog.Molding blades? To create moldings? Can you post what you got, because the ones included with models seem almost worthless.
I noticed they they have a molding scraper.
I'm ordering a longboat kit and getting the scraper also. I have the AL scrapers and do not really care for them. The smaller profiles are really limited IMO.
To be honest, that's the one I tried for an hour or so, and didn't work well. My cut razor blade did more in 10 minutes.Your log inspired me to take a look at the CAF catalog.
I noticed they they have a molding scraper.
I'm ordering a longboat kit and getting the scraper also. I have the AL scrapers and do not really care for them. The smaller profiles are really limited IMO.
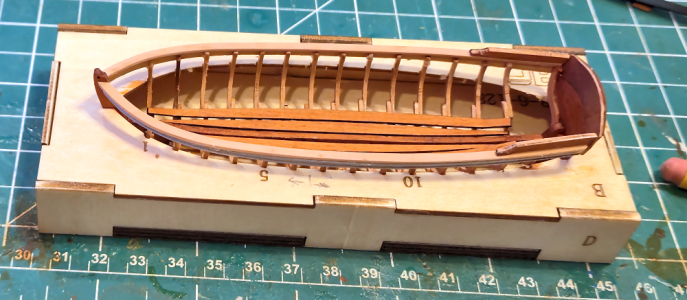
Continuing on with the ship's boat, I've changed my color scheme, so have gone ahead and added the gunwale and stern trim:
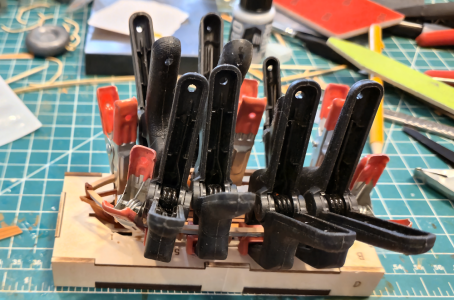
The seats, called thwarts, are supported by clamps, as the cross-beams of a ship are supported by clamps. These are glued at specific locations on the inside, and what holds the clamps in place while drying? Clamps, of course:
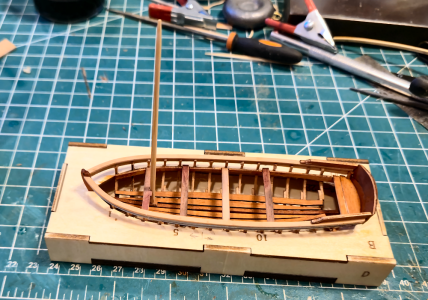
The clamps are now in place, and the thwarts have been added. The mast (not included in the kit) is located so as to place the mast step:
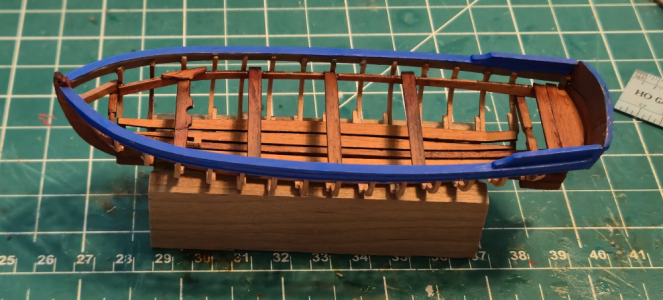
This is not the final color, but it's what I had on hand, so went ahead and painted the gunwale and molding. I've also added the rollers or whatever the heck they're called at each end, as discussed above and on the What Is This thread:
Here I've shown the "rollers" a bit better and identified them with red arrows:
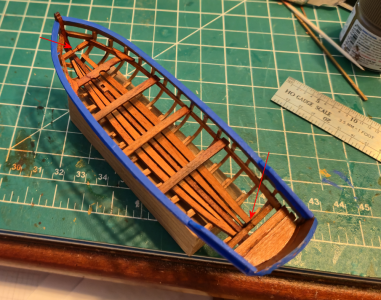
To be continued.....
The seats, called thwarts, are supported by clamps, as the cross-beams of a ship are supported by clamps. These are glued at specific locations on the inside, and what holds the clamps in place while drying? Clamps, of course:
The clamps are now in place, and the thwarts have been added. The mast (not included in the kit) is located so as to place the mast step:
This is not the final color, but it's what I had on hand, so went ahead and painted the gunwale and molding. I've also added the rollers or whatever the heck they're called at each end, as discussed above and on the What Is This thread:
Here I've shown the "rollers" a bit better and identified them with red arrows:
To be continued.....
Last edited: