• Ships of Scale has incorportated an extra level of security when you log In. Please follow on-screen prompts to acknowledge that you are not a robot via a "Check Box" or a "Pictorial Check Box Puzzle". This is needed due to higher level of AI Activity Security.
  • SUBSCRIBE TO SHIPS IN SCALE TODAY!

    The beloved Ships in Scale Magazine is back and charting a new course for 2026!
    Discover new skills, new techniques, and new inspirations in every issue.

    NOTE THAT OUR NEXT ISSUE WILL BE July/August 2026
  • Win a Free Custom Engraved Brass Coin!!!
    As a way to introduce our brass coins to the community, we will raffle off a free coin during the month of August. Follow link ABOVE for instructions for entering.

Bending

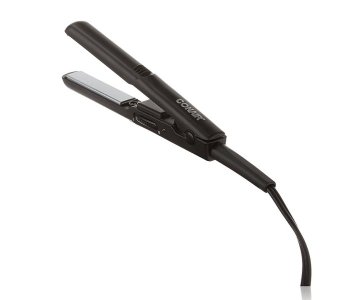
A few years ago I “borrowed” my wife’s hair straightening iron and it works perfectly! It’s the small travel size, dual voltage, heats up in seconds and has no exposed edges to burn yourself nor your workbench. It’s worked so well on easily curving wood that I’d soaked in water for 30 seconds, that I’ve kept her iron. They cost about CAD$25 and honestly wouldn’t try planking without one.

IMG_5660.jpeg
 
Thanks Guys! Great info. I’m just done with the initial planking on the Model Shipways Pilar and after soaking the basswood planking strips bend like crazy, much easier than when dry. I’m only worried about the wood being swollen from the soaking (I measured roughly a 10-20% increase in the plank widths compared to dry strips). It seems that after being thoroughly dry the basswood shrinks a little. Now that the hull is completely dry I notice that the seams are wider and I will have to use more wood filler than I thought. My efforts to get a nice tightly-planked hull without wood filler have been dashed to pieces
 
I’m thinking maybe I should wet then heat the strips to bend and form them and let them dry before glueing them on to avoid shrinkage after soaking.
Btw guys, what are the best woods for:
1) planking
2) building deck structures
3) anything else you can think of :)
 
anything else you can think of
Yes, keep an eye on the soak time, wet the wood, avoid saturation. I soak the planks 10-15 minutes or so.

I don’t use an electric plank heater in my shop, burned myself and takes too long hence bending along the template. And the template allows bending more than one at a time.

Soaked wood expands in water (“raises the grain”) and flashes to steam with the electric bender, thus changing the dimensions.

If the deck isn’t on, apply wood filler from inside the hull out, to get little strips of filler to knock off on the outside. Or, it’s work, mask along the seams on the outside, avoid getting filler across the face of the outside planks. If the hull is to be stained wood filler along the face fills the pores so after staining the filled in pores look different.

I go with the kit materials for the deck and planking. And make yards out of popular. It takes stain and paint well.

-RBF
 
Thanks RBF! The instructions say to leave the planks soaking all through the planking process but I noticed they only need 10-20 minutes to soften enough and I don’t need heat. I hate the damn electric plank bender, fire hazard and last week I burned my thumb and index finger pretty bad when I instinctively grabbed the shaft when I knocked it off the bench like a jerk. And like you say I also noticed that applying the wood glue from inside the hull is cleaner. I’m definitely gonna try applying the filler that way. Thanks for the great info!
 
Btw I watched Chuck Passaro’s YouTube videos on planking. I’m gonna try his technique of just wetting the planks and edge bending them on a jig then applying heat with an iron. I also like the bending jigs that are a quarter round block of wood. I’m gonna try both. I recently finished the Model Shipways Mayflower and used the bent plank jig that’s included in the kit (designed by Mr Passaro) and it worked beautifully.
 
Thanks Guys! Great info. I’m just done with the initial planking on the Model Shipways Pilar and after soaking the basswood planking strips bend like crazy, much easier than when dry. I’m only worried about the wood being swollen from the soaking (I measured roughly a 10-20% increase in the plank widths compared to dry strips). It seems that after being thoroughly dry the basswood shrinks a little. Now that the hull is completely dry I notice that the seams are wider and I will have to use more wood filler than I thought. My efforts to get a nice tightly-planked hull without wood filler have been dashed to pieces
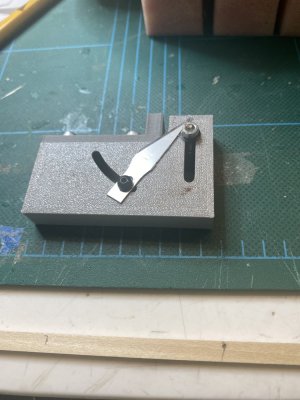
Two things, As you suggested, when I plank and need to bend wood I will clamp it into place and let it dry. I then secure them. This could help with "shrinkage" :rolleyes: :). The other thing is to bevel the side of the plank that is abutting the previous plank to make it fit tighter. I usually sand the edge a bit but you can also buy a device to help with that fairly cheaply.

IMG_2145.jpeg
 
Thanks Guys! Great info. I’m just done with the initial planking on the Model Shipways Pilar and after soaking the basswood planking strips bend like crazy, much easier than when dry. I’m only worried about the wood being swollen from the soaking (I measured roughly a 10-20% increase in the plank widths compared to dry strips). It seems that after being thoroughly dry the basswood shrinks a little. Now that the hull is completely dry I notice that the seams are wider and I will have to use more wood filler than I thought. My efforts to get a nice tightly-planked hull without wood filler have been dashed to pieces

I don't know where the idea came from that you affix wet, or damp, planks to a hull.

Treat it as a 2 stage process - a little like full size practice.
1 - bend and shape the plank to fit its own specific place on the hull. You may elect to cut out the plank from wider material to incorporate a curve, or you may want to dampen the timber to allow steaming it to plasticity and clamping it into place until it dries.
2 - When it is dry, and retaining the shape you need, then you can final fit it, so that it butts tight up and will be watertight. glue it and treenail it into place.

Continue for the rest of the hull. use a scraper or abrasives to bring it to a fine finish, and apply a couple of seal coats of something appropriate to the final finish. It's always shellac for me, but YMMV.

I realise that, especially for a first attempt at planking, it is very tempting to get the newly curved and sopping plank onto the ship. Don't do it. Either strap it there until it dries, or make up a curving jig you can use to hold the curve overnight or until dry.

Jim

 
Thanks guys. You are right on. I’m experimenting and will incorporate your advice. Btw, when I watched Passaro’s YouTube planking vids: he mentioned very briefly about beveling the plank edges. I almost blew it off because he kinda mentioned it in passing. Just like you said. That’s why my planks stick out at the edges and I have to sand my face off to get the hull smooth (and use a lot of wood filler). Live and learn (thanks to you guys). Dang I love this stuff. Thanks for taking your time to help me out
 
Back
Top