SAIL-ATTACHED BLOCK FABRICATION, BRACE RIGGING & LOWER COURSE DUAL-BLOCK RETROFIT
Session Start: September 28, 2026
Session End: October 2, 2026
Session Time: 9.0 Hours
Total Build Time: 406.0 Hours (397.0 Hours base from Session 19 + 9.0 Hours Session 20)
Hardware Allocation & Initial Clew Preparation
My work began by auditing, mass-producing, refining, and stropping the full allocation of single blocks attached directly to the sail corners across El Molino’s six sails.
Rather than installing raw kit boxwood blocks, all single blocks underwent a multi-step custom refining process:
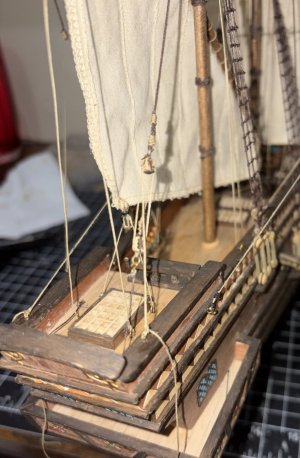
Canvas Installation: Threaded the long strop tails through the sail corner eyelets across the spritsail, topsails, and mizzen lateen-settee.
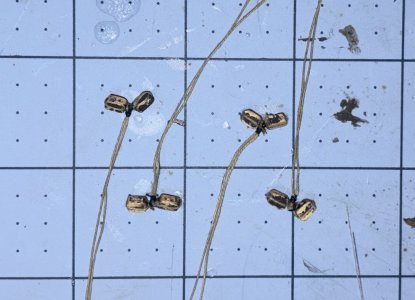
Pennant Legs: Configured the 4 topsail blocks (Fore & Main Topsails) to hang on 10–15 mm tan pennant legs off the canvas corners to prevent fabric chafing. <which I removed at a later point>
Seizing & Locking: Bound the strops tight against the grommets using minimal turns of ultra-thin black thread, locked with CA glue, and trimmed tails flush.
Remaining Brace Rigging
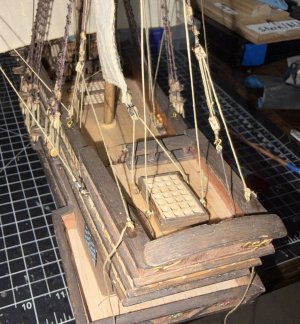
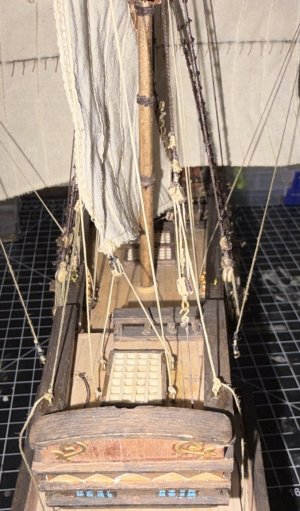
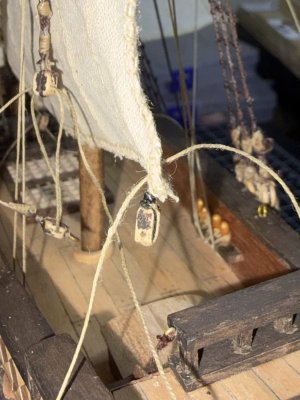
Final six Braces: Completed the remaining brace lines carried over from Session 19—specifically the four foremast braces (tied off to the main forestay) and the two spritsail braces (tied off to the stay).
Seizing Technique: Used double-seizes on each stay attachment using thin black thread over tan lines to match previous work, locked with CA glue.
Lower Course Dual-Block Upgrade
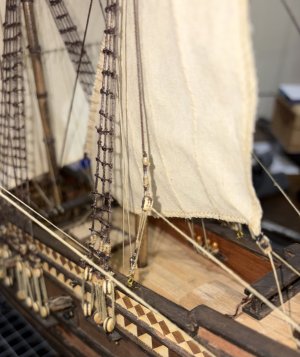
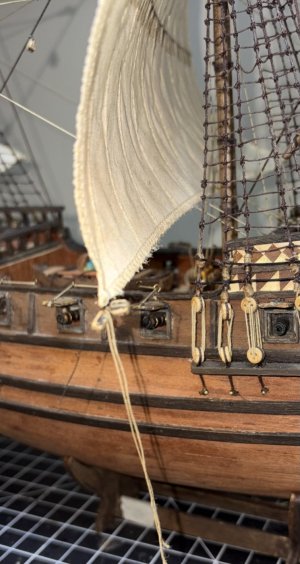
Looking over OcCre's instructions, specifically pages 28 (lower sheets J33/J36) and 29 (topsail sheets/clewlines J40/J42/J43/J45) revealed that each lower corner of the lower courses requires two distinct line leads: one pulling down toward the deck/bulwarks and one running up toward the yard.
The kit instructions imply this done by running multiple lines through a single block, while historical 17th-century galleons used a single iron clew ring (cringle). But then looking closely at their videos shows 2 single blocks on the main lower sail (while the lower fore sail only has a single block). I decided to use the same dual-single block assemblies that I had used previously.
Final Sail-Attached Hardware Summary
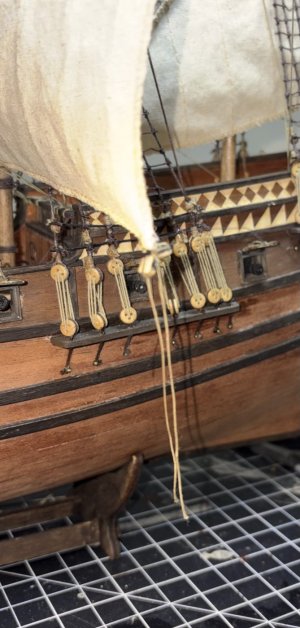
Lower Courses (Mainsail & Foresail): 4 dual-single figure-eight assemblies (8 blocks total).
Topsails (Fore & Main Topsails): 4 single blocks on 10–15 mm tan pennants. <which I removed at a later point>
Spritsail: 2 single blocks flush to clew eyelets.
Mizzen Sail (Lateen-Settee): 2 single blocks (1 aft clew block, 1 forward tack bridle block).
Grand Total: 16 single blocks mounted directly to canvas or corner bridles across the ship.
Shipwright's Note: When available, check the video for every sail corner before you strop and seize anything. If there are no videos, thoroughly review any printed instructions or build logs. I put single blocks on all the sails and had to redo both lowers. Always verify how many lines each corner carries first.
The mizzen lateen settee is still to be angled and locked down, and the tack, sheet, and clewline lines on the lowers are not yet rigged.
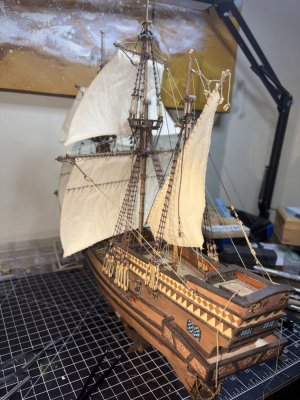
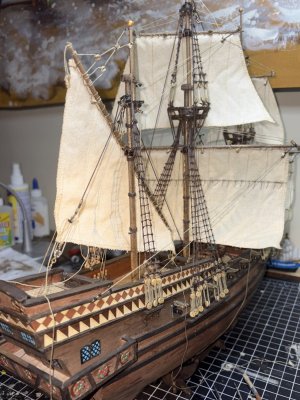
Next up: Session 21 will take me off course as I take a planned detour to make El Molino's flag with cigarette paper and a design from Claude AI. The write up for this session will also form the basis of a flag-making article for the monthly newsletter of the Rocky Mountain Shipwrights, the Scuttlebutt which I write, edit, and distribute. If you have an idea for an article, or would like to be a guest writer (volunteer work here), please let me know. Rigging resumes after that.
Session Start: September 28, 2026
Session End: October 2, 2026
Session Time: 9.0 Hours
Total Build Time: 406.0 Hours (397.0 Hours base from Session 19 + 9.0 Hours Session 20)
Hardware Allocation & Initial Clew Preparation
My work began by auditing, mass-producing, refining, and stropping the full allocation of single blocks attached directly to the sail corners across El Molino’s six sails.
Rather than installing raw kit boxwood blocks, all single blocks underwent a multi-step custom refining process:
- Shaping & Grooving: Lightly sanded each block shell to remove factory mold burrs, then filed circumferential score grooves around the waists to nest the strop lines securely flush against the wood.
- Sheave Clearance: Hand-drilled and reamed out sheave holes to ensure free, unsnagged passage for running lines.
- Staining: Soaked and stained all prepped blocks in dark walnut stain to highlight scale detail and simulate dark-aged oak.
- Strop Production: Stropped the sail-corner blocks using 0.15 mm tan line, leaving long 3"–4" working tails bound with thin black thread seizings for contrast.
Canvas Installation: Threaded the long strop tails through the sail corner eyelets across the spritsail, topsails, and mizzen lateen-settee.
Pennant Legs: Configured the 4 topsail blocks (Fore & Main Topsails) to hang on 10–15 mm tan pennant legs off the canvas corners to prevent fabric chafing. <which I removed at a later point>
Seizing & Locking: Bound the strops tight against the grommets using minimal turns of ultra-thin black thread, locked with CA glue, and trimmed tails flush.
Remaining Brace Rigging
Final six Braces: Completed the remaining brace lines carried over from Session 19—specifically the four foremast braces (tied off to the main forestay) and the two spritsail braces (tied off to the stay).
Seizing Technique: Used double-seizes on each stay attachment using thin black thread over tan lines to match previous work, locked with CA glue.
Lower Course Dual-Block Upgrade
Looking over OcCre's instructions, specifically pages 28 (lower sheets J33/J36) and 29 (topsail sheets/clewlines J40/J42/J43/J45) revealed that each lower corner of the lower courses requires two distinct line leads: one pulling down toward the deck/bulwarks and one running up toward the yard.
The kit instructions imply this done by running multiple lines through a single block, while historical 17th-century galleons used a single iron clew ring (cringle). But then looking closely at their videos shows 2 single blocks on the main lower sail (while the lower fore sail only has a single block). I decided to use the same dual-single block assemblies that I had used previously.
- Custom Figure-Eight Strops: I re-rigged both lower courses (Mainsail and Foresail) using dual-single block assemblies using tan figure-eight strops with black seizing.
- Four Assemblies Total: Created 4 figure-eight assemblies (2 for the Mainsail clews, 2 for the Foresail clews), using 8 single blocks in total.
- Sail Attachment: Threaded the central tan strop loops through each sail corner eyelet, bound tight against the canvas with minimal turns of thin black thread, locked with thin CA glue, and trimmed all tails flush.
Final Sail-Attached Hardware Summary
Lower Courses (Mainsail & Foresail): 4 dual-single figure-eight assemblies (8 blocks total).
Topsails (Fore & Main Topsails): 4 single blocks on 10–15 mm tan pennants. <which I removed at a later point>
Spritsail: 2 single blocks flush to clew eyelets.
Mizzen Sail (Lateen-Settee): 2 single blocks (1 aft clew block, 1 forward tack bridle block).
Grand Total: 16 single blocks mounted directly to canvas or corner bridles across the ship.
Shipwright's Note: When available, check the video for every sail corner before you strop and seize anything. If there are no videos, thoroughly review any printed instructions or build logs. I put single blocks on all the sails and had to redo both lowers. Always verify how many lines each corner carries first.
The mizzen lateen settee is still to be angled and locked down, and the tack, sheet, and clewline lines on the lowers are not yet rigged.
Next up: Session 21 will take me off course as I take a planned detour to make El Molino's flag with cigarette paper and a design from Claude AI. The write up for this session will also form the basis of a flag-making article for the monthly newsletter of the Rocky Mountain Shipwrights, the Scuttlebutt which I write, edit, and distribute. If you have an idea for an article, or would like to be a guest writer (volunteer work here), please let me know. Rigging resumes after that.