HMS Victory - Caldercraft / JoTiKa 1/72 Scale - First proper wood ship build

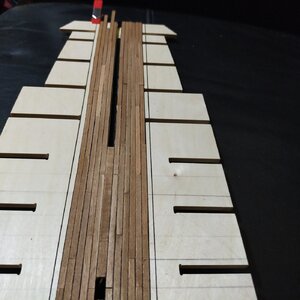
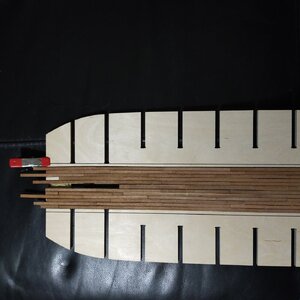
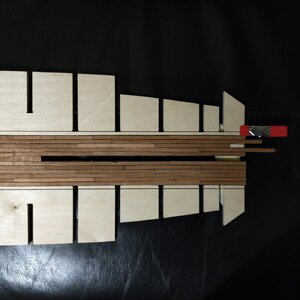
This is the false lower gun deck with the planking I've done so far. OK, so its not perfect, so here is my mitigation.

This is my first ever attempt at proper deck planking, and I had no idea even after experimenting how I was going to get around some quite important issues. So I just bit the bullet and went for it.

Also only a small percentage of this deck will ever be seen once the ship is complete. The manual calls out that only a part of this deck be planked but in order to get my self experienced in this Im doing the whole of this deck. The manual also calls for it to be fitted first and then planked. Not on my watch!

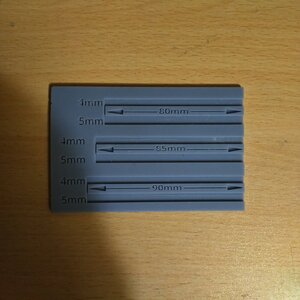
Plank length. Should be 85mm x 4mm according to the manual so I had a colleague at work 3D print me a pattern for cutting planks at 80mm, 85mm and 90mm, all at 3mm and 4mm widths. A colleague at work very kindly 3d printed a design for a plank length cutting gauge, various lengths and for two widths. However I didn't allow for shrinkage of the printed gauge ( I didn't even consider shrinkage as I had no idea it would shrink).and it shrunk enough to give me less than 85mm and 4mm width planks do no fit it the 4mm gauge recess. They did for a while but then they didn't.

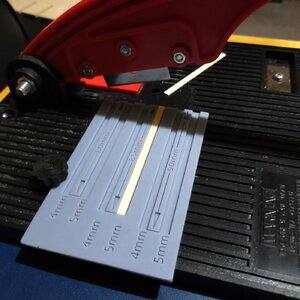
Cutting: I bought a really flimsy cutter. The handle flexed like a flag in the wind when tryin' to chop me wood up! However, a slight mod to this has made the handle stiffen to a degree where the planks can be cut with a decent 90 deg. angle ( I superglued lolly sticks into the recesses of the cutting handle and that stiffened it enough.

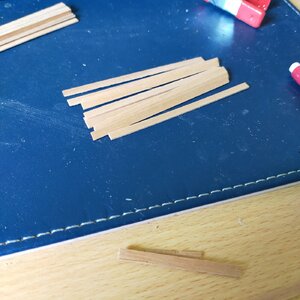
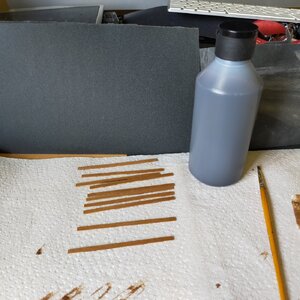
Colour of the planks: Easy, I used Colron Geogian Medium Oak wood stain, The reason for staining rather than varnish is that after all this is done I'm going to have to sand this all down flat and so it will probably need staining again. Theres only one coat of stain on each plank. The stain is quite dark but then that deck would be a rather dark part of the ship I would think. Subsequent decks will be lighter

1022.jpg1026.jpg1037.jpg1035.jpg


The false deck so far .....

Caulking: Using the brick layers technique, of using a line of thread to give me straightness. I laid thread (with some tension) across the length of the deck using the planks as width markers, in the photo's there is one either side of the planks laid. The thread also then becomes the caulking, or at least the first layer to give me the gap to run another line on top and in between the lines of planks. (The plan here is to drizzle some extra thin super glue to soak into the thread to make it hard and sandable.)

The only unsolved issue I have is how to caulk the butt joints. Where I did attempt it I used black paper but soon gave up on that, too fiddly. so I decided not to bother but for the next two decks that go on it needs to be solved. They need to be more or less perfectly done.

The important thing here that quickly became apparent was to lay the planks in between the lines of thread and not to butt the sides of the planks together. Lay them inbetween the lines of thread and they will be straight. Tacked down with wood glue and when the "big drizzle" of this extra thin superglue happens then it should soak doen into the wood fibres and consolidate the bond of the panks to the deck.

Four butt shift pattern: Complicated but I think I've done it right. There are 5 pencil lines running across the width of the deck that are 17mm apart. Each row is lined up against thes lines in the pattern that I believe to be correct shift pattern.

All the planks are 4mm wide, give or take a few hundred microns, to allow for natural wood imperfections. The exeption to this is the centre plank which is 6mm wide. I did this to allow for the width of the false keel slots and the 4mm planks go either side in a mirror image pattern.

1043.jpg1045.jpg1046.jpg1047.jpg1048.jpg

So, thats where I am right now, A few more weeks of just laying this little lovelies down and it can be trimmed, fitted and glued.

Im ever so sorry this is so long but I hope that it's interesting.

Cheers. :)
 
This is the false lower gun deck with the planking I've done so far. OK, so its not perfect, so here is my mitigation.

This is my first ever attempt at proper deck planking, and I had no idea even after experimenting how I was going to get around some quite important issues. So I just bit the bullet and went for it.

Also only a small percentage of this deck will ever be seen once the ship is complete. The manual calls out that only a part of this deck be planked but in order to get my self experienced in this Im doing the whole of this deck. The manual also calls for it to be fitted first and then planked. Not on my watch!

Plank length. Should be 85mm x 4mm according to the manual so I had a colleague at work 3D print me a pattern for cutting planks at 80mm, 85mm and 90mm, all at 3mm and 4mm widths. A colleague at work very kindly 3d printed a design for a plank length cutting gauge, various lengths and for two widths. However I didn't allow for shrinkage of the printed gauge ( I didn't even consider shrinkage as I had no idea it would shrink).and it shrunk enough to give me less than 85mm and 4mm width planks do no fit it the 4mm gauge recess. They did for a while but then they didn't.

Cutting: I bought a really flimsy cutter. The handle flexed like a flag in the wind when tryin' to chop me wood up! However, a slight mod to this has made the handle stiffen to a degree where the planks can be cut with a decent 90 deg. angle ( I superglued lolly sticks into the recesses of the cutting handle and that stiffened it enough.

Colour of the planks: Easy, I used Colron Geogian Medium Oak wood stain, The reason for staining rather than varnish is that after all this is done I'm going to have to sand this all down flat and so it will probably need staining again. Theres only one coat of stain on each plank. The stain is quite dark but then that deck would be a rather dark part of the ship I would think. Subsequent decks will be lighter


View attachment 337252View attachment 337253View attachment 337254View attachment 337255


The false deck so far .....

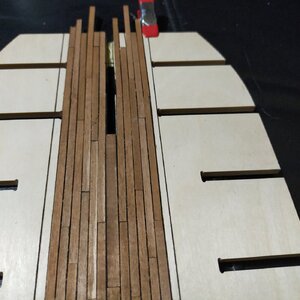
Caulking: Using the brick layers technique, of using a line of thread to give me straightness. I laid thread (with some tension) across the length of the deck using the planks as width markers, in the photo's there is one either side of the planks laid. The thread also then becomes the caulking, or at least the first layer to give me the gap to run another line on top and in between the lines of planks. (The plan here is to drizzle some extra thin super glue to soak into the thread to make it hard and sandable.)

The only unsolved issue I have is how to caulk the butt joints. Where I did attempt it I used black paper but soon gave up on that, too fiddly. so I decided not to bother but for the next two decks that go on it needs to be solved. They need to be more or less perfectly done.

The important thing here that quickly became apparent was to lay the planks in between the lines of thread and not to butt the sides of the planks together. Lay them inbetween the lines of thread and they will be straight. Tacked down with wood glue and when the "big drizzle" of this extra thin superglue happens then it should soak doen into the wood fibres and consolidate the bond of the panks to the deck.

Four butt shift pattern: Complicated but I think I've done it right. There are 5 pencil lines running across the width of the deck that are 17mm apart. Each row is lined up against thes lines in the pattern that I believe to be correct shift pattern.

All the planks are 4mm wide, give or take a few hundred microns, to allow for natural wood imperfections. The exeption to this is the centre plank which is 6mm wide. I did this to allow for the width of the false keel slots and the 4mm planks go either side in a mirror image pattern.

View attachment 337247View attachment 337248View attachment 337249View attachment 337250View attachment 337251

So, thats where I am right now, A few more weeks of just laying this little lovelies down and it can be trimmed, fitted and glued.

Im ever so sorry this is so long but I hope that it's interesting.

Cheers. :)
Hi,
Just something to try and remember.
Anything that you now glue to the deck that did not require planking according to the instructions will now be the deck plank thickness higher so more tweaking will be required to correct things.
So plenty of dry fitting to make sure that everything lines up.
 
Hi,
Just something to try and remember.
Anything that you now glue to the deck that did not require planking according to the instructions will now be the deck plank thickness higher so more tweaking will be required to correct things.
So plenty of dry fitting to make sure that everything lines up.
Yes, good point! That was all taken into account when I did my dry fitting of the hull and searching the build manual for possible snags in that respect.
 
Its a great kit, but a LOT of work. I 'm nearly done with the copper plating, about 25% left to go.
So far its been relatively easy to do as the parts fit so well. Take care with the gun port alignment & rear galleries and your good to go.

Be a while yet befor my next update on my log.
 
Remember, "it's not the goal that's important, but the trip there.

Its a great kit, but a LOT of work. I 'm nearly done with the copper plating, about 25% left to go.
So far its been relatively easy to do as the parts fit so well. Take care with the gun port alignment & rear galleries and your good to go.

Be a while yet befor my next update on my log.
Hi Paul, you must be the guy that convinced me to get this kit from watching your YouTube videos? I've only heard about that issue with the gun ports from two places, and that was in a you tube video and your build log. I'm looking out for that so I want to try and dry fit as much as I can so understand the problem. And I need to go through your log again and follow it.

It is lot of work but that's okay, I'm not rushing it.

Cheers
Yep thats me. Just follow the instructions excactly as they say in the book. & plans.
 
Hi again,

Apologies are due. I thought an update was long overdue on this build. It is far from abandoned and forgotten about.

It's been some 2 years and 4 months or so since I last posted. Unfortunately life got the way of this build, and there has been no progress since my last post either.

However I am planning to start again and carry on where I left off, namely the lower gun deck that I was planking. I've had a complete change of plan regarding it so all the planking I did is coming off (most of it already has) and the remaining residue to be sanded down. More details to follow once I finally make some more progress.

Progress will be slow and sporadic so, be warned!

Thanks
 
So, this 'monster' has been sitting under cover for the best part of 2 years and being rather neglected.

This weekend I chiseled off the original deck planking I did. I just was not happy with it. Starting over, I turned the deck over and started, this time I will plank this deck in situ and this time define borders of the (to be) planked area. If it goes well then I will do the entire deck. No need to make more work for myself but, its one of those things that is just crying out to me to be done.

Im sticking with a King Plank down the middle just simply because its the same width as the ply it sits between and then from there use that to lay the planks down.

1050.jpg

1051.jpg

Planks will be between 84 to 85mm long X approx 3 to 4mm wide x 1mm thick. I think, if my memory serves me correctly that 84 to 85mm is the scale length of these planks in 1/72. I could be wrong about that though.
I stained the original planks (shown in previous pics) in some kind of dark oak wood stain but I wont be doing that this time.

The planking will be laid down using the 4 plank shift method. May be I will use the thread I used previously between the planks for caulking.

Lime wood strips (not from the kit though) cut on my newly refined strip cutter. I'm going to try to work out a method for skimming planks to a uniform width and length which would be how I would want to do the more visible deck planking.

1052.jpg


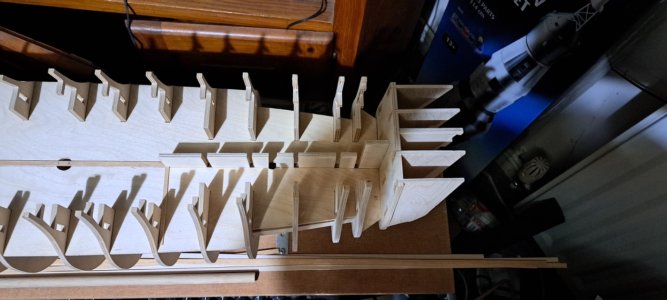
The next phases of this build is to shape the hull formers into some kind of shape to take the sides and the hull planking.
Although I do have a sticking point here where I've glued the stern post on and I believe it should be attached after the hull planking is done. Has anyone else done this in their buld? I'd be interested to know

Also I will be looking through all the build logs I can find on here for this, and probably following them.

Thanks for looking.
 
So, this 'monster' has been sitting under cover for the best part of 2 years and being rather neglected.

This weekend I chiseled off the original deck planking I did. I just was not happy with it. Starting over, I turned the deck over and started, this time I will plank this deck in situ and this time define borders of the (to be) planked area. If it goes well then I will do the entire deck. No need to make more work for myself but, its one of those things that is just crying out to me to be done.

Im sticking with a King Plank down the middle just simply because its the same width as the ply it sits between and then from there use that to lay the planks down.

View attachment 501573

View attachment 501574

Planks will be between 84 to 85mm long X approx 3 to 4mm wide x 1mm thick. I think, if my memory serves me correctly that 84 to 85mm is the scale length of these planks in 1/72. I could be wrong about that though.
I stained the original planks (shown in previous pics) in some kind of dark oak wood stain but I wont be doing that this time.

The planking will be laid down using the 4 plank shift method. May be I will use the thread I used previously between the planks for caulking.

Lime wood strips (not from the kit though) cut on my newly refined strip cutter. I'm going to try to work out a method for skimming planks to a uniform width and length which would be how I would want to do the more visible deck planking.

View attachment 501575


The next phases of this build is to shape the hull formers into some kind of shape to take the sides and the hull planking.
Although I do have a sticking point here where I've glued the stern post on and I believe it should be attached after the hull planking is done. Has anyone else done this in their buld? I'd be interested to know

Also I will be looking through all the build logs I can find on here for this, and probably following them.

Thanks for looking.
Great to see you're back on the Victory
I'll follow your build
 
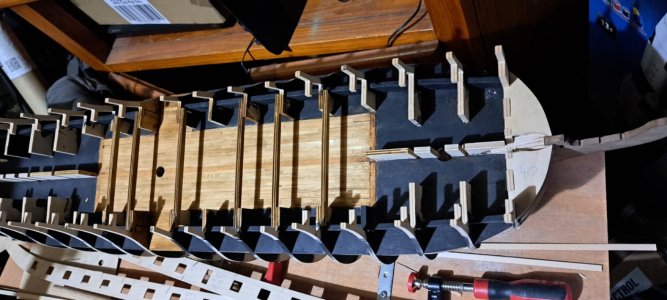
I've been hard at it over the last couple of weeks laying the lower gun deck planking.

I laid the planks down onto the gun deck using a (sharp intake of breath!) Pritt Stick. That proved to be somewhat of a mission. But there was a reason for it. All I wanted was to tack the planks in place and not have them stuck with no recourse for alteration or replacing any planks. This is did with the deck not fitted to the main hull bulkheads.

The first photo shows the planked deck, almost finished but the middle of the deck has been soaked in very very thin superglue, hence its slightly darker. The rest of the deck was finished and again this very very thin superglue was applied and soaked into the wood planks, hopefully making these planks adhere solidly to the deck underneath. Which they did, As it turned out this fitted into the slots very well.

The whole structure in the photos is now glued in place and is still according to my measurements and calculations still only 1mm out of true, and that's after 2 years of sitting dormant.

The idea for the superglue to soak into the wood is really to finish instead of varnish.

Anyway I did this the wrong way around. Disaster! Not quite though.

I scraped the planks flat, rather than taking the much easier route of sanding them flat. Staining, scraping, staining, scraping, staining and scraping.

What I ended up with was a deck that I thanked the Good Lord for being in a place where most of it can't be seen!

I'm in the process of painting the rest of this thing black. I decided to paint the remainder of the un-planked deck black too, along with the insides of the two uppermost thick strips running down the ship. The thinking for this was that if these areas were dark then once all the decks do go on then this horror of a planking effort will be even harder to see.

20250302_142425[1].jpg

20250309_080926[1].jpg

20250309_081001[1].jpg
 
Lets face it. That lower gun deck was awful. I re-did it, well, I scraped back the varnish, the stain and the superglue, then levelled it out again. It still doesn't look great but on the face of it, it'll be mostly hidden.

Next up was to fit the next middle deck support beams. Which I stained with one of the little tester pots I got from Littlefairs shop on Amazon. 15ml pots of stain in light oak, medium oak and I treated myself to a little bottle of driftwood grey too. Just a couple of quid a bottle.

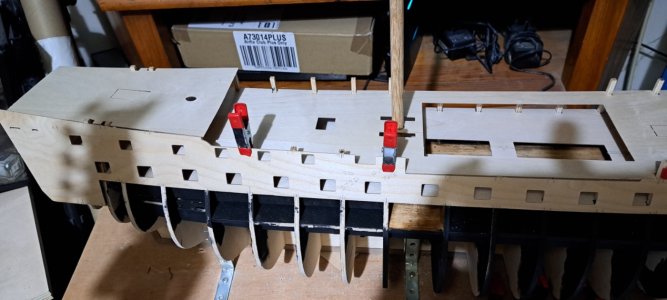
Currently I am preparing the 6 side patterns for fitting and so I am forming them to the location and the fit they need to be at.

I think that pretty much covers it for now.


20250323_075316.jpg


20250313_062810.jpg


Just trying out a sort of trial fit here, complete with oak masts
 
Back
Top