1/200 RMS Titanic - Build Log

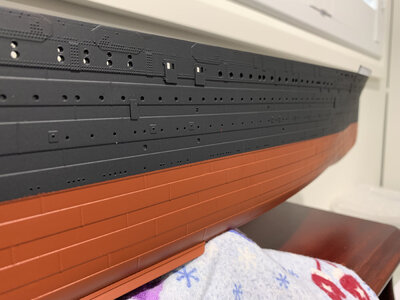
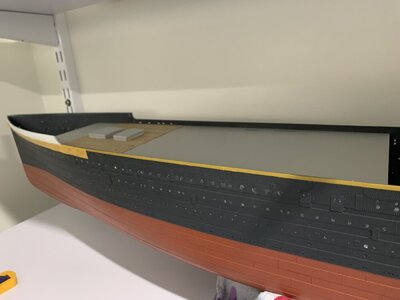
Finally got around to finishing up the hull painting; rudder and propellers to come later.
For those who may be interested, the following paint combination was used:
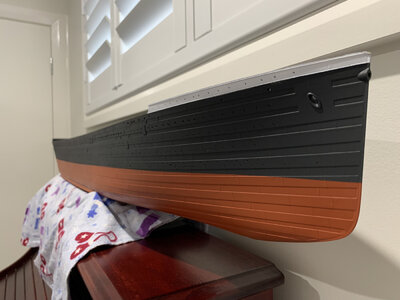
  1. Primer over entire hull (inside and out): Vallejo Black Primer (spray can)
  2. Primary Hull: Tamiya TS-82: Rubber Black
  3. Anti-fouling: Mr. Hobby 'Mr. Oxide Red Surfacer 1000'
  4. Upper bow and stern: Tamiya Fine White Surface Primer.
Bow shot.jpgStbd side.jpeg
Those with an eagle eye and a tendency to zoom may notice the prow is a little 'disfigured'. Thanks to my doggo tripping me up moving the hull from one room to another after painting. More concerned over the prow, than the dent in the wall. :)
 
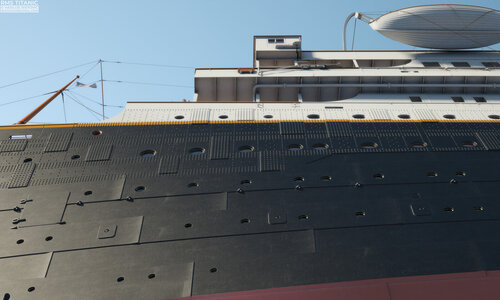
With a model of this scale I enjoy finding detail that has been left off the kit (and upgrades) but was part of the actual ship. For Titanic there are a few of these, but the one I am researching at present is the pipeline that runs underneath the promenade deck extension (see Mr. Ristovic's beautiful graphic below).

Promenade Pipe.jpg

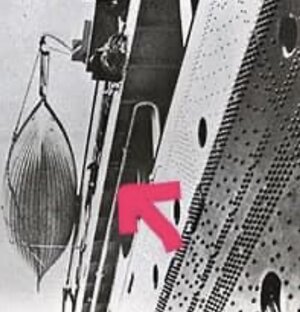
At present I'm trying to find out where the pipes enter/exit the superstructure to run along under the deck extension. Thanks to some research provided from the Midwest Model Shop (including below photo) I now have an image of the pipe on the forward part of the ship and will try and identify for sure where it terminates towards the rear.

If anyone has some research from any of the Olympic class ships which identifies this, it would be most welcome.

Pipe run.jpeg

Also keen to hear from any SoS Members working the Trumpeter 1/200 build who may also be planning to add this detail as to how you have, or are planning to, go about it. :) At present I'm thinking some Evergreen rod, but open to suggestions. I fully realise that, once completed, I will likely be the only one aware of the addition, but my OCD insists I include it.ROTF
 
Last edited:
At present I'm trying to find out where the pipes enter/exit the superstructure to run along under the deck extension. Thanks to some research provided from the Midwest Model Shop (including below photo) I now have an image of the pipe on the forward part of the ship and will try and identify for sure where it terminates towards the rear.

If anyone has some research from any of the Olympic class ships which identifies this, it would be most welcome.

View attachment 281662

Also keen to hear from any SoS Members working the Trumpeter 1/200 build who may also be planning to add this detail as to how you have, or are planning to, go about it. :) At present I'm thinking some Evergreen rod, but open to suggestions. I fully realise that, once completed, I will likely be the only one aware of the addition, but my OCD insists I include it.ROTF

Steve,
You may or may not have come across the Rivet Counter site but a description of the pipe you show and it’s direction may assist you.

(The following link should open to the pipe detail and the same photo).

 
Steve,
You may or may not have come across the Rivet Counter site but a description of the pipe you show and it’s direction may assist you.

(The following link should open to the pipe detail and the same photo).

Hi Roger,

Yes, I used to visit the Rivet Counter decades ago when I build my first 1/350 Titanic. I had forgotten about them and had no idea they were still around.

Many thanks for the link.

Regards,
Steve
 
Greetings all,

I haven't posted any updates for a bit, but work is progressing, albeit slowly due to some Covid related complications. :confused:

I've been focussing on finishing up the hull exterior, which is basically done now, and inserting all the fibre optic rods into the portholes. This task is about 75% complete, and I'll post some pictures once it is finished.

Installed an initial LED ribbon inside the hull to test the starboard side illumination and I must admit to being quite happy with the results. Still trying to decide on how much illumination to install into the upper areas of the model, C Deck and above; will likely be a bit of trial and error to see what looks good and what's likely 'over the top'. ;)

So, crawling along but making progress. As mentioned, pictures to come hopefully in the near future.

Take care all.
 
Well, it appears to have been almost a year since I went back to Titanic. How time flies when you work, have family, contract Long COVID and such. :)

So, where am I?

Well, the hull is done, ex screws and the rudder. They'll come more toward the end game. Fibre optics installed in the hull with LED lighting.

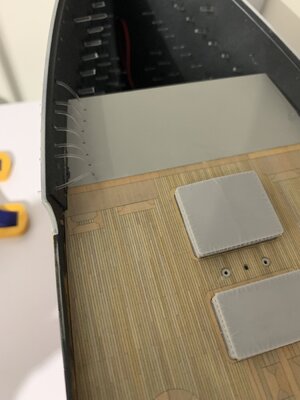
Installed the forward well deck yesterday and started to place the fibre optic runs (as suggested in the Mid West Models build) through the deck to ensure the forecastle port holes light, while avoiding any light leaks. Will do the same with the aft well deck section. The KA well deck hatches have been cleaned up and placed on the deck for now. Will paint and install shortly.

FWDWell Deck in.jpegFWD fibre run.jpeg

Today's task: well deck PE and commence work on the forecastle deck.
 
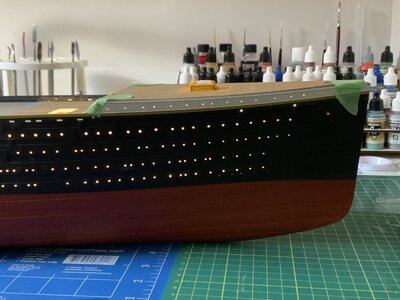
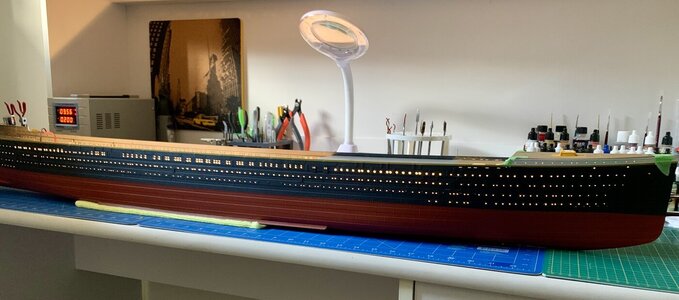
First test of the LED runs to the bow forecastle lights to check for light leaks. Not there's some drain holes down low that I missed and light out the hawse pipes. Will need to fix those up before permanently placing the forecastle deck. Overall though, quite happy with the way the lighting has turned out. So far. :)

Bow LED.jpegSTBD LED.jpeg
 
First test of the LED runs to the bow forecastle lights to check for light leaks. Not there's some drain holes down low that I missed and light out the hawse pipes. Will need to fix those up before permanently placing the forecastle deck. Overall though, quite happy with the way the lighting has turned out. So far. :)

View attachment 351054View attachment 351056
One thing to think about when lighting the inside of the model is to avoid light leakage through the anchor chain hawse pipe openings in the deck and the hull.
 
One thing to think about when lighting the inside of the model is to avoid light leakage through the anchor chain hawse pipe openings in the deck and the hull.
Hi Beau. Thanks for the comment. I'm considering the hawse pipes at the moment and have a couple of ideas in mind. Also looking at a fix for some minor leakage from around the well deck hatches, which were fully replaced in the KA upgrade.
 
Noting my last post to this log, it's been almost a year to the day; thanks to COVID/Long COVID basically robbing me of almost a year of good health. However, back in the swing and have started to make a little progress on my models again.

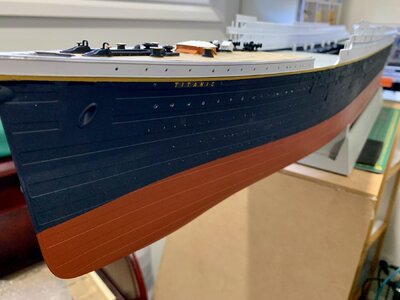
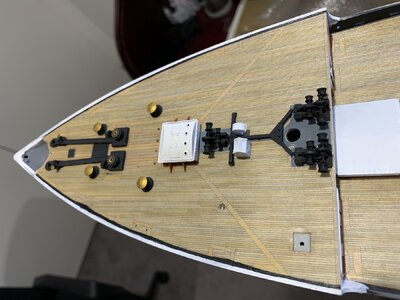
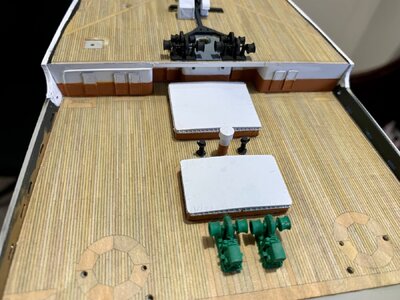
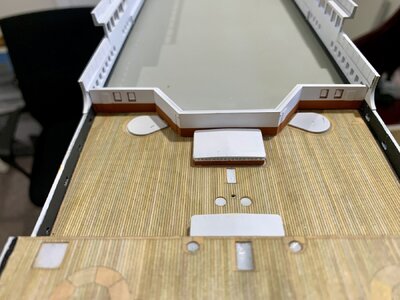
Just some basic additions to the Titanic, attaching the superstructure side walls, fore and aft decks and progress on the well decks. Been using fibre optics and LEDs to light the lady so far, and will continue that with interior and exterior lighting as the superstructure and deck houses come on.

Will focus on the forecastle and forward well deck areas not to get those squared away, but happy to finally have her name on the bow. :)
IMG_4122.jpegIMG_4123.jpegIMG_4124.jpegIMG_4127.jpeg
 
I really like how the decks look. The tonal variations are realistic. Are you planning to light up every porthole on the hull or will you simulate some cabling lights being off? Great work so far!
 
I really like how the decks look. The tonal variations are realistic. Are you planning to light up every porthole on the hull or will you simulate some cabling lights being off? Great work so far!
Thanks for the comment, but I have to give thanks to Scaledecks for the realistic nature of the timber decks. :) As for lighting; I currently have each porthole connected to a fibre optic line, so the entire hull is currently lit. I may revisit this as I get more of the ship built, and can always black out select portholes if I decide to go that way.
 
Hi Wayne,
Good to see that you have started working on your Titanic again.
It looks really good.

I wish I could say the same about mine, which is packed away in its box.
I am not sure when it will see the light of day again.
Presently working on my 1/48 AMK F14D Tomcat which is turning into alot of work.
One day I hope to finish all the models I have, but that could be a challenge.
Thanks Beau.
I hear you. Long COVID kicked me till it hurt last year, so my projects were all covered in dust clothes. Picked the Titanic to get back into it, as I really want to see her completed. I still have the Arizona and Enterprise CV-6 in build too, as well as a stash which is much bigger than what I have listed. I too hope to finish what I have, but time will see. Not getting any younger. ;)
Cheers,
Steve
 
Back
Top