1/48 scale 20 gun ship from Modelship Dockyard kit [COMPLETED BUILD]

Joined
Aug 14, 2018
Messages
467
Points
323

A twenty-gun ship of the 1719 Establishment.

From the Modelship Dockyard POF kit HMS Blandford.


The 1719 Establishment Group was the first real attempt to standardise dimensions of the various different rated ships of the Royal Navy. Although small the 6th rate 20-gun ships were very important and widely used throughout all areas of RN influence. Over the next two decades more than twenty ships were built, although all but three were rebuilds, (a common practise, either cutting down a larger older ship or simply using the best timbers from a decommissioned ship). The three new builds were Blandford, Greyhound and Rye.

The class was based on HMS Dursley Galley, commissioned 1719, built by Master Shipwright Richard Stacey, Stacey also built, among several of the others HMS Blandford. Photographs of a beautiful model of the Dursley Galley feature in the book ‘The Sailing Frigate by Robert Gardiner’ as well as on the cover. Interestingly Stacey, while Master Shipwright of the Royal Dockyard, Portsmouth built HMS Success in 1712 a 24-gun 6th rate,(20 x 6 pound ud and 4 x 4 pound qd), although slightly shorter at length 94.5 feet looks remarkably similar to the 106 feet 1719 Establishment.

My intention is to build one of the 1719 ships as I think it might have looked in the 1720’s.

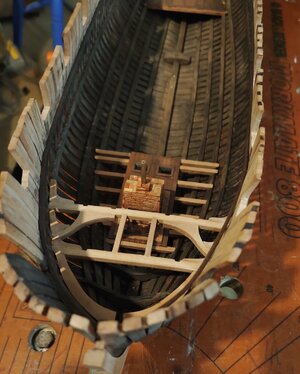
I started this build back last September but done little work on it until I finished the little Zulu sailing trawler ‘Boys’. Since then I have progressed to the point that I am now ready to install the lower deck cross beams. So far the build, although tedious at times, has went well with only one major faux pas. Unthinking I filled the 4mm spaces between the frames with the provided 4mm filler pieces without taking in regard the additional thickness of the fixing adhesive, and, although it was a very low viscosity yellow glue, by the time I realised that the frames were gradually being pushed of vertical I had reached beyond the halfway stage, stupid! I managed to fix it by using a very thin bladed Japanese push saw to cut though the fillers, thus reducing their width, I have taken more care since.

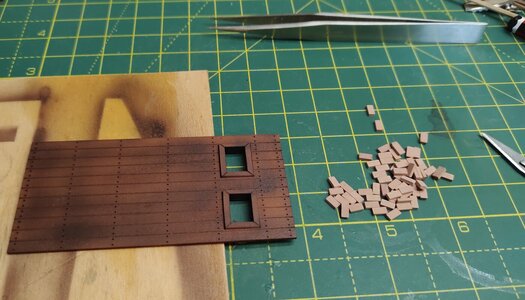
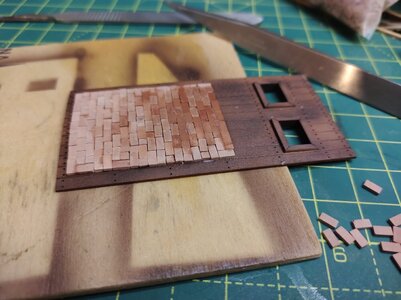
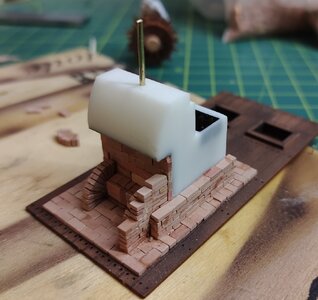
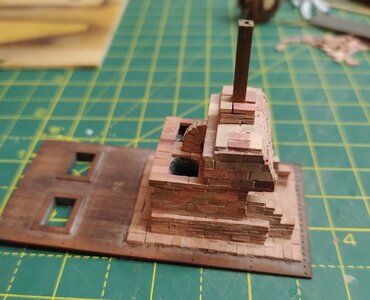
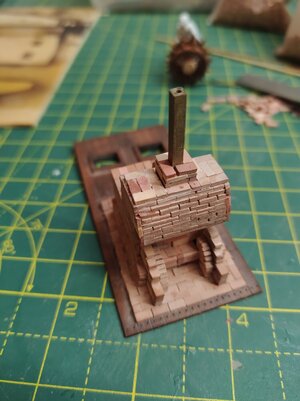
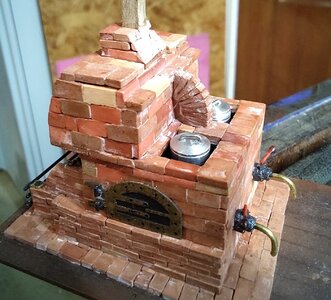
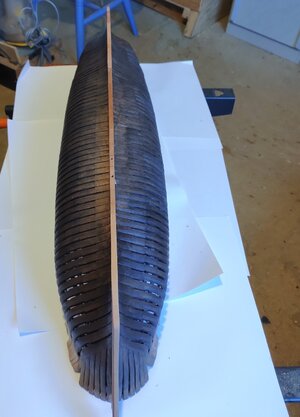
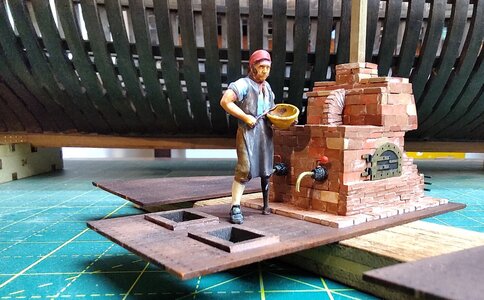
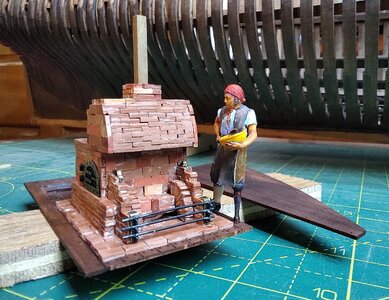
Since I wish to display this ship painted and stained I have covered the exposed parts of the frames with a dark oak stain and then sprayed the out sides with a protective clear lacquer I now want to leave it for several days to dry really hard so that if I have to I can return the hull to its cradle hopefully without damage. In the meantime I have turned my attention to the ships stove, the kit comes with an ok 3d printed stove but it looks more like a later iron fire hearth rather than the brick one that would have been originally installed. So never faint hearted I have had a go to build one from tiny 1/48 scale ceramic ‘bricks’, see pics. Sine it is situated deep within the bowels of the ship I should get away with it.

Here are some photos of my progress.

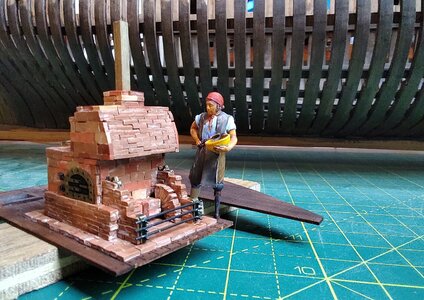
IMG_20230111_132720.jpgIMG_20230111_132729.jpgIMG_20230111_195155.jpgIMG_20230111_195102.jpgIMG_20230107_114203.jpgIMG_20230107_122749.jpgIMG_20230107_170558.jpgIMG_20230107_225246.jpgIMG_20230109_081910.jpgIMG_20230109_081933.jpg And here is the all but finished stove, at least Cook 'Slushy Peg leg' seems to approve!

IMG_20230111_204722.jpgIMG_20230111_205036.jpgIMG_20230111_205056.jpg Cheers for now JJ..


GReat that you started this topic and building log of a 1719 Establishment ship

Some years ago I made a topic collecting some information about this regulation and the ships built based on this - maybe it is interesting for some members just in begiining of your log


The stove with cook is looking great - I love it!
 
After waiting for the lacquer to dry on the frames I was all ready to fire on with the lower deck main beams when it dawned on me having installed said beams there would little chance of drilling guide holes out through the outer planking to mark the position of the sweep ports s. So it looks like I have to plank down to the main wale first.
As an aside, while trawling the net for anything to do with the 1719 Establishment,( no a lot ), I found an article in the 'The Blandford Express, Tales of old Blandford,' relating to the 1720 HMS Blandford after she was decommissioned. She was sold to a Bristol man called James Pearce in 1742 for £222. Pearce had her 'modified' the refit included the addition of two ventilators improving the air flow to the hold. Then under a Captain John Brackenridge, he put her about the what was called the 'triangular trade'. So the old Blandford finished her days as a Black Bird. Not sure how his ventilators worked as she lost around seventy or so of the five hundred odd slaves she carried on her first voyage! She was then sold again, this time to an American and little else is known , although the article states that the town of Blandford Massachusetts in the USA is named after her. Well that's one of the twenty two ships names of my list for this kit.
Back to my build, before planking the outside I have to finish the stern, a task I have been putting off as it looks quite fragile and I recon I could easily knock it while adding the internal beams, but needs must. To help secure the transom beams I drilled their ends to take some 0.5mm brass pegs, but I still think I will have to go slow at this to let the pva glue really harden for each step.

IMG_20230112_225918.jpgIMG_20230113_102244.jpgIMG_20230113_171836.jpg
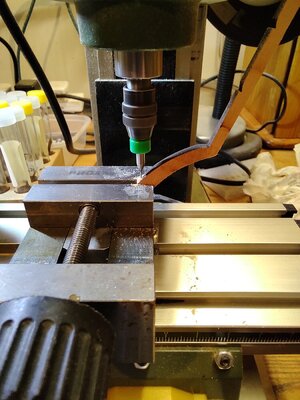
While I have been waiting I turned a couple of little pots for the brick stove, so that's it finished and ready to install now.

IMG_20230113_171713.jpg

Cheers JJ..
 
A twenty-gun ship of the 1719 Establishment.

From the Modelship Dockyard POF kit HMS Blandford.


The 1719 Establishment Group was the first real attempt to standardise dimensions of the various different rated ships of the Royal Navy. Although small the 6th rate 20-gun ships were very important and widely used throughout all areas of RN influence. Over the next two decades more than twenty ships were built, although all but three were rebuilds, (a common practise, either cutting down a larger older ship or simply using the best timbers from a decommissioned ship). The three new builds were Blandford, Greyhound and Rye.

The class was based on HMS Dursley Galley, commissioned 1719, built by Master Shipwright Richard Stacey, Stacey also built, among several of the others HMS Blandford. Photographs of a beautiful model of the Dursley Galley feature in the book ‘The Sailing Frigate by Robert Gardiner’ as well as on the cover. Interestingly Stacey, while Master Shipwright of the Royal Dockyard, Portsmouth built HMS Success in 1712 a 24-gun 6th rate,(20 x 6 pound ud and 4 x 4 pound qd), although slightly shorter at length 94.5 feet looks remarkably similar to the 106 feet 1719 Establishment.

My intention is to build one of the 1719 ships as I think it might have looked in the 1720’s.

I started this build back last September but done little work on it until I finished the little Zulu sailing trawler ‘Boys’. Since then I have progressed to the point that I am now ready to install the lower deck cross beams. So far the build, although tedious at times, has went well with only one major faux pas. Unthinking I filled the 4mm spaces between the frames with the provided 4mm filler pieces without taking in regard the additional thickness of the fixing adhesive, and, although it was a very low viscosity yellow glue, by the time I realised that the frames were gradually being pushed of vertical I had reached beyond the halfway stage, stupid! I managed to fix it by using a very thin bladed Japanese push saw to cut though the fillers, thus reducing their width, I have taken more care since.

Since I wish to display this ship painted and stained I have covered the exposed parts of the frames with a dark oak stain and then sprayed the out sides with a protective clear lacquer I now want to leave it for several days to dry really hard so that if I have to I can return the hull to its cradle hopefully without damage. In the meantime I have turned my attention to the ships stove, the kit comes with an ok 3d printed stove but it looks more like a later iron fire hearth rather than the brick one that would have been originally installed. So never faint hearted I have had a go to build one from tiny 1/48 scale ceramic ‘bricks’, see pics. Sine it is situated deep within the bowels of the ship I should get away with it.

Here are some photos of my progress.
View attachment 350840View attachment 350841View attachment 350842View attachment 350843View attachment 350844View attachment 350845View attachment 350846View attachment 350847View attachment 350848View attachment 350849 And here is the all but finished stove, at least Cook 'Slushy Peg leg' seems to approve!

View attachment 350850View attachment 350851View attachment 350852 Cheers for now JJ..

Good morning Jack. I will certainly watch this with interest. What a unique stove. A brick stove it was and a 1:48 brick stove is made- brilliant. Cheers Grant
 
Good morning Jack. I will certainly watch this with interest. What a unique stove. A brick stove it was and a 1:48 brick stove is made- brilliant. Cheers Grant
Hi Grant, the stove is a bit of a guess but it looks ok to my eye. On the real ship a sixth rate was allowed seven hundred bricks to build their stove, they would have weighed over two tons! Mind you on a first rate like Victory the Navy Board allowed two and a half thousand bricks, a lot of work for the brickie. Cheers JJ..
 
Hi Jack. I have no idea how this one slipped my attention, but luckily not for too long! This is great to see your next project and amazing to see all the work you have already done. The stove is just the bees' knees - brilliant!
 
A twenty-gun ship of the 1719 Establishment.

From the Modelship Dockyard POF kit HMS Blandford.


The 1719 Establishment Group was the first real attempt to standardise dimensions of the various different rated ships of the Royal Navy. Although small the 6th rate 20-gun ships were very important and widely used throughout all areas of RN influence. Over the next two decades more than twenty ships were built, although all but three were rebuilds, (a common practise, either cutting down a larger older ship or simply using the best timbers from a decommissioned ship). The three new builds were Blandford, Greyhound and Rye.

The class was based on HMS Dursley Galley, commissioned 1719, built by Master Shipwright Richard Stacey, Stacey also built, among several of the others HMS Blandford. Photographs of a beautiful model of the Dursley Galley feature in the book ‘The Sailing Frigate by Robert Gardiner’ as well as on the cover. Interestingly Stacey, while Master Shipwright of the Royal Dockyard, Portsmouth built HMS Success in 1712 a 24-gun 6th rate,(20 x 6 pound ud and 4 x 4 pound qd), although slightly shorter at length 94.5 feet looks remarkably similar to the 106 feet 1719 Establishment.

My intention is to build one of the 1719 ships as I think it might have looked in the 1720’s.

I started this build back last September but done little work on it until I finished the little Zulu sailing trawler ‘Boys’. Since then I have progressed to the point that I am now ready to install the lower deck cross beams. So far the build, although tedious at times, has went well with only one major faux pas. Unthinking I filled the 4mm spaces between the frames with the provided 4mm filler pieces without taking in regard the additional thickness of the fixing adhesive, and, although it was a very low viscosity yellow glue, by the time I realised that the frames were gradually being pushed of vertical I had reached beyond the halfway stage, stupid! I managed to fix it by using a very thin bladed Japanese push saw to cut though the fillers, thus reducing their width, I have taken more care since.

Since I wish to display this ship painted and stained I have covered the exposed parts of the frames with a dark oak stain and then sprayed the out sides with a protective clear lacquer I now want to leave it for several days to dry really hard so that if I have to I can return the hull to its cradle hopefully without damage. In the meantime I have turned my attention to the ships stove, the kit comes with an ok 3d printed stove but it looks more like a later iron fire hearth rather than the brick one that would have been originally installed. So never faint hearted I have had a go to build one from tiny 1/48 scale ceramic ‘bricks’, see pics. Sine it is situated deep within the bowels of the ship I should get away with it.

Here are some photos of my progress.

View attachment 350840View attachment 350841View attachment 350842View attachment 350843View attachment 350844View attachment 350845View attachment 350846View attachment 350847View attachment 350848View attachment 350849 And here is the all but finished stove, at least Cook 'Slushy Peg leg' seems to approve!
View attachment 350850View attachment 350851View attachment 350852 Cheers for now JJ..

Hey Jack, where's you get Slushy Peg Leg? I'm looking for miniatures for my Endurance, especially some huskies to put in the dog houses. Thanks!
 

Sheaves Jeeves

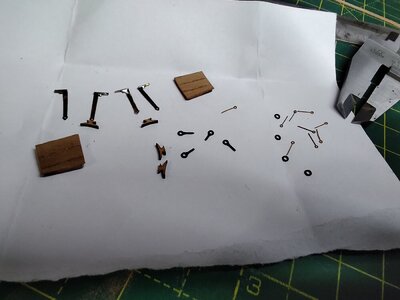
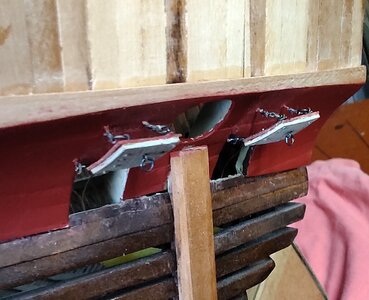
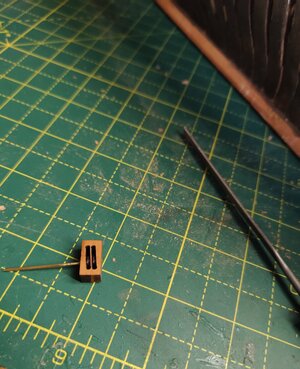
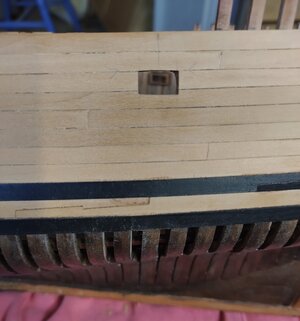
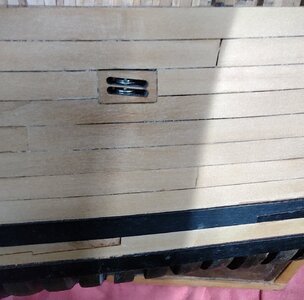
I wasn't going to post anything until I had finished the outer planking on both sides so that I might cut the sweep ports before going back to the internal beams, however while looking through the many sheets of laser cut parts to see if sweep port lids were included I noticed some double sheave blocks that had no part numbers associated to them. I should also say there is no mention of any through hull sheaves in the online 'instructions', (no surprise there then),and the only mention I can find of them is on a page of the printed plans that shows a small rectangle that is numbered with what I assume is the number left of the wood sheet of double sheave blocks, curiously this page of plans is labelled 'staysails'! I am only mentioning this to demonstrate the downside of this kit in that the instructions are poor to contradictory to non-excitant, working it all out is a real head scratcher! However there is little to complain about the quality of the wood and cut pieces supplied.
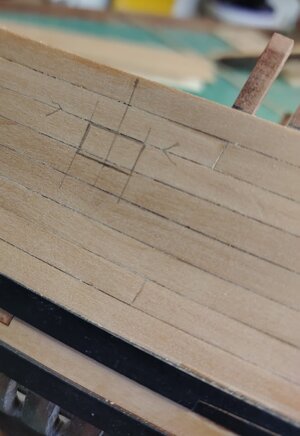
Anyway, with mouth in heart and fingers crossed,(not literally) I cut through my newly attached planks, frames and fillers. Thankfully all turned out ok. now for the sweep ports.
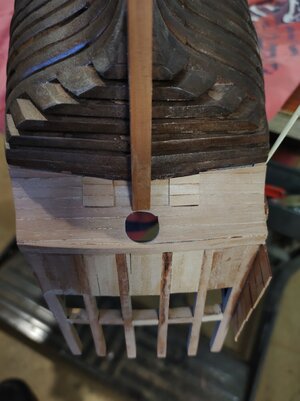
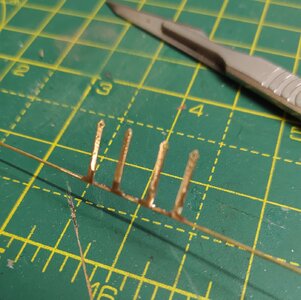
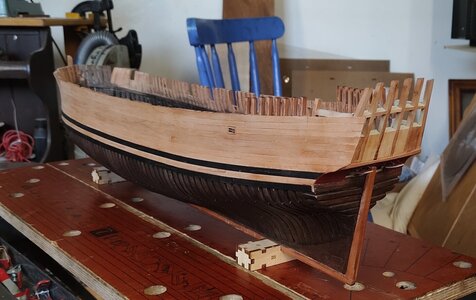
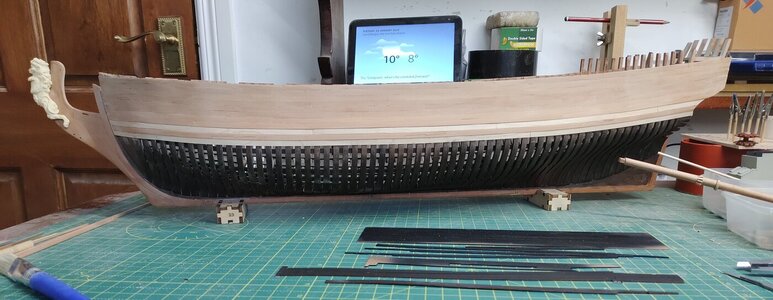
Here are some pics., including the soldering of the pins to the rear gun port hinges where I discovered it is far easier to solder them all together the cut them of separately. You can now get an impression of the nice, albeit gentle, sheer of this wee ship, nice.

IMG_20230120_162014.jpgIMG_20230120_170607.jpgIMG_20230120_171756.jpgIMG_20230121_062252.jpgIMG_20230125_160541.jpgIMG_20230125_151142.jpgIMG_20230125_154036.jpgIMG_20230125_160158.jpgIMG_20230125_161306.jpgIMG_20230124_153405.jpg
This last picture is interesting, if you look at the top of the stem it is cut at an angle of 28 degrees to horizontal the correct angle for the bowsprit, however if you project a line forward to the figurehead knee it passes through it rather than over it. The kit does not include a bowsprit but I intend to add a cut off one, as it stands going over the figurehead the best angle achievable is around 34 degrees and looks ridiculous. Just another head scratcher for the future.

Cheers JJ..

IMG_20230125_151128.jpg
 
Just curious why you stained the frames a dark colour ? Did you not like the look of the timber ?

Anyway, its come up superbly, well done.:)
 
Just curious why you stained the frames a dark colour ? Did you not like the look of the timber ?

Anyway, its come up superbly, well done.:)
Hi Bryian.
First of all thank you for your comments. As to the stain, you are right I am not fussed on the colour of pear wood but the main reason is that I want a strong contrast between the frames and the hull planking, I will most likely paint the planking as for the same reason. Pear is just too orange for my liking, especially when varnished. Wished I could have afforded to plank her in boxwood. Ah well c’est la vie.
BTW I have watched from a distance your builds and have to say they are excellent.
Cheers JJ..
 
Nice build Jack. I am wondering that if the hull planking of this kit are laser cut or just timbers?cuz from your photos, builders need to cut out the port by themselves. cheers.
 
Nice build Jack. I am wondering that if the hull planking of this kit are laser cut or just timbers?cuz from your photos, builders need to cut out the port by themselves. cheers.
Hi Jackie,
Yea both, they are laser cut 5 x 1mm thick inside and out, but you still have to cut all the ports including eighteen sweep oar ports on each side. The partial decking is in the form of sheets with laser etched planks. Cheers JJ..
 
Hi Jack. I must be the only one in my circle of friends in China who has not yet gotten Covid (touch wood). I always tell them I am too stupid to contract Covid! Well, it has taken me at least a few reads and re-reads to finally figure out what your current project is. Wow! I cannot believe you have built the Blandford hull so fast. I am looking forward to the process of turning her into an Establishment vessel. Will she be called Black Bird?
 
Hi Jack. I must be the only one in my circle of friends in China who has not yet gotten Covid (touch wood). I always tell them I am too stupid to contract Covid! Well, it has taken me at least a few reads and re-reads to finally figure out what your current project is. Wow! I cannot believe you have built the Blandford hull so fast. I am looking forward to the process of turning her into an Establishment vessel. Will she be called Black Bird?
Hi Heinrich, fingers cross that you keep dodging covid, myself likewise as it would probably finish me of. As for the ship, (POF), it is a new type of challenge for me and I am just feeling my way. I am still a bit peeved about the lack of instructions and the contradictions within what instructions there are. The 'Black Bird' reference was with regard to HMS Blandford who after being sold out of the RN became a slaver!
Keep well JJ..
I think you and I are both spoiled with kit instructions - you with Chris's instructions and me with Hans's. ROTF However, it is worrying that so many build logs complain of poor instructions lately.
 
I think you and I are both spoiled with kit instructions - you with Chris's instructions and me with Hans's. ROTF However, it is worrying that so many build logs complain of poor instructions lately.
Hi Heinrich, you are correct, it's comforting to be able to ask directly from the designers of a kit if you run into a problem or unsure about a design point. Looking at the Kolderstak site I am very impressed by the beautiful organic lines of the 17th century fluytschip, very nice. I would hope it will be my next build all being well. What is this about you leaving China? I must of missed that. JJ..
 
Hi Heinrich, you are correct, it's comforting to be able to ask directly from the designers of a kit if you run into a problem or unsure about a design point. Looking at the Kolderstak site I am very impressed by the beautiful organic lines of the 17th century fluytschip, very nice. I would hope it will be my next build all being well. What is this about you leaving China? I must of missed that. JJ..
Hi Jack. The Chinese government only grants work permits to foreigners up to the age of 60. There are exceptions of course, but it is never something you can count on. This means I have until February 2024 to work and stay here - if things stand the way they are now.
 
Back
Top