1:48 scale POF HMS Alert by Keith [COMPLETED BUILD]

Joined
Jan 10, 2022
Messages
571
Points
403

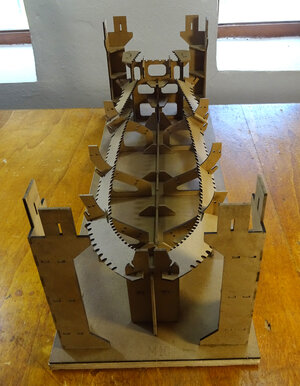
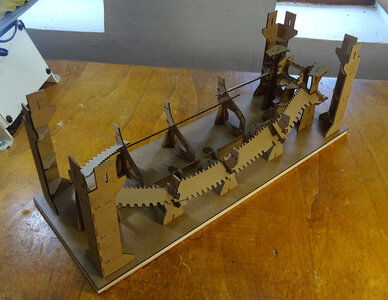
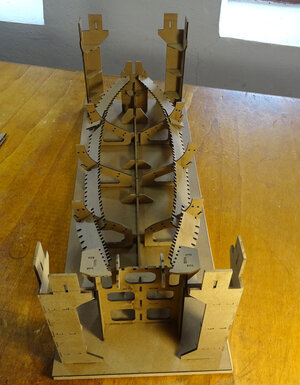
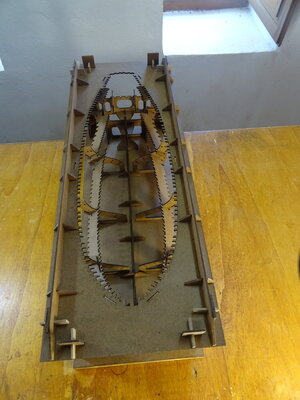
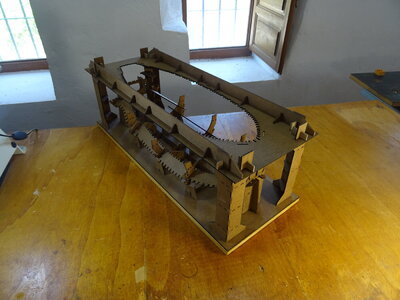
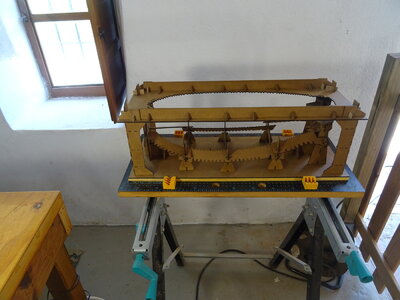
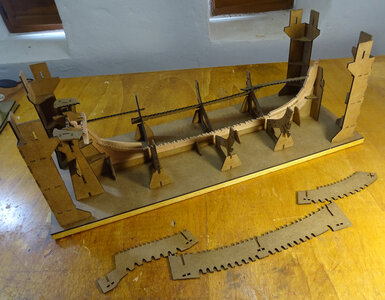
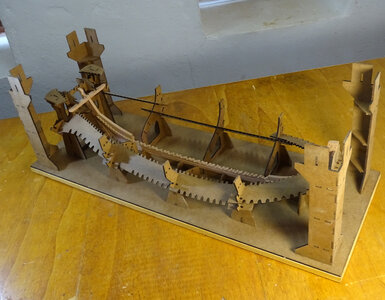
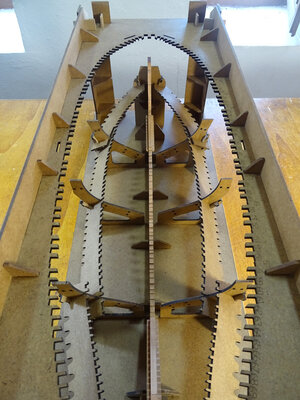
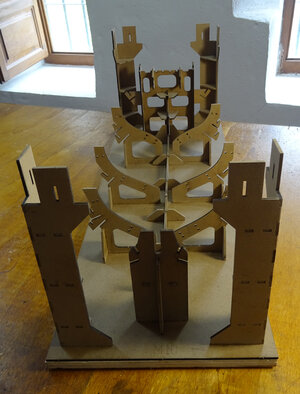
Hi everybody. I have now begun my build of this great 1:48 scale POF kit by Trident Model, HMS Alert. l ordered the kit in the middle of January and it arrived safetly here in Spain 4 weeks later. (2 weeks delay due to the Chinese New Year holiday) with no problems at all, everything tightly sealed and in perfect condition. Reading the instruction manual it suggests making the keel and frames first before the building cradle, which is the jig used to hold and accurately position the hull frames and transom timbers during the construction of the hull. l can see why the manufacturer suggests this as it would be easier to place the complete keel in the jig as it is being constructed, but the clever design allows parts of the jig to be taken apart after construction to get unobstructed access to the keel and wing transom assembly, so there is no problem completing the jig first. Which is how l chose to do it. The parts shown here that will be in contact with the ribs at the lower part of the hull are not glued but held in place with little pegs so they can taken apart when it is time to remove the finished hull. The whole construction is made from good quality laser cut MDF and it all fits together very accurately and tightly, so a very light sanding is needed, especially on the tabs and in the slots for a snug fit and lowering the risk of damaging the parts by applying too much force.

DSC06377.JPG

DSC06380.JPG

DSC06387.JPG
 
The parts positioning and holding the wing transom (Nos. 15, 16, 17 and 19) are not glued so they can be removed to allow easy removal of the hull from the cradle. Nor is the entire top section, which is held in place by tags through the corner pieces. All in all an innovative and clever design by Trident making this a small project on it's own. l even gave the finished cradle a coat of tung oil to prevent the black laser char from the parts that will be in contact with the ribs transfering onto the model. (And also to make it a little feature in itself)

DSC06390.JPG

DSC06397.JPG

DSC06401.JPG

DSC06414.JPG

DSC06415.JPG

DSC06417.JPG
 
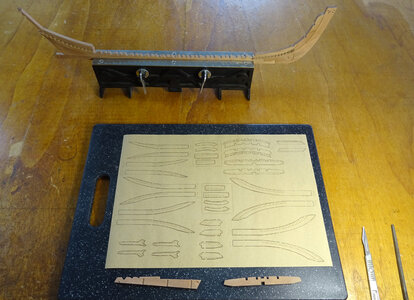
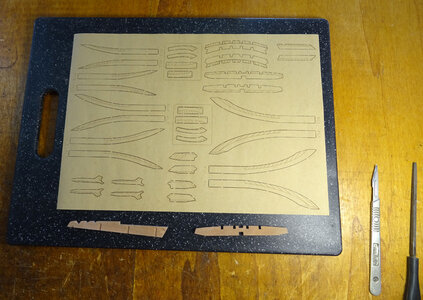
Moving along now to the construction of the ship itself. Essentially all the parts for this kit are CNC cut from cherry wood. The boards are very good quality and even in grain and colour. There are loads of aids supplied with this kit to assist in the positioning and shaping of various parts. A couple of plywood jigs are included to accurately align the parts making up the keel and also to mark the bearding line and position the deadwood at the bow and stern

DSC06418.JPG

DSC06420.JPG

DSC06422.JPG

DSC06423.JPG

DSC06424.JPG

DSC06425.JPG

DSC06427.JPG
 
Last edited:
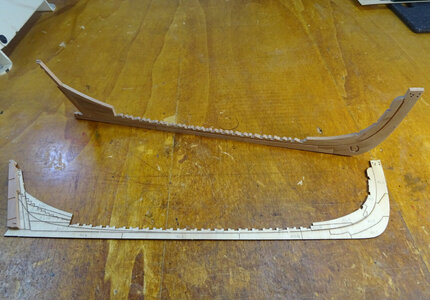
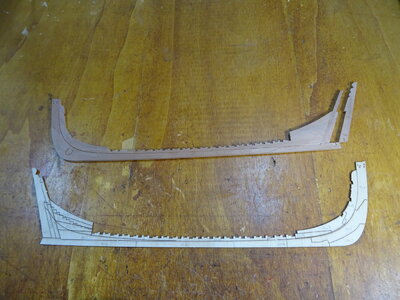
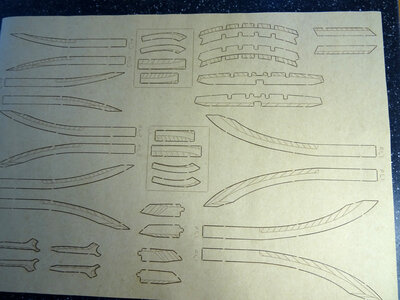
Another simple but clever idea are these stickers that can be applied directly to the wood to give sanding lines to shape individual parts and to fair the cant frames at the bow and stern. Once the wing transom has been shaped according to the stickers, top and bottom it is fitted into place, which completes the keel . The whole assembly is then transferred to the cradle, which has been partly dismantled to allow access.

DSC06431.JPG

DSC06432.JPG

DSC06433.JPG

DSC06436.JPG

DSC06437.JPG

DSC06438.JPG
 
Last edited:
Another great build to watch and see how the master creates his master build of this fine ship. One day I will start on mine when I get the docks cleared of current projects.

Another great build to watch and see how the master creates his master build of this fine ship. One day I will start on mine when I get the docks cleared of current projects.
Thank you Kurt. l hope l can live up to that. Good luck with your build when you start
 
The kit looks very impressive. Thanks for sharing your observations on the little things that can make or break a kit, like the instructions, sanding/faring tape. The little, but important things that many builders struggle with. Faring is one of those and is so important to get it right.

Did the keel come with the rabbit already cut?

If I were to build another kit I think it would be one much like this. Is the kit an admiralty model or full mast/rigging?

I'm following along and based on your last build, look forward to another beauty! Thumbsup
Thanks for your comments Ken. l intend to bring up the subject of how this kit deals with fairing the frames in my next post. The rabbat had to be done before the two keel halves were joined together. l used a blade to scrape a 1 mm 45 degree edge on both sides of the 2 halves of the keel tapering away to nothing as it reaches the stern. Also the bearding at the stern had to be sanded using the template supplied to give the line.
This kit is an admiralty model so there is no rigging.
 
Dear Keef A particularly impressive start for a beautiful model, I will join the rest of the friends and continue to watch your work with great curiosity! You are welcome at any time in Jimski's, Maarten's, and mine's impressive construction diaries (without offending the other excellent builders in the group)
It's a nice tight fit and everything fits in place perfectly, so it can be reassembled ready for the next stage, the shaping, positioning and fitting of the ribs of the hull

View attachment 373777

View attachment 373778

View attachment 373779

View attachment 373780

View attachment 373781

View attachment 373782
Dear Keef
impressive start for a beautiful model, I will join the rest of the friends and continue to watch your work with great curiosity!
You are welcome at any time in impressive construction diaries by Jimski's, Maarten's (without offending the other excellent builders in the group)
 
Dear Keef A particularly impressive start for a beautiful model, I will join the rest of the friends and continue to watch your work with great curiosity! You are welcome at any time in Jimski's, Maarten's, and mine's impressive construction diaries (without offending the other excellent builders in the group)

Dear Keef
impressive start for a beautiful model, I will join the rest of the friends and continue to watch your work with great curiosity!
You are welcome at any time in impressive construction diaries by Jimski's, Maarten's (without offending the other excellent builders in the group)
 
Thank you my friend. l hope l can match the quality of the other builds l have seen featured here
 
Looks like the designers at Trident have thought of everything!
Some kits I've tackled seem to have been designed by people who never actually put one together. At least not according to their instructions ,like gluing one long flat strip of wood on top of the other to plank the hull without spiling. Impossible to do . Beautiful start. Very instructive. I will follow with great interest. Thumbsup
 
Back
Top