• Win a Free Custom Engraved Brass Coin!!!
    As a way to introduce our brass coins to the community, we will raffle off a free coin during the month of August. Follow link ABOVE for instructions for entering.

12 Gun Brig-of-War

Joined
May 17, 2025
Messages
27
Points
48

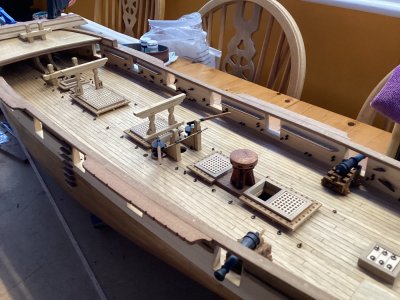
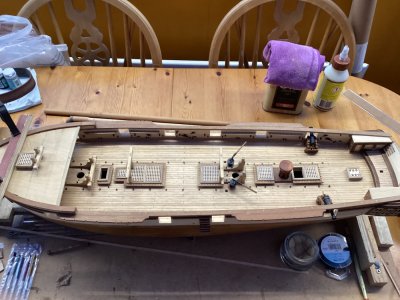
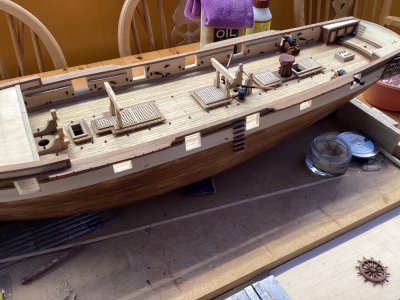
I started this model some 30 years ago pre-internet days when resources (materials and references) were a lot more limited. Mistake one: treenails spaced incorrectly! Nonetheless, given that everything on the model is scratch built with limited means (I even cut the planking myself), I am pretty happy with the look of the ship so far and despite the big gap in my model building experience I am hoping to maintain a similar or better standard of build. Certainly the level of craftsmanship on some of the scale ships on display on this site are almost beyond my comprehension. I am sure that I will find plenty of helpful information and advice from fellow scale ship enthusiasts on this site.
I am pleased to say that after 30 years of storage the only damage the model has suffered is to the end of the port side cathead which should not be too difficult to repair. I will aim to post some updates as progress allows. Currently I am working on the foc'sle area and hope to be able to start planking it in soon. My goal is not complete authenticity in construction techniques but rather to have the model look as close to realism as my skills, time and available research material allow.
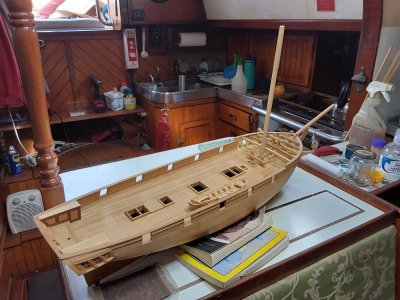
20250421_141026.jpg
 
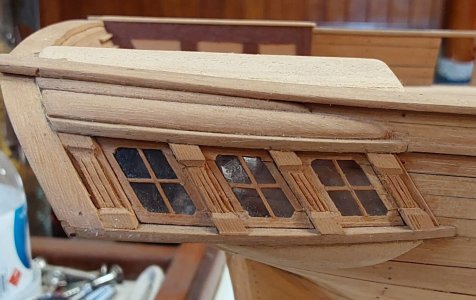
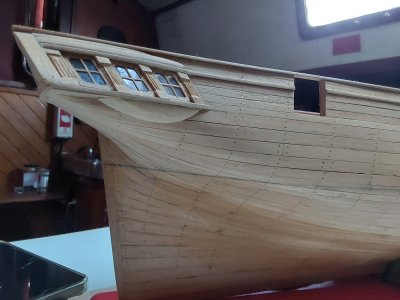
I am especially interested how you made window frames looking so accurate to scale. From my experience it is one of most difficult parts to build. What material the glass is made of?
 
I am especially interested how you made window frames looking so accurate to scale. From my experience it is one of most difficult parts to build. What material the glass is made of?
From memory, I made the windows from the plastic from a shirt box.
 
Modern photography can be so cruel to miniatures.

But - it also shows the care and attention to detail that produced those mouldings. At those sizes, it becomes necessary to use magnification and surgical scalpels to produce perfect fit joints - and even then the timber doesn’t scale down, so you get unwanted texture.

But this is good stuff. Better than my early attempts.

J
 
I attach a photo (obviously looks a bit rougher in close up especially with a bit of dust build up).

Thanks for posting the photos. Close up photos are often the best way to find things that are amiss. Things look so good when seen by the naked eye from two or three feet away and then BOOM, we take a photo and see things that we missed. There have been many times when I was not a fan of whoever the person is that invented macro photography. :(
Allan
 
I'd like to comment that you've managed to keep your ship's wood so fresh looking despite 30 years. I might have expected oxidation and UV darkening over that time. Has it been boxed or bagged all those years?

And, this model is beautiful, your craftsmanship is superb.
Alf in Iowa
 
I'd like to comment that you've managed to keep your ship's wood so fresh looking despite 30 years. I might have expected oxidation and UV darkening over that time. Has it been boxed or bagged all those years?

And, this model is beautiful, your craftsmanship is superb.
Alf in Iowa
Thanks Alf. Your encouraging comments are much appreciated. The model was stored in a cardboard box in a shed on my brother's property while I was off sailing the world for all those years, so I am very grateful that it has survived so well. However, one problem I am now having is finding timber that matches the wood I used originally.
 
However, one problem I am now having is finding timber that matches the wood I used originally.
Are you referring to the actual timber, or the colour (color) match?

No short cuts on locating timber that will match in grain and colour. BAFRA members are obliged to hold stocks of donor timber, culled from old furniture and parts, to allow matching. To become a member, you are physically inspected, and expected to produce such materials to match a specimen, on request.
Even so, the question of colour matching a repair always arises, and whilst it is perfectly possible to stain and match new wood to old, it is exceeding difficult to keep that match over time. The original timber is aging and changing. Its finish of oil, varnish, paint even, is also slowly changing, and any stain or colour you apply to the new repair instantly starts to slowly alter.

There is no magic answer of course. If you can find the right old timber you may be able to use UV light to rapidly age it to match your original, or a light touch with sympathy, using something like Van Dyke crystals to gently match in. Maybe you stain the entire model with weak van dyke so that new material can blend and share any subsequent colour change. (It's water based and amazingly adaptable)

Alternatively, depending on what new wood you are putting to the model, I have seen 'dockyard' scenes with a few obviously new planks being fitted, or maybe some new spars and rigging being fitted, or repairs to a wheelhouse or whatever.

I wish you well in your search.

Jim
Hi Jim,
Thanks for the advice. What is BAFRA?
I was referring to both the timber (grain/texture) and the colour.
As far as I know, the availability of species of timber that are available in your part of the world are much harder to come by in Australia. I am pretty sure I used mostly Tasmanian Oak when I started the build but what is currently available seems to be much more opened grain and lighter in colour, though the difference in colour is no doubt mostly related to age. I am probably going to use Huon Pine for much of the remainder of the build and will likely have to accept the difference in colour. I am planning on painting the model as per the colour scheme of the period so the most noticeable difference will be between the main deck, which is complete, and the forecastle, which is what I am currently working on.
I have fiddled about a little with some stains but don't think they are the answer.
Once again, appreciate the input.
Bob
 
Thanks for posting the photos. Close up photos are often the best way to find things that are amiss. Things look so good when seen by the naked eye from two or three feet away and then BOOM, we take a photo and see things that we missed. There have been many times when I was not a fan of whoever the person is that invented macro photography. :(
Allan
Thanks Allan. I am not aspiring to the superb level of build that I see in most of the posts on this website. If I need to use a magnifying glass (or macro photography) to see the numerous imperfections in my work than I will be more than satisfied. Trying to avoid clumsy work that is all too obvious to the naked eye is challenge enough, especially if I want to finish this model this side of doomsday!
 
Hi Jim,
Thanks for the advice. What is BAFRA?
I was referring to both the timber (grain/texture) and the colour.
As far as I know, the availability of species of timber that are available in your part of the world are much harder to come by in Australia. I am pretty sure I used mostly Tasmanian Oak when I started the build but what is currently available seems to be much more opened grain and lighter in colour, though the difference in colour is no doubt mostly related to age. I am probably going to use Huon Pine for much of the remainder of the build and will likely have to accept the difference in colour. I am planning on painting the model as per the colour scheme of the period so the most noticeable difference will be between the main deck, which is complete, and the forecastle, which is what I am currently working on.
I have fiddled about a little with some stains but don't think they are the answer.
Once again, appreciate the input.
Bob
Sorry - British Antique Furniture Restorers' Association - the kind of people who restore the finest of furniture when the kids have wrecked it, or it is discovered in a barn after 300 years of being left.

I'd say you have identified your issue. Oak (Quercus) is generally tannin rich, and darkens over enough time to pretty black. You can induce some of this colouring by washing with iron rich acid solutions (dissolve some nails, and wipe over with the liquid) or fume it in an ammonia rich atmosphere - though this has a greyishness all its own when freshly done.
Old grown oak is very like to have been tighter grained than today's timber yard stock. Oak can still be found tight grained if you search about through enough timber suppliers - but a simpler answer (here at least) is to check out auction sales for old furniture with what you are looking for in the drawer linings, or anywhere on the carcass. Here we have some superb 'brown' furniture selling for a couple of tens of pounds. It isn't as if you are buying for the design, or the quality, or absence of damage. A small check of drawers will yield enough for a couple of models. If you merely steal the drawer linings, you could replace them with modern timber and sell the chest on.
But the point is to get some more Tas oak, at that is 'correct' for the rest of the model.
As for stains and dyes and such - there is a Huge Enormous body of work on the subject. Experimentation is your friend there - that, and being sceptical of claims.
Best suggestion I could give there is to give the entire hull a coat of dewaxed super blonde shellac. Probably a couple of thin coats brushed on. Why? - because it provides a sealing coat that is easily removed with alcohol. after using it, you can colour down your new work by a couple of shades - and then take it off again if it isn't right. You need to be careful about what type of colour you use - avoid 'spirit'(alcohol) based stains etc, for they will go through your seal coat. but if you lay down some water based colour, you can take it off again.
One more thing - you may not want that French polished look, so after the shellac, you go over with some pumice to knock back any gloss you don't want.

Test and test again....

Best wishes
 
Hi YT, thank you for the interest. I simply glued veneer strips to the perspex sheet. I attach a photo (obviously looks a bit rougher in close up especially with a bit of dust build up).

View attachment 520570
Would like very much to see the “bath tub” arrangement beneath the window galleries. I am building the same model and am at about the same stage in our builds. I attach some pictures of my progress.

IMG_0674.jpeg

IMG_0643.jpeg

IMG_0646.jpeg
 
Great looking work, for a ship that is 30 already, wonder if the model is older than the original ship lasted?

As for your goal of accuracy, it is only a model, not an exact scale replica and build to suit your wants and abilities is the best way to go.
 
Would like very much to see the “bath tub” arrangement beneath the window galleries. I am building the same model and am at about the same stage in our builds. I attach some pictures of my progress.

View attachment 524565

View attachment 524566

View attachment 524567
Hi Captain Cutlass,
Great to connect with someone building the same model and solving similar problems. I attach a photo of the "bath tub", which is simply a bit of wood carved to fit the hull and shaped according to the plans as best I could work out. I would love to see a few more close ups of your deck fittings.

20250610_082103.jpg
 
Hi Captain Cutlass,
Great to connect with someone building the same model and solving similar problems. I attach a photo of the "bath tub", which is simply a bit of wood carved to fit the hull and shaped according to the plans as best I could work out. I would love to see a few more close ups of your deck fittings.

View attachment 524652
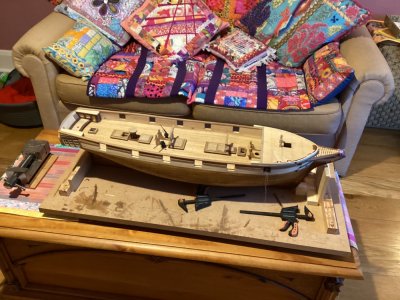
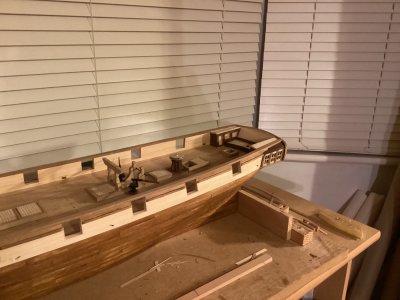
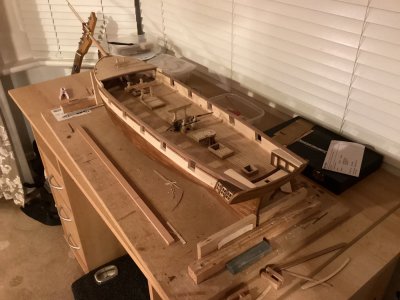
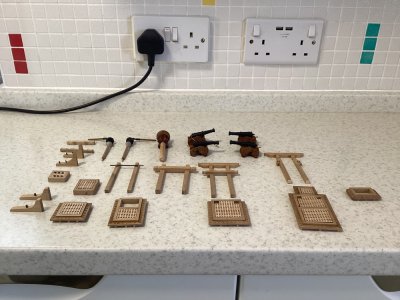
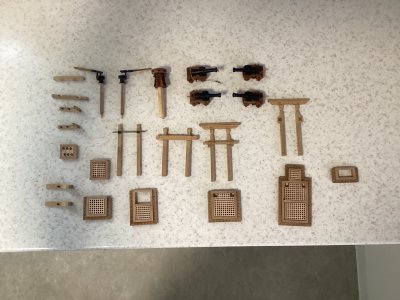
Many thanks for your reply and picture. I had made something very similar but was not happy that it looked correct. I will have another go at it. I attach some pictures of the deck fittings none of which are fixed in place yet, just loose fitted. I think it makes it easier to complete the many ring bolts, eyebolts and cleats without the clutter to work around. I used the drawing number 780 for the details.

IMG_0715.jpeg

IMG_0714.jpeg

IMG_0711.jpeg

IMG_0710.jpeg

IMG_0709.jpeg
 
Many thanks for your reply and picture. I had made something very similar but was not happy that it looked correct. I will have another go at it. I attach some pictures of the deck fittings none of which are fixed in place yet, just loose fitted. I think it makes it easier to complete the many ring bolts, eyebolts and cleats without the clutter to work around. I used the drawing number 780 for the details.

View attachment 524675

View attachment 524676

View attachment 524677

View attachment 524678

View attachment 524679
Thank you CC. Your work looks great and it seems you arebuilding with rather basic workshop facilities, as I am. Many of the models on this site are totally awesome but, to be honest, can be a little demoralising as I know I cannot come close to producing work of a similar quality. So it is good for morale to have someone who appears to be working under similar constraints as I am but still achieving excellent results. Looking at your photos, at this stage I am particularly interested in how you made your cannons and the steering wheel. I would also be interested to know what your tool kit looks like.
 
Back
Top