1669 Soleil Royal - ZHL [COMPLETED BUILD]

Hi Gilbert--

I'm amazed at your rigging of all of those canons! I wish I had better dexterity to manipui;ate all those small items. It will be a big challange for me when that time comes and I will probably "pick your brain" for how you do it.
 
Hi Gilbert--

I am presently working on ZHL's Le Soleil Royal. My question is more of a general nature but applies speifically to the LSR. I am "super glue challenged". The surfaces can be clean of dust and grease, either very tiny gaps or none at all, and yet--it just won't "stay stuck"--it falls right off. What am I doing wrong. My problem is that I have parts 61, 62, and 65c all glued together and firmly affixed to the starboard side of the ship. Then it hit me-->I neglected to glue all of the half canon mounts on the backside of part 61! It is possible for me to get the half canon mount behind part 61, but I already anticipate that super glue will not work ("Oh ye of little faith"). What do you sugest?

Thank you so much,

Andy from Kenosha
Hi Andy
I have faced an issue which is somehow close to this: after having mounted parts 61 and 62, one of the cannon mount fell off inside the hull.
What I did was to make a small piece of wood with a small rear support, insert it in the cannon hole and glue it to the keel or to one of the bulkhead (I don't remember exactly but believe it was the keel).
Hope this helps
Thank you so much for this info.
 
Hello all
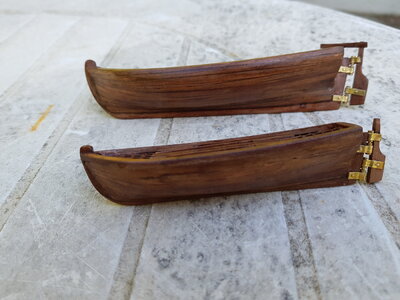
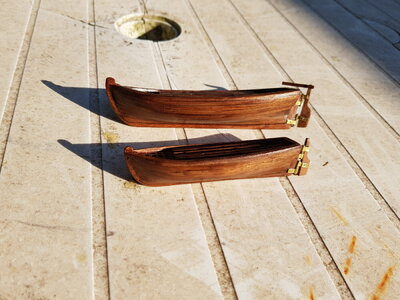
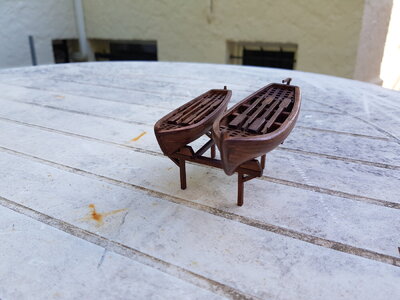
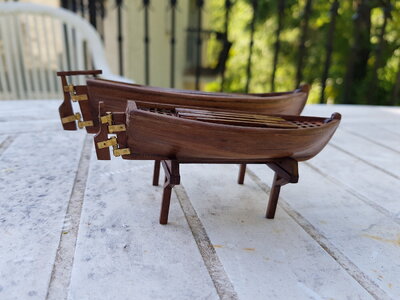
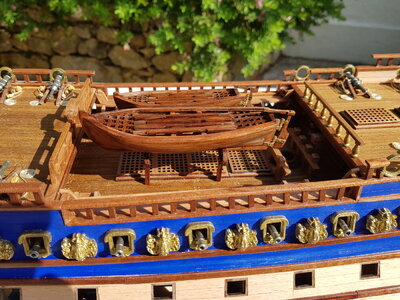
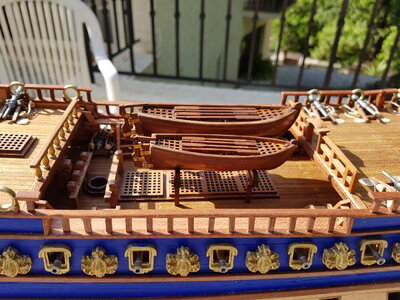
My next project was to build the 2 rescue boats. And boy, this was quite an effort. After multiple tries, using different plank thickness and width, I finally made it. I am quite happy with the results. I ended up using the planks that were provided in the kit.
I was not expecting this would take so much time.
Some pictures below

20210605_184620.jpg
20210605_184642.jpg
20210605_184724.jpg
20210605_184739.jpg
20210606_173803.jpg
20210606_173830.jpg
 
The size/workmanship look great! I have a hard time with ship's boats due to their small size--I wish I had a better"dexterity-level" of ability.
 
Hello all
My next project was to build the 2 rescue boats. And boy, this was quite an effort. After multiple tries, using different plank thickness and width, I finally made it. I am quite happy with the results. I ended up using the planks that were provided in the kit.
I was not expecting this would take so much time.
Some pictures below

View attachment 237441
View attachment 237442
View attachment 237443
View attachment 237444
View attachment 237445
View attachment 237446
Looking good Gilbert, you are doing a great job.
 
HI gilbert, maybe you can help me with a question. I am working on the same. on Pgs 17-18 did you build up the thickness with part P1 (2x6mm, hull thickness) before adding P3? this is the internal thickness next to the decking before the cap rail goes on. Also,,, I'm looking for the part # of the cap rail before the fencing goes on. Does that make sense? thanks
 
HI gilbert, maybe you can help me with a question. I am working on the same. on Pgs 17-18 did you build up the thickness with part P1 (2x6mm, hull thickness) before adding P3? this is the internal thickness next to the decking before the cap rail goes on. Also,,, I'm looking for the part # of the cap rail before the fencing goes on. Does that make sense? thanks
I think I answerd my own question. It is initialy 2mm, then add the outer .5, then the inner .5 for a total of 3, the cap rail before the fencing is part P5, which is 5.5 mm wide. Which leaves a over hang of 1.25 mm on each side.... Does that sound correct... If you think otherwise, please let me know.
 
I think I answerd my own question. It is initialy 2mm, then add the outer .5, then the inner .5 for a total of 3, the cap rail before the fencing is part P5, which is 5.5 mm wide. Which leaves a over hang of 1.25 mm on each side.... Does that sound correct... If you think otherwise, please let me know.
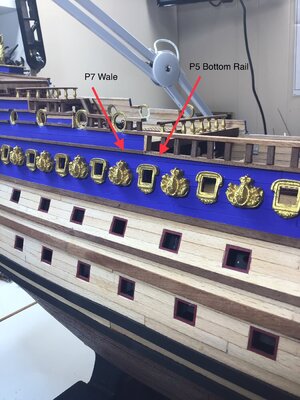
Inge…am sure Gil won’t mind me jumping in on this. Your math on the P5 rails is correct, EXCEPT, the outer portion of the bottom rail should match up with the P7 wale. This wale is 2mm wide so if you place P5 evenly as you suggested, it will not be flush with the wale since it will overhang only to 1.25mm.
Hope this helps.
OK, that makes sense. I think
 
HI gilbert, maybe you can help me with a question. I am working on the same. on Pgs 17-18 did you build up the thickness with part P1 (2x6mm, hull thickness) before adding P3? this is the internal thickness next to the decking before the cap rail goes on. Also,,, I'm looking for the part # of the cap rail before the fencing goes on. Does that make sense? thanks
Hi Inge
Yes, I used P1 first and then P3 as second layer
 
Hello
It has been quite some time since my last post, I have been struggling with the poop balcony and have tried many different approaches.
I finally came out with a reasonable way and have then been able to move forward.
Below where I stand:

View attachment 211673
View attachment 211674View attachment 211675View attachment 211676

I then painted the upper part of the hull. I started with ultramarine blue (Liquitex) but found it too dark. I then moved to Cobalt blue (2 coats).
View attachment 211677View attachment 211678View attachment 211679

I also planked the stem (using sapeli).
View attachment 211680

Next steps will be to complete the balcony at the stem and start with the deck elements.
HI, gilbert... I have a question... in reference to the "gun port frames" I noticed you put in the frames for the two lower gun decks before the second planking. did you find this easier..... then on the upper gun deck added later. (after painting) The directions say after second planking. ( I realize directions here are limited and only a "rough guide") As your second planking continued, did you just cut the pieces to size or cut out the frames. Thanks,,, Inge
 
HI, gilbert... I have a question... in reference to the "gun port frames" I noticed you put in the frames for the two lower gun decks before the second planking. did you find this easier..... then on the upper gun deck added later. (after painting) The directions say after second planking. ( I realize directions here are limited and only a "rough guide") As your second planking continued, did you just cut the pieces to size or cut out the frames. Thanks,,, Inge
OK, I answered my own question... I will put them in b4 the second planking... I went and looked at other builds and they also put them in b4..... thank you for your build log, it is helping dramatically.
 
HI, gilbert... I have a question... in reference to the "gun port frames" I noticed you put in the frames for the two lower gun decks before the second planking. did you find this easier..... then on the upper gun deck added later. (after painting) The directions say after second planking. ( I realize directions here are limited and only a "rough guide") As your second planking continued, did you just cut the pieces to size or cut out the frames. Thanks,,, Inge
Hello Inge
I installed the gun frames before the second planking in order for those frames to be slightly inside the planking
See the post below that explains
https://shipsofscale.com/sosforums/threads/soleil-royal-zhl-1-90-scale-by-paulb.4716/page-7

In terms of your second question I found out that the easiest approach was to have the second planking flush with the upper and lower part of the gun ports so that the above or below plank is easier to install. I then cut small pieces of planks between the gun ports.

Hope this helps
Yes,,,, it helps dramatically. As you know, the directions leave quite a bit to be desired.
 
Hello
Both sides of the hull (below and above the wales) are now planked and I am quite happy with the results.
I have applied 2 coats of wood sealer on the lower part of the hull (sapele).

View attachment 207967View attachment 207974View attachment 207975
View attachment 207977

Planned for the coming days
- Complete planking the bow on the port side
- Get started on the stern
In reference to your second planking of the light colored wood.... Looks like you cut the wood down into lengths.... were they specific lengths? or just kind of randon.... thank you
 
Back
Top