1930 Bentley Blower by Aifix 1/12 build log

Continued on the body components. Today, I tackled the soft top frame. They are very few ref pictures of the frame and even fewer of a top in place. I could only find one. So there is a lot of "modelers leeway" in the design.

Here's the frame so far.

Capturedcran2024-04-15211120.jpg.b56fad358421a6bcb107d7255f73d54d.jpg


Capturedcran2024-04-15211301.jpg.142e57a2715da430611a26a0ea6b4af8.jpg


And the only pictures of a top up

Capturedcran2024-04-15211315.jpg.60fdab3567c46d2bfe15218f359f076d.jpg


I'll try to 3d model the top itself, not easy to do.
 
The top is modeled and it was effectively not easy to do. Hopefully I'll be able to do it for real.

Here's my 3d model

Capturedcran2024-04-16204735.jpg.0d6eae2db3b71fb9a69386b15057175b.jpg


Capturedcran2024-04-16204848.jpg.ce5eb6b9ec95dcbdd9bb7428863f68d6.jpg


And a real top

Capturedcran2024-04-15211315.jpg.d67fb661ac2923eb7e362e24c8e28299.jpg


I've worked hard on printing the different windscreen components and as predicted, some were very tricky to do. I've dry fitted the meshscreen with it's mounting frame and I'm very pleased with the result. The difficulty with the mesh screen was to figure out the proper shape of mesh to cut. Since the mesh is not flat ( it has a fairly prononced bump to clear the oil tank cap), it's shape is not a rectangle but rather a mix of straight and curved line. I tried to determine the shape using good old geometrie but I've been using a 3d cad system for so long the my basic draftman's skills are very rusty. So I took the easy way out and printed a 2 piece male/female press to conform the mesh. All I had to do was to cut the mesh following the contour of the press. I then had a correctly shape mesh that could be inserted in the frame. Easier said than done. It took me about 1 hour but I got it in! Too bad I'll have to disassemble it for paint but I know it fits.

Here are some pictures.

The male/female press


The mesh in the press ready yo be trimmed

20240418_212500.jpg.ad64a58e2271003db801869d0957a61e.jpg


The mesh inserted in the frame


Scratch built clamping screws

20240418_223026.jpg.e6e86d2271a792d75bc165c24411f278.jpg


20240418_223123.jpg.04af1d05685ef802caff21041988c297.jpg


The real one

Screenshot_20240418_223808_Photos.jpg.ee7b5d6de3a6a97c86c174aab4de096b.jpg


The mesh screen installed in the mounting frame


My assembly next to the kit's


The aftermath...


Next up, the foldable top frame.
 
Up date time.

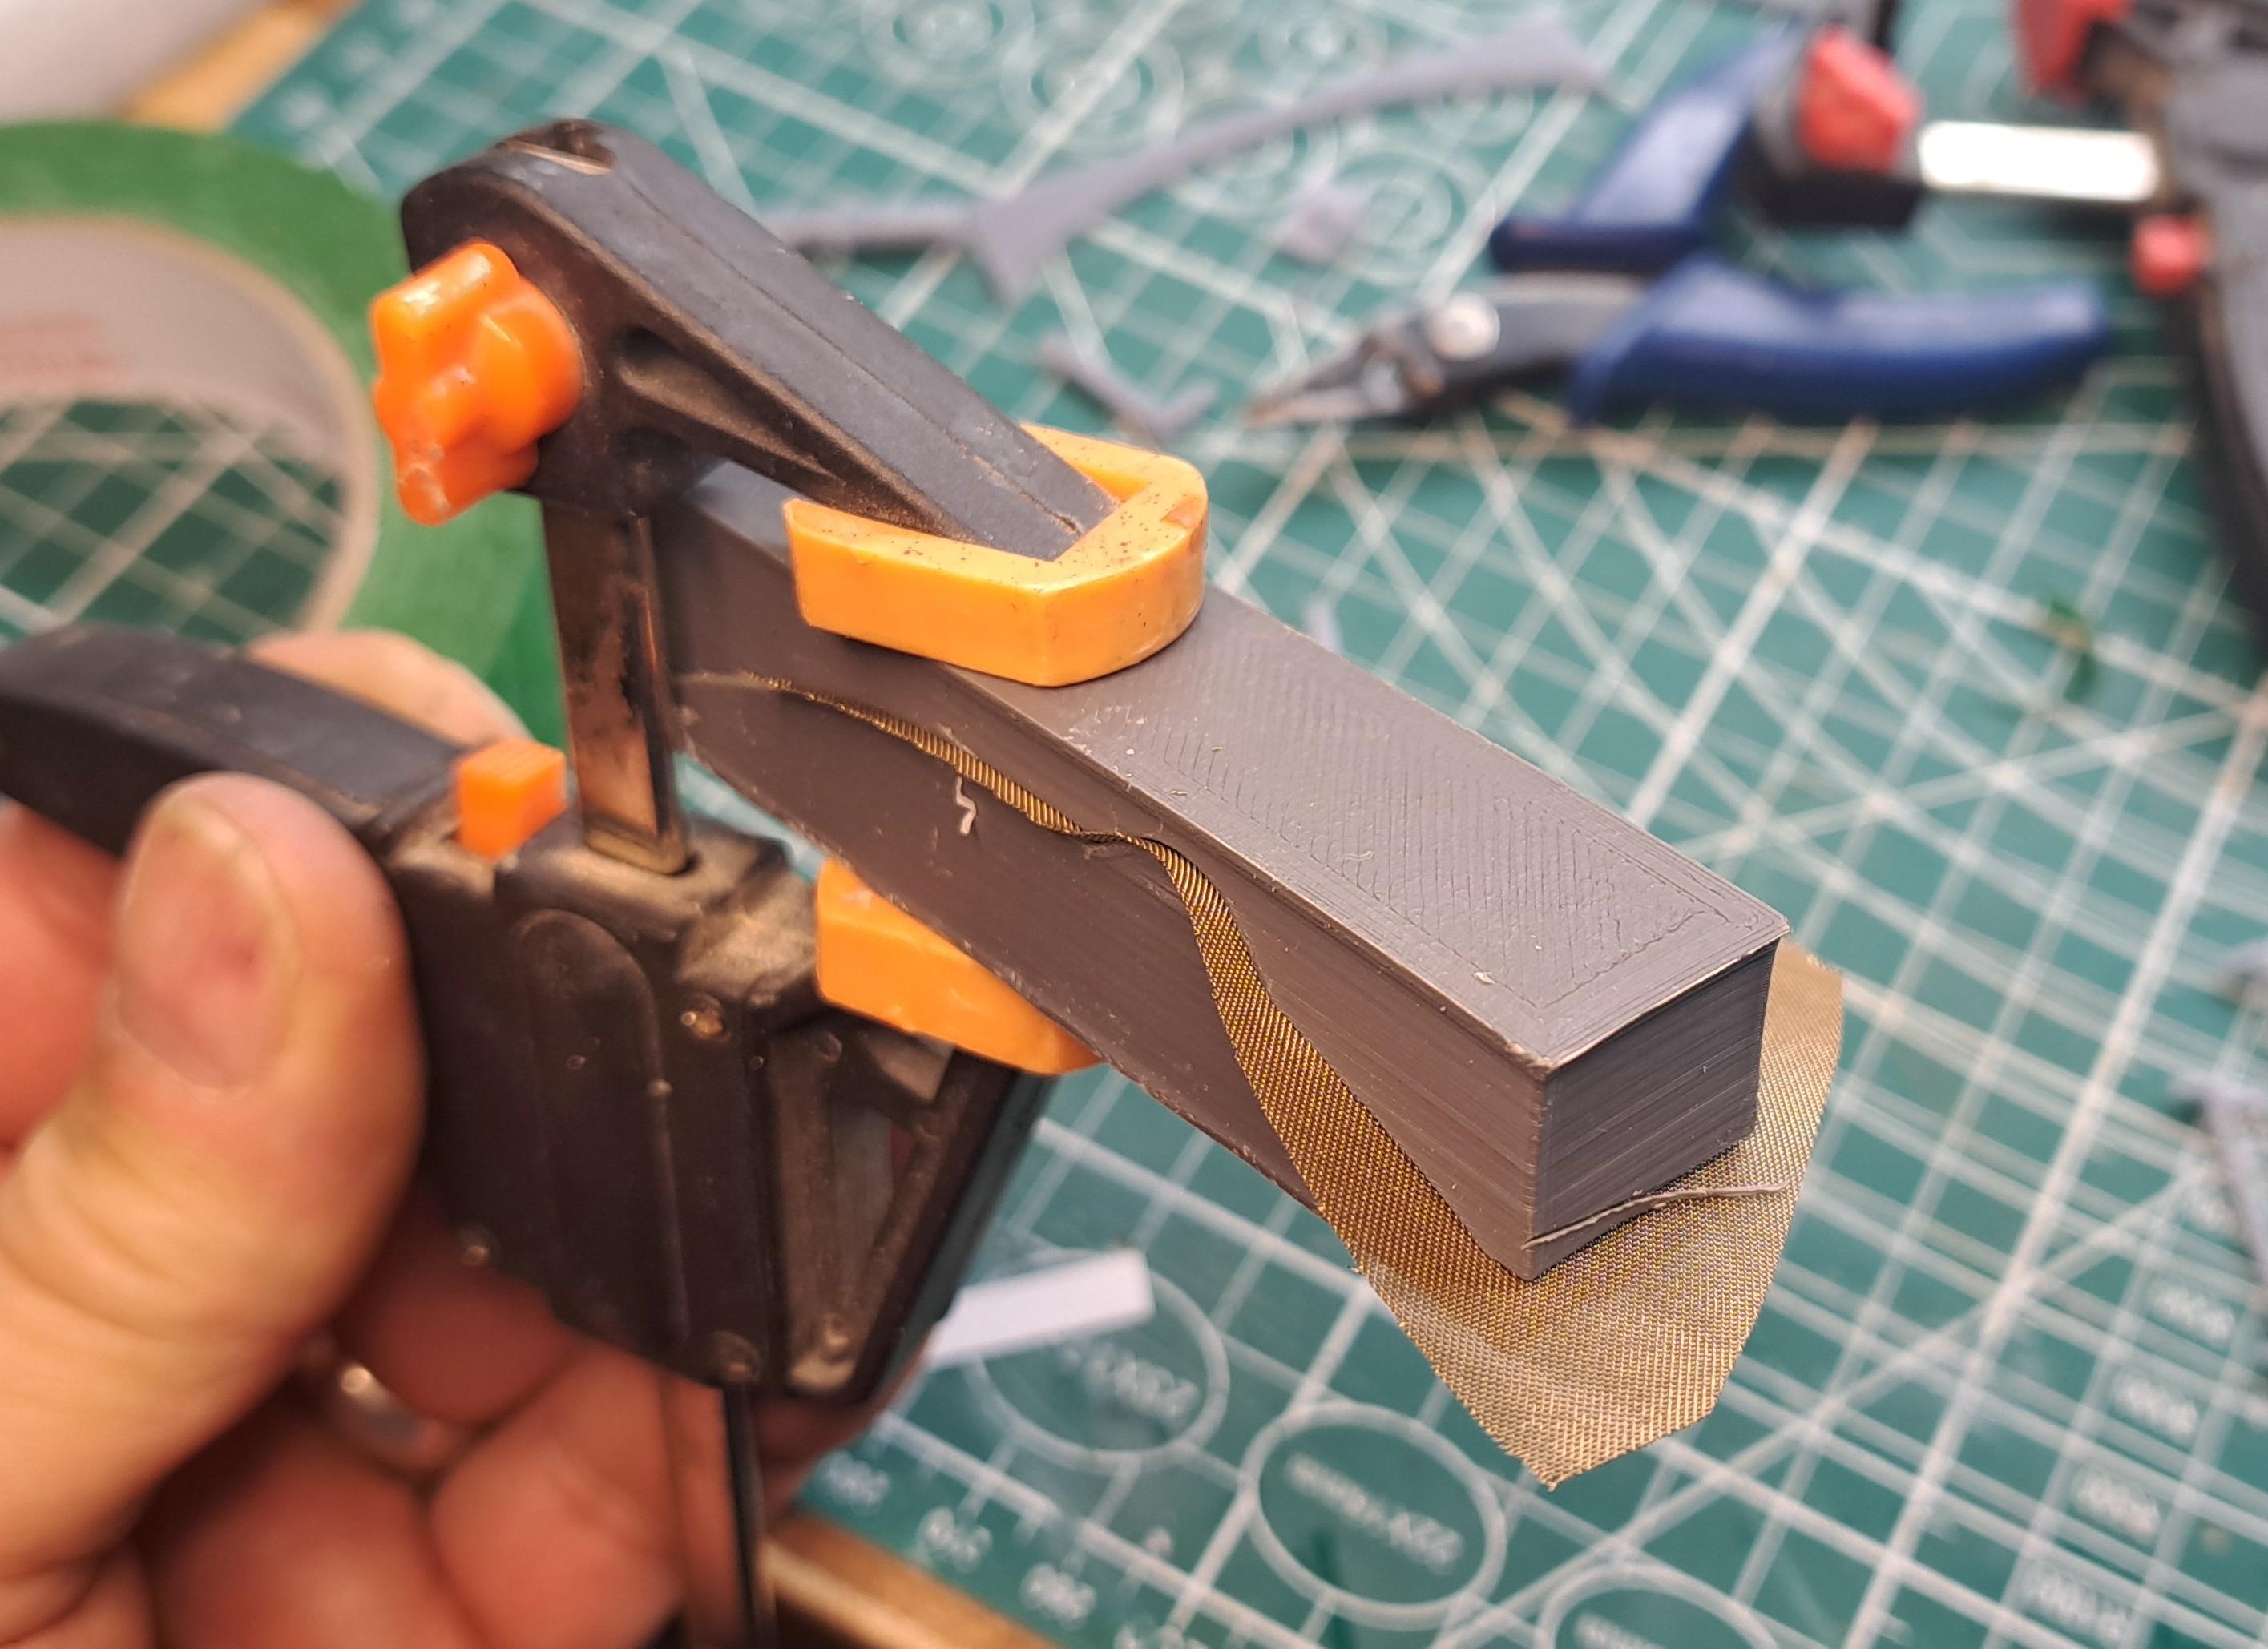
I'm slowly advancing the body. I made a full wrapping test using a 4 way stretch fabric. The result was pretty good but installation was very difficult. First, it needs to be glued using a spray on contact ciment. So once on, that is pretty much it. The edges once wrapped around don't hold very well since the material is so stretchy and contrary to leather, it doesn't react to well to ca glue.

Here's what it looks like.


So I went back on the web to search some more and stumpled on a material called a vinyl car wrap which is basically a vinyl menbrane used to wrap over a car when you want to change color. And it just so happens that a big player in the car wrapping business is about 25 min from my house. There are many positive features to this product. First, it very cheap. 15$ for a 12in x 60in piece, big enough for at least 7 to 8 tries. Second, at only .005in (1/16in scaled up) , it's half the thickness of the 4 way fabric I tried and much more to scale. Third, it has heat activated glue on the back so I can reposition it as much as l like and once satisfied, apply heat to bond. And fourth, it's heat shrinking so once wrapped over the edges, you apply heat and it hucks the edge. I found a piece that is satin black that I think should look pretty good.

Here's a test I did on a door


I should be wrapping soon.

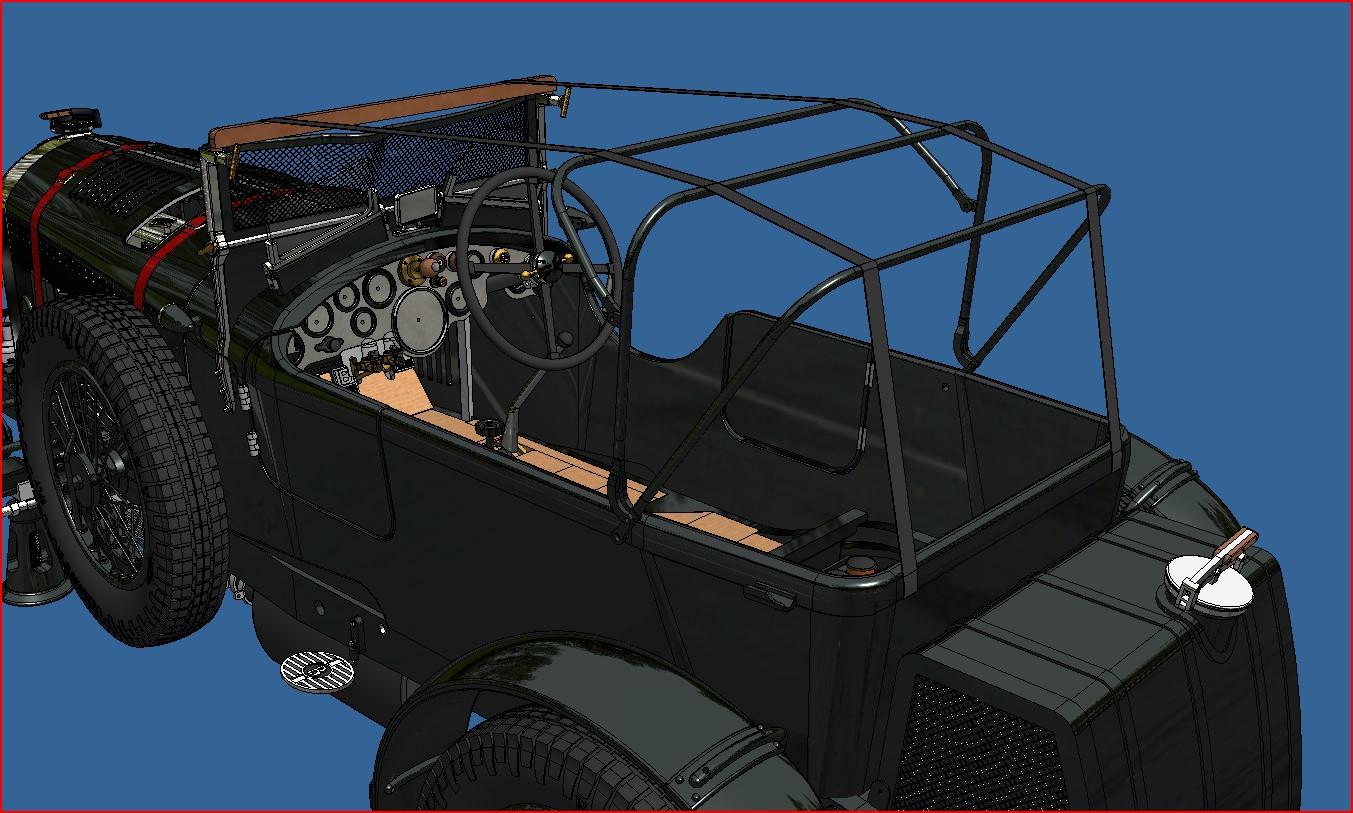
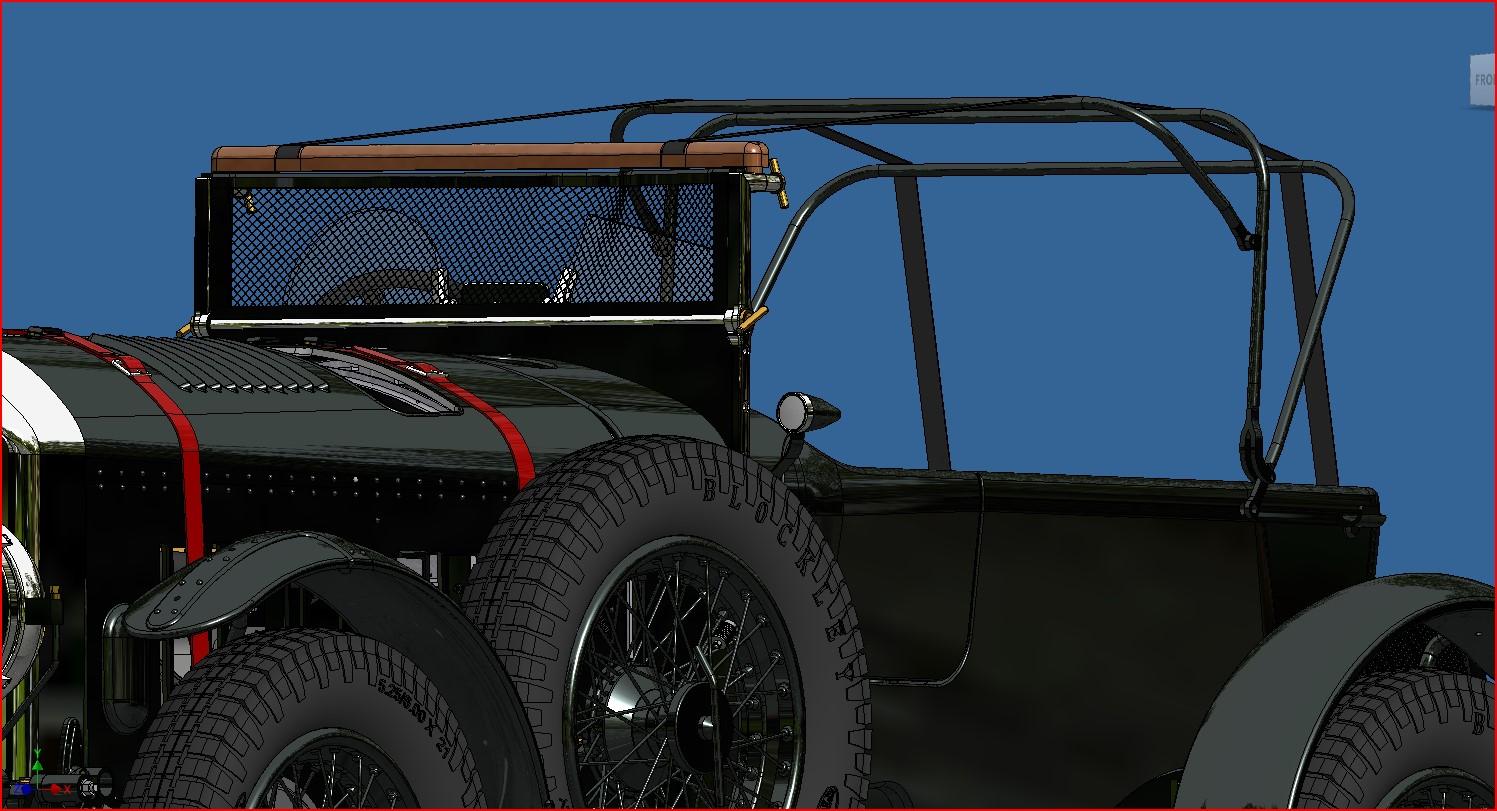
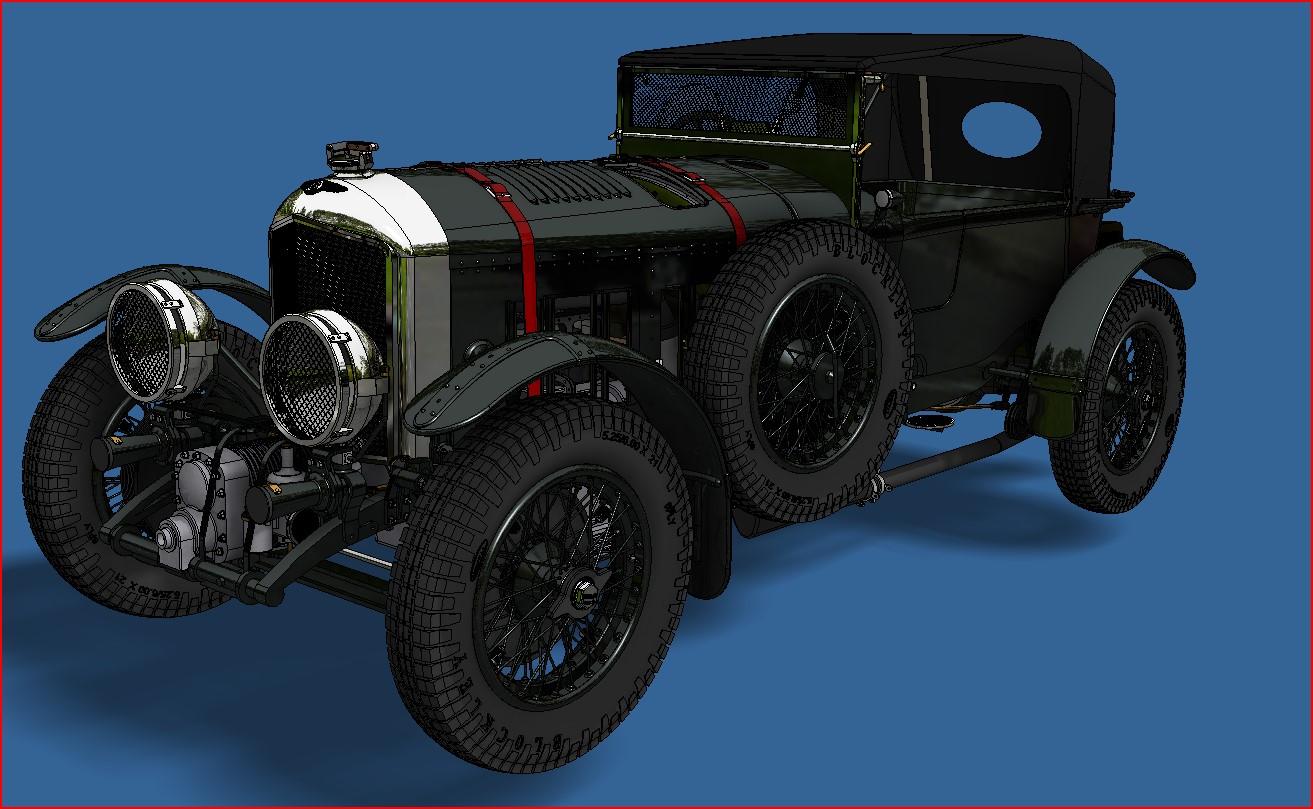
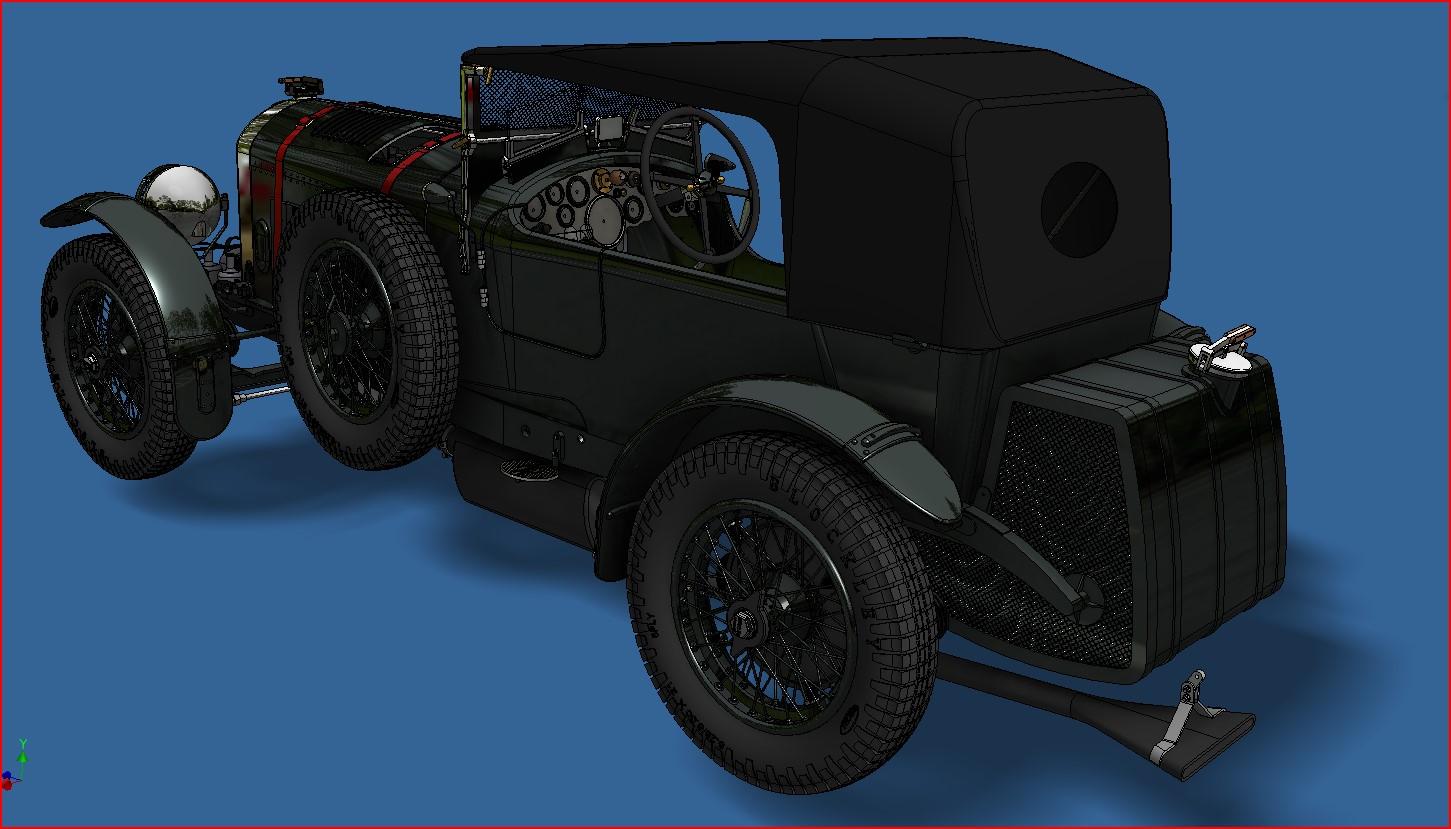
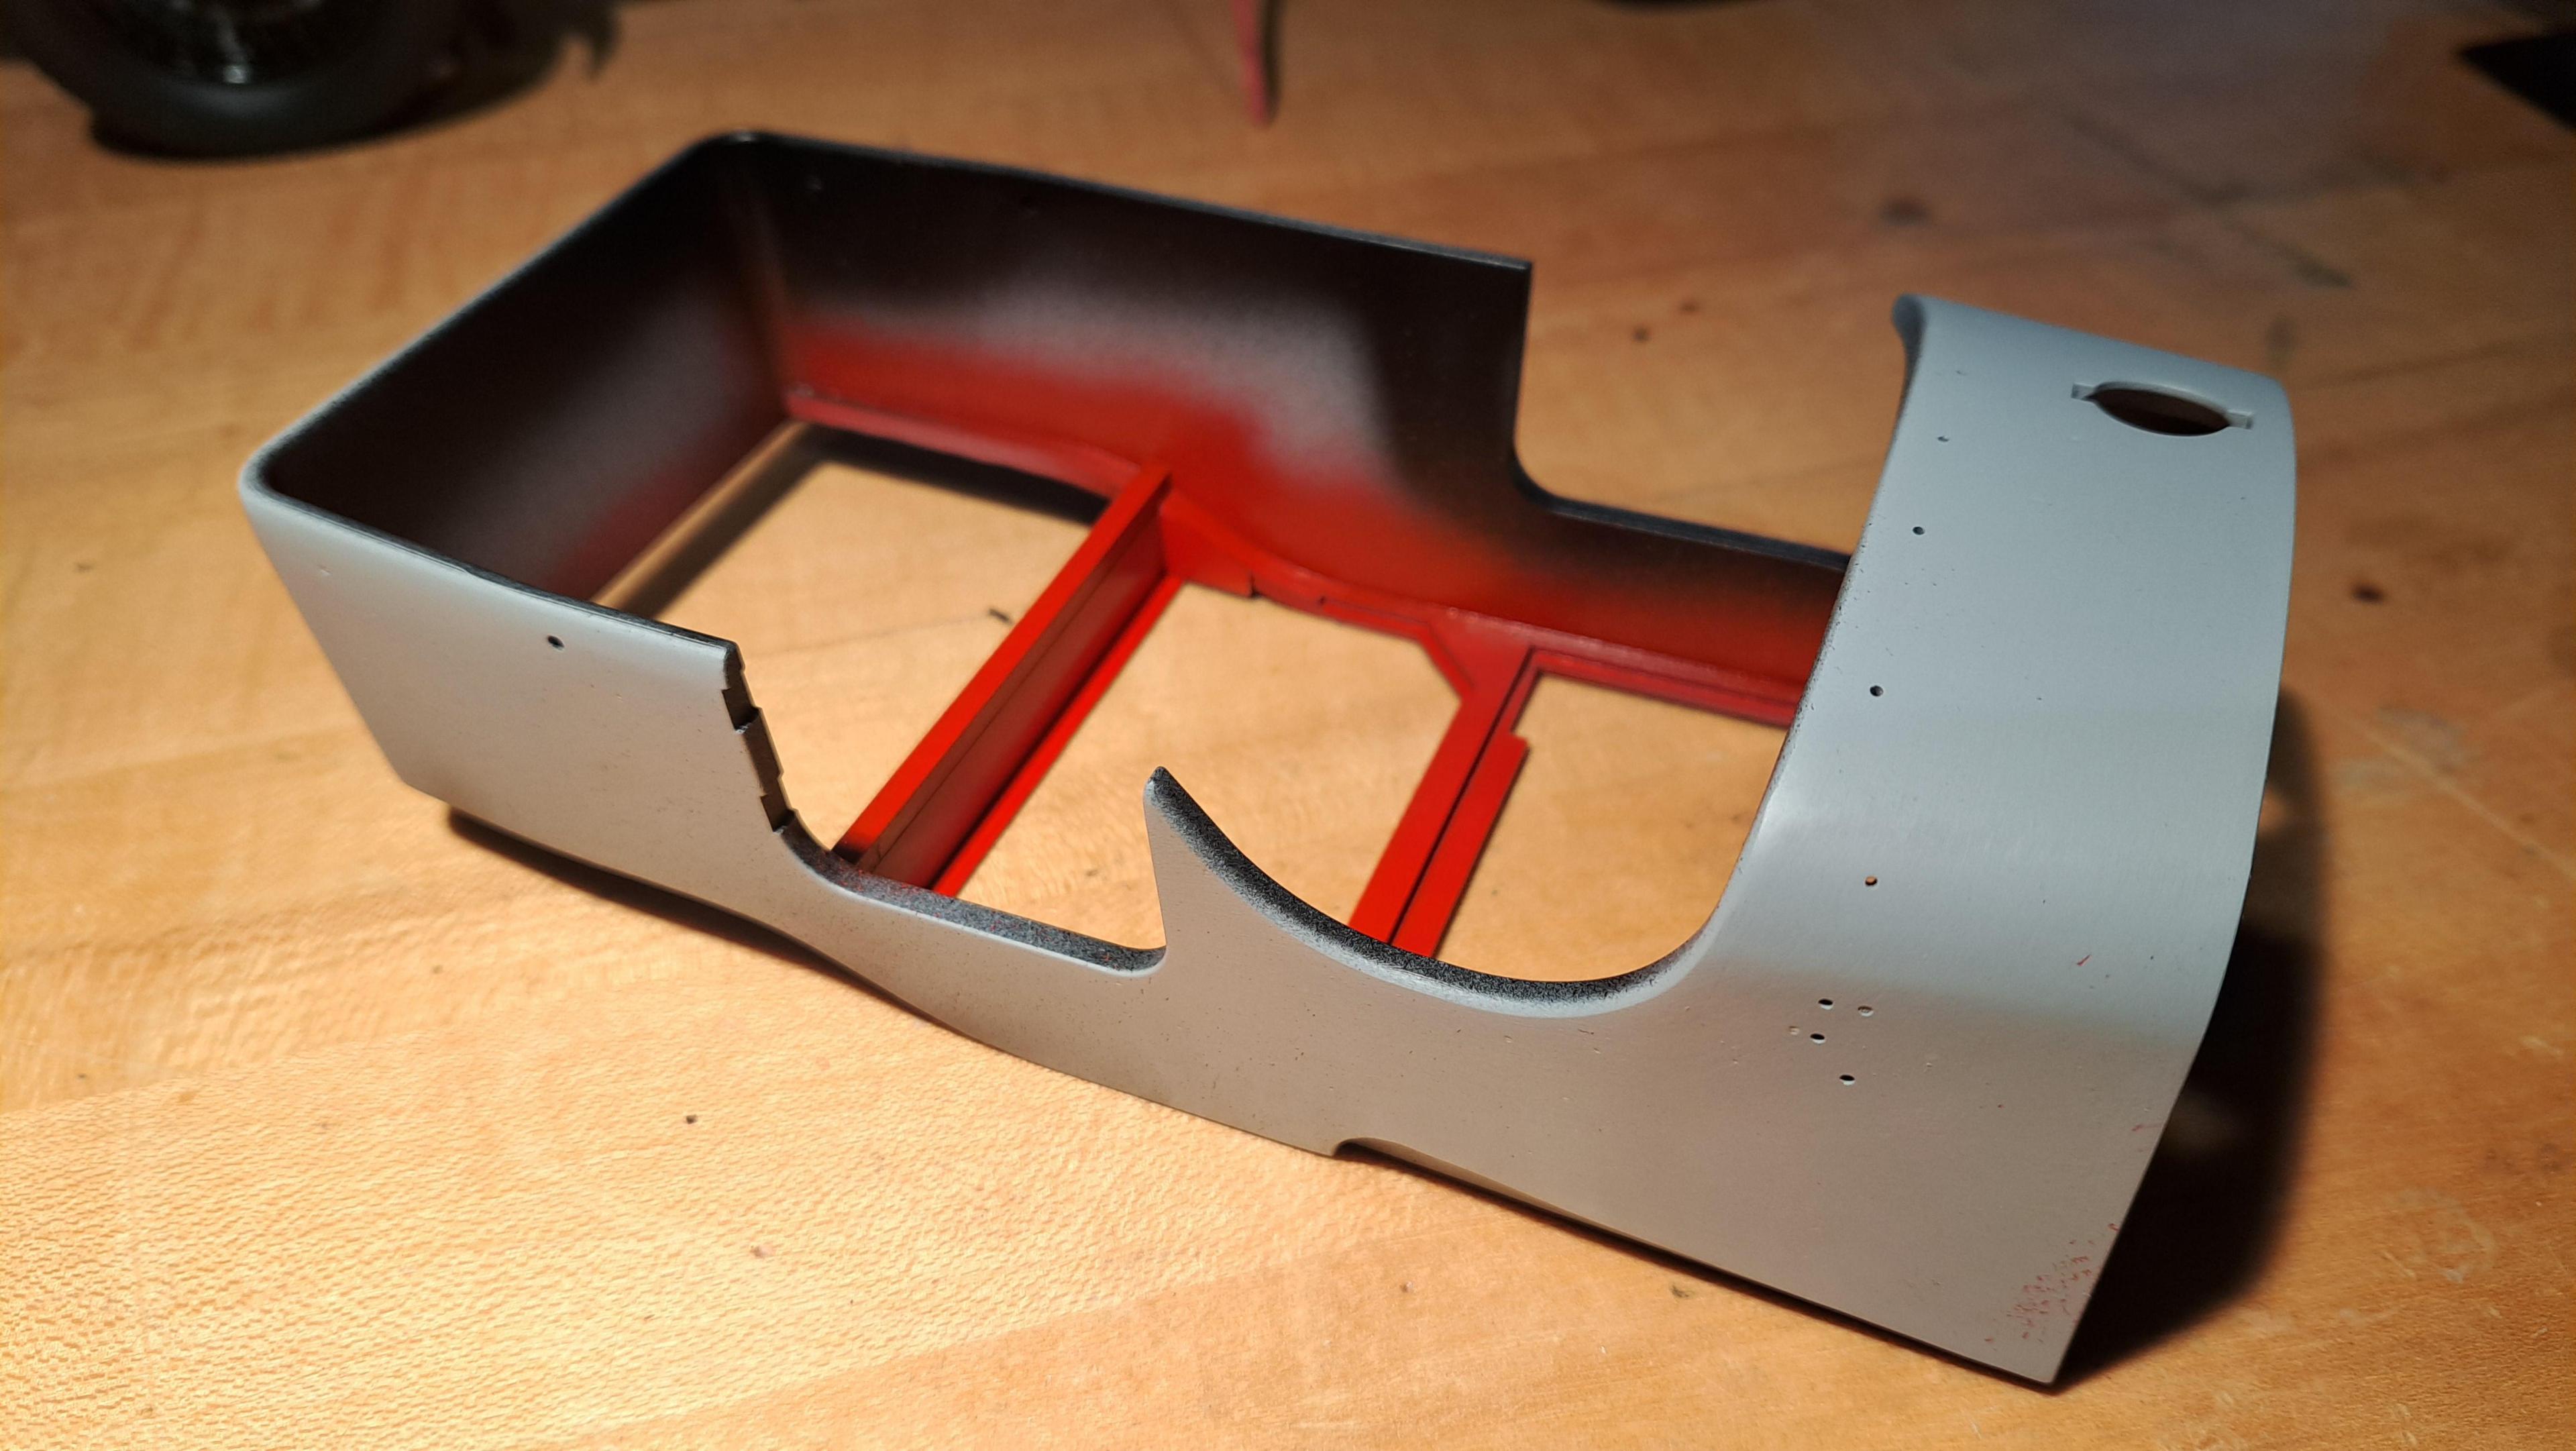
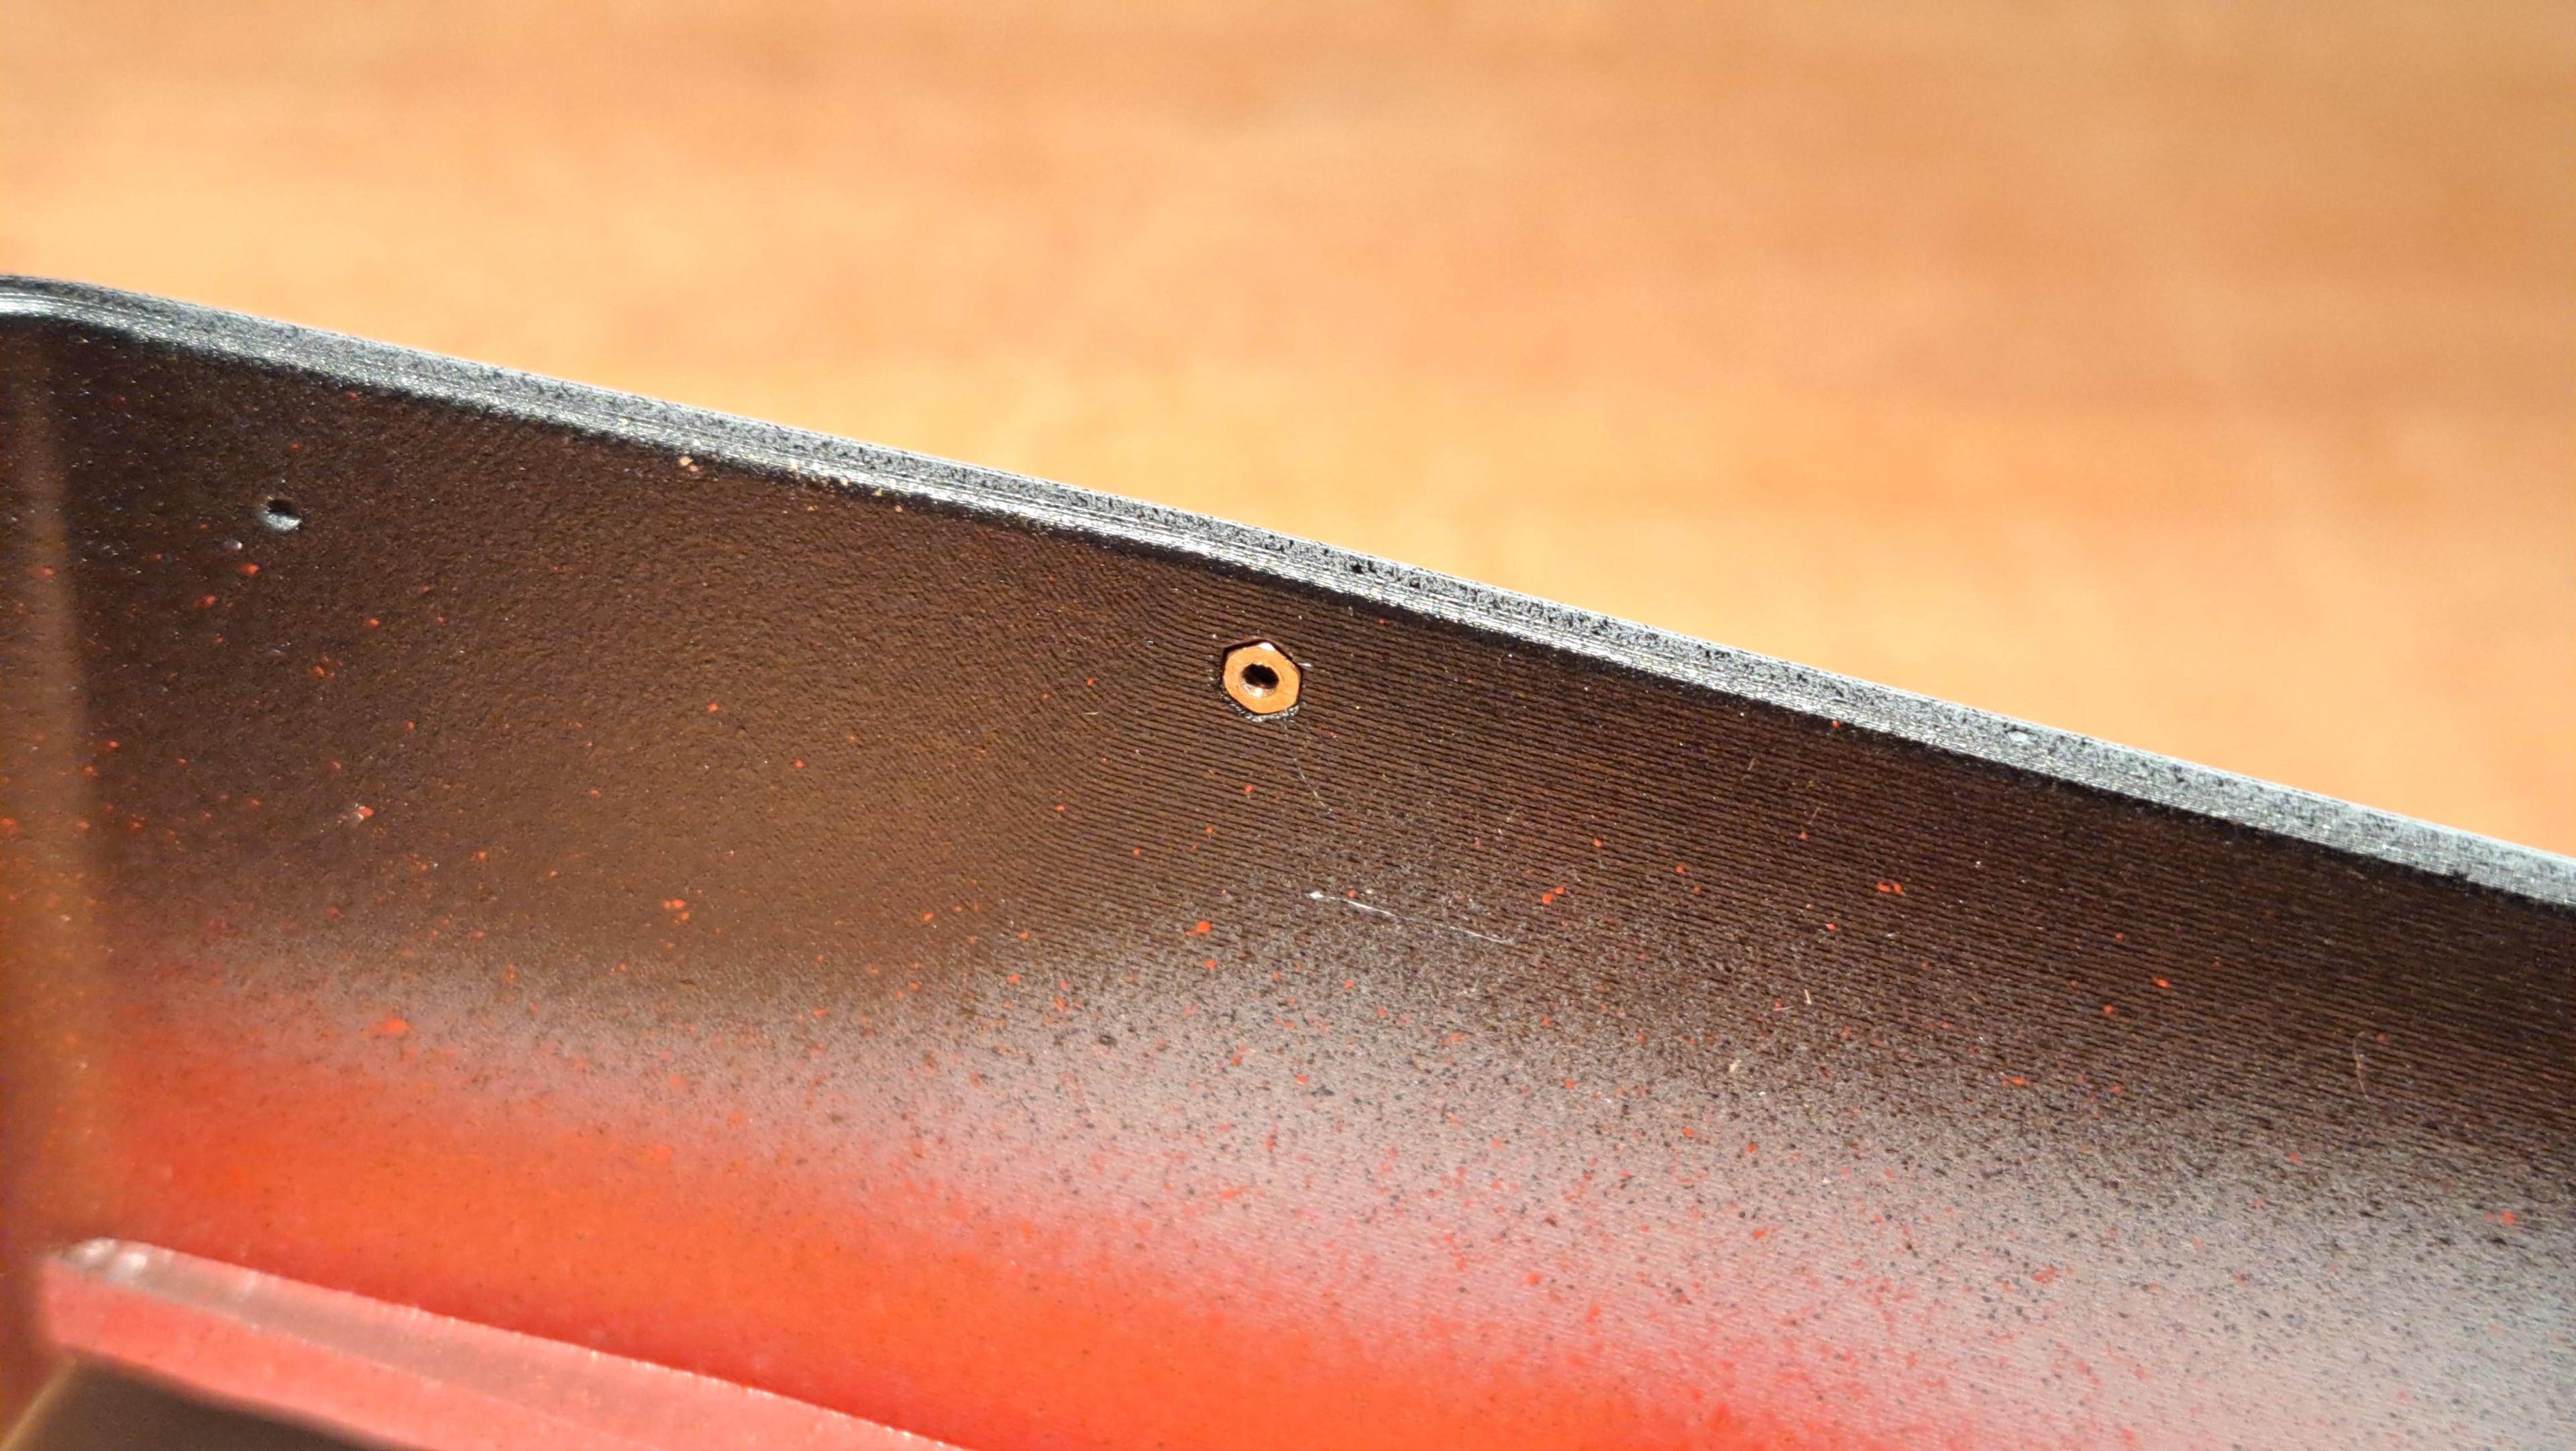
I reprinted a body with all mounting holes in it. It's now primed and ready for wrapping. Since the interior will be upholstered in red leather, I painted certain areas red in case the leather doesn't cover everything. I even incorporated hex nuts to screw in the foldable top frame.


here's my body collection so far


I found a nice piece of red leather for 5$. It's a bit thicker than l like but I should be able to skive it.


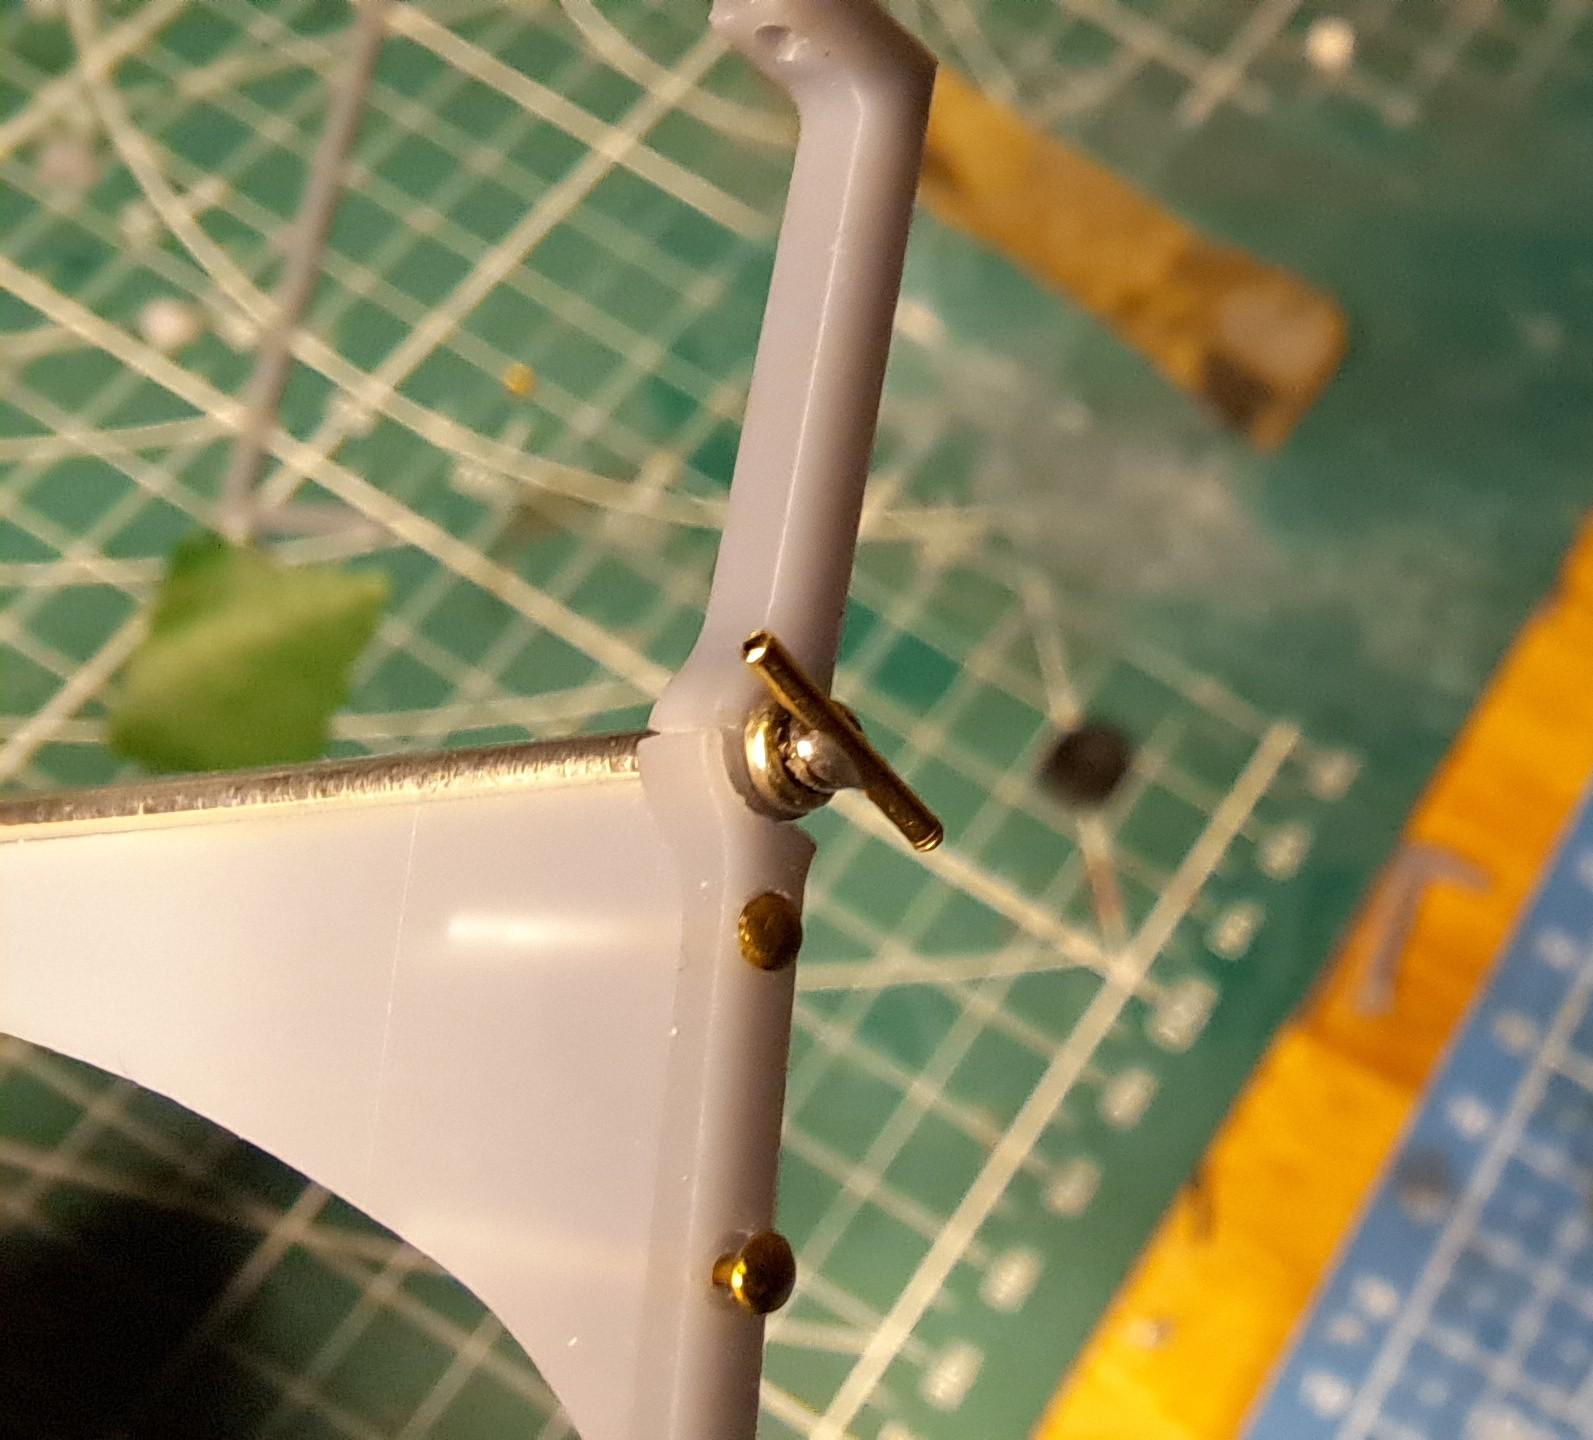
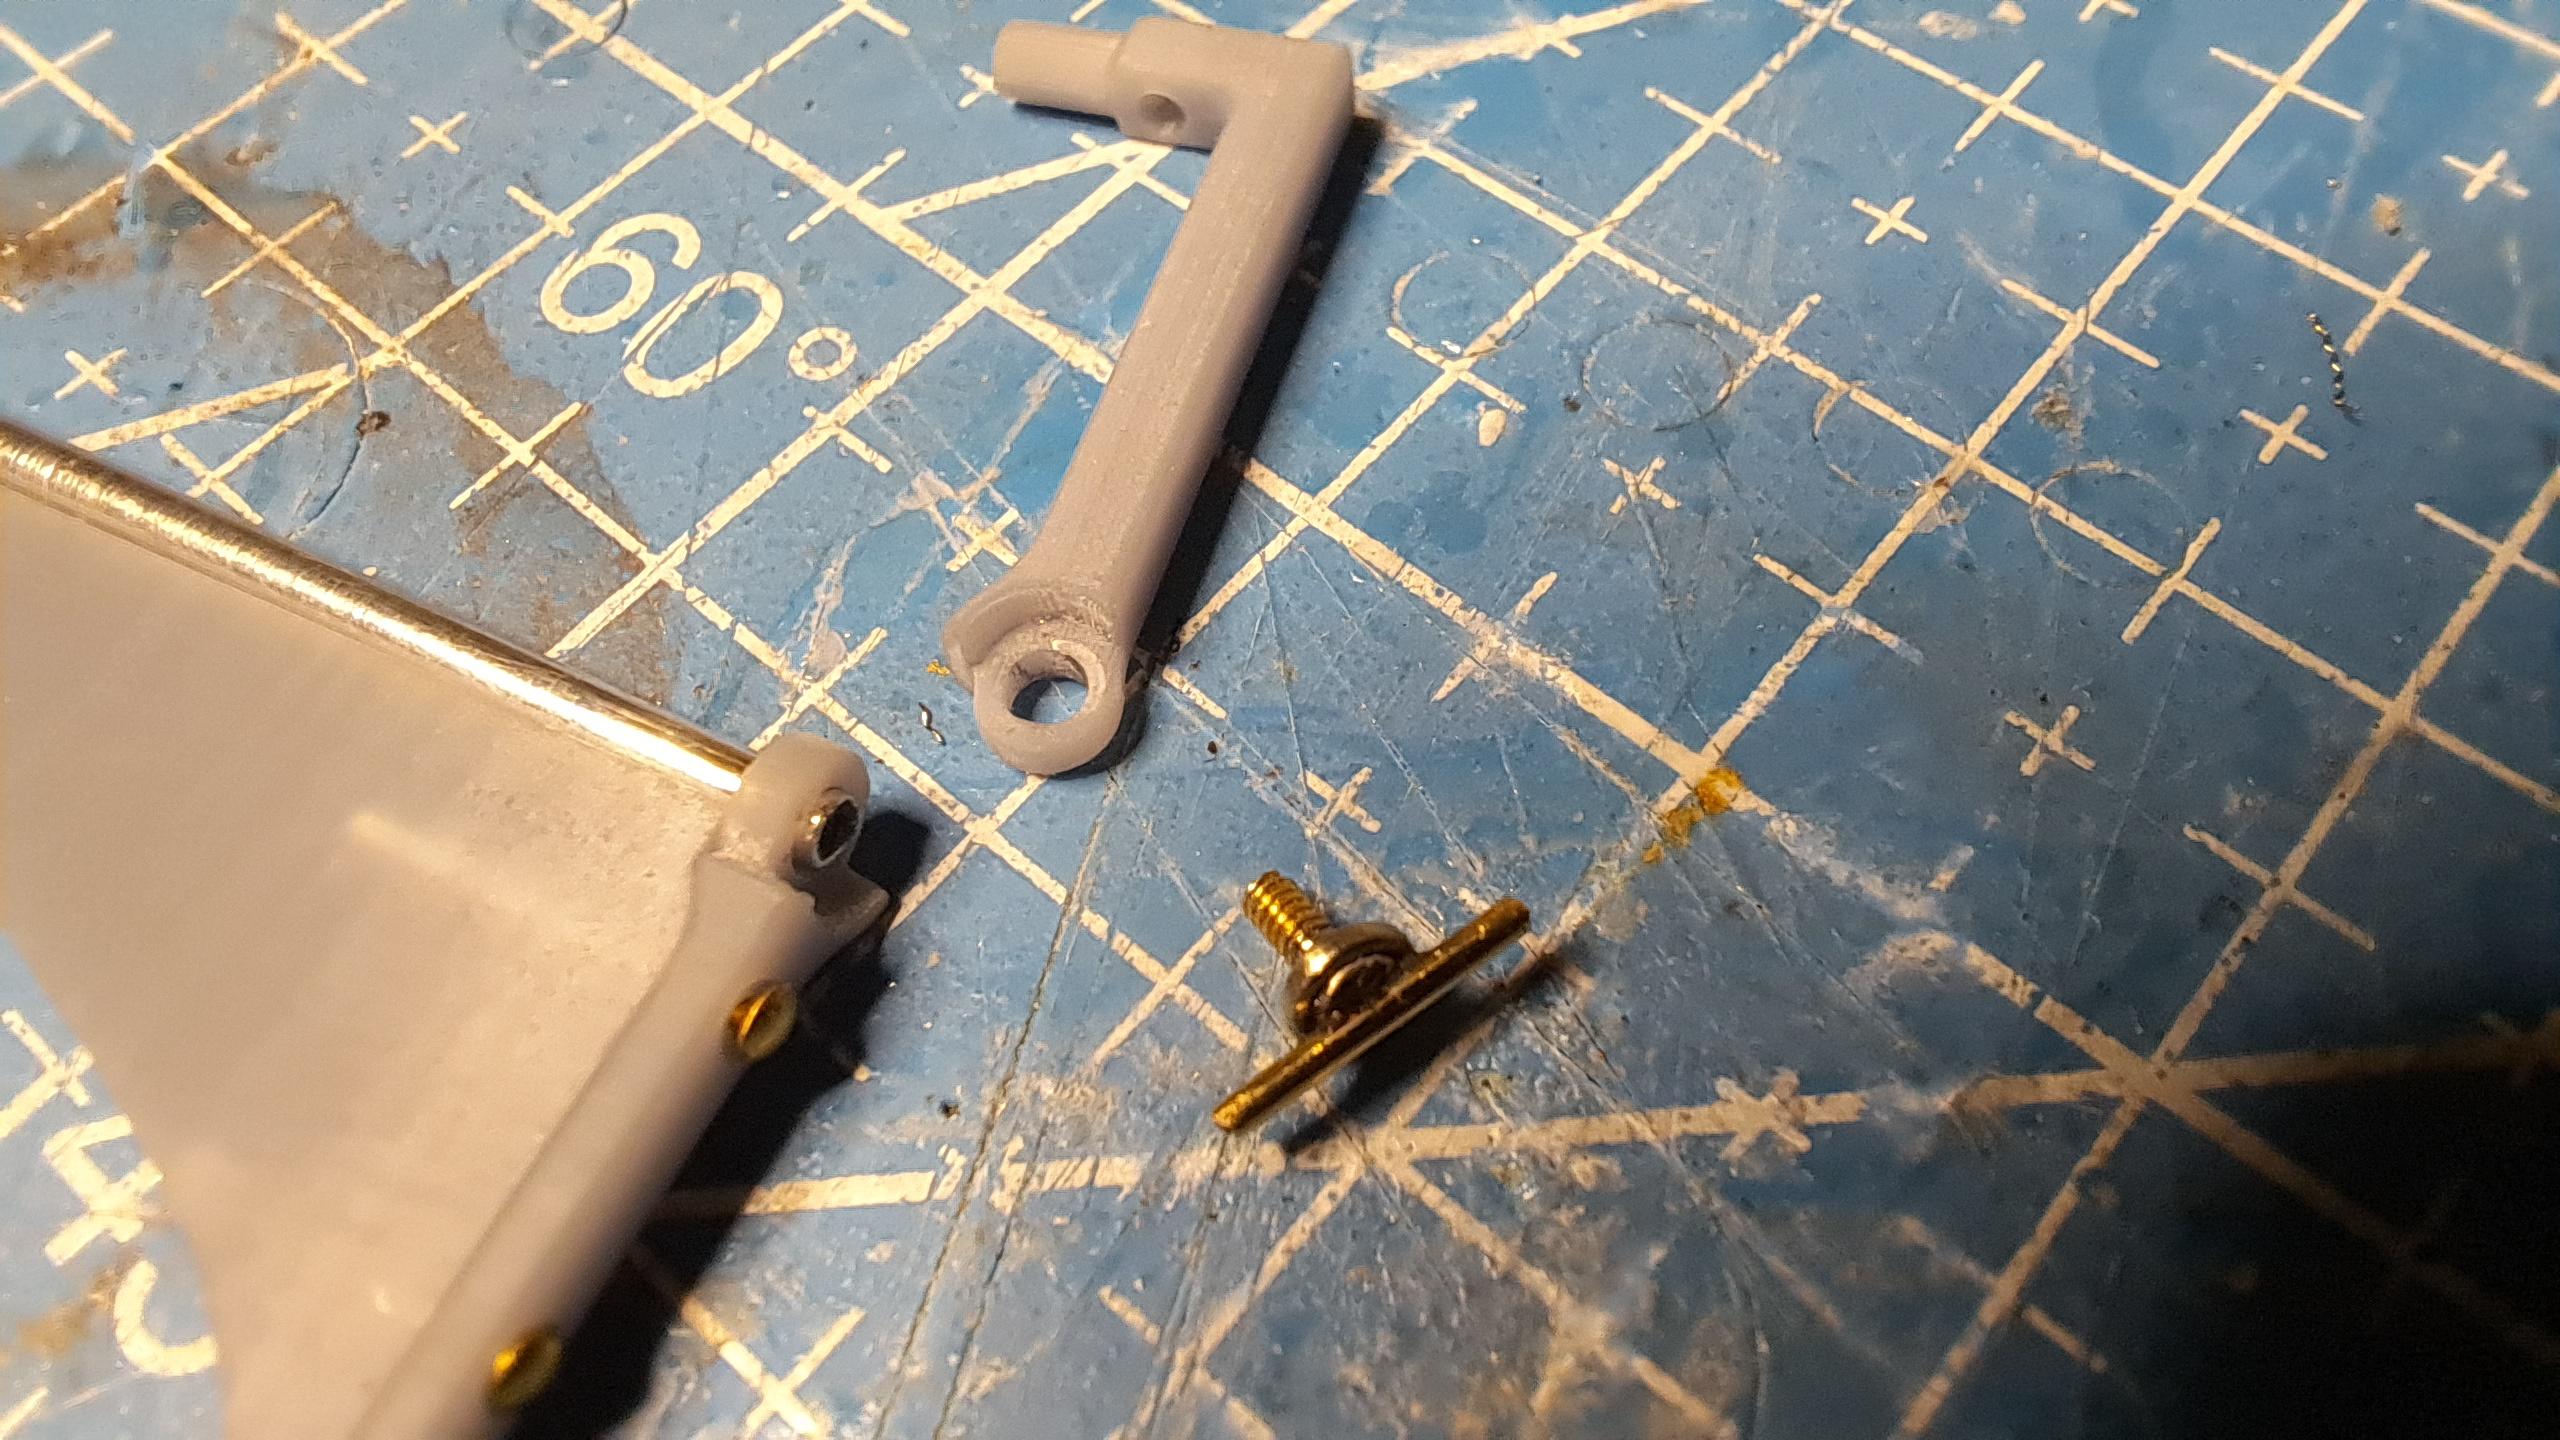
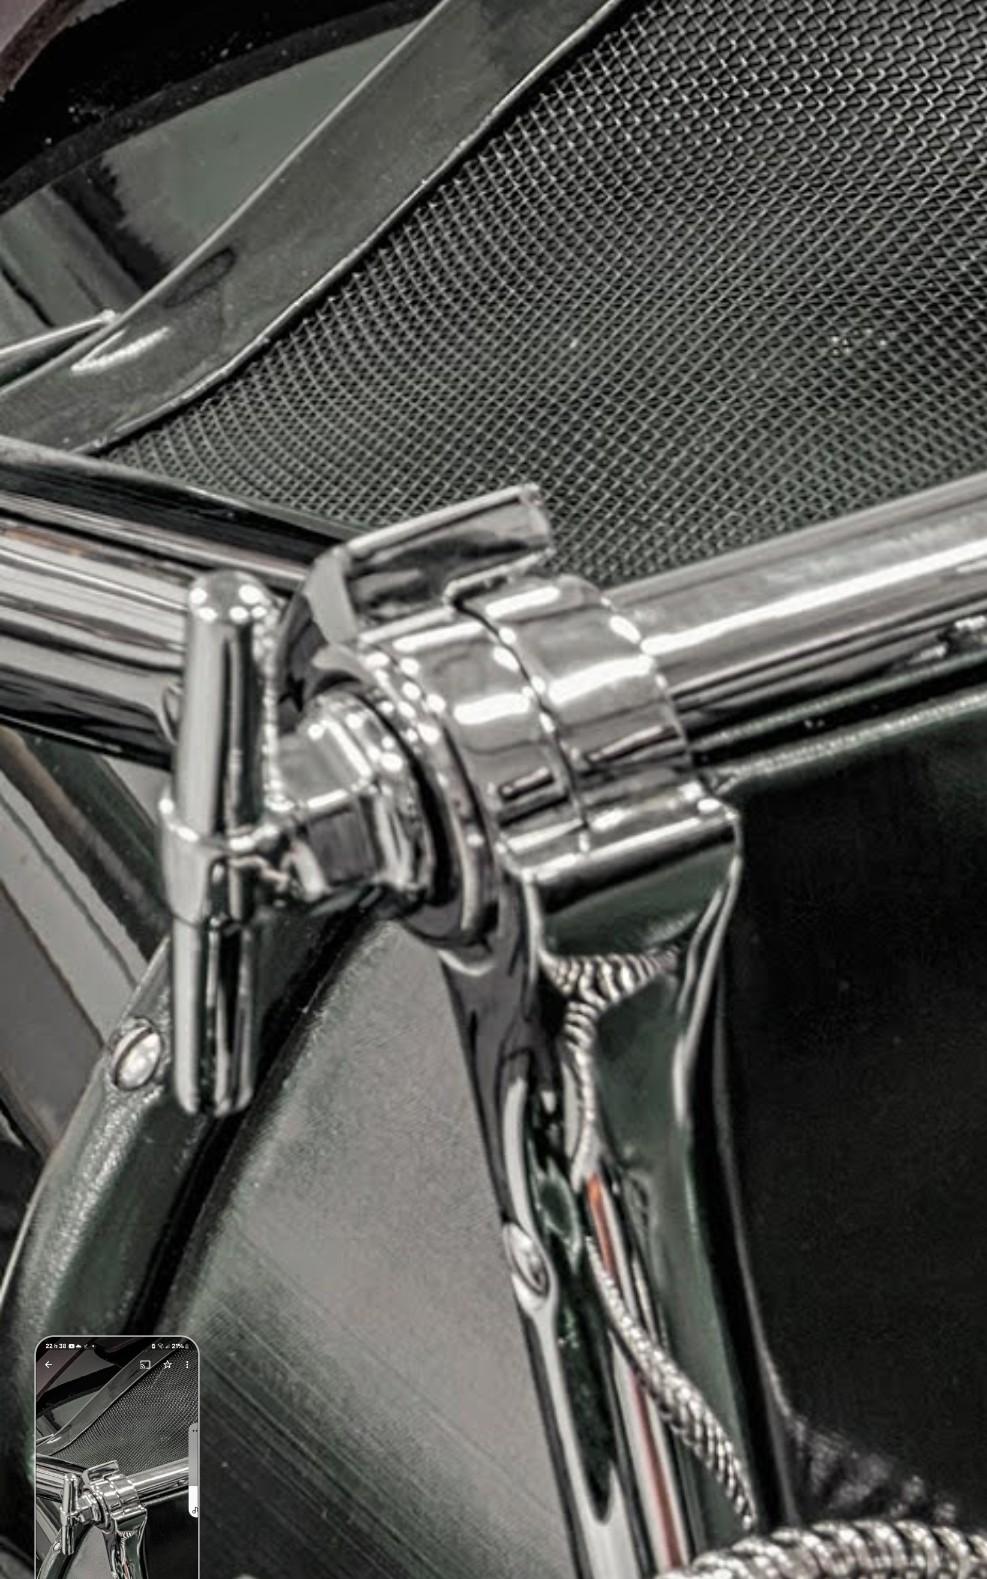
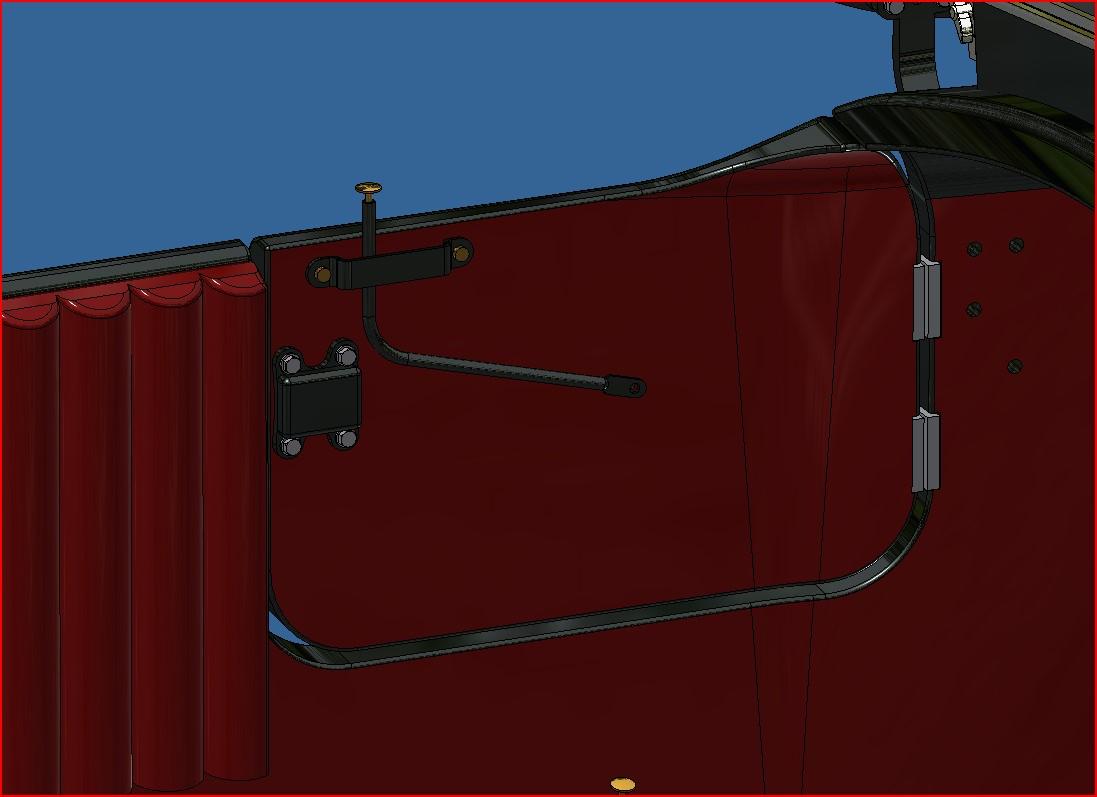
I started 3d modeling the interior finishes. I modeled the door latch based on the few pictures I could find.

The latch inspiration

Capturedcran2024-04-25100013.jpg.95da28c37d42b59852cfd22135e1d5ab.jpg


My 3d model

Capturedcran2024-04-26193302.jpg.3a99eb722cf444b6234cea35320fc3e2.jpg


Capturedcran2024-04-26194210.jpg.cb0aa4cc93d6d9e4c3778511c01ac8cf.jpg


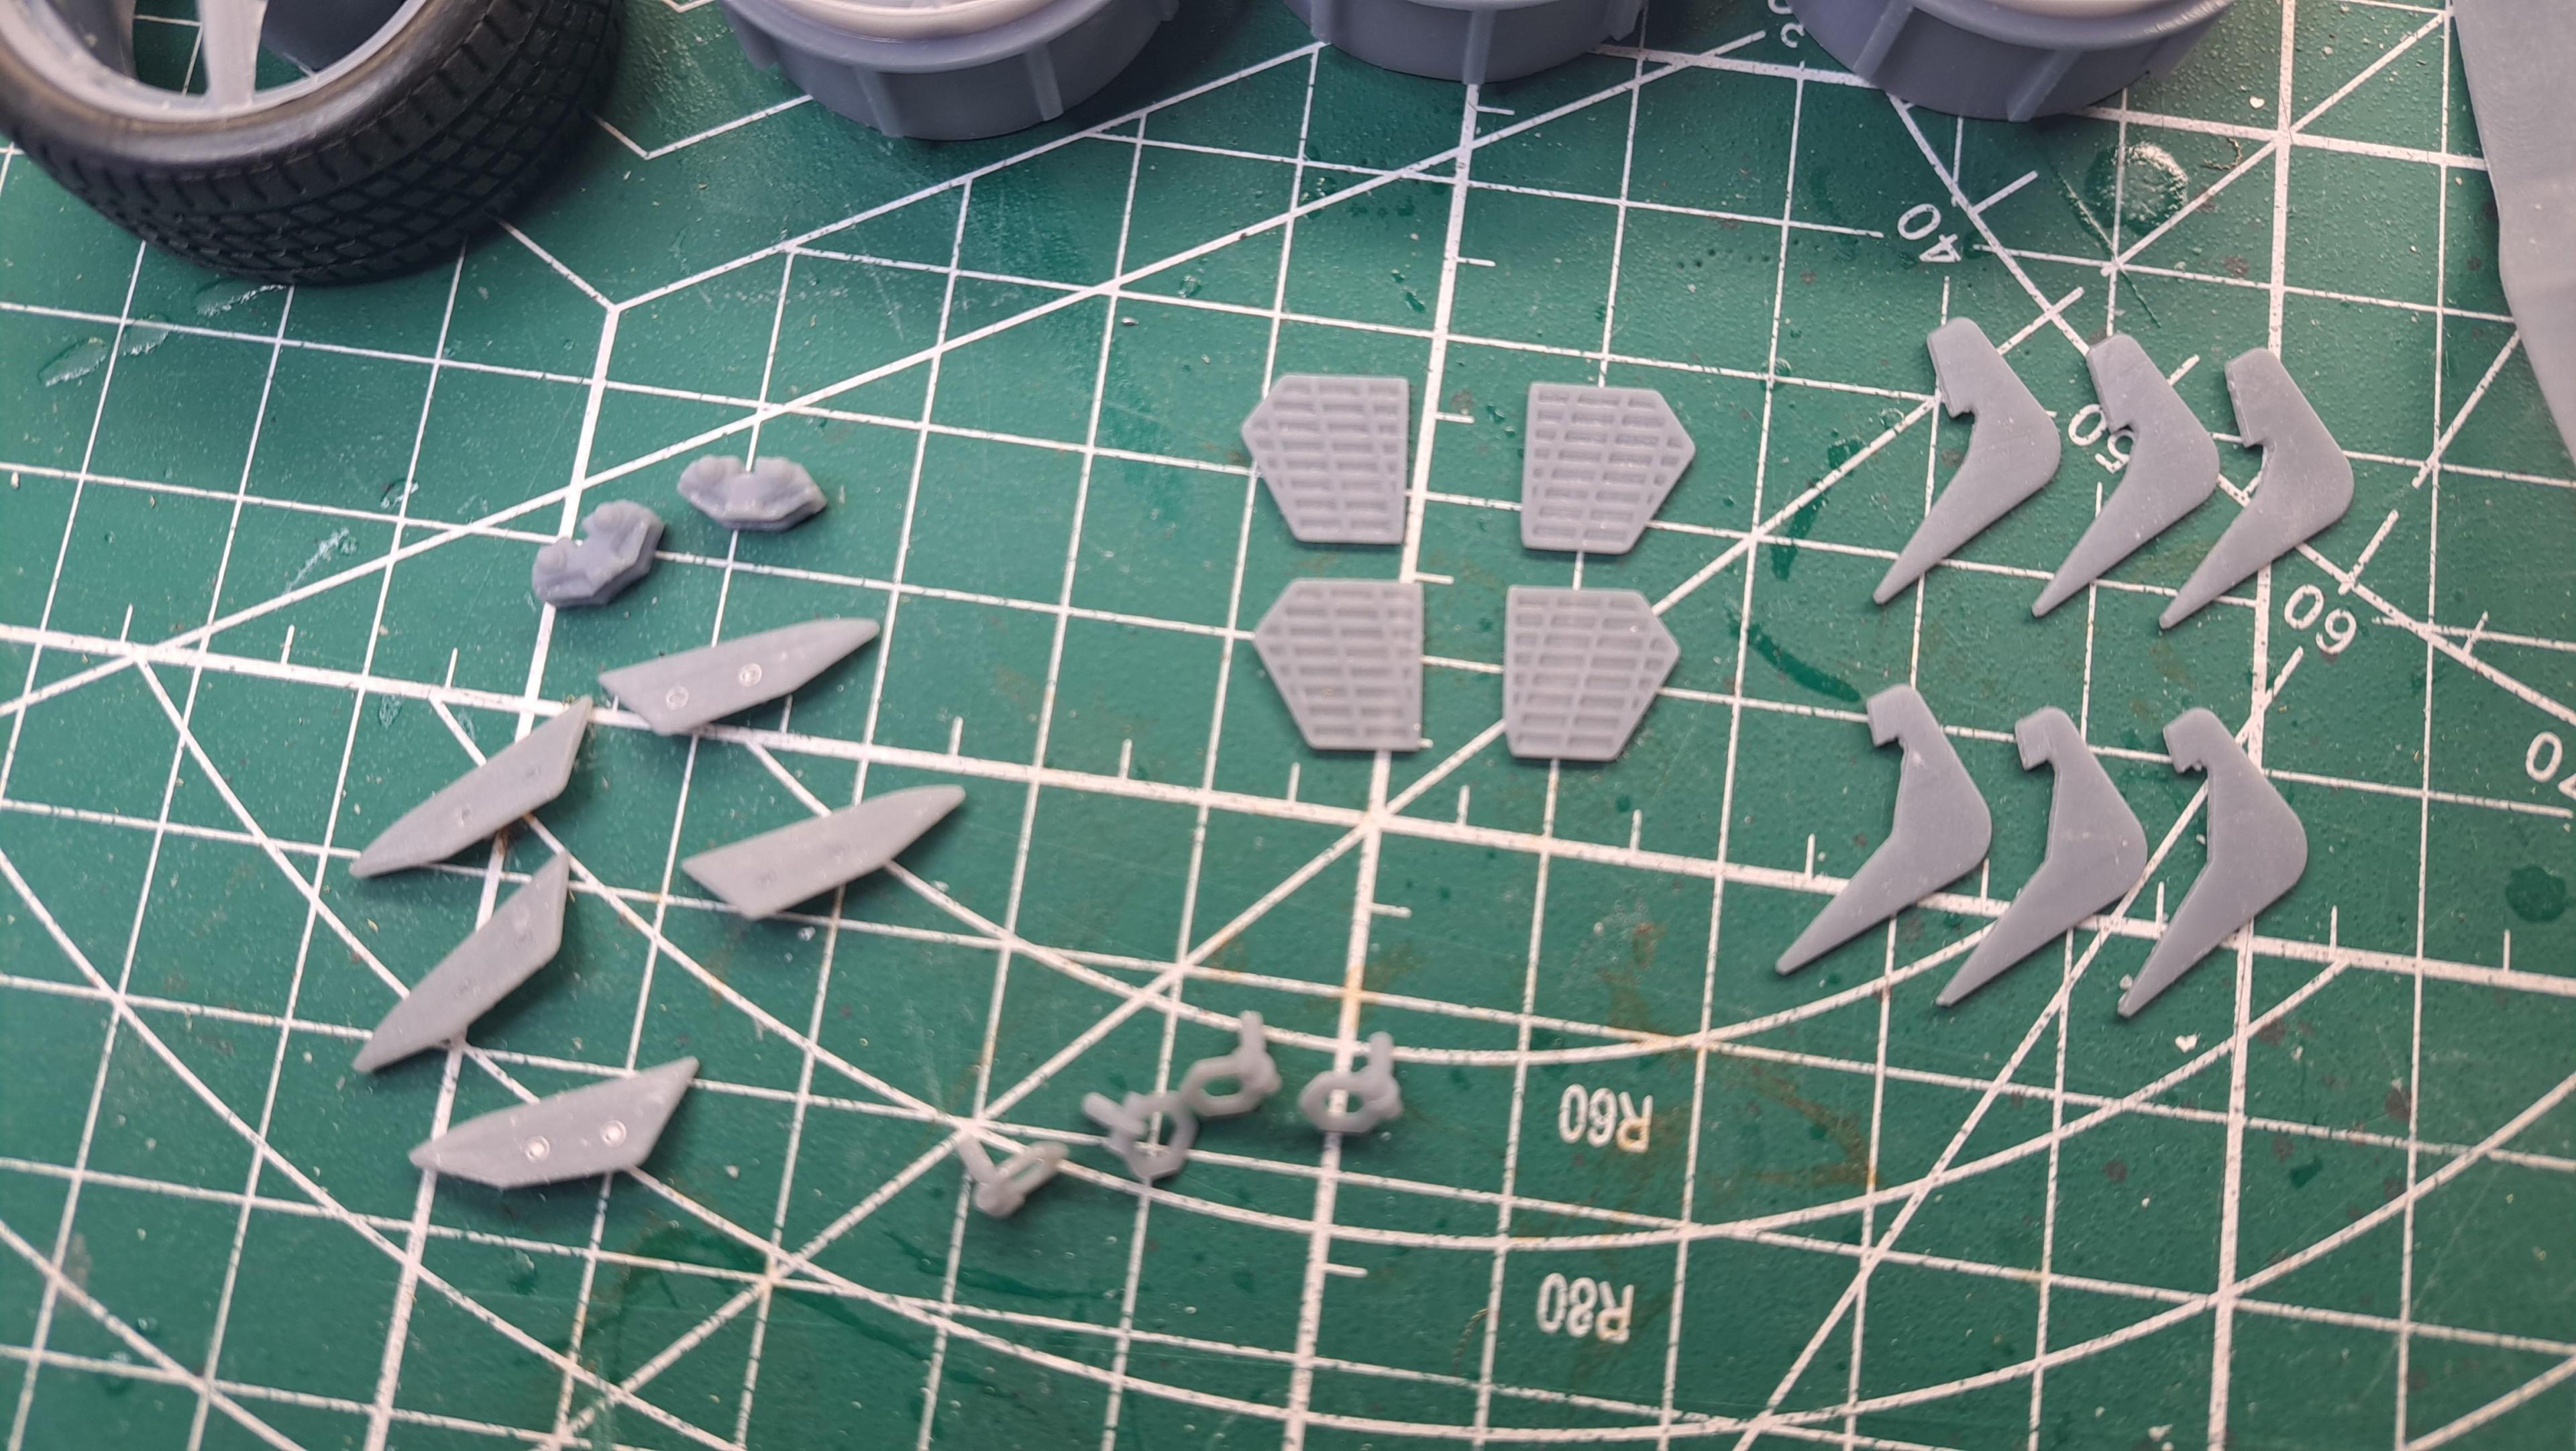
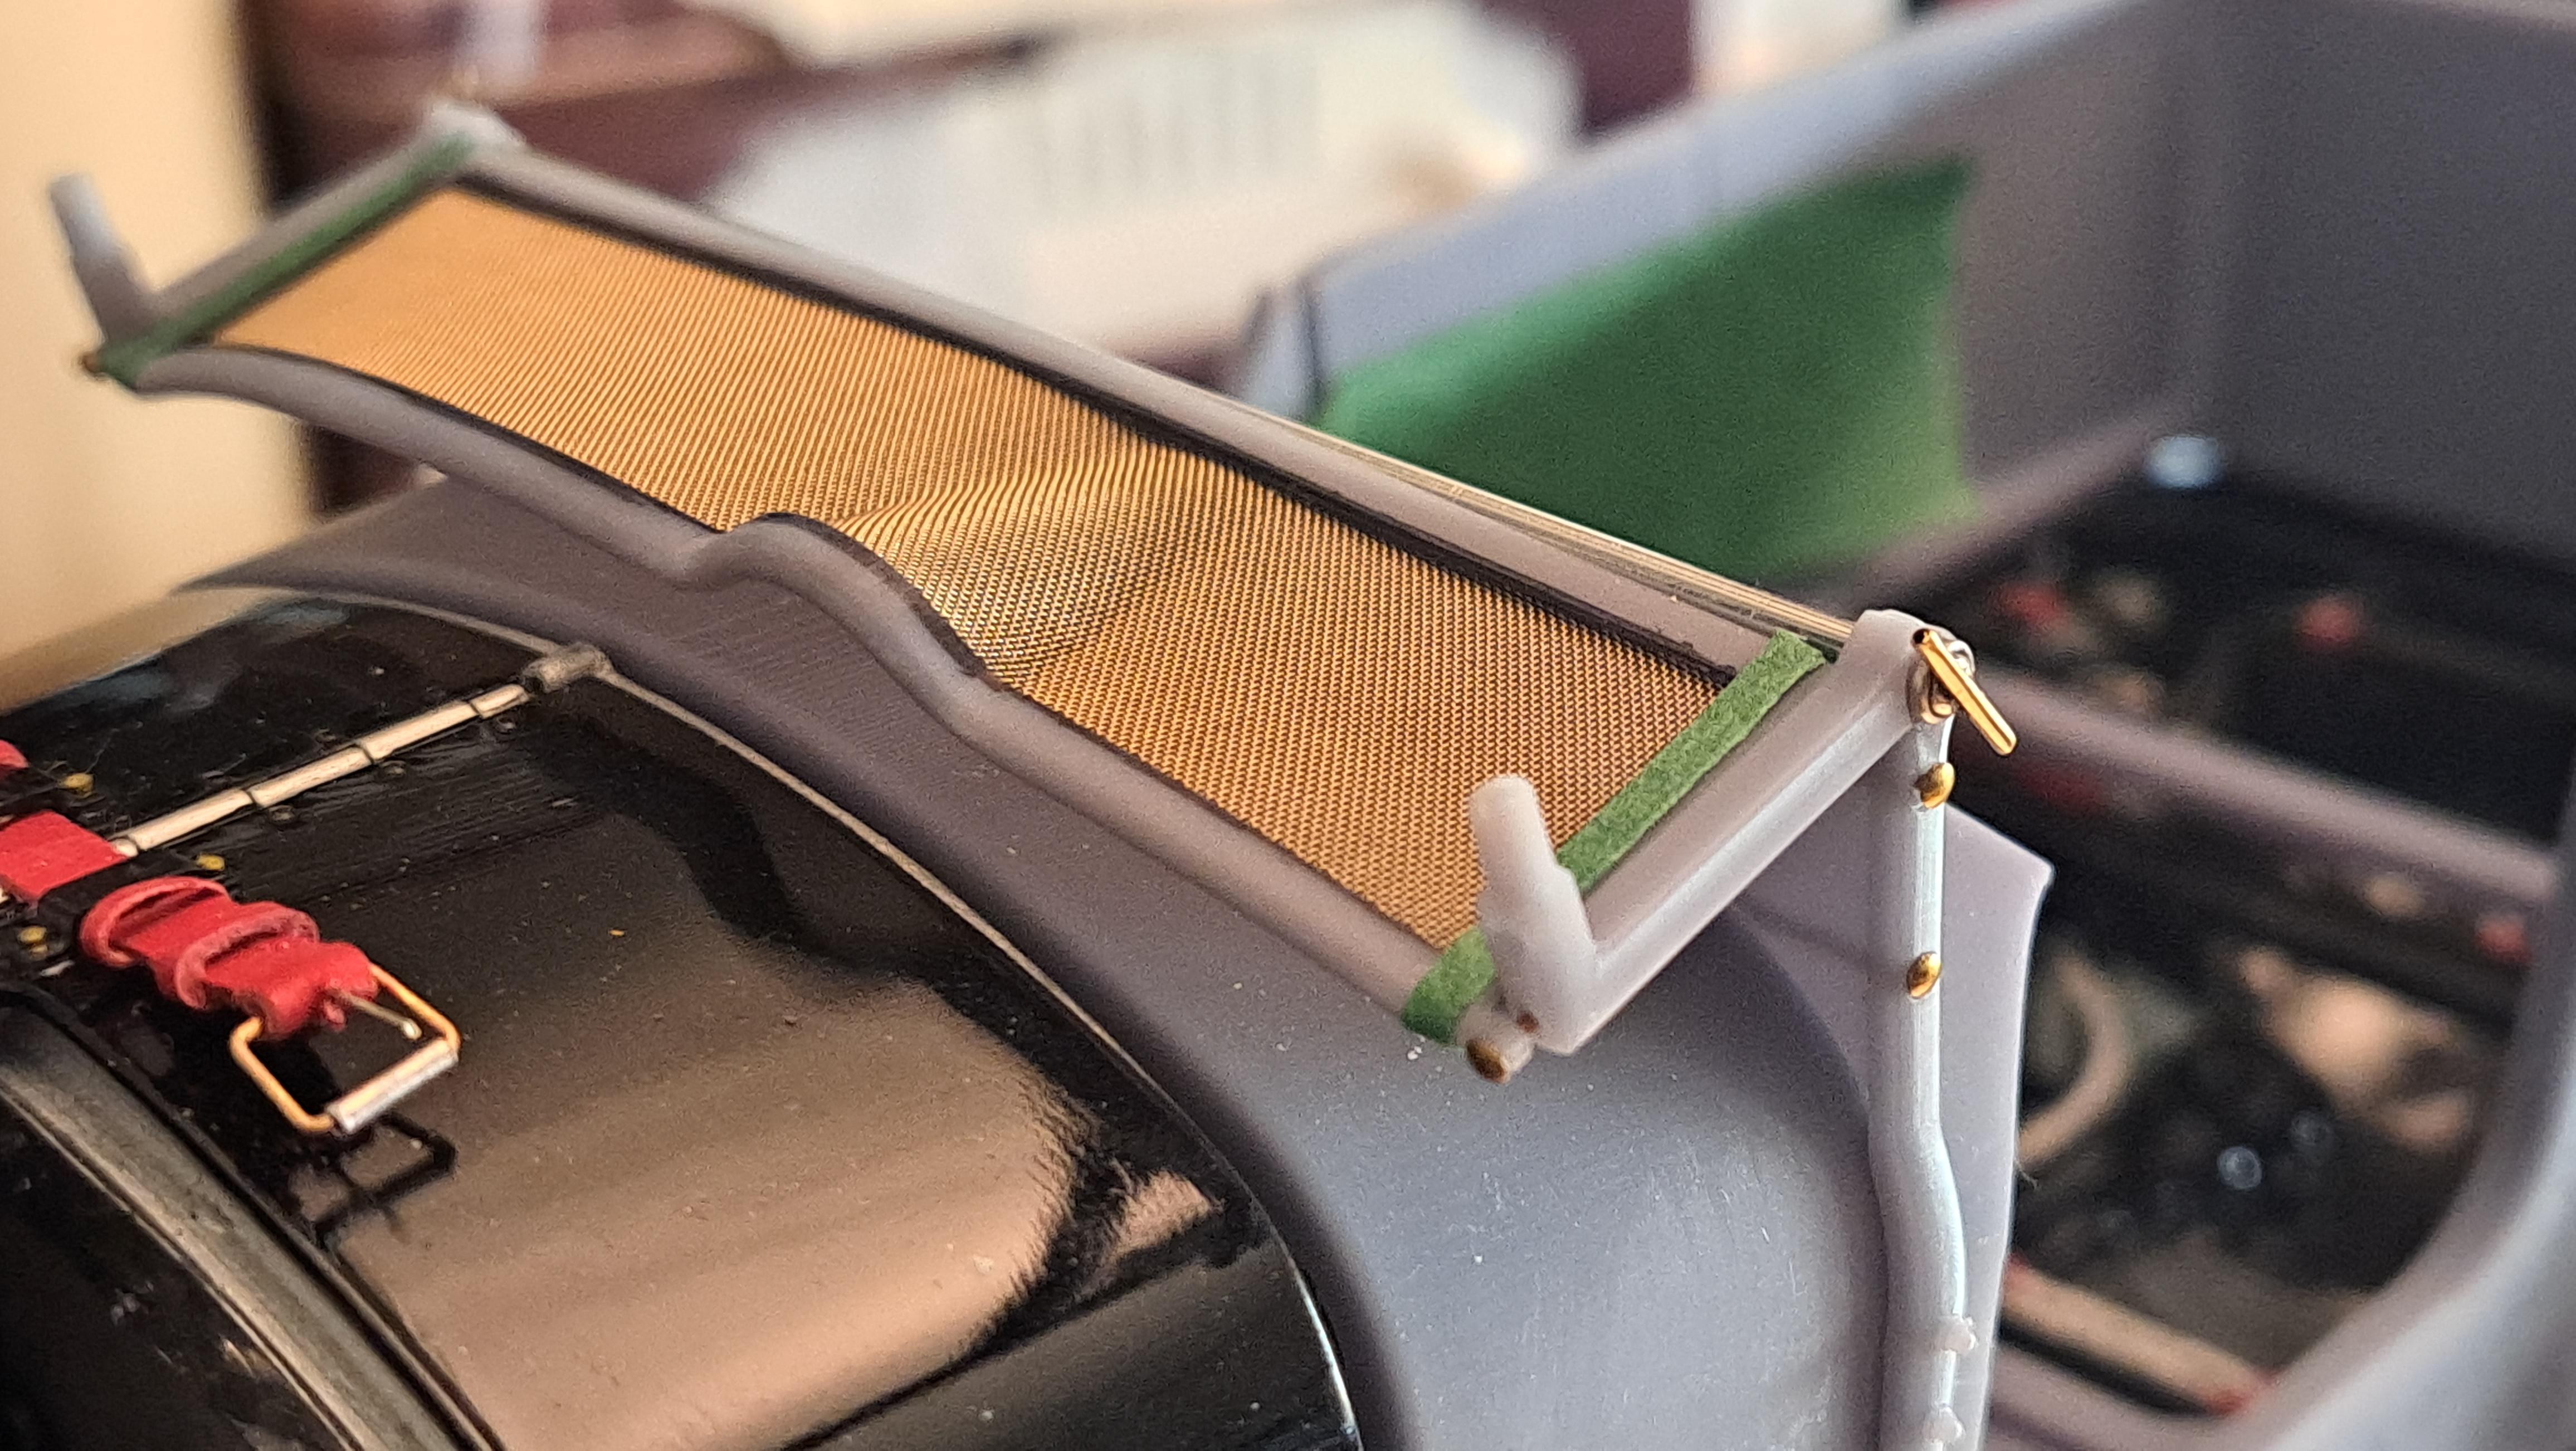
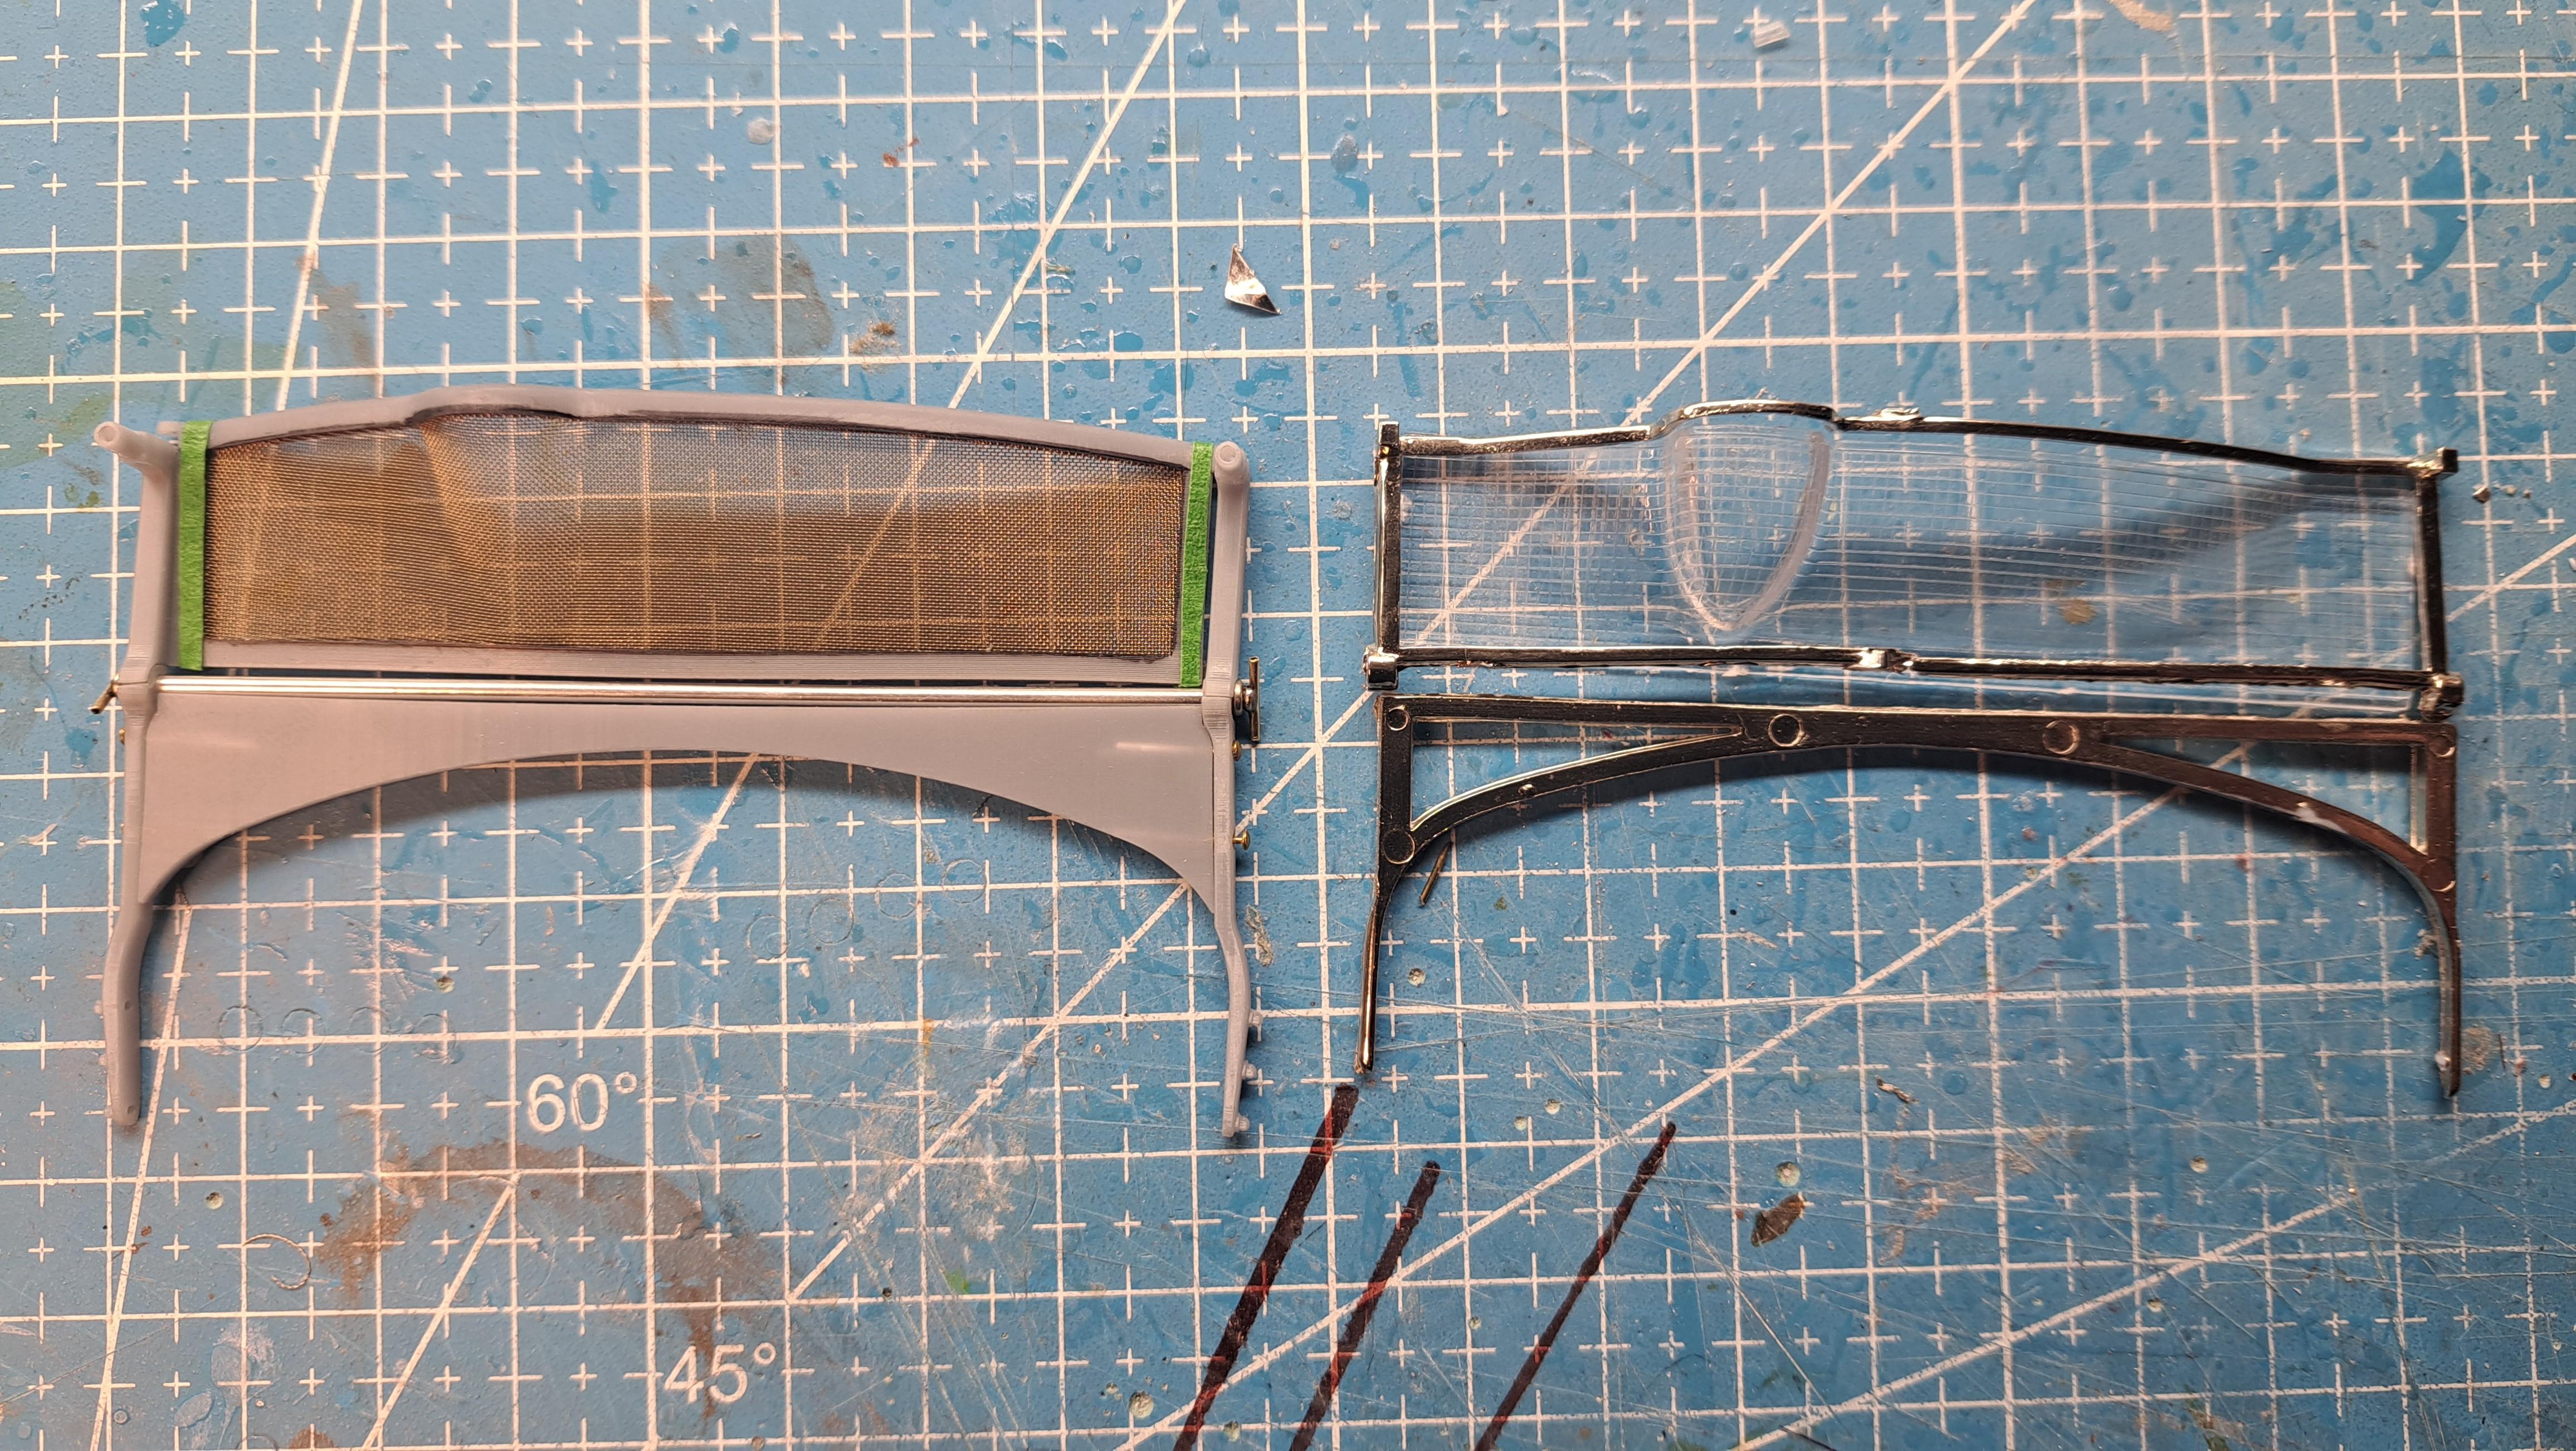
And finally, I made some bending test for the foldable top frame.


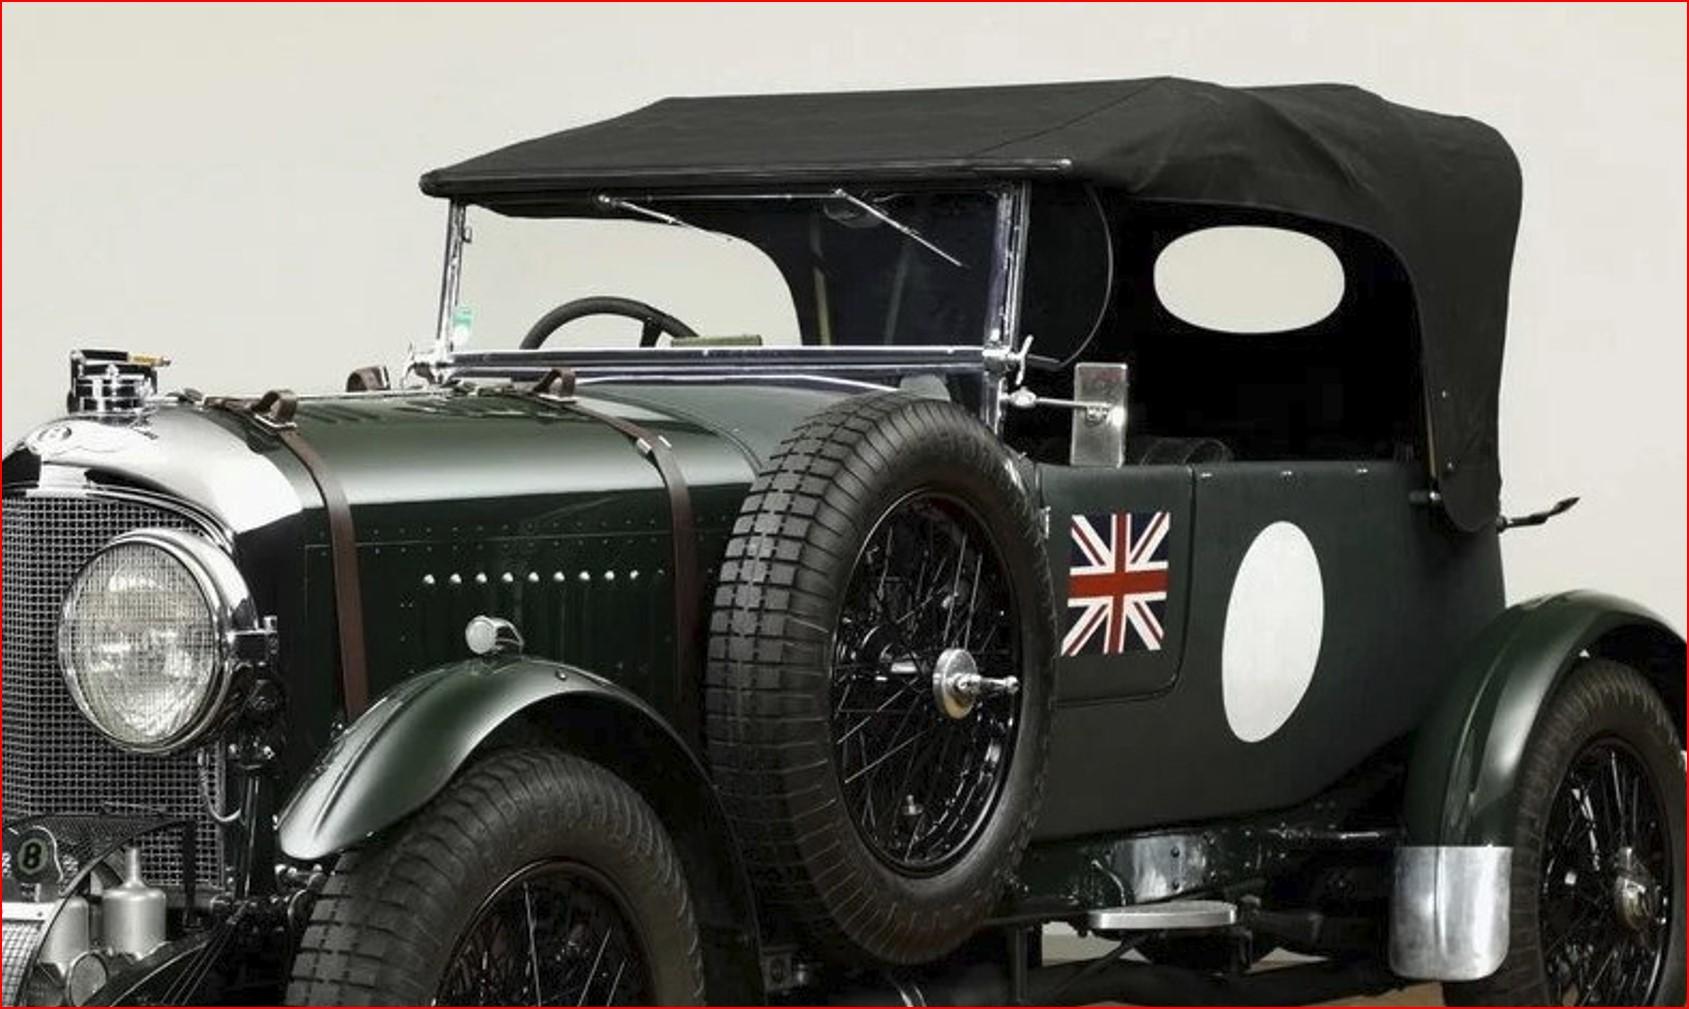
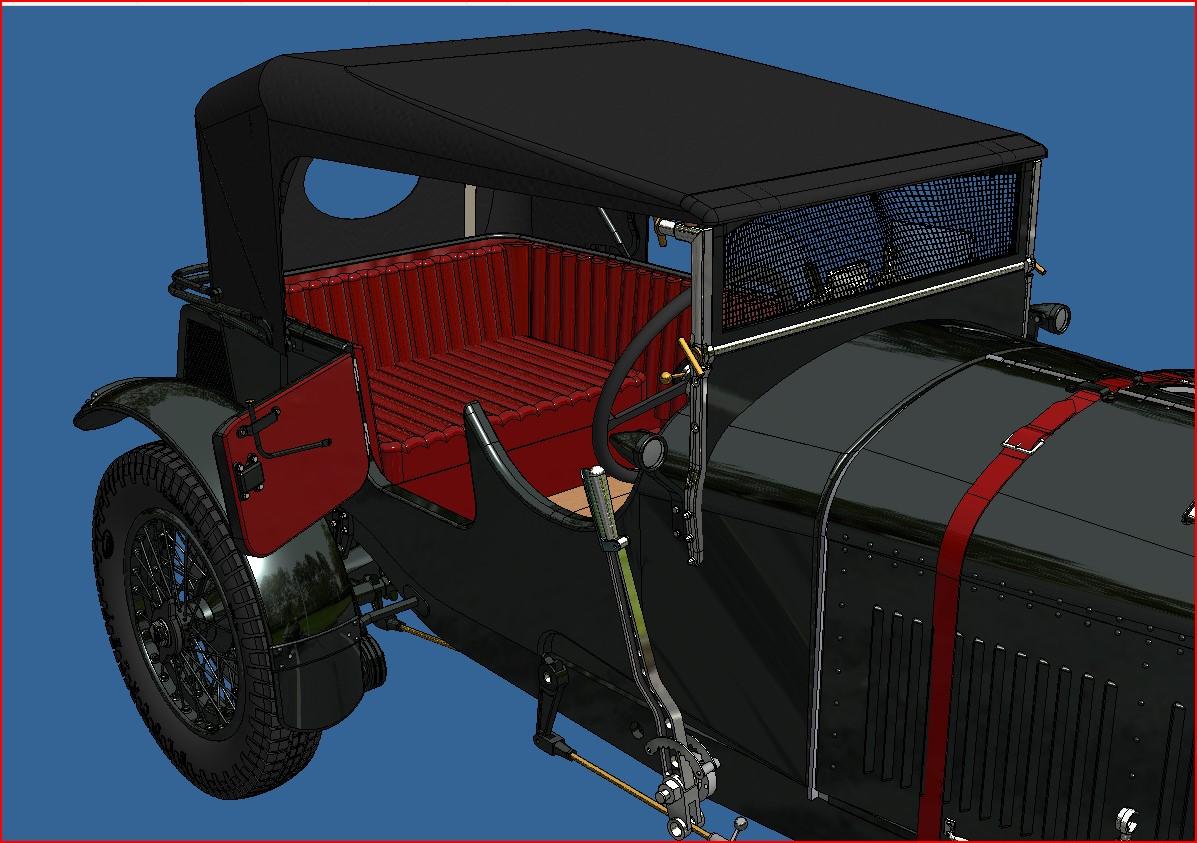
Here's another comparison shot of my model and the ref car


And another video of the running engine because it's just fun to watch.
View attachment 20240425_120412.mp4
As a side note, I was asked to design and print some parts for a 1/18 scale diecast C8 Corvette. The guy has the real one but his diecast model didn't have the correct wheels, rear spoiler and was missing a few other parts.

Here's the real car


the wheels I printed


And all the parts


Back
Top