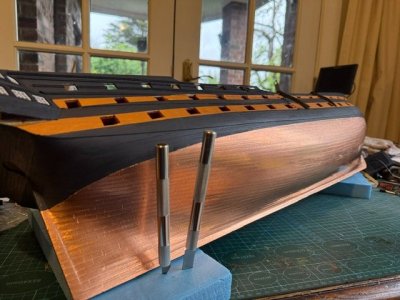
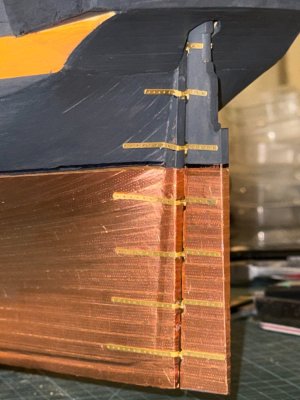
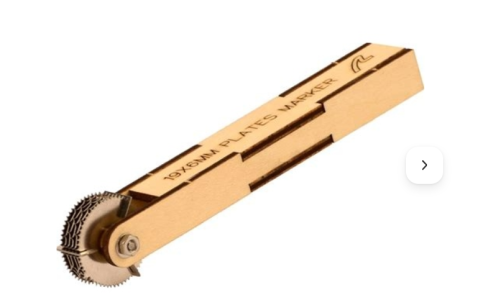
Copper tape to copper the hull of my 1:72 model 74 gun ship Bellerophon.
I used 5mm wide copper tape for my model USS Constitution in 2025 and it was reasonably effective.

I was persuaded that at 1:93 scale the nail impressions would not be visible on my Constitution copper plating, but in researching the topic for Bellerophon I came across this photo of HMS Trincomilee, a frigate made 1817 in Bombay for the British navy.

HMS Trincomalee is still afloat, although this shot was taken when she was in drydock for repairs. Even though the coppering is not original it does show the nail positions by the dimpling which the nails produce in the copper sheets. Somewhat confusingly, it also shows the upper sheets overlapping the lower ones, which was not the practice for British ships of war in the original era. From this distance of a few meters the dimpling is clearly visible.
So I decided that my Bellerophon model would have nail heads showing on the copper sheets.
For the nail pattern I used a diagram from Mark Stanforth's monograph "The Introduction and Use of Copper Sheathing - A History" which shows the front sheets overlapping the rear ones AND the bottom sheets overlapping the upper ones. This overlap apparently only occurred in Royal Navy ships. On merchant navy ships the upper plates overlapped the lower ones. I can find no explanation for this difference.

The diagram also shows the location and nail spacing of the edge nails compared with the centrally located ones.
While not copying this diagram precisely for my Bellerophon, it was very influential.

I removed every alternate nail impression of the edge nails because at my 1:72 scale they would have been only 0.5mm apart. I might yet reintroduce them because one eagle eyed member of my model engineering club imediately spotted the difference today.
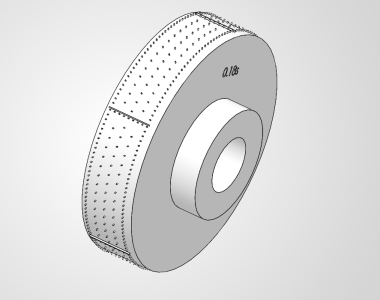
As you can see I drew up the pattern in AutoCAD, saved it as a dxf file without the dimensions and borders....

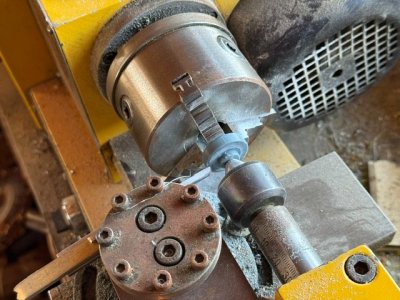
.... and imported it onto a tangent plane of a 3D impression wheel modelled in Solidworks, then used the wrap with emboss option to wrap the nail head impressions around the wheel, which now has tiny projections for the nail head embossing (tiny ... 0.1mm high and 0.1mm diameter) and slightly higher for the plate divisions (about 0.12mm high). Saved the model as an stl file. Printed one wheel, modified the resin print settings, and then printed 2 port and 2 starboard wheels in basic water washable resin. The resin print runs took 1.5 hours each.

Draining the unused resin back into the printer tray.
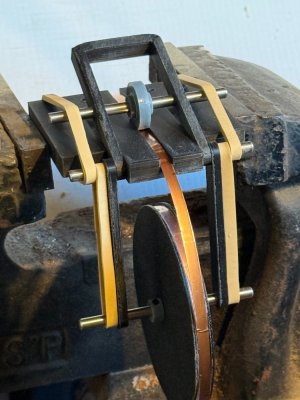
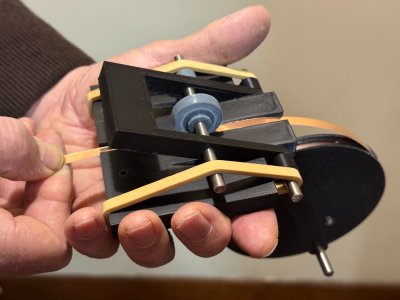
After washing, de-supporting and curing the wheels I made some test patterns in some laser cut strips of copper tape. At this stage I just used a rough handle to hold the wheel. When my 25 meter 6mm wide tape rolls arrive I will make a proper jig to position and spring pressure the wheel onto the tape and make accurately positioned strips for their embossed patterns.

This was the first printed wheel and first wobbly copper tape impression. The 26mm diameter wheel was printed at a 45 degree angle to the build plate, but some pins did not print properly, hence the imperfect impression pattern in the test tape. The later 4 wheel printed wheels were printed with the side faces parallel to the build plate, and the minute pins came out perfectly. I used a 0.02mm layer height.
So, waiting impatiently for the rolls of 6mm wide tape to arrive, so I can finalise my design for the jig to print 65-70 strips 800mm long, and then to attach them to Bellerophon. Why 6mm tape for 5mm coverage? I will overlap the tape strips by approx 1mm .
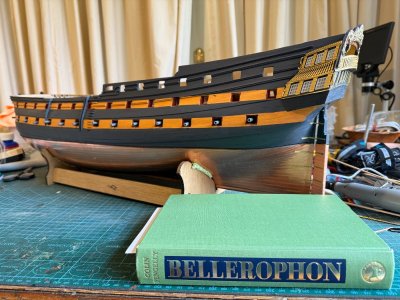
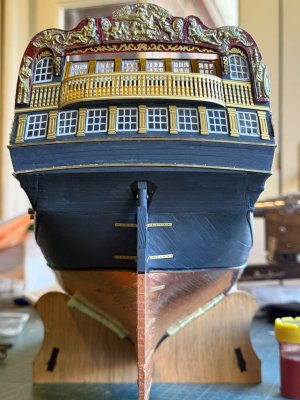
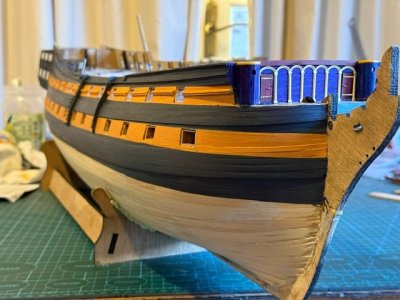
Watch this space for "Coppering Bellerophon -3". The picture below is Bellerophon waiting for coppering. It is from Amati/Vanguard plans, but almost a scratch build. I am using some Amati brass etched parts.
I used 5mm wide copper tape for my model USS Constitution in 2025 and it was reasonably effective.

I was persuaded that at 1:93 scale the nail impressions would not be visible on my Constitution copper plating, but in researching the topic for Bellerophon I came across this photo of HMS Trincomilee, a frigate made 1817 in Bombay for the British navy.

HMS Trincomalee is still afloat, although this shot was taken when she was in drydock for repairs. Even though the coppering is not original it does show the nail positions by the dimpling which the nails produce in the copper sheets. Somewhat confusingly, it also shows the upper sheets overlapping the lower ones, which was not the practice for British ships of war in the original era. From this distance of a few meters the dimpling is clearly visible.
So I decided that my Bellerophon model would have nail heads showing on the copper sheets.
For the nail pattern I used a diagram from Mark Stanforth's monograph "The Introduction and Use of Copper Sheathing - A History" which shows the front sheets overlapping the rear ones AND the bottom sheets overlapping the upper ones. This overlap apparently only occurred in Royal Navy ships. On merchant navy ships the upper plates overlapped the lower ones. I can find no explanation for this difference.

The diagram also shows the location and nail spacing of the edge nails compared with the centrally located ones.
While not copying this diagram precisely for my Bellerophon, it was very influential.

I removed every alternate nail impression of the edge nails because at my 1:72 scale they would have been only 0.5mm apart. I might yet reintroduce them because one eagle eyed member of my model engineering club imediately spotted the difference today.
As you can see I drew up the pattern in AutoCAD, saved it as a dxf file without the dimensions and borders....

.... and imported it onto a tangent plane of a 3D impression wheel modelled in Solidworks, then used the wrap with emboss option to wrap the nail head impressions around the wheel, which now has tiny projections for the nail head embossing (tiny ... 0.1mm high and 0.1mm diameter) and slightly higher for the plate divisions (about 0.12mm high). Saved the model as an stl file. Printed one wheel, modified the resin print settings, and then printed 2 port and 2 starboard wheels in basic water washable resin. The resin print runs took 1.5 hours each.

Draining the unused resin back into the printer tray.
After washing, de-supporting and curing the wheels I made some test patterns in some laser cut strips of copper tape. At this stage I just used a rough handle to hold the wheel. When my 25 meter 6mm wide tape rolls arrive I will make a proper jig to position and spring pressure the wheel onto the tape and make accurately positioned strips for their embossed patterns.

This was the first printed wheel and first wobbly copper tape impression. The 26mm diameter wheel was printed at a 45 degree angle to the build plate, but some pins did not print properly, hence the imperfect impression pattern in the test tape. The later 4 wheel printed wheels were printed with the side faces parallel to the build plate, and the minute pins came out perfectly. I used a 0.02mm layer height.
So, waiting impatiently for the rolls of 6mm wide tape to arrive, so I can finalise my design for the jig to print 65-70 strips 800mm long, and then to attach them to Bellerophon. Why 6mm tape for 5mm coverage? I will overlap the tape strips by approx 1mm .
Watch this space for "Coppering Bellerophon -3". The picture below is Bellerophon waiting for coppering. It is from Amati/Vanguard plans, but almost a scratch build. I am using some Amati brass etched parts.
Last edited: