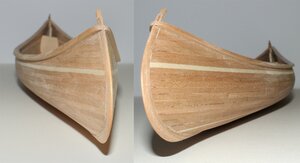
#4 Support: Outer stems and gunwale installation

Joined
Feb 18, 2019
Messages
684
Points
353

Here we will address:
All matters about installation of the Outer stems and gunwale.

_DSC5239 stem copy.jpg
 
Last edited:
Building up the outside stem

For some reason, my lumber package did not include the ¼” x 1/32" (6.4 x 0.8 mm) stock so I had to use the narrower strip. This caused some issue as it resulted in having to spend some time sanding down the side of planking at the ends: some sanding is normally required but it should be minimal. The photo above is what it is supposed to look like with the right size strips.

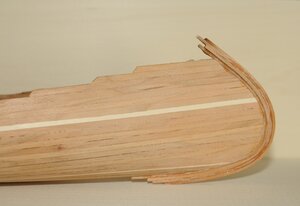
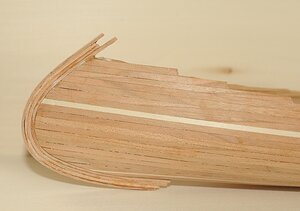
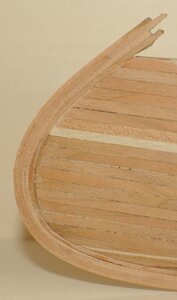
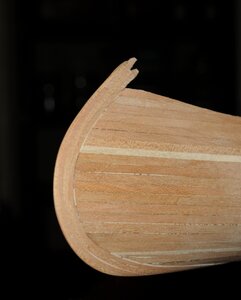
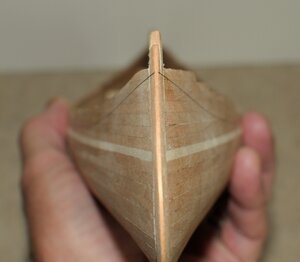
Anyways the stems are now laminated and in place: in total 4 strips, just to make sure the transition between this part and the planking is seamless when finished.

So here is a view of both ends.

_DSC0988 aa.jpg

_DSC0986 aa.jpg

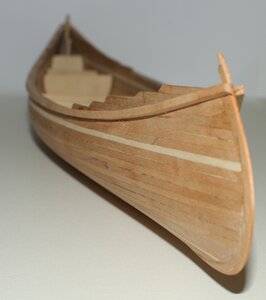
And here is an overall view of the model as it stands at this stage of the construction.

_DSC0991 aa.jpg

Now the glue needs to dry and cure before shaping to follow the profile of the planking.

G.
 
Last edited:
Glad to see I am not the only one who had minor gaps in planking strips.

What was it Clint Eastwood said in this movie Heartbreak Ridge, "learn to improvise, adapt and overcome!"
 
Well, above I mentioned about achieving a seamless transition between the outer stem and the planking.
After about 1/2 hour work on the upper part of one side of the stem, it is almost there.
Here is an image where you can actually compare the top of the stem where sanding, then scraping, then sanding again and finally scraping yet again was applied and the bottom of the stem, below the light contrasting strip, which is still untouched.

_DSC0994 aa.jpg

So a lot more work to be done on this side.... and then repeat on the other side and other end of the canoe.

G
 
Slow and steady wins the race! I think you have time to take working as yours is only one I have seen this far along!

But don't wait too long, we might catch up from behind!
 
Builders who have the right size strips will have an easier time: the 1/4 inch (6.4 mm) strip listed in the guide for this step.
One side is done.... 3 to go. Final light sanding with 320 or 400 grit paper will be done at a later stage.
The outside stem should be an extension of the planking so it should follow the same lines / taper. Please refer to the guide in regards to the the thickness at the outside edge: although builders have some flexibility (may be thicker).

_DSC1001 aa.jpg

To be continued...
G
 
This build to me is not a beginners weekend paddle but has challenges in planking skills following those of good framing. What is the source of the kit or plans and materials list? It may have to be my plan 2 breaktime from Bluenose when my pilot boat is completed.
PT-2
 
This build to me is not a beginners weekend paddle but has challenges in planking skills following those of good framing. What is the source of the kit or plans and materials list? It may have to be my plan 2 breaktime from Bluenose when my pilot boat is completed.
PT-2

Building this is not complicated. It is fairly simple strip planking over a form made of cross-sections: it will give someone some experience in laying strips (planking) as well as some general experience in building a wood model.
Details about this project can be found here:
G.
 
Just a thought regarding the narrow bow. I think that it is unlikely that an actual wood canoe would have a fragile bow but more of a sturdy rounded one not damaged when beaching. Boat owners are usually very protective of their boat no matter the materials. Just for consideration as a broader bow is not as attractive as a more narrow one. PT-2
 
Just a thought regarding the narrow bow. I think that it is unlikely that an actual wood canoe would have a fragile bow but more of a sturdy rounded one not damaged when beaching. Boat owners are usually very protective of their boat no matter the materials. Just for consideration as a broader bow is not as attractive as a more narrow one. PT-2

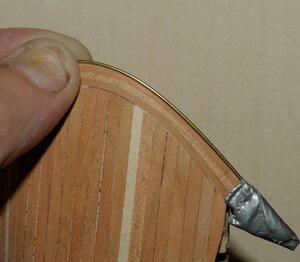
You have a point ..... "Boat owners are usually very protective of their boat": especially when they build their own. In many cases the bow of a canoe is limited to a thin outer stem wood strip to dress the end of the planking. Wood-strip canoes are sometimes fitted fitted with a brass runner for protection against damage from "beaching": a half-round brass strip from top to bottom.
This is of course an option that individual builders have.
My own 1:1 scale canoe was refinished a couple of times due to scratches, etc...
Here is a quick demonstration as to what can be done to that effect.

_DSC1030 aa.jpg

As far as the shape of the bow, wood strip canoes can be "utility" canoes as well. Having paddled, fiberglass, aluminum and wood strip canoes myself, I can tell you that I treated my wood canoe (self built) a bit different than the others.
Canoes are built for different purposes. A wood strip canoe is as much a mode of transportation as it is a work of art to be enjoyed on the water.
You may do an online search for images of "wood strip canoes" and you will find many representations and will note that many are shaped as to what you would qualify as "fragile": and they may be...
G.
 
I never had or used a wood strip canoe and have only seen them rearely on a car top. Thanks for your experience and insight, adding to my own limited basis as I said to a rather broad flat bottom Grumman aluminum primarily and a decade go with a more narow rounded hull that I cannot recall but it was not aluminum or wood. possibly fiberglass and I seriously doubt that it was a wood frame with stretched and painted canvas that two of us used for a duck hunting float on the Willamette River north of Eugene, Oregon.
PT-2
 
Well, sanding took some time.... but...
Now that the stems have been shaped and sanded down flush with the strip planking, it is time to work of the outer gunwales (3/32 x 3/32" or 2.5 x 2.5 mm strips).
These are installed at this point to stiffen the hull as the station mold will soon be entirely removed.

Dry fitting and referencing / marking / tracing the lower edge onto the canoe using a fancy clamping system:

_DSC1036 tiff aa.jpg

The result after tracing: having ensured that the 2 sides are as symmetrical as possible:

_DSC1041 tiff aa.jpg

The installation looks just like dry fitting so no image.

Then it is time for some close-up views....
Overall side view of the canoe:

_DSC1066 tiff aa.jpg

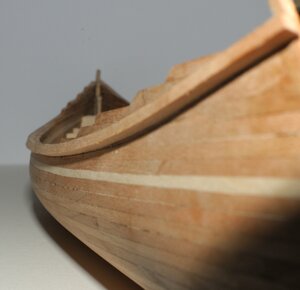
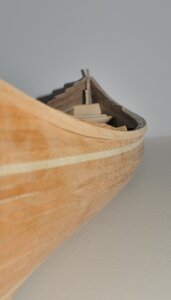
And detail view from each side: the curves look good...

_DSC1072 tiff aa.jpg

_DSC1074 tiff aa.jpg

The next step will of course consist in removing the extra planking material forward and aft, and then a preliminary rough sanding to give the gunwales their basic shape.

So, to be continued............

G.
 
Last edited:
Preliminary sanding / shaping the outwales at the stems.
Start by slightly tapering the strip towards the stems. The end can be rounded flush to the edge of the stems.
At this point, you may only want to work on this to avoid the ends of the strips getting hooked onto something when handling the canoe for the rest of the construction. Shaping the outwales along the entire length of the model will be done in the final stages of the construction. Again this is only a preventive step against possible damage... so proceed lightly.

Untitled-1 aa.jpg

G
 
Last edited:
The other purpose for posting the photos above is to appreciate the lines / curves in the vessels.
For example, the curve at the cheek of the stem area (the vertical curvature of the sides as seen in the photo on the left), which is part of the design, and the fore and aft curve of the gunwale, which is a choice on my part, accentuated by the rise of the planking to the very top of the stem. The curve is an added flexibility on the part of the builder, as extra planks can be added to any height between the 1st plank installed and the top of the stem piece. In the illustration above, you will note that I installed 5 extra planks above the 1st plank, so the the planking covers the full height of the stem pieces. This feature can really change the final look of the model.
G.
 
Last edited:
It is obvious to me that very good cameras, lenses, and lighting are being used in the build log progress photos. Closest that I can come is with my iPhone. PT-2
 
I do like the added planks to the bow and assume the same was done at the stern. Without comparisons with other builds this will be a great canoe. PT-2
 
Back
Top