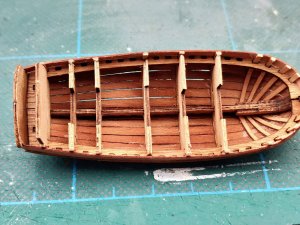
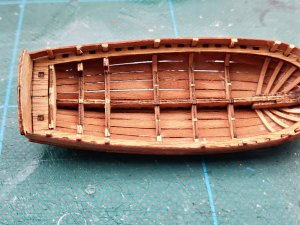
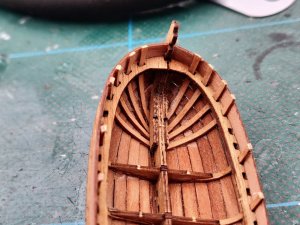
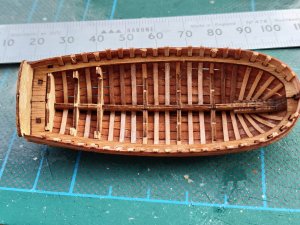
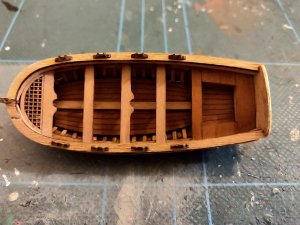
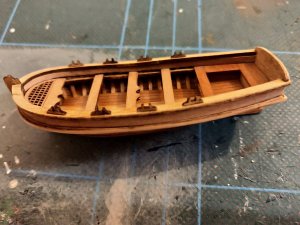
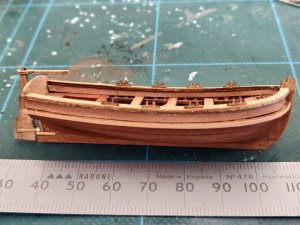
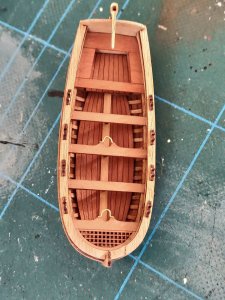
75mm Lifeboat-Master Korabel

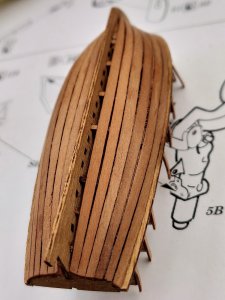
I have continued with the planking working my way down towards the Keel. I have taken my time with this, fitting one plank a day, trying to make sure each plank fitted up tight to the one above. I hit a problem about half way through with the C.A. glue, it must have started to "go off" because it would not stick the planks to the Frames, it would stick the planks to my fingers though. I have noticed this before, when you want something to stick it won't, when you don't it will stick. In the process of planking I also managed to break the tops off of a couple of Ribs and one frame, but they can all be repaired. I was so busy trying to get the planks in place before the glue set that I didn't pay attention to where I was holding the boat.
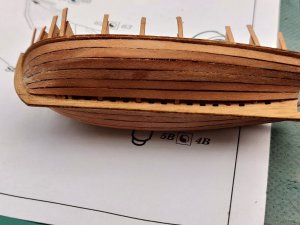
LifeboatD5.jpg

LifeboatD6.jpg

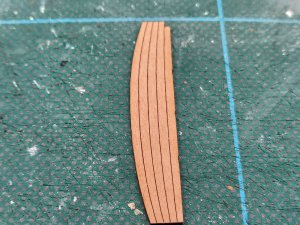
Master Korabel give you 2 each of the last plank next to the Keel, one is wider to allow for any variations in the planking. The gap that I had was narrower than either of the 2 planks so I had to gradually adjust a plank to fit, at least I had a spare one in case of any problems. I just need to rub the Hull down now before I remove the frame supports on the inside. There are a few small gaps between a couple of planks, that's the trouble with using Macro Mode on my phone camera, but if you hold the boat at arm's length you can't see any gaps, and in hot weather "all the boards did shrink" see Rime Of The Ancient Mariner by Samuel Taylor Coleridge.

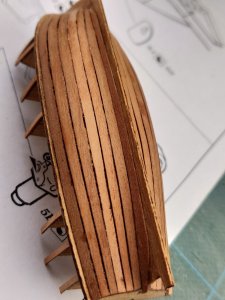
LifeboatD7.jpg
LifeboatD8.jpg

Cheers Andy
 
I am really astonished on the correct fitting of these laser cut-planks
- and it is very positive, that Master Korabel is adding two different sizes of the last plank -> They are really thinking about the needs of the modeler!
And you are making a very good job with this small boat! Many Thanks for sharing
 
Danke Uwe, I am really impressed by the quality of this kit.
I gave the planking a rub down with a sanding sponge and once I had got a smooth finish I gave the Hull a coat of Danish Oil. The top plank (Gunnel) was soaked in warm water and then fitted. I started at the Bow where it fits into a slot in the Stem and glued it in place a couple of ribs at a time.

LifeboatE1.jpg
LifeboatE2.jpg

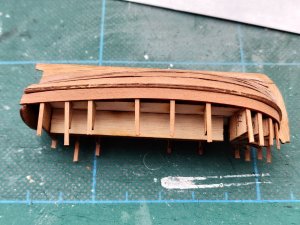
I left the Lifeboat for a couple of days to let the glue and oil fully harden and then started to remove the inner support core. Starting with the Bow area I carefully cut away the Bulkheads by cutting the Ribs just above the Gunnels.


LifeboatE4.jpg

I then cut the remaining Ribs and with help of a Bulldog clip and a pair of tweezers I carefully eased the centre core out.

LifeboatE6.jpg

The remaining Bulkheads were then cut down to the marks on them and removed.

LifeboatE9.jpg
LifeboatE10.jpg

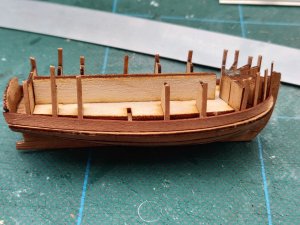
I just need to clean up the inside of the Hull and then fit the remaining Ribs. I am going to fill the gaps in the planking from the inside, they are not as bad as they look in the pictures where it looks like you could drive a double decker bus through them,

Cheers Andy
 
I spent a few days thinking how to fill the gaps in the planking. I decided not to use sawdust and glue as this sounded a bit messy, so I cut part of a plank into thin strips and then rubbed it across a needle file until I had smoothed it down enough for it to fit the gaps. I then fixed it in place from the inside using diluted PVA. The outside was then smoothed down and another coat of Danish Oil was applied. I have spent the last week fitting the remaining Ribs, I soaked a few of the wood strips in water and then using C.A. glue I fitted 3 or 4 Ribs every morning before I headed off to work, and then trimmed them down that evening. I have left then slightly over length to help with the later fitting of the inner Gunnel plank.
LifeboatF1.jpg

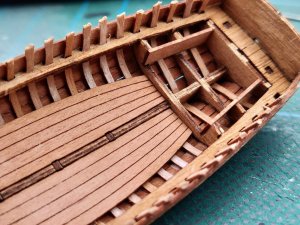
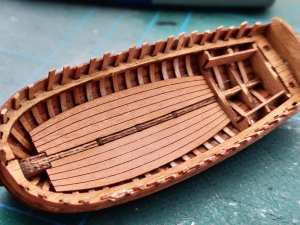
The lower Floorboards are in 2 pieces, they were cut out and then fitted using C.A. gel.


LifeboatF2.jpg

LifeboatF3.jpg

The 2 side planks were then fitted to the rear of the inner Hull and then the rear Footboards.

LifeboatF4.jpg
LifeboatF5.jpg

The plank that covers the joins on the lower Footboards was next, after I took the picture I realised I had fitted it the wrong way round but fortunately I was able to remove it without any damage being done and it is now fitted the correct way.

LifeboatF6.jpg

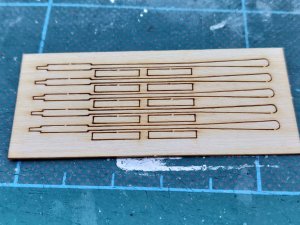
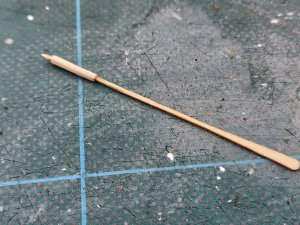
I have also made a start on the 10 Oars, each Oar needs a piece of wood glueing to the Handle either side which then needs to be shaped to create a round Handle. I have glued all the extra pieces on using wood glue and they will be left alone for a few days before I attempt to shape them.

LifeboatF7.jpg
LifeboatF8.jpg

And before anyone asks I have absolutely no idea how I am going to shape the Handles, I'm hoping I'll wake up one morning and find that they are fully shaped,

Cheers Andy
 
And before anyone asks I have absolutely no idea how I am going to shape the Handles, I'm hoping I'll wake up one morning and find that they are fully shaped,

There should not be much of a problem. Glue the handles to both sides, dry, then rotate a piece of fine sand paper around a finger and carefully go with sanding of the sharp corners.
Do not forget to press the detail against something hard in order not to break it.
 
There should not be much of a problem. Glue the handles to both sides, dry, then rotate a piece of fine sand paper around a finger and carefully go with sanding of the sharp corners.
Do not forget to press the detail against something hard in order not to break it.
Thanks for the advice, the main problem is that the shaft is very thin and it's being able to hold the Oar without it breaking and do 10 of them. As you say I need to be careful.

Thanks again, Andy
 
Many Thanks for showing - It is looking very good (your work and also the kit)
Especially if we see the size of these small elements - especially if we compare with your gripper in one of your photos. :cool:
 
Thanks for all the "likes" and comments.
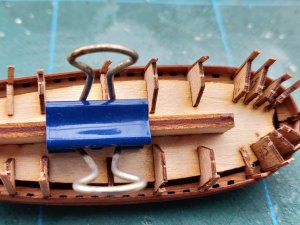
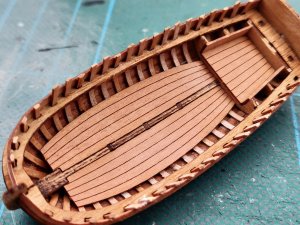
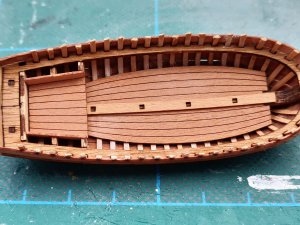
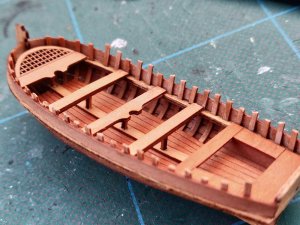
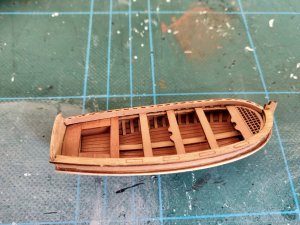
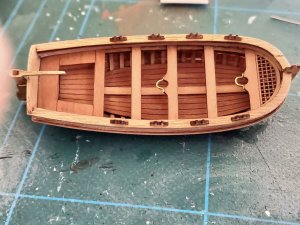
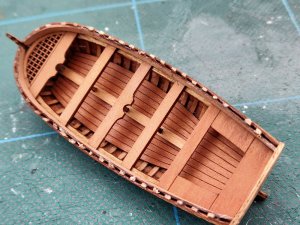
The next stage of the build is to fit the "Seats," firstly the set of Seats at the rear of the boat. These are in one piece and need an additional piece fitted underneath before the whole thing is glued in place. The grating at the front then has a cross piece fitted and a support, before this was fitted ensuring the seat support fitted into the small hole on the inside lower fore/aft strip.


LifeboatG1.jpg

The other 3 Seats need to have a piece glued to the underneath and then a support piece fitted. Once these were dry the Seats were then glued again ensuring they all lined up correctly.


LifeboatG2.jpg
LifeboatG3.jpg
LifeboatG4.jpg

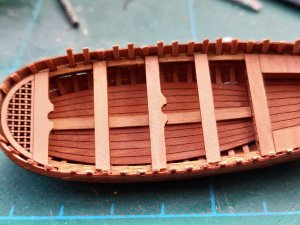
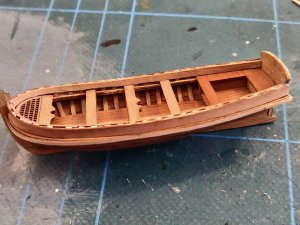
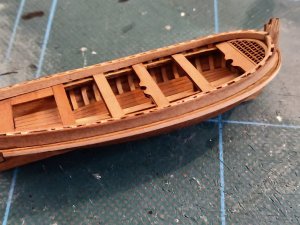
The inner Gunwales are next, they were soaked overnight in water and then carefully eased into place. Such is the quality of the design and manufacture of this kit that they both fitted without the need for any adjustment despite my repeated attempts to make a mess of the construction. I used C.A. glue to fix the Gunwales in several places and then put diluted PVA between the inner and outer Gunwales alongside each Rib. I'll leave this for a few days before I trim down the Ribs ready to fit the top rail.

LifeboatG6.jpg
LifeboatG7.jpg

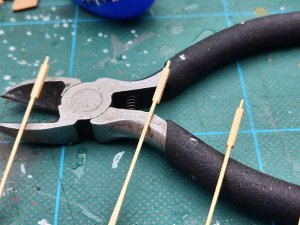
Inbetween all of this I have managed to work on one of the Oars. Using a small needle file I filed the corners of the Handle so I had 8 sides and then I rolled the Handle on a sanding sponge using my finger until the corners were fairly smooth. Close up it's not brilliant but if you stare a bright light for a couple of minutes and then look at the Oar it's fine :cool:

LifeboatG5.jpg

Cheers Andy
 
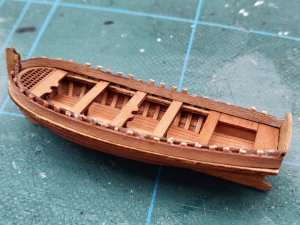
I spent some time gradually trimming down the exposed parts of the Ribs, they are quite fragile and I didn't want any to split, as it was one came loose and needed re-glueing. Once this was done I used a sanding sponge to remove the laser char from the part that's around the Hull and then got ready to fit the Rubbing Strakes. These are pre-cut to shape and starting with the left one, it was left for a day to soak in water. It took me a while to work out which side of the plank to fit, but after a bit of dry fitting I got it right. I carefully bent the end of the plank between my thumb and fore finger and then starting at the Bow glued a bit at a time using C.A. glue. The plank wasn't quite long enough so I cut it about 5mm from the end and fitted a piece of spare strip to complete it. This was then repeated for the other side. I then trimmed the end of the Strakes down flush with the Stern and sanded the Strakes until the join disappeared.

LifeboatG8.jpg
LifeboatG9.jpg

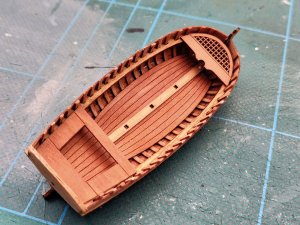
The Gunwale capping piece was again pre-cut. I needed to make a few small adjustments to it front and rear to get it to fit, and they were then fitted, again starting at the Bow and working my way towards the Stern. Once dry they were tidied up, any laser char being removed with a sanding sponge.

LifeboatG10.jpg

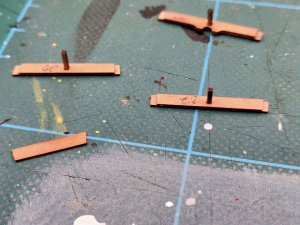
8 Rowlocks then need to be fitted, you actually get 10 pre-cut, which was fortunate because one split as I was smoothing the base of it.

LifeboatH1.jpg
LifeboatH2.jpg

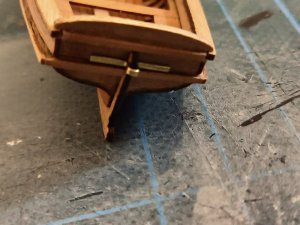
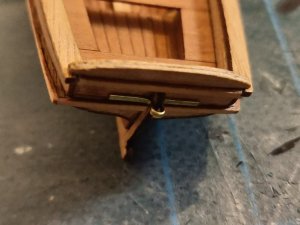
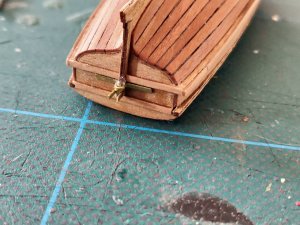
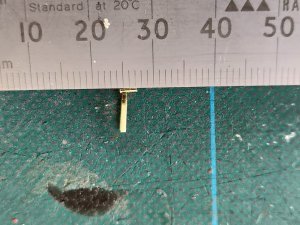
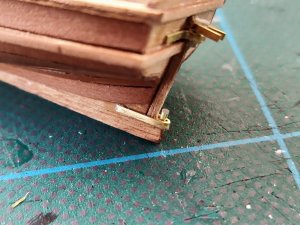
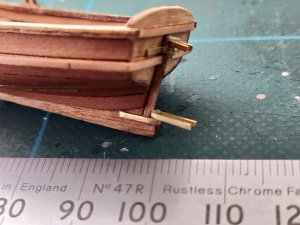
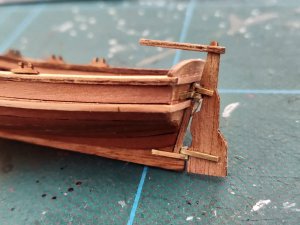
This just leaves the Rudder to fit. I trained as a Mechanical Technician and it's always nice to get to a bit of metal working but this size makes it more interesting. The Pintles and Gudgeons are made from brass strip which is about 1.5mm wide and is difficault to bend. I started with the top Gudgeon and decided it would be easiest to form the "loop" for the pin first and then cut the ends to size. I first of all bent the strip round one of the 3 pins that are supplied using a pair of fine nosed pliers and then after removing the pin, gradually opened up the loop until it was "U" shaped and fitted onto the Transom. After numerous dry fittings and slight adjustments I was happy with the fit and that the pin would also fit, so I then cut it to size, filing off any burrs that were left. It was then glued to the Transom. This was the easy one, and it only took me about 2 hours last night, the fun will start when I actually fit the Rudder.
LifeboatH3.jpg
LifeboatH4.jpg

LifeboatH5.jpg

Cheers Andy
 
Have you burnt the brass strip with the lighter? I think you know, that after burning the brass becomes much softer to bend.
 
Have you burnt the brass strip with the lighter? I think you know, that after burning the brass becomes much softer to bend.
I did think about annealing the Brass strip but we are all electric here so no gas cooker or oven, I don't know if a Cigarette lighter would be hot enough, I don't smoke anyway. We have a small portable flame thrower that's used to burn, sorry, caramelise sugar on the top of Apple Cumble but it's been put away somewhere and I can't find it. Not to worry I managed to get the Brass strip bent to shape. I decided it would be easier to fit the Rudder Pins and Pintles to the Gudgeon plates first and then fit the Rudder itself. I cut a pin down and then glued it in place and once dry I filed it down until it was slightly longer than the width of the Brass strip. The top Pintle was then bent into shape and dry fitted to the previously attached Rudder Pin. I was then able to dry fit the Rudder and trim the ends of the Pintle down until they were correct length. When I was happy with the fit I glued the top Pintle to the top Rudder Pin.

LifeboatI1.jpg
I then filed down the bottom of the Rudder Pin until the end was about 1mm below the Pintle. I worked out how long the lower Gudgeon plate needed to be and then added 2mm for the loop. It was bent to shape round a spare pin and then dry fitted and the ends gradually trimmed until it fitted. I then cut down another Rudder Pin and filed it until it was the correct length.

LifeboatI2.jpg
The lower Gudgeon was then glued in place and then the Rudder Pin was added.

LifeboatI3.jpg

The lower Pintle was then made, the Rudder dry fitted so that I could again get the lower Pintle the correct length. The lower Pintle was then glued onto the lower Rudder Pin.
LifeboatI4.jpg

I needed to make a few small adjustments to the Rudder and once happy with the fit I glued it in place.


LifeboatI5.jpg
LifeboatI6.jpg

The 2 Mast Straps were then made from the Brass strip and then glued in place.
LifeboatI7.jpg
LifeboatI8.jpg

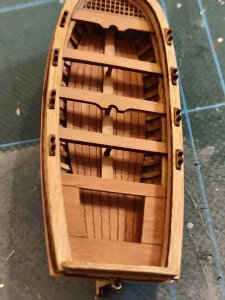
I need to finish off 4 Oars and then give the whole boat a coat or 2 of Danish Oil.

Cheers Andy
 
Andy,
These boats are brilliant little models in themselves! Thank you for sharing your build log with us. You have done them justice quite nicely :) Seeing how they turned out, I'm going to order a few myself along with a windlass. Did you use Ebay or the Master Korabel site?

Ron
 
Andy,
These boats are brilliant little models in themselves! Thank you for sharing your build log with us. You have done them justice quite nicely :) Seeing how they turned out, I'm going to order a few myself along with a windlass. Did you use Ebay or the Master Korabel site?

Ron
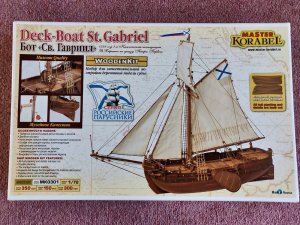
Thanks Ron, I bought this one from a Russian seller on Ebay. It cost about £17 in total including postage which I think is excellent value considering the quality of the kit. If you get one from Europe or USA you will get English instructions included. Thank you for following my build, I have certainly enjoyed building this and I was so impressed by this little kit that this bigger ship arrived in the post last week.

IMG_20180923_100138.jpg

Cheers Andy
 
Are you also starting a log on this fine model?
Looks like a beatifull small model.
Hi Andy, I'm also looking forward to following the construction log of St. Gabriel.
beautiful ship
Greetings
Willy

Thanks Maarten and Willy, yes I will be doing a build log of St Gabriel, but I need to finish a couple of other things first. Before I decided to get this ship I downloaded the instructions from the Master Korabel website and knew this was an ideal model for me.
Cheers Andy
 
Back
Top