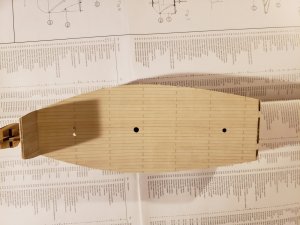
A couple tips, How I do things

Joined
Aug 4, 2018
Messages
1,266
Points
443

Location
Baltimore, Maryland USA
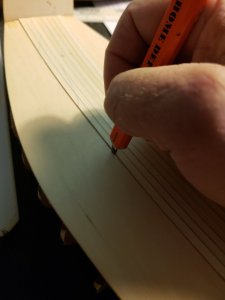
I love the separated Plank look on ships its those small details that really make a ship come to life. For me its rather difficult to edge color a thin deck plank so I do it a little different. I color the edge with a carpenters pencil sharpened to a chiseled edge. I lay the plank in its place and use the pencil to color the edge right on the deck. I do both edges this way prior to putting glue on the strip.20180811_133153.jpg20180811_133129.jpg
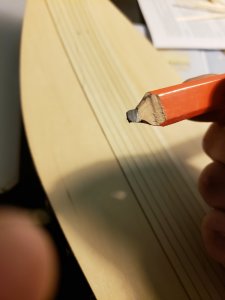
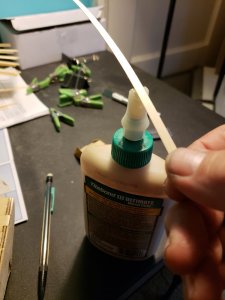
I then apply glue in a very easy way that coats the whole length I need very simply. I squeeze a little roll of glue up onto the tip then drag the strip across it while I continue to squeeze just enough glue up to coat the strip I then lay the strip down and make sure the whole surface has glue by spreading it with a clean finger. Then I place the strip where I need it and wipe away any excess that squeezes out, but I rarely have any. That takes practice to know just how much is enough without a lot of excess.
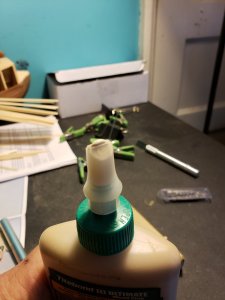
20180811_133100.jpg20180811_132409.jpg
When the strip is fully glued down and any excess glue wiped away, I use the carpenters pencil to recolor the edge that will mate with a new strip one last time.
Hope this helps someone, its not a perfect way, but it works well for me.
 
I have used pencil too for imitatating caulking,I think the easiest and simple way to do it.
 
I have used Marker in the past and it wanted to bleed into the strip often times making the caulk look very thick and un natural to the size of the plank, fine if I'm not building with everything to scale in mind, but I usually like to keep to scale whenever possible especially on high end ship builds. I've also had it streak into the fibers that's unacceptable no matter what.
 
I always use HB pencil on deck plank edges both sides. Never had an issue with bleeds on sanding. In reality at 1:72 and above it would not be seen, else in real scale it would be massive calking. Still it looks nice....
 
I always use HB pencil on deck plank edges both sides. Never had an issue with bleeds on sanding. In reality at 1:72 and above it would not be seen, else in real scale it would be massive calking. Still it looks nice....
That's very true on scale, I try to keep my caulk lines as small as possible. Never had any problems with pencils but I've used a sharpie in the past and it bled badly into the wood fibers on the .6 planking. 1.5 planking it works pretty well with a sharpie, but I still use a pencil anyhow. Those edges are much easier to color in I only color one side so it keeps that joint as small as possible visually. My first ship I didn't do anything to, just planked it. After seeing how much nicer it could have looked with that caulk line, I now do it on just about all my builds. How do you like the AL Santa Ana kit? I would love to build that one at some point
 
The SA kit Quality is very good. The wood is great. The Instructions & plans are typical AL ( sometimes great, sometimes really bad. somtines ARRRHHHHGGG). It is not a easy ship to build, but is a lot of frustrating fun. Definitely not for the faint of heart or beginner. Unfortunate;y AL do not make it anymore. Kits on store shelves are older stock. The only builds I have found are on https://www.foromodelismonaval.com/index.php which is italian I believe and needs google translate
 
I like Frustrating fun for sure. I've build quite a few AL ships and the instructions are always the worse part of the kits. I wish they would do something about that as I have always liked the materials given for the build, with the exception of the pot metal parts. Are you making a build log for the SA? I speak Italian so Ill definitely go look at that site. I'll grab that kit while I can, but wont get to it for awhile as I'm building 2 at the moment and will be starting some of the Scientific kits I have with my Grandson. once I' up to rigging on Both. I like to do my rigging alone where no one can hear my potty mouth LOL so that will be in the Garage
 
I tries several methods to simulate caulking and here is one idea that worked


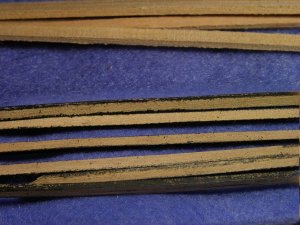
The process of planking the deck begins with taking the planks and coloring the edges with a black crayon. At this stage the planks look quite messy because you do not have to be very careful if you run over the edge with the crayon. The wax crayon does not sink into the wood like paint or glue it just sticks to the surface.

1423927828_105_FT19718_caulked_planks3_.jpg

the planks are not cleaned off but set in place as is. I know what your thinking what a mess and how is this ever going to look good?

1423928085_105_FT19718_planking_unfinished3_.jpg


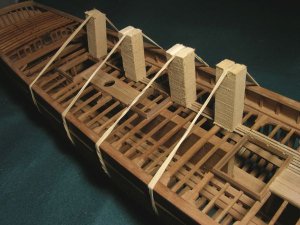
There isn’t much room to use C clamps to hold the planking to the deck beams while the glue sets, the most effective method is to use blocks and rubber bands. By adjusting the rubber band you can lean a block into the edge of a plank and pull it towards the plank next to it. I also cut a shallow grove in the top of the block to prevent the rubber band from slipping off.

1423928250_105_FT19718_blockinga_.jpg

The deck is not sanded I will scrape the deck smooth.
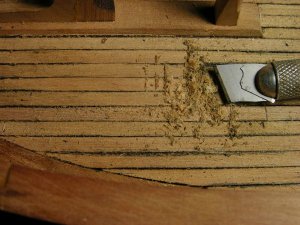
Take a single edge razor blade and hold it with pliers and break it into pieces. Pieces of the broken razor blade are then inserted into the handle of an Exact O blade handle.
Scraping the deck removes any crayon and gives the wood a smooth clean surface. In larger areas a full size single edge razor blade is used to scrape smooth the deck. Because the crayon wax is soft and pliable it will fill in the space between the planks. Sanding did not work as well as scraping because the wax clogged the sandpaper.

1423930801_105_FT19718_scraping3_.jpg

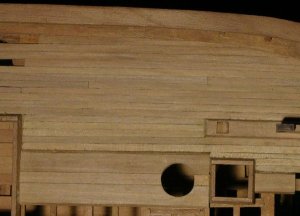
after scraping the deck it removes all traces of the crayon. Advantages to using a crayon is it does not bleed into the wood like a marker or paint or ink, if your plank edges are not exactly smooth or the planks do not fit tight to each other all along the edge the crayon will fill in any slight gaps or ooze out a little in tighter areas. Using a pencil will work but that is more of a dry graphite powder and does not fill in gaps. Sometimes paper is used and that works except when sanding or scraping it is shredding the edge of the paper creating a fuzzy line. The wax crayon gives the caulking a natural look.

1423930849_105_FT19718_final_scraping_.jpg

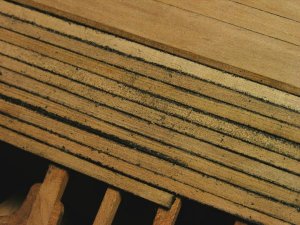
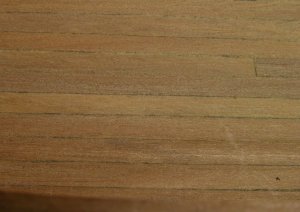
lets take an ultra close look at the deck. I was on my hands and knees checking out caulking on real ships, looking at the deck caulking and looking at it from a distance. I found the caulking was not a clean, even line in places it was wide and it also vanished to almost nothing, for the most part caulking lines were uneven. Using paper or a pencil did not give me a realistic look I needed something that would simulate the oozeness (made up word) of real caulking that is when I thought of wax then it was a short leap to bingo! crayons. This is a close as I can get to the real deal.

1423931425_105_FT19718_very_closea_.jpg
 
Pretty cool, but hard to do on the .6 thickness planks I wish all planking was 1.5mm like the hull planks. This is what I end up with my method using the .6 mm planks I may use your method on the Hull planks as your correct the crayon wont ruin the finished side because it cant penetrate the wood 20180812_122308.jpg
 
Back
Top