A Helping Hand

Peglegreg

Staff member
Forum Moderator
Joined
Jul 30, 2017
Messages
1,653
Points
488

Location
Central Coast NSW
In this thread I would like like our great family of modelshiprights to put down their unique ways of overcoming a difficult job that always comes up. It could be a simple jig take you made to help you. A method that has a different approach, but get the same result easier. This thread is here so you can share, and we'll all gain with the vast knowledge of our fellow members of SOS.
Thanking you all in advanced
Greg
 
Not meaning to make lite or fun of this, but one difficult job is avoiding distractions and the "admiral" and my DOG to leave me alone !!! No, really, it seems everytime I have my hands full that blasted DOG is going to come into my room whining about NEEDING something. Now, the admiral is a different story !!! LOL
 
G'day all
How many times that you need to sand a piece of timber to an exact angle and you find that you have to do multiple attempts until you get sonethung close to what you needed?
Well to me once was too many. I search Ebay for a gadget and found this one.
20180716_145136.jpg
All you have to do after you know the angle are these following steps to get the correct sanding angle.
Step 1
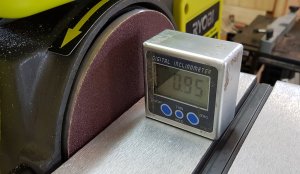
After checking to see if the sanding platform is square to the disc. Place the inclinometer on the platform.
20180716_145404.jpg
Step 2
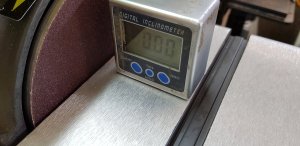
As in my case my bench top is not exactly level (I don't think anyone will have a perfectly level work bench), so I pressed zero to make the inclinometer thinks it is level.
Step 3
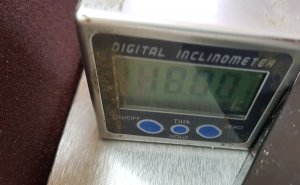
20180716_143529.jpg
Then adjust the tilt platform to what angle you want. In this example I chose 18°.
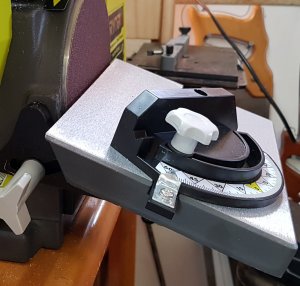
20180716_145445.jpg
Now my sander is ready to sand st the prescribe angle.
20180716_150026.jpg

If you want to find the angle you need, you can do similar steps as 1 and 2 above to work out what angle you need!
Thanks for watching.
Happymodeling to all
Greg
 
There's another aide that may help others.
Having Parkinson's disease, my right hand shakes a lot and glueing things are difficult.
If I want to make a square frame for instance, I firstly draw it on a good quality architecture drawing paper IN REVERSE DIRECTIONAL. Then a quick spray of contact adhesive glue over the drawing will leave it tacky, but not too sticky.
Using the point of a needle, scalpel or similar, I nudge the first piece where it should be, do not press on hard.
After all the pieces are laid down, I sprinkle talcum powder over the spray adhesive. Be very careful not to get talcum powder on the timber frame.
Then the next until they are all in place.
THEN getting baking paper, I then spray adhesive on it, more than the architectural drawing paper. Using my handle of the scalpel, I rub over each piece and carefully peal the baking paper WITH the frame off the architectural paper.
Now that the frame is on the baking paper, you can start gluing the frame together. The glue wouldn't stick to the baking paper easy, so when the frame's joints are dry and firm it can come off the baking paper. Clean up both sides with sandpaper.
That's it.
Happymodeling
Greg
 
  • Like
Reactions: ADC
Thanks for the tip on the inclinometer. Just bought one. I also don’t have a true level or straight surface to work on. This will come in handy. Any work that requires a reasonably level and straight surface I do on my dining table.
 
There's another aide that may help others.
Having Parkinson's disease, my right hand shakes a lot and glueing things are difficult.
If I want to make a square frame for instance, I firstly draw it on a good quality architecture drawing paper IN REVERSE DIRECTIONAL. Then a quick spray of contact adhesive glue over the drawing will leave it tacky, but not too sticky.
Using the point of a needle, scalpel or similar, I nudge the first piece where it should be, do not press on hard.
After all the pieces are laid down, I sprinkle talcum powder over the spray adhesive. Be very careful not to get talcum powder on the timber frame.
Then the next until they are all in place.
THEN getting baking paper, I then spray adhesive on it, more than the architectural drawing paper. Using my handle of the scalpel, I rub over each piece and carefully peal the baking paper WITH the frame off the architectural paper.
Now that the frame is on the baking paper, you can start gluing the frame together. The glue wouldn't stick to the baking paper easy, so when the frame's joints are dry and firm it can come off the baking paper. Clean up both sides with sandpaper.
That's it.
Happymodeling
Greg
I'll have to wrap my head around this a little better. CMT causes severe tremors much like Parkinson's; they're permanent, constant, uncontrollable, and interfere with the simplest of tasks. I eat my peas with honey ...
 
Unexpected help from nature.

While washing the dishes this morning I saw a flying Crow through the window. It had a twig in its beak. Ah, Spring is in the air.

As I watched, it did a u-turn, as if it had forgotten something, and flew out of sight towards the wilderness. At that moment, in my heart, I felt the primal urge of the Crow. To become creative, build its first nest with success, and to show ability of parenthood. A fely a glips of what stirs us about model making. I am sure, when we model, we tap into our primal roots.

Still washing away with inspiration anew, I noticed the Crow is now flying back. It headed straight towards me. As it flew over I saw TWO twigs in its beak. Inspired indeed!
 
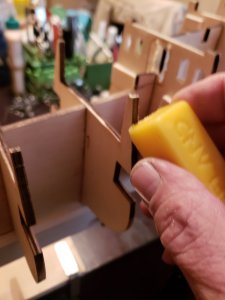
some Ships require you to cut off frame or bulkhead ends after the bulwarks are installed this can be a real pain in the rump if glue gets between the bulwarks and the upright on the frame or bulkhead. I found this trick years ago since I built a good number of Mamoli, Mantua and Sergal ships which always require this step for some reason. I use wax on the uprights to prevent glue sticking there this makes it simple to just cut it off and flush it up with the deck with a sanding block. no more having to pry it from the bulwarks and clean the glue from them 20180903_170712.jpg
 
Back
Top