-

Win a Free Custom Engraved Brass Coin!!!
As a way to introduce our brass coins to the community, we will raffle off a free coin during the month of August. Follow link ABOVE for instructions for entering.
-

PRE-ORDER SHIPS IN SCALE TODAY!
The beloved Ships in Scale Magazine is back and charting a new course for 2026!
Discover new skills, new techniques, and new inspirations in every issue.
NOTE THAT OUR FIRST ISSUE WILL BE JAN/FEB 2026
You are using an out of date browser. It may not display this or other websites correctly.
You should upgrade or use an alternative browser.
You should upgrade or use an alternative browser.
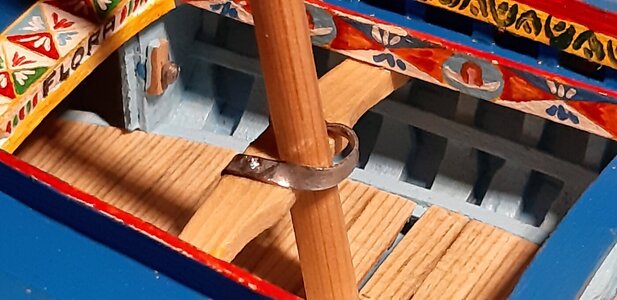
I am curious how you kept the ring free to rotate while soldering the legs through the deck plate??? NIce work. Rich
The soldering keep well only to prepared surfaces so if you are carefull you select where to fix and where not.
If some pond wil go where it shouldn't you can remove it with an old knife. I always save old unusable blades for these works.
If you force the ring with pliers you can free it, the soldering on those sizes can't resist to a determined modeller
If some pond wil go where it shouldn't you can remove it with an old knife. I always save old unusable blades for these works.
If you force the ring with pliers you can free it, the soldering on those sizes can't resist to a determined modeller
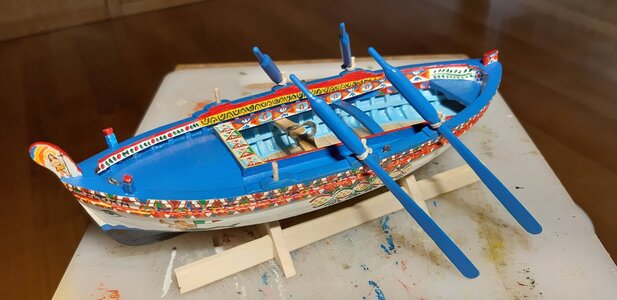
Oars.
I had already completed the first two oars of the first boat. For the other two I have planned another six.
Modern boats are almost all equipped with outboard motors and usually have only two oars to maneuver and for small movements, on the vintage I have provided four.
They are made from bamboo sticks from the Chinese restaurant.
I prepared them in different stages of processing.
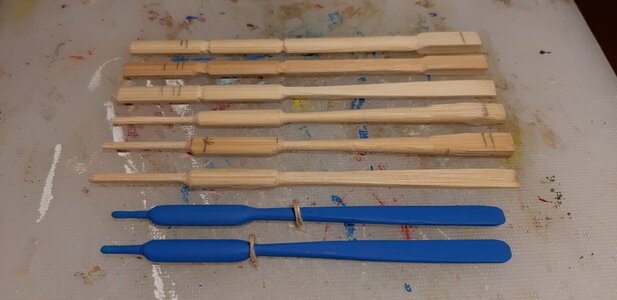
Complete, only to be painted.
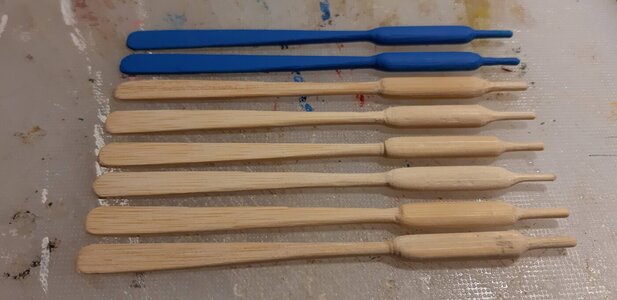
Painted and complete with knots for fixing to the rowlocks.
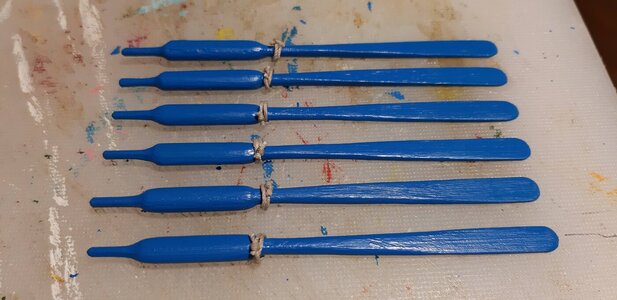
As I said four are for the boat in the works.
I had already completed the first two oars of the first boat. For the other two I have planned another six.
Modern boats are almost all equipped with outboard motors and usually have only two oars to maneuver and for small movements, on the vintage I have provided four.
They are made from bamboo sticks from the Chinese restaurant.
I prepared them in different stages of processing.

Complete, only to be painted.

Painted and complete with knots for fixing to the rowlocks.

As I said four are for the boat in the works.

I had not considered the bamboo chopsticks as a resource. Cleaver insight and nicely shaped oars. The heavier section by the handles must be a counterweight for the stroking action. Your model(s) are a cultural presentation. Well done. Rich (PT-2)Oars.
I had already completed the first two oars of the first boat. For the other two I have planned another six.
Modern boats are almost all equipped with outboard motors and usually have only two oars to maneuver and for small movements, on the vintage I have provided four.
They are made from bamboo sticks from the Chinese restaurant.
I prepared them in different stages of processing.
View attachment 264389
Complete, only to be painted.
View attachment 264390
Painted and complete with knots for fixing to the rowlocks.
View attachment 264391
As I said four are for the boat in the works.
View attachment 264392
Bamboo has a very straight grain and is so useful for this use either if it isn't a wood used in our tradition.I had not considered the bamboo chopsticks as a resource. Cleaver insight and nicely shaped oars. The heavier section by the handles must be a counterweight for the stroking action. Your model(s) are a cultural presentation. Well done. Rich (PT-2)
I almost always use woods that correspond to the ones used by real craftsmen, hard wood for the frames and pine wood for the planking.
The mast and the antenna could be good in Bamboo too but that will be made of pine instead, being left in natural.
That is a complex bit of bending and twistng. RIchHardware - episode three
A couple of details already seen in latest shots.
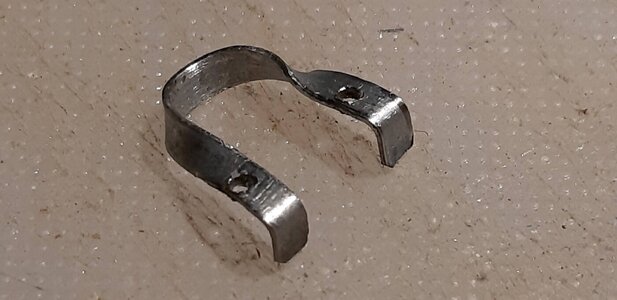
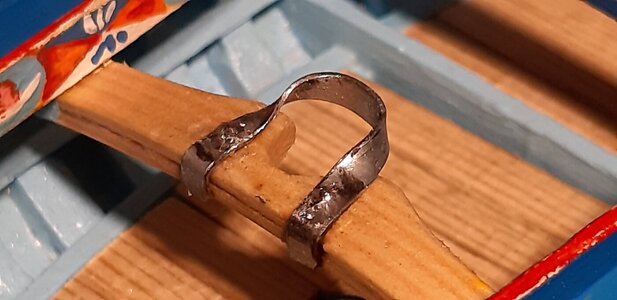
The horseshoe that will keep in place the mast, fitted with a wedge. This time not from the tomato can but from a thicker metal.
View attachment 265188
View attachment 265189
View attachment 265190
Sail
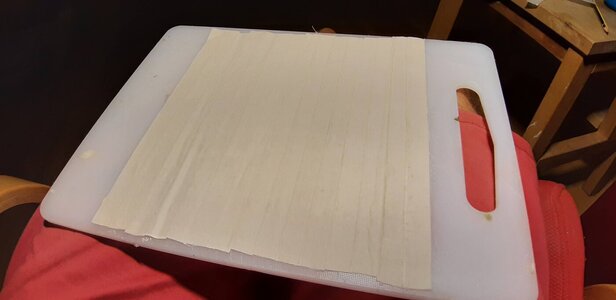
The fabric had been prepared some time ago.
I was undecided whether to start with a whole piece of fabric on which to simulate the seams.
But I thought it would be out of scale and unrealistic so I found a video on youtube where it was explained how to glue the strips of fabric to get the realistic effect.
I have revised the technique in my own way to adapt it to my way of working.
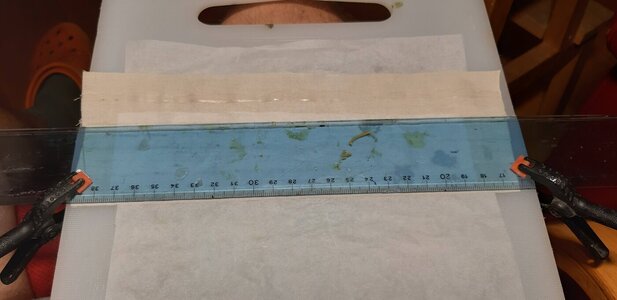
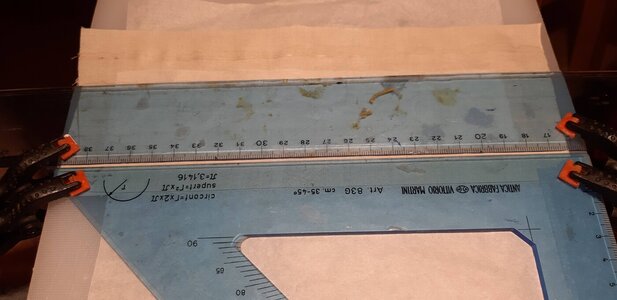
The strips are overlapped by a millimeter or so and held in place with rulers.
The glue is inserted in the space left free by the rulers and pans inside the fabric by capillarity.
More glue is added later to better secure the joint.
I use oven paper to prevent the dry glue from looking too shiny where it dries near the rulers.
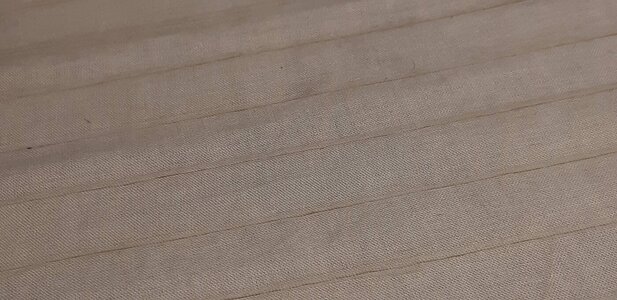


Sails and scale seem to be a challenge that does no away. I hope this approach works for you when you have it close or on the model. Rich (PT-2)Sail
The fabric had been prepared some time ago.
I was undecided whether to start with a whole piece of fabric on which to simulate the seams.
But I thought it would be out of scale and unrealistic so I found a video on youtube where it was explained how to glue the strips of fabric to get the realistic effect.
I have revised the technique in my own way to adapt it to my way of working.
The strips are overlapped by a millimeter or so and held in place with rulers.
The glue is inserted in the space left free by the rulers and pans inside the fabric by capillarity.
More glue is added later to better secure the joint.
I use oven paper to prevent the dry glue from looking too shiny where it dries near the rulers.
View attachment 265409
View attachment 265410
View attachment 265411View attachment 265412
1.5mm in 1/24 scale corresponds to 36mm in full scale that's maybe twice the size of a reasonable seam overlapping. A smaller overlapping doesn't seem to be feasible.
I think that this shouldn't look terribly out of scale. In a smaller scale I won't apply the same stile.
The width of the strips should be in scale too, being 40 to 60 cm wide in full scale on this kind of boats.
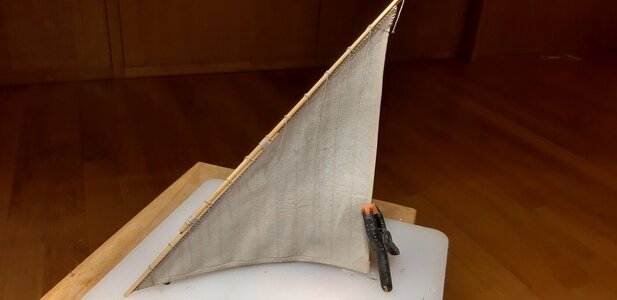
I will try to post the completed sail as soon as possible.
I think that this shouldn't look terribly out of scale. In a smaller scale I won't apply the same stile.
The width of the strips should be in scale too, being 40 to 60 cm wide in full scale on this kind of boats.
I will try to post the completed sail as soon as possible.
I greatly appreciate and respect your sense of scale to the model. We all have to do what is feasible and not only theoretically correct. . . or restated the feasible is the correct way for each of our skills and models. Rich (PT-2)1.5mm in 1/24 scale corresponds to 36mm in full scale that's maybe twice the size of a reasonable seam overlapping. A smaller overlapping doesn't seem to be feasible.
I think that this shouldn't look terribly out of scale. In a smaller scale I won't apply the same stile.
The width of the strips should be in scale too, being 40 to 60 cm wide in full scale on this kind of boats.
I will try to post the completed sail as soon as possible.
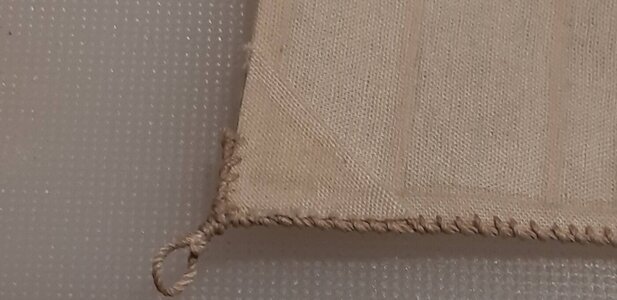
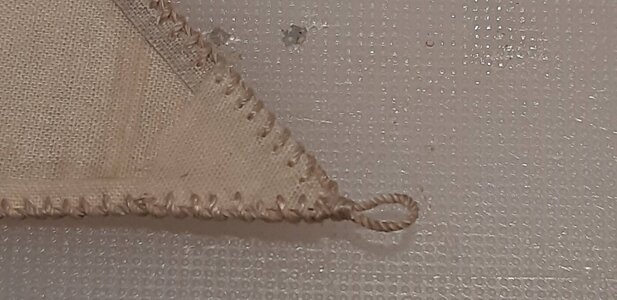
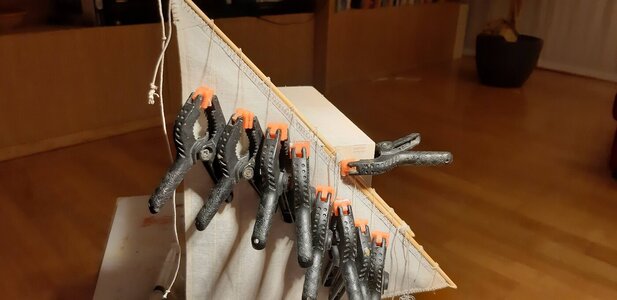
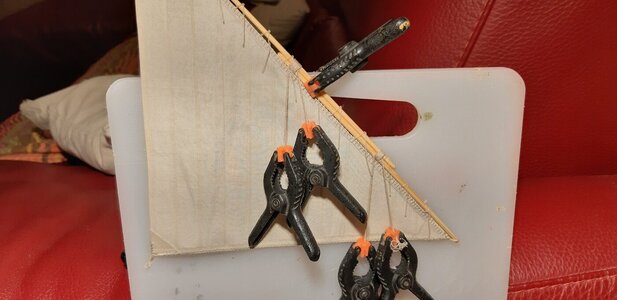
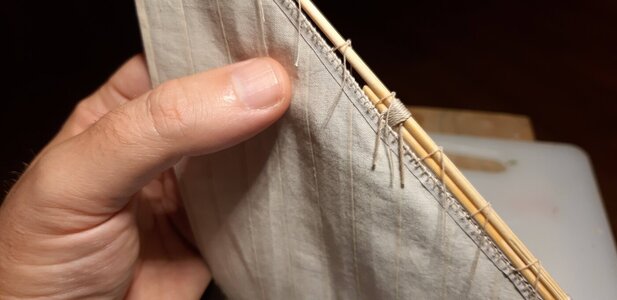
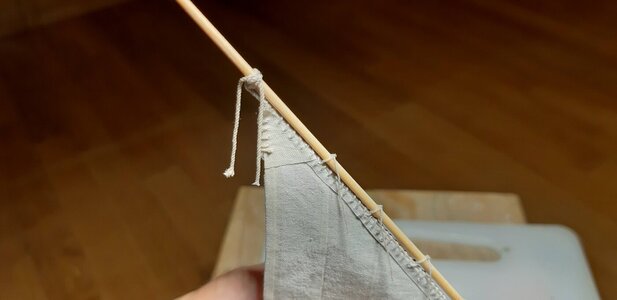
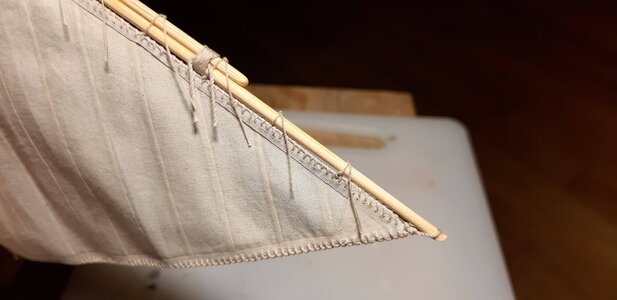
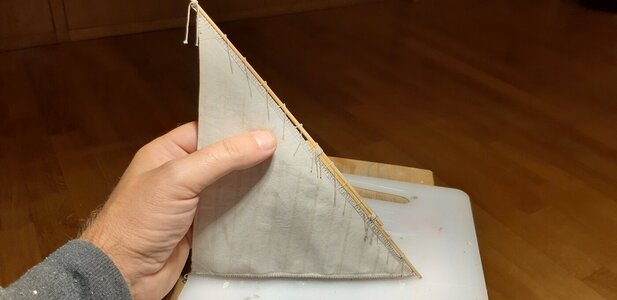
You do very uniform hand sewing that looks great! Rich (PT-2)As promised here the completed sail.
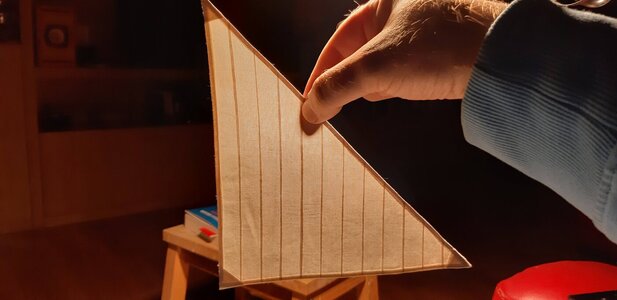
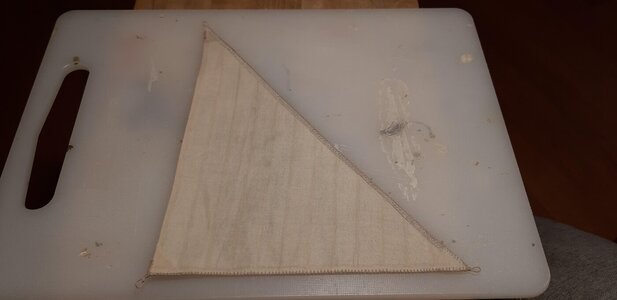
Firstly cut to shape and reiforced borders and vertices.
View attachment 265545
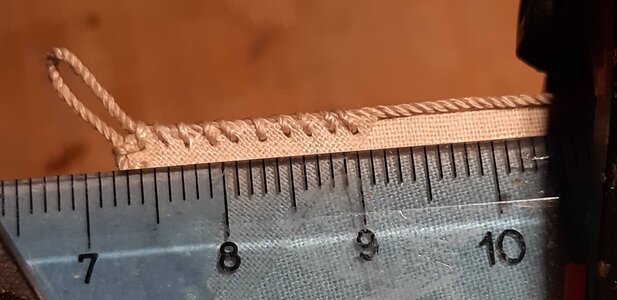
And then the sewing work on two borders.
View attachment 265546View attachment 265547View attachment 265548View attachment 265549
I'm already fixing it to the antenna, some details need to be perfected before posting the photos.
That looks like 1.5 mm per stitch, very patient and close work with the aid of the ruler for control. RichThank you very much for your appeciacion.
I use a ruler as a reference as you can see in the second photo


