Parts review Aftermarket naval guns parts to upscale, Part 3/3

Jimsky

Administrator
Staff member
Administrator
Forum Moderator
Joined
Nov 3, 2018
Messages
13,080
Points
938

Location
Brooklyn, New York USA
"Raise your words not your voice, it is rain that grows flowers, not thunder." Greetings all.​

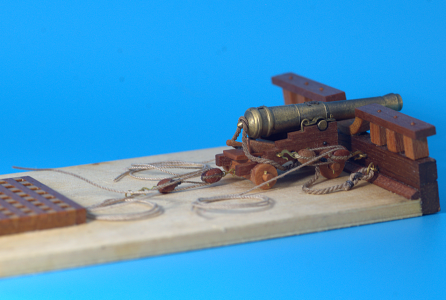
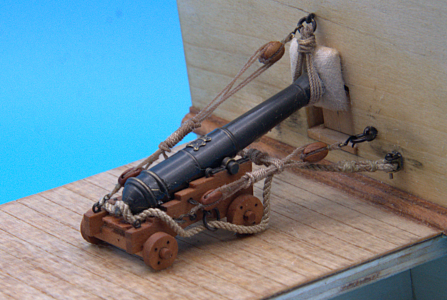
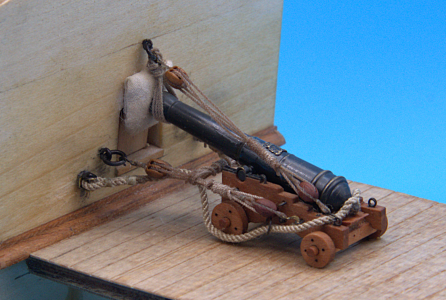
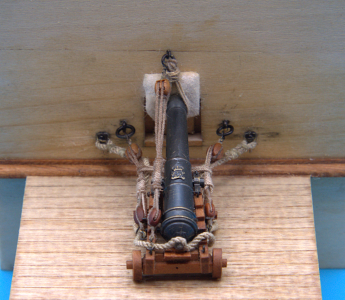
This is Part 3 of 3 series log Accesories\Uspscale mini kits of naval guns. It is not the typical review, where the review subject is giving evaluation, it is rather the parts 'in action', In other words, the use of those parts in real scenarios. To those of you who came directly to this post, I suggest familiarizing yourself with my previous parts (Part 1/3 and Part 2/3) of reviews about aftermarket naval gun mini kits (links below)


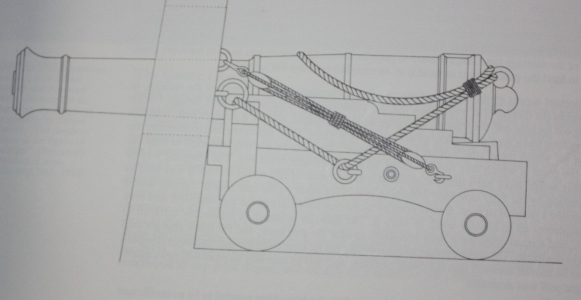
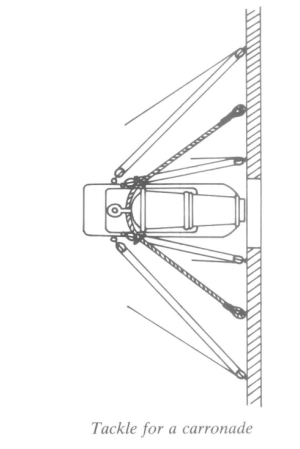
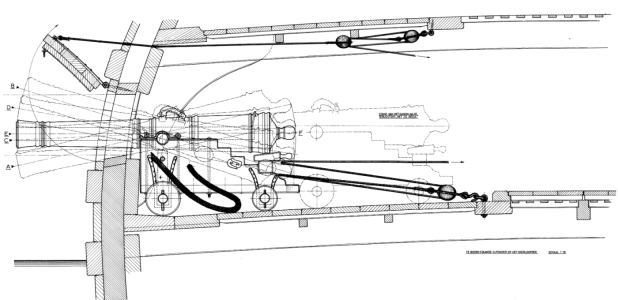
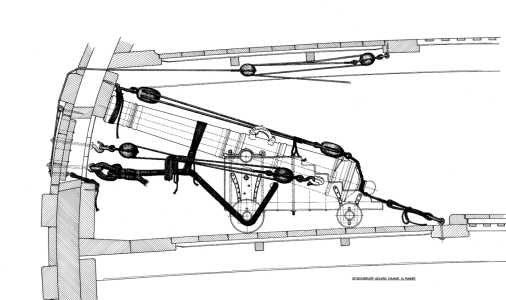
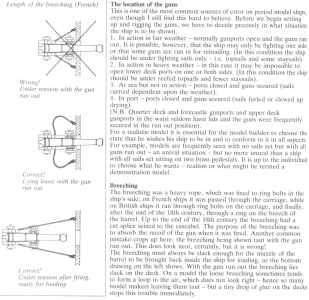
I thought about the best way to show the reviewing parts 'In action', e.g. the use of them. Since the review of the naval guns, it would be most suitable to rig those guns. This way all the parts from the mini-kits will be used and shown as the final product. Besides the country of origin, where guns differ from rigging, there are various locations for rigging naval guns. Let's examine the image below courtesy of Wolfram Zu Mondfeld from the book 'Historic Ship Models'. While the image shows the location of the French rigging gun, it should give you an idea.
1727886522634.png

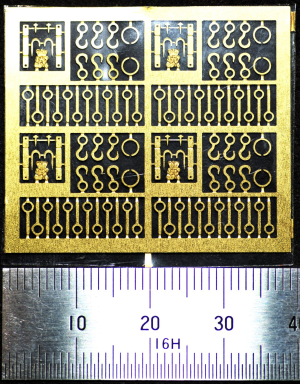
As you can see, there are at least 4 common situations where the gun will be rigged differently. I will be showing a few situations, but the parts in my review give all the possibilities. If you have not had a chance to read the review of PE fret (image below), you can read it here. It is a complete set and has all the necessary parts to rig the gun for any situation.
1727887533039.png

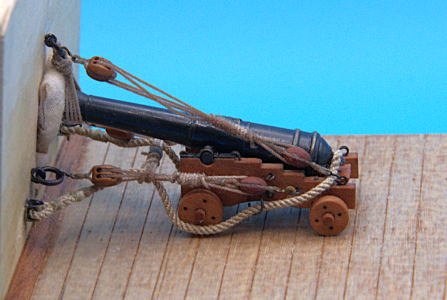
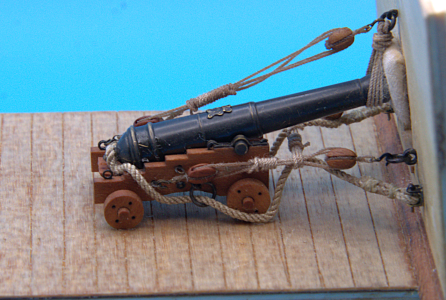
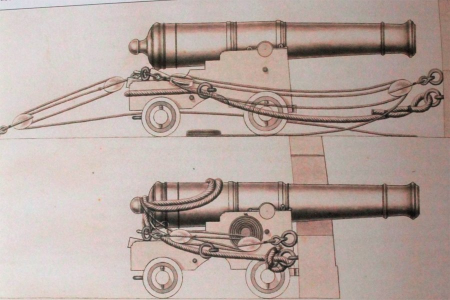
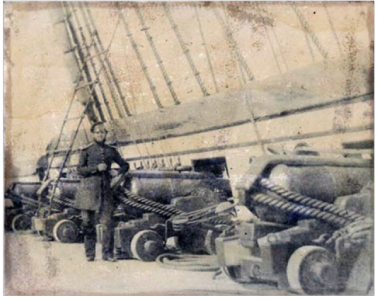
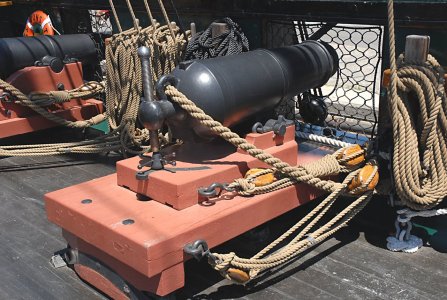
Since the naval gun belongs to the British Navy, we will be setting up and rigging the gun in a British manner, and use the 'In action' situation, e.g. one side of the ship is ready to fire, or while other guns 'run in' for reloading.
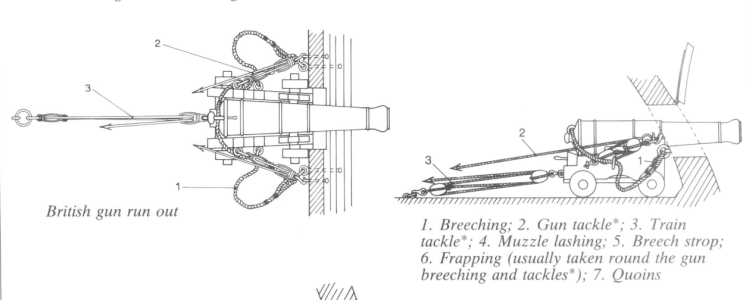
1727889863147.png

This is how I plan to rig my guns, but wait... one of you should ask: " Jim, what about the rope, what kind of rigging without the rope? You have not shown us the ropes"!!! And you will be right, I have not reviewed any ropes...yet. But be assured that DryDoc has all the ropes to rig the entire ship, not just guns. I have some of the many varieties of ropes that Drydoc can offer us. Let's review some ropes for no.

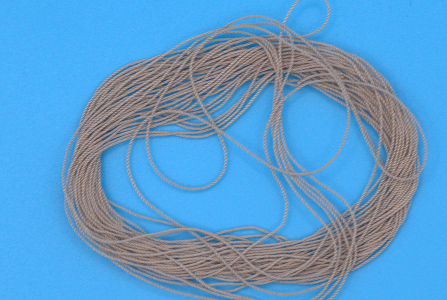
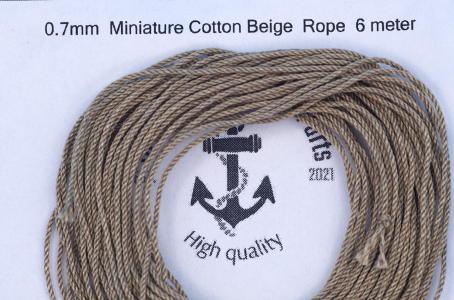
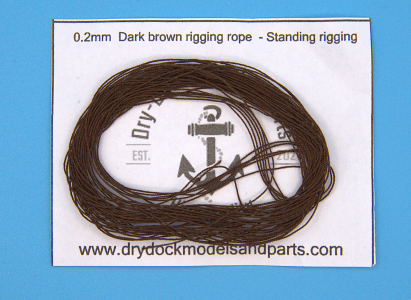
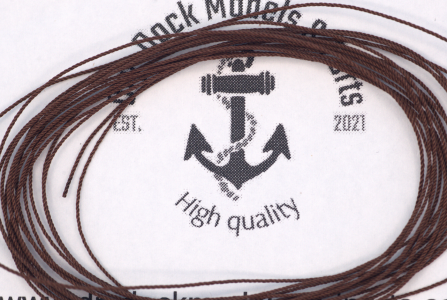
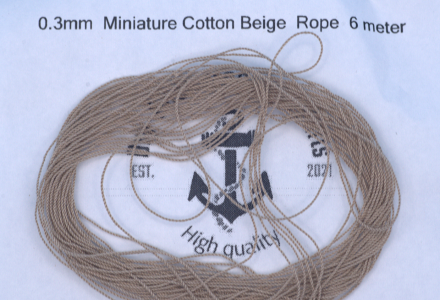
Currently, I have the cotton rigging lines (ropes) and they come in two colors: Beige, for running rigging, and Dark Brown suitable for standing rigging. Ropes come in a plastic bag and have all the common sizes from 0.2mm to 1.4mm.
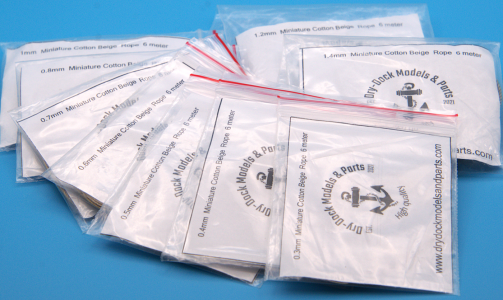
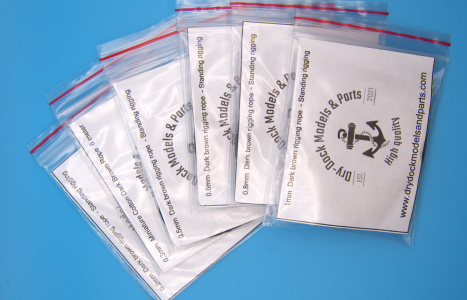
600_4780.png
600_4782.png

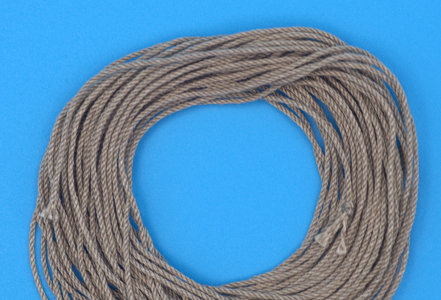
Being a cotton rope, it does have some minor fuzz, but it is only when you do macro. Other than that, the ropes are twisted evenly in the entire length and look nicely laid. Here are some images with close-ups.
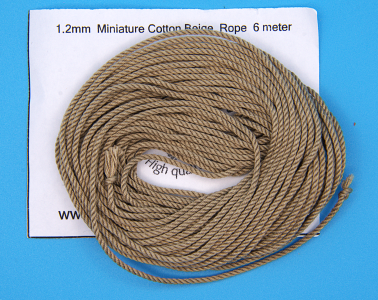
600_4785.png
600_4808.png
600_4809.png
600_4804.png
600_4805.png

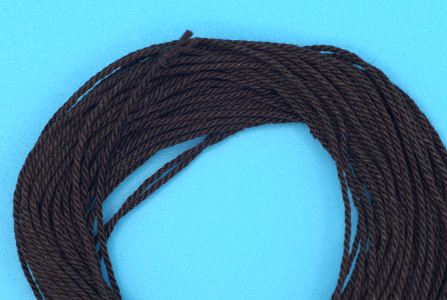
...and now Dark brown

600_4796.png
600_4800.png
600_4803.png

I hope you get an idea of the quality rope DryDock can offer, I like it, and going a bit ahead, pleasure to work with. Note: I have not had a chance to use Dark Bown rope, but I am sure it will be the same experience as the Beige.

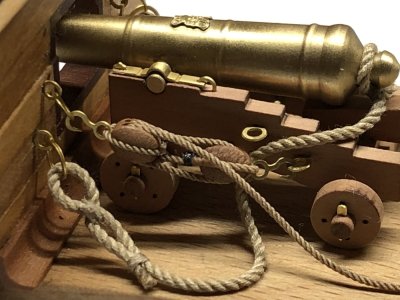
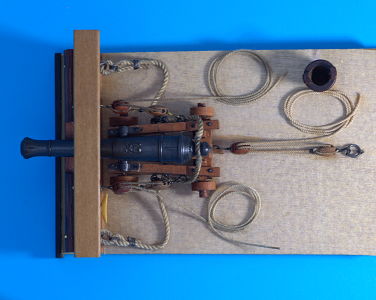
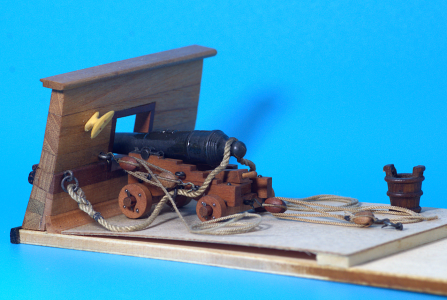
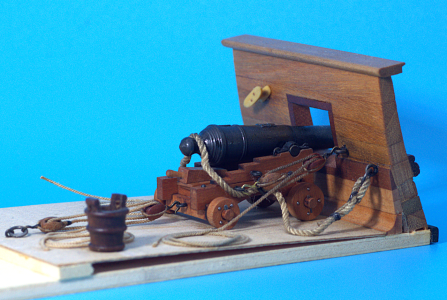
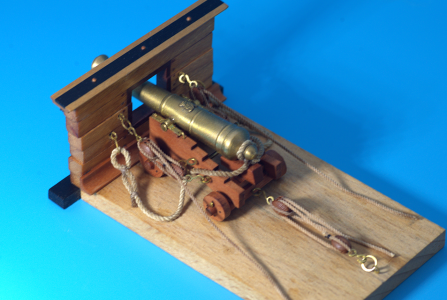
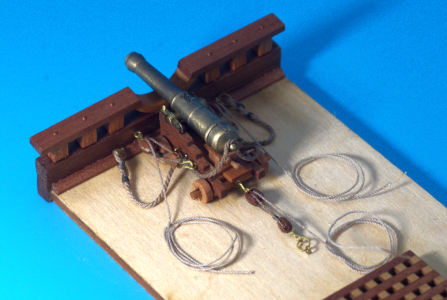
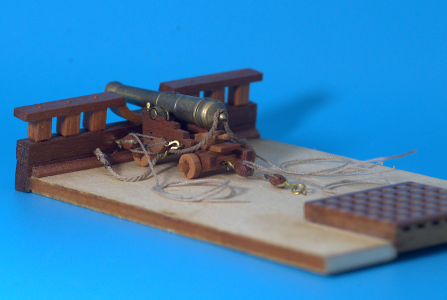
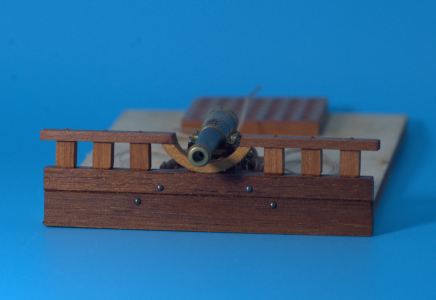
Moving on to the rigging of the gun. For each scale gun, I made simple buttle stations. While some of them look 'Fancy', and others do not, they are simply constructed from leftover material, just to show the actual rigging. They are made with no scale, nor belong to a specific ship. Getting parts ready for use.
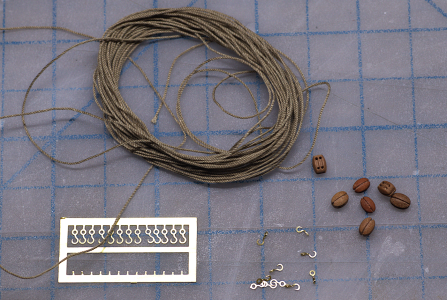
600_4759.png

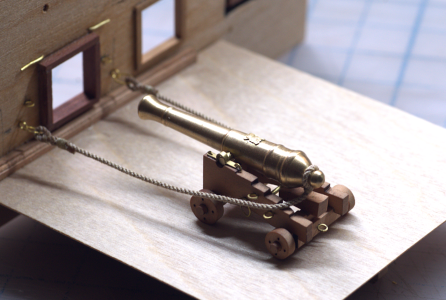
I started to make a breeching line.
600_4768.png600_4769.png600_4770.png

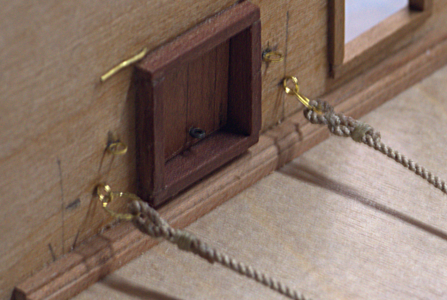
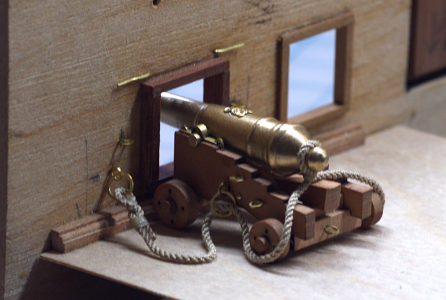
This is the breeching position for a 'ready for action' situation. Note how the Breeching loop is made and attached to the breeching line.
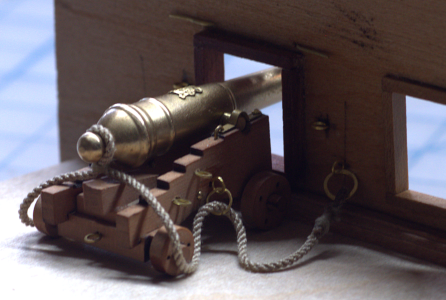
600_4771.png 600_4772.png

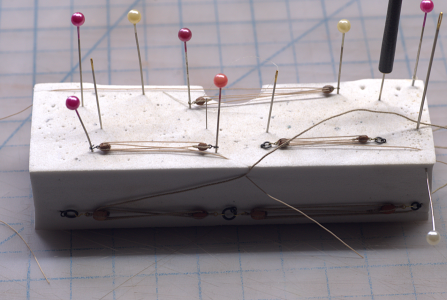
Train and outhaul (side) tackles are made the same: one single and one double shave block per tackle.
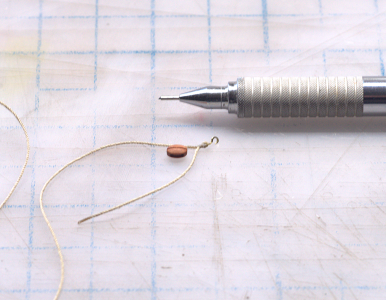
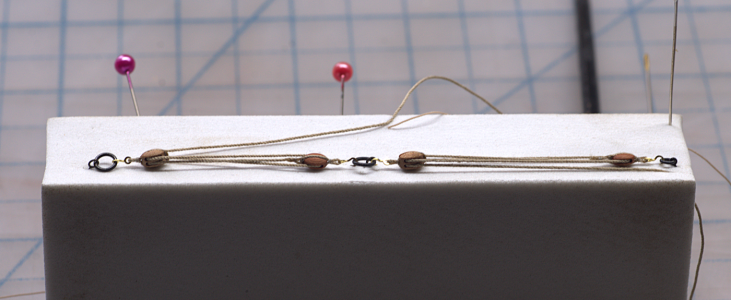
600_4765.png 600_4763.png

close-up view. These are 3.00mm blocks
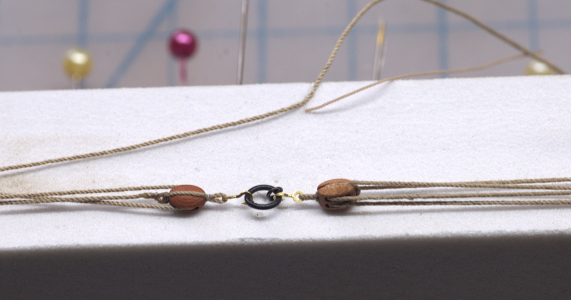
600_4762.png

All three tackles are made and ready. I left them with a bit of tension for a few days. It wasn't required but it gave my eyes some break while I worked on something else.
600_4764.png

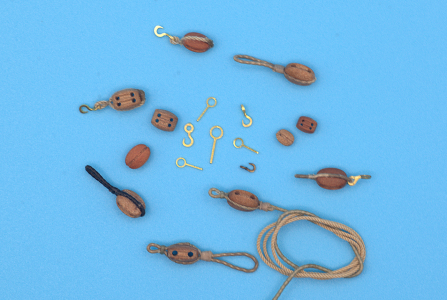
Below are some other rigging blocks, I use for other rigging tasks. Just so you have an idea
600_4810.png

Alright, the following images will show the rigging for all scale guns available at DryDock. Starting with a 1:48 scale. To those who followed my latest review, I utilized the battle station built to show gunport hinges. ;)

Continue on the next page, as 25 images per post are reached....
 
Continue from the previous posts...

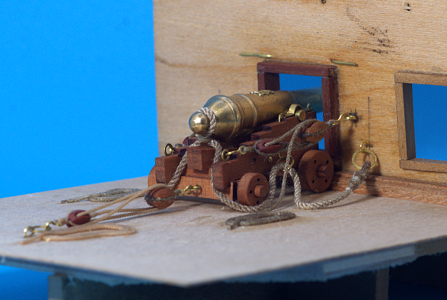
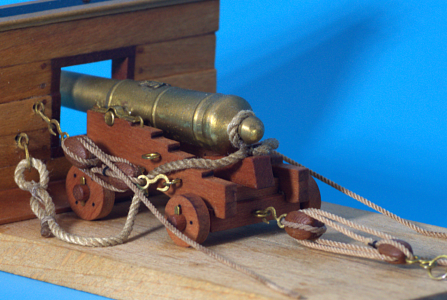
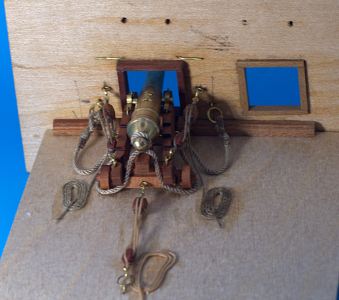
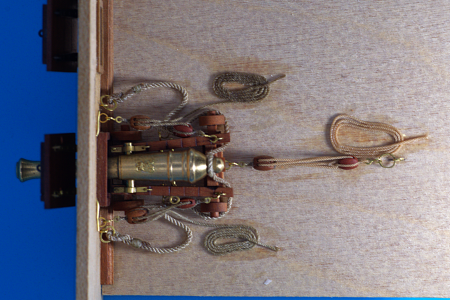
Ready for action gun in scale 1:48

600_4849.png
600_4856.png
600_4841.png
600_4840.png
IMG_2742.jpeg

Ready for action in scale 1:64. Here the barrel and all the fittings are blackened.

600_4842.png
600_4852.png
600_4853.png
600_4855.png

Scale 1:48

600_4856.png
600_4857.png
600_4859.png
600_4861.png

... and the smallest scale is 1:96

600_4863.png
600_4864.png
600_4865.png
600_4866.png

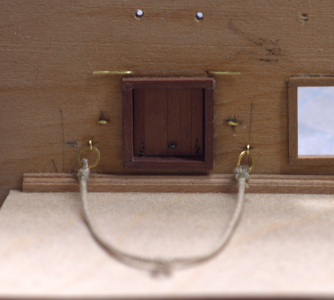
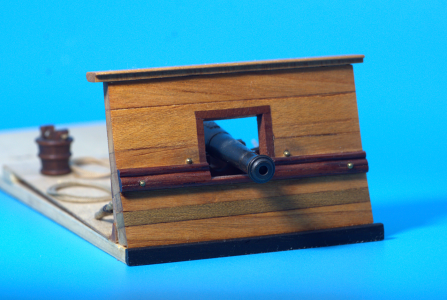
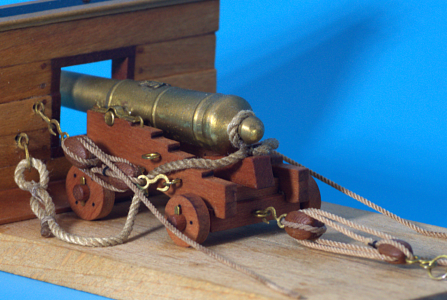
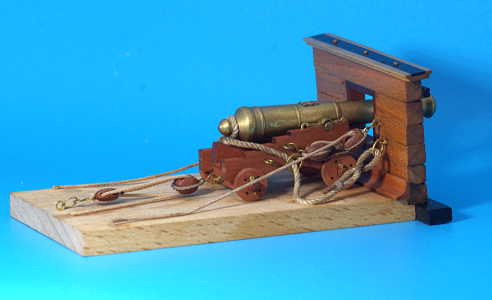
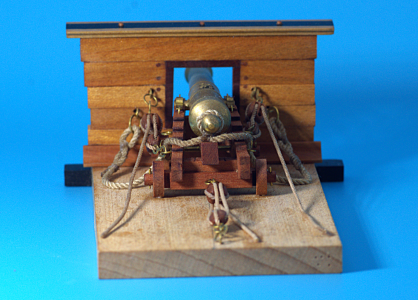
Uhhh...I was ready to say that's it but... I missed showing the gun at 1:72 scale, and I do have photos of this battle station but... the 1:72 scale is shown in different situations, heck why not??!!! It will be ' at sea, but not in action. Ports are closed and gun secured. I made yet another battle station with a closed port.

Scale 1:72, at sea but not in action.

600_4875.png
600_4876.png
600_4878.png
600_4882.png
600_4881.png

Well..., I regret but the review, as well as the series of reviews, comes to an end. I have hours of joy working with those mini-kits, and I have even more joy when sharing my experience with you. I will give a big thumb for those mini-kits, and PE parts, and can recommend those to anyone looking to upscale the kit-provided fittings. It is hard to recommend to scratch modelers but hey... why not? It may save you some valuable time making those fiddly eyerings and hooks to rig 100+ cannons. Obviously, you cannot substitute the joy of making your own, from scratch but...in case you change your mind, the choice is here... at DryDock Model and Parts!

As always, if you have any questions, I will be glad to help. What do you think about those mini-kits? Don't be shy and give your opinion. Thank you all for your participation!
 
Great series of reviews Jim. I like the way you have shown rigging for different scenarios. I have been trying to find information for rigging arrangements for cannon and carronades on American ships, circa 1803. Do you possibly have a source or suggestion where I can find details? Thanks.
 
Great series of reviews Jim. I like the way you have shown rigging for different scenarios. I have been trying to find information for rigging arrangements for cannon and carronades on American ships, circa 1803. Do you possibly have a source or suggestion where I can find details? Thanks.
Thank you, Roger. I am not sure, I will have to look at my books.
 
Jim,

Super timely and incredibly valuable information WITH photos for us who are rigging cannons on our builds!!!

The wide variety of rope sizes seems critical in accurately rigging cannons.

Your kits were all done in the British manner and my Bonhomme Richard is using the French but most of the information transfers perfectly.

Thanks for sharing this valuable information with the superb references.

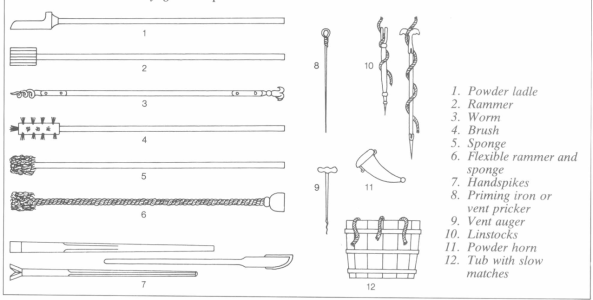
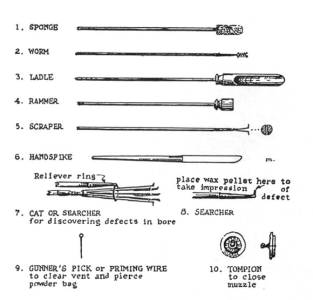
Now, is there going to be a "part 4" in the series: Tools and accessories at a cannon station??

Think buckets, rammer, ladle, worm, pompom, swab, cannonball staging, etc....
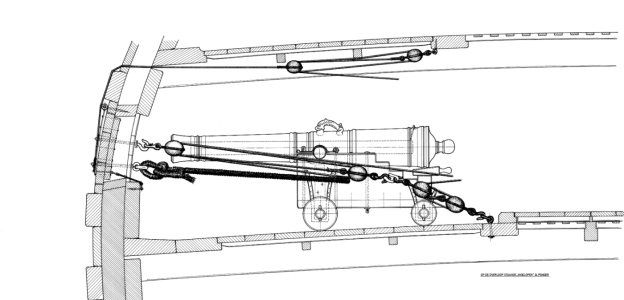
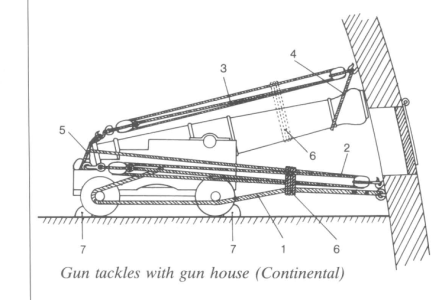
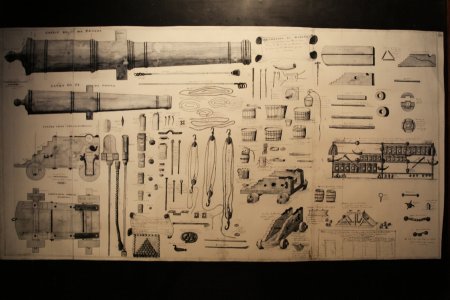
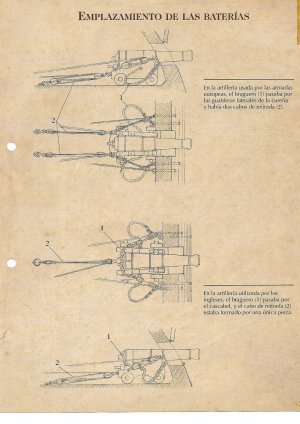
Thank you, Brad. I am glad you found this review valuable. I can look at the French rigging. Here are what i fount immediately, now.

1727925027668.png

1727925151629.png
1727925162973.png
1727925176595.png

1727925688214.png

About Part 4. All of those Parts are a set of reviews for a product of DryDock Model and Parts, Unfortunately, they didn't sell aftermarket products such as Tools and accessories at a cannon station. However, I will have to find out if I have available documentation about tools, etc. then I can make a review. ;)
 
Brilliant detail and presentation, Jim.

Something for every serious builder to bookmark for future reference.
Thank you, Ian.
The idea for those reviews is to let scale modelers know about the parts available. I think they are not just for serious builders. Those guns were assembled from the mini-kits offered by the DryDock Model and Parts. From personal experience, it is easy enough to assemble carriages, BTW, beautiful wood (PinkPear), and brass barrels need only some oxidation cleaning. Rigging is something some of the modelers may experience as challenging, perhaps as novices. Also, using the standalone PE parts (not the one made for cannons), saved us time to make the fiddly eyebolts and hooks. I tried to make my hooks from scratch, and I still cannot make them look uniform. Casting would be the optimum way of producing hooks but it does require machinery tools and would be costly, the way @archjofo makes hooks, I love those as well as his work. ;)
 
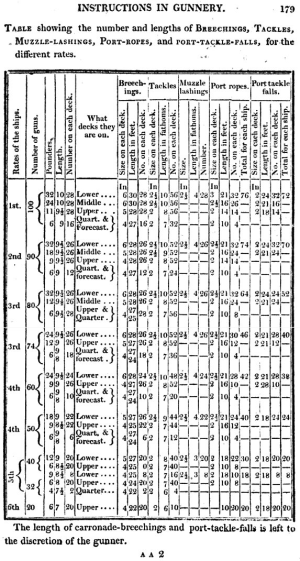
Thanks Jim, very helpful. The footnote of the table (first image) leaves some leeway for carronade breeching and tackle-falls length. The arrangements overall appear quite similar to other nations rigs, which makes sense really.
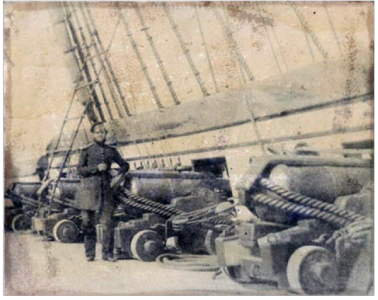
one more image found

1727964006664.png

1727964166618.jpeg
 
Jim,
Thank you for the great photos of the French method! I am thinking about adding some of the equipment found at each station (bucket, swabs, etc) on the BHR cross section. Maybe with 3 guns run out and one pulled in for reloading, with this equipment spread out.
 
Last edited:
Here are what i fount immediately, now.
Hi Jim,
This subject is terrific! The first picture in post #8 is very timely for me. I am trying to find out when two train tackles rather than one would be used. In volume 2 of The History of English Sea Ordnance, Caruana states that in his research he found no indication that there were train tackles used at all until sometime in the 18th century. Lavery also mentions that there is no evidence of the use of train tackle before the 18th century in the Arming and Fitting of English Ships of War. Once they came into use sometime in the 18th century, when would there be a single train tackle and when would there be two? I suspect it had to do with the weight of the gun and possibly era, but I cannot find anything based on contemporary sources. If anyone has some information based on contemporary sources that they can share I would be extremely grateful.
Allan
 
Jim,
Thank you for the great photos of the French method! I am thinking about adding some of the equipment found at each station (bucket, swabs, etc) on the BHR cross section. Maybe with 3 guns run out and one pulled in for reloading, with this equipment spread out.
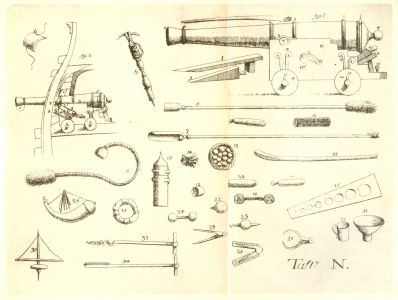
You are most welcome! Here I found some tools

1727983565722.png
1727983580459.png
1727983596003.png
1727984243445.jpeg
 
Hi Jim,
This subject is terrific! The first picture in post #8 is very timely for me. I am trying to find out when two train tackles rather than one would be used. In volume 2 of The History of English Sea Ordnance, Caruana states that in his research he found no indication that there were train tackles used at all until sometime in the 18th century. Lavery also mentions that there is no evidence of the use of train tackle before the 18th century in the Arming and Fitting of English Ships of War. Once they came into use sometime in the 18th century, when would there be a single train tackle and when would there be two? I suspect it had to do with the weight of the gun and possibly era, but I cannot find anything based on contemporary sources. If anyone has some information based on contemporary sources that they can share I would be extremely grateful.
Allan
Thanks, Allan

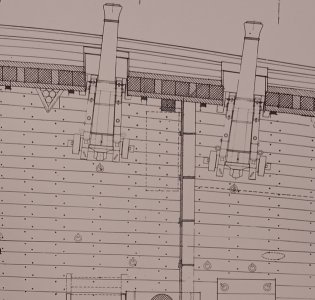
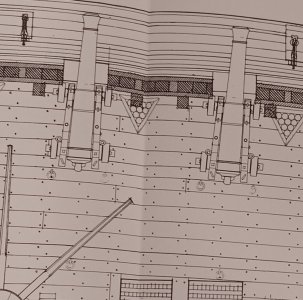
Two train tackles were used for the guns in Continental\French Navies, I couldn't find if they were just for heavier caliber, thought. There were two eyebolts attached to the end of each side's carriage. I have not found a single draft, yet, showing those two rings on the carriage. The British Navy uses the single eye bolted to the rear axletree.

1727984363421.jpeg

1727984752486.png
 
Jim seems you issued a challenge to have some good aftermarket kit parts company to produce a good set of gun tools and buckets to go with the great ropes, blocks and hooks available from Dry Dock models.
yep... this had been discussed already with the designer. Do you remember Radioshack's slogan: You have the question, we have the answer! ;)
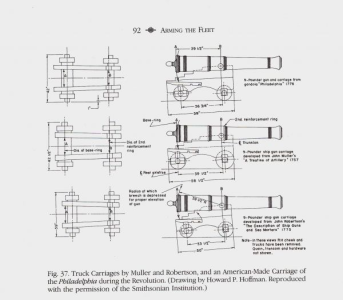
 
I suspect it had to do with the weight of the gun and possibly era, but I cannot find anything based on contemporary sources. If anyone has some information based on contemporary sources that they can share I would be extremely grateful.
Allan
I believe two versus one in-haul line was based on weight of the cannon. On the Boudroit drawings of the Bonhomme Richard, the main gundeck has rings for two in-haul lines on the main gun deck. Next deck up, there is only one ring for a single in-haul line. See photos below:s

Main Gundeck (two rings)
20240922_145750.jpg

Middle Deck (smaller cannons and only one center ring for in-hauling)
20240922_145430.jpg
I'm not sure what the rings are directly behind the carriage wheels??? Looks to me like they would cause big problems while the carriage rolled back.
 
Back
Top