
Good day John!
As I remember we didn't talk about yard tackles at all... about mast tackles - yes , we told about them.") ))
))
As I remember we didn't talk about yard tackles at all... about mast tackles - yes , we told about them.
))
 |
The beloved Ships in Scale Magazine is back and charting a new course for 2026! Discover new skills, new techniques, and new inspirations in every issue. NOTE THAT OUR NEXT ISSUE WILL BE MARCH/APRIL 2026 |
|
 |
As a way to introduce our brass coins to the community, we will raffle off a free coin during the month of August. Follow link ABOVE for instructions for entering. |
|
))Yet again I screwed up.Good day John!
As I remember we didn't talk about yard tackles at all... about mast tackles - yes , we told about them.


 You can see the wires underneath, holding the cannon to the deck. And lots of CA and some sprue goo to make the deck as secure as I can. The interior is painted black to minimse light.


 )) with one assembled model only ))
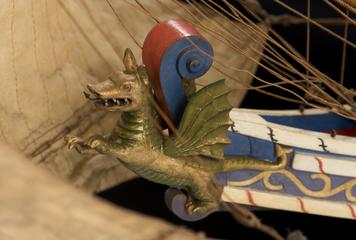
 collection.sciencemuseumgroup.org.uk

But it is fantastic...Good day John,
You made me very really fun when call me "legendary" !
Yes that is true. I didn't say you were the only legend hereseriously , there are , on this forum, a few really legendary members making wooden and plastic models on extremelly , fantastic high level!
")
Regarding current project, I would like to say , may be there is sence to change both positions of 14, hook and running end of the stay tackle and secure both of them( when not in use) somewhere to the lower block of the main stay, to place it along main stay, and to check alternative way how to secure upper block of this MS tackle... as far as I remember , such option was mentioned in Anderson book?
Ps
Look at this picture, solution I m talking about
Elizabethan Galleon, 'Elizabeth Jonas' | Science Museum Group Collection
Model ship, with full rigging and figure on deck. 1:48 scale model of the Elizabethan galleon, 'Elizabeth Jonas', built c.1600. Constructed by Science Museum model maker Philip Davies, in the workshops at South Kensington, London, in 1931. The human figure was a later addition made by Barbara...
View attachment 595708
