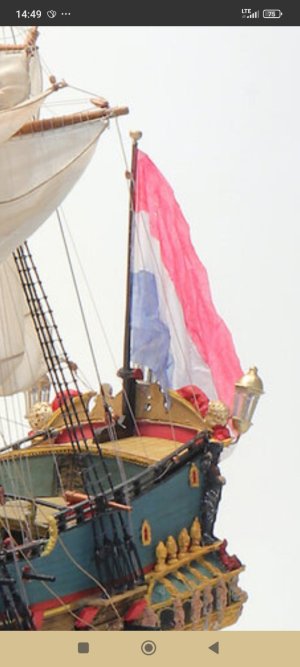
AKERBOOM 1681 after Ab Hoving nominally 1/66 but drawings in 1/64

No, not al all, I just lost track when you mentioned other ship's names. I thought what is he planning now?

And using machines is no problem at all. In model building the name of the game is 'problems solving' all the way and that is a synonym for creativity, a very good way for healing.

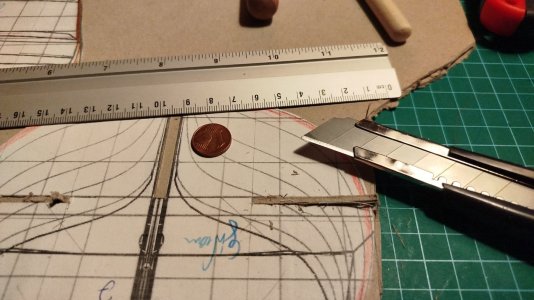
By the way, for cutting 2 mm cardboard you need something sturdier than a scalpel. Try a good old Stanley knife, preferably with breaking blades, so you can quickly replace the sharp edge. Cardboard causes knives to become dull quite quickly. And the good thing is that there will be no dust at all. :)
I did mention the GIDEON 1664 - as she is a "only friday project" in a social club near my flat. The group is recently a femal handworking circle I was allowed to use the (fully equiped but left alone) workshop and so I made good use of the tramendous welding table standing half in the display window.

There I was invitated to build something to lift the number of men in the club (above one) and I thought shipmodels would be an interesting issue for the younger generation. So here is our logo:

Polish_20250404_175702412.jpg

The groups name is "That (is something) You Can Do It, to!.'' So my friend's part is knitting, sewing, crafting and such arts - mine is modelbuilding. And as this isn't the wealthy side of Berlin the price of materials mattes very much to those who may find this hobby interesting. And it may also be a possiblity to escape the older men from loneliness in their small flats sitting alone the hole day in front of a TV bubbling nonsence - it is a social club.

And so I decided to use "something" that would certainly dominate the window's decoration between sewing machines and self made lady dresses, when it is ready. I voted for a very luxurious transom on a big hull I am already building once - so why not building it just for happyness of others twice?
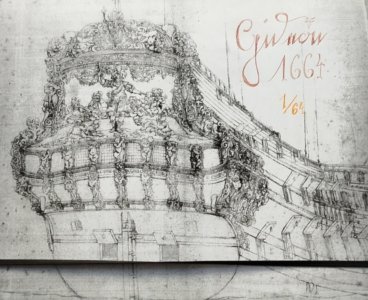
Polish_20250404_124125752.jpg

P.S.:
Due to the black rubber ribbon at my A3-folder I was suddenly remembered of the sinking of the lower gundeck towards the stern (to interchange the guns into the aft gunports). And this brought me to this very serious question of the decks' exact placing and much needed drawing of it on each single bulkheads varying in position.
 
Last edited:
there is really no need to lift the cut out "deck bow" to imitate the upped deck going upwards to the ship's stem?
Am I right when I think you are making things more complicated than necessary? You decided (I believe) to leave out the real lower deck and prepare the gun ports measured from the waterline 'deck' underneath. Then what is exactly your problem?
Just make sure that the upper deck has the right shape and location and all will be well.
the sinking of the lower gundeck towards the stern
The lower deck is not really 'sinking', it is laid flatter than the rest of the deck to prevent problems with guns on the sloping deck.
You can always draw the location of the lower deck on the sides of the ship once you have covered your bulkheads.
 
Yesterday night I gave the bookmaker's glue a go - it works perfectly to glue paper onto cardboard - but this was this morning's result for paper onto paper:IMG_20250408_210933.jpg
Now I am on the way towards the DIY-Market to by UHUhart...
 
GIDEON

A little bit of progress at GIDEON (using 2mm cardboard)
Polish_20250410_111617177.jpg
IMG_20250410_103327_841.jpg
Also working in a stand - technically:
IMG_20250410_121917_046.jpg
and how to clad with northeuropean barock:

Polish_20250410_123335992.jpg
That's all for today!
 
GIDEON

Today a bit of progress does appearIMG_20250411_112204_079.jpg:
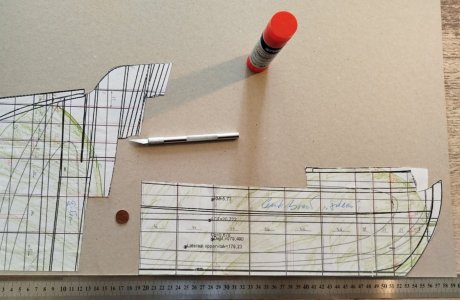
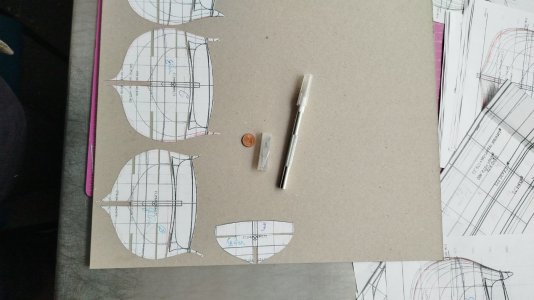
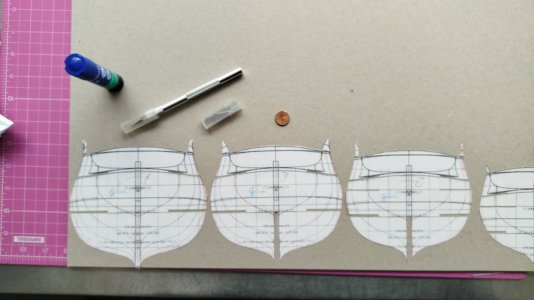
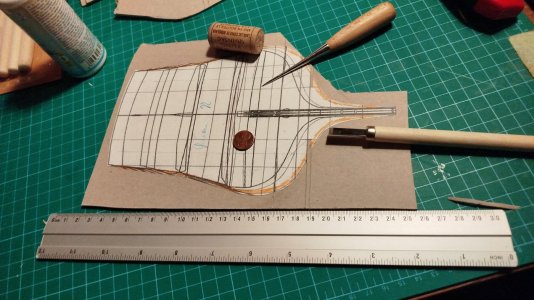
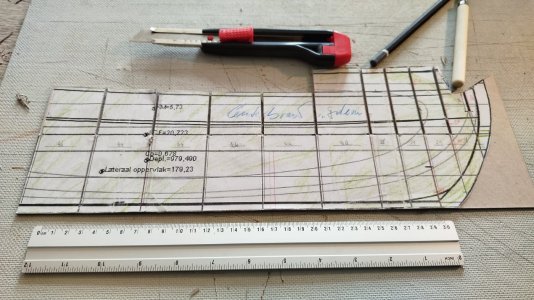
I draw in all the lines' that may be important and cut them out:
IMG_20250411_113702_558.jpg

And after this gluing my paper progress onto 2mms card board:IMG_20250411_122644_757.jpg
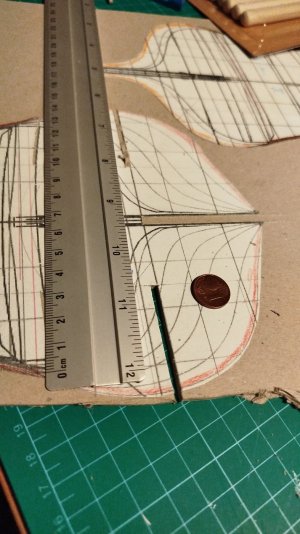
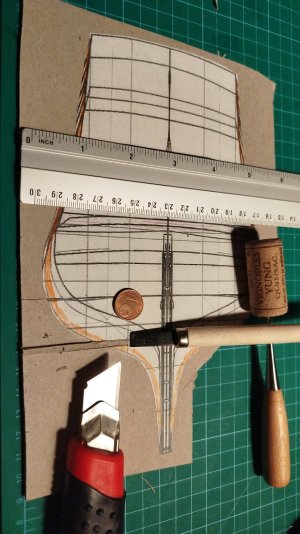
The cutting of the cardboard with a staniel knife is easily done in four or fife light Passes:
IMG_20250411_122703_519.jpg
 
Today's progress is mainly drawings of lines: IMG_20250411_112204_079.jpg

then simply cutting out the bulkheads as above...


This afternoon I did starting the first half of centerboard of (at the very end) doubled cardboard:
IMG_20250411_172319_873.jpg

Getting the first part of the centerboard cut out - getting a first idea of the real size of the GIDEON - yes she is my "big, fat Dutch lady"!
IMG_20250411_185135_686.jpg

@Ab Hoving

Where are the three slots for the three masts to be cut in?
 
Last edited:
GIDEON 1664


Hello friends,

yesterday a good friend of mine credenced me a beautiful watertight suitcase in DIN A2 measurements for my ways with the model's cardboard and plansets to the workshop every friday:
IMG_20250412_203522_171.jpg

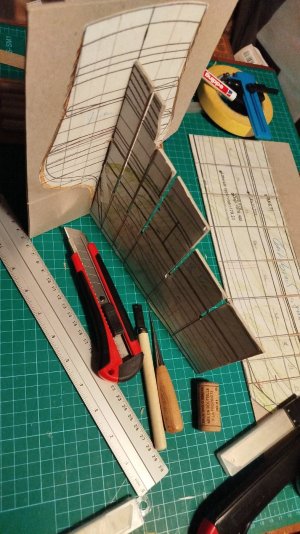
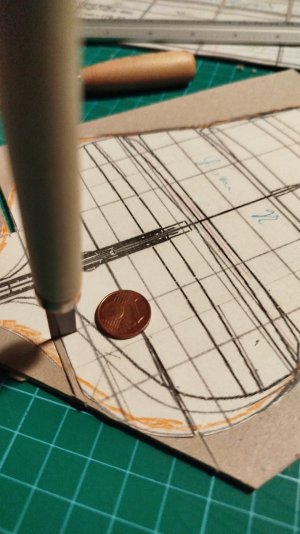
Today I want to stay public my way of working with the 2mms bookbinder's cardboard for you. Following the great advice I use a Staniel knife for easier cutting - I used a never to press the guiding parts as tight as possible for a precise cut. IMG_20250412_225339_500.jpg
This evening I just worked on the slots for the CWL-layer:
IMG_20250412_225534_176.jpg
I first scratched a line with the (shoemaker's leather pointing) awl, leading the cutting blade easier/safer; the rectangular end is simply brutally punshed with a sharp chisel - as it is 3mms longer than the 2mms needed cut it is highly important to lead the "overcut" innerboards so the stability of the bulkheads isn't at risk!

IMG_20250412_230319_435.jpg

I know this may look like overengeneering - I am for better shure than sorry... When I do figure out an easier way giving the very same quality of results to me I will certainly be happy to take a cut corner.

But the more parts I do cut out and the more I do realised the fullness of body of my Dutch mistress the more I fell into love...
 
Last edited:
Off topic on:

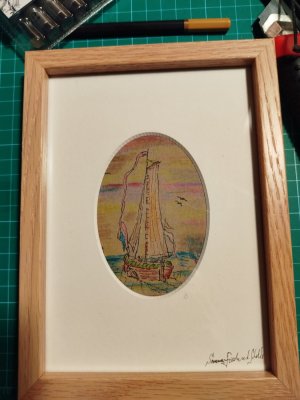
As I did work on a little present for a Dutch loving friend of mine for easter by badly copying and colouring of a van de Velde's ink:


Polish_20250412_214031909.jpg
Off topic off.


GIDEON
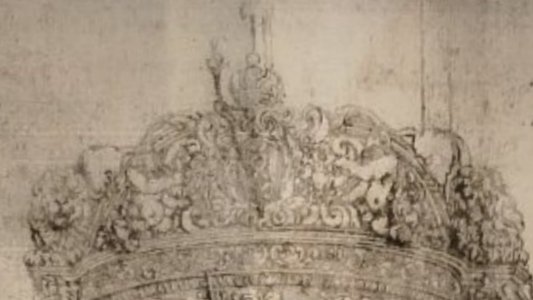
considerations over the transom
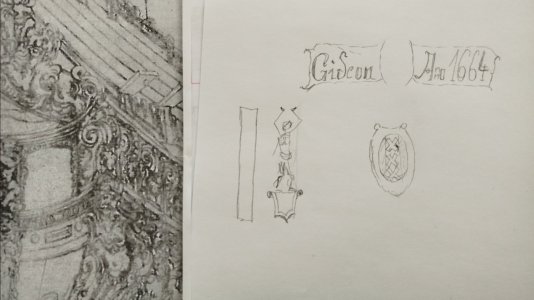
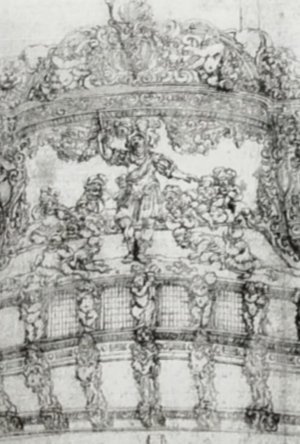
I decided this afternoon to given the transom's principal artwork a closer look for the detailing to be done. I decided I will copy a plenty of single details by using smaller pieces of frostpaper frostpaper.
Polish_20250413_000005695.jpg
And my "decision" is as the mainfigur of Gideon is standing on the sticking out roof of the windows' row I am forced to build him (min.) as a relief and for all the right arm completly figural (as his baton is clearly seperated of the upper framing and the painting behind him). Or is this again "propagandistic painting" as the SOLELY ROYAL in blue over all?


Me completly unexpierienced with "cladding" a transom to a hull do think very much about solutions - perchance overengeneering again.
I would like due to the scale glased windows with a little bit of interieur visible (one window may be open to show a figure learning out a bit for scale giving purposes).

figurative figurehead?
And than I thought of my French plansets and paniced - so here a question to the more empowered colleauges:

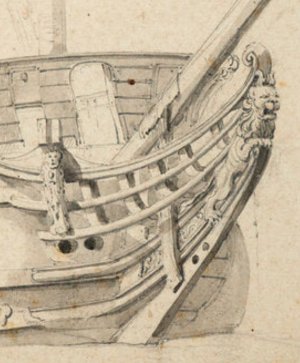
Was there (hopefully!!!) allways a crowned lion as a standardised figurehead on Dutch ships of the second Anglo-Dutch war or do I have to work on a second (but three dimensional) stature of Gideon for the figurehead as it is such an important biblical motif?
 
Last edited:
GIDEON

Hello friends,

the very best news first:
IMG_20250413_205335_049.jpg
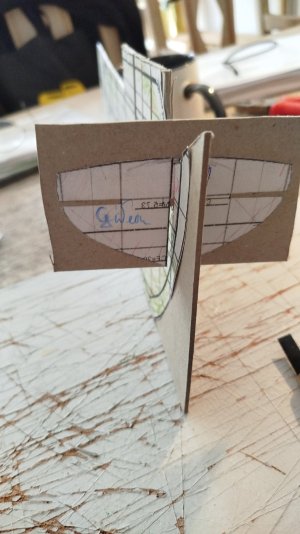
Bulkhead "N" stays upright in his slot in the centerboard!

But I documented the work process of my rectangular ending cut in two pictures - here the cut hast to be punched through the cardboard...

IMG_20250413_203854_062.jpg

...and it is done with brutal forced (here the smoking gun!)
IMG_20250413_204216_666.jpg

My job for tomorrow is to cut out all the slots for the frontpart of the centerboard's starboard side. The port side half will habe the galion part - just forgot about it by cutting out the cardboard.
IMG_20250413_205956_419.jpg
 
Not a crowned lion Chis, just a bare-headed lion. The Republic did not love crowned heads enough for such a figurehead.;)
Aaaaaaah the humbleness shown openly - thanks you very much.

As I do deal with the centerboard tomorrow could you kindly tell me where to place the slots for the mast(stump)s?
 
As I do deal with the centerboard tomorrow could you kindly tell me where to place the slots for the mast(stump)s?
You can find the locations at the original drawing of the Hohenzollernmodel.
The original formula is: take the length between perpendiculars, divide it by 5.5. Place the foremast at 1/2 of the outcome from the fore perpendicular and the mizzenmast at 1 part from the aft one. Place the mainmast in the middle of the ship or preferably one or two feet more backwards.
Thanks you very much!
 
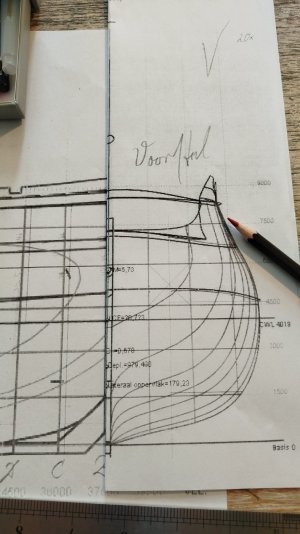
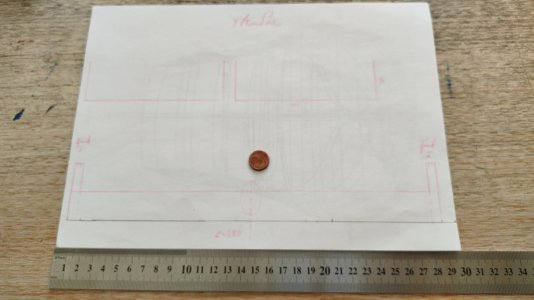
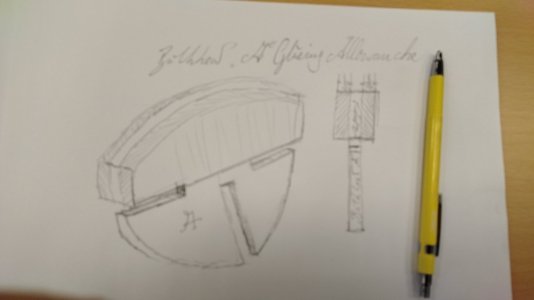
Hello as I do think about the gluing of the hull's planking ;-) I do deal with an idea of a good area to get the hull glued onto the bulkheads' skeleton - I think about an additive allowance. Here my first doodlings certainly in the kind of good old German overengeneering - giving 6mm of glueing space.
IMG_20250415_142703_032.jpg

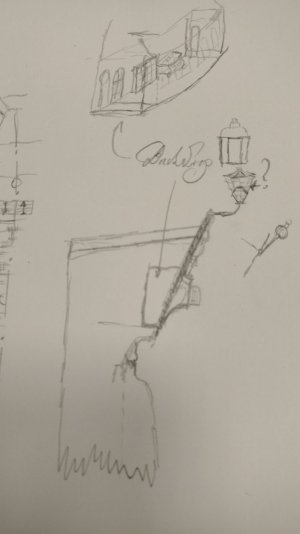
Now it is the very moment to think about the captain's quartier - because I may have to alter the centerboard for the culisse/back drop so I can fullfill my dream of working windows in the transom:IMG_20250415_145245_674.jpg
And in the same moment it is the first moment to talk about the lamp - here Ab's very reasonable solutions at AKERBOOM:
Screenshot_2025-04-15-14-49-51-667_com.android.chrome.jpg

And I found a single stanchion for the GIDEON in the vdV drawing (addit it to my doodling above) :
Polish_20250415_145520409.jpg

And so I may have to add a cut out into the centerboard to add a flat dollhouse there.
 
Thank you for this instructive tutorial, Ab.
Well, actually it's Chis who does the tutorial, but it is my pleasure to help a bit.
What puts me off a similar project is how to do a fair attempt at the 'gingerbread' on such a vessel.
Never refrain from an experimental project because in the far distance something seems to be hard or even impossible. Study and creativity will help you out in the end, or maybe I can do some small suggestions....
Paperwork really helps you to build interesting objects, even sitting in a chair.
 
Hello @pugwash,

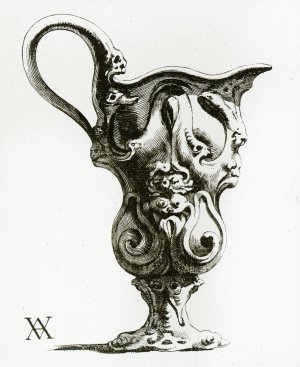
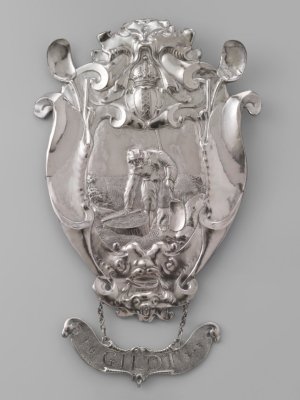
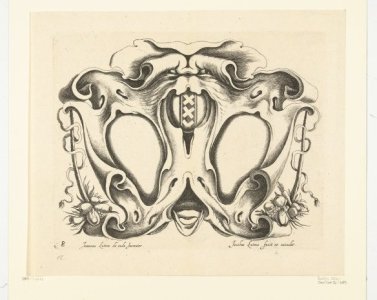
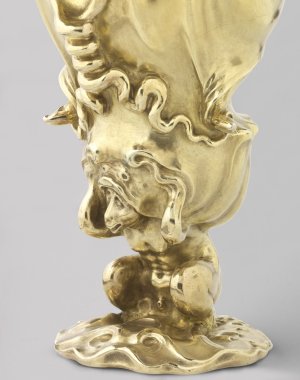
a short journey into art history for you and those interested in the "gingerbread style".

Constighe_Modellen_I.jpg

Kwabstijl, auricular or lobate style (German: Ohrmuschelstil) is the correct word for your "gingerbread" it does belong to the north european baroque. The center of development of styles in Europe were Italy and later France - while you do have baroque style in the south the sunken VASA does show still Renaissance forms. So the evolution of art went from south towards north in the Dutch and "Northgerman" countries the style different a lot from the Italian or French style - a regional influence changed it so a unique form come to light.

bk-nm-10556-b.jpg
So creativity and the wish to build something very solid is certainly a couple well mixed - I am a very complex thinking person due to this I like this kind of decor very much. So sometimes I may overdo it but I do love this ship and the "gingerbread" decor is really a challenge I will have to face and like fo face.

The style is very intersting and very dynamic.
design-tazza-1512-1547-pierino-del-vaga.jpg
The motifs are very free on the one hand but are still in the typical geometrical order of the baroque in mirrowing and repeating:
Adam_van_Vianen_-_Design_for_a_Large_Plate_-_NMH_131-1973_-_Nationalmuseum.jpg

And so I found the center of my stand with the nice surrounding on Cote d'Arms of the city of Amsterdam:
rp-p-1885-a-9223.jpg
So it is a very nice methode to get a baroque texture without the force in your neck to repead absolutly correct.

There is a plenty to tell more about this beautiful kind of art:
adam-van-vianens-herdenkingskan-voor-zijn-broer-paulus-het-pronkstuk.jpeg

I may have forgotten or mixed up something - so please do not hasitate to correct me or to add information in here that do help and teach all of us.
1280px-Verscheyde_Constige_Vindigen_om_in_Gout,_Silver,_Hout_en_Steen_te_wercken_(Plate_9)_MET...jpg
And the most important is to have fun!
 
Last edited:
Back
Top