• Win a Free Custom Engraved Brass Coin!!!
    As a way to introduce our brass coins to the community, we will raffle off a free coin during the month of August. Follow link ABOVE for instructions for entering.

Albatros by Occre - First Build

  • Thread starter Thread starter Zlong1
  • Start date Start date
  • Watchers Watchers 9
Joined
Oct 19, 2025
Messages
6
Points
8

Hello, I’m beginning a build log for the Occre Albatros that I’ve been working on as my first build.

Originally was not going to do a log but figured I could benefit from some input along the way.

The build log is starting a little late but will keep it regular from here.

Here goes:

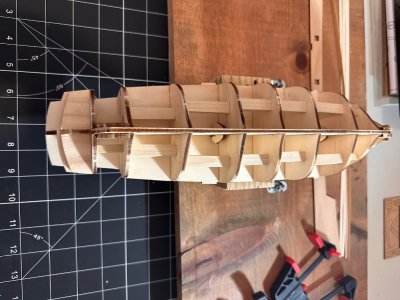
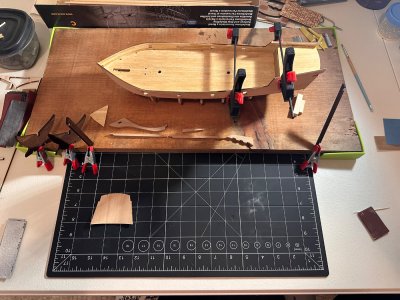
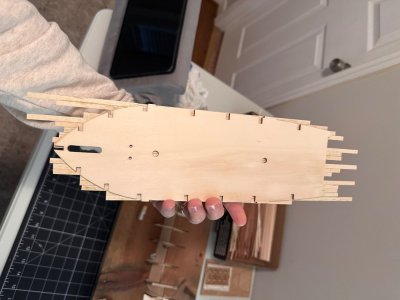
Before glueing the bulkheads to the false keel I knew I would need some sort of jig to hold the ship upright while I worked on it. I wanted to be able to clamp something square on either side of the bulkheads against the false keel to ensure the bulkheads are on square.

I built said jig (you can see in photos) and began dry fitting and gluing bulkheads in place. I used legos clamped snug against the bulkheads on either side of the false keel to hold them squarely as they dried.

Now beginning where I have images.
IMG_5220.jpeg
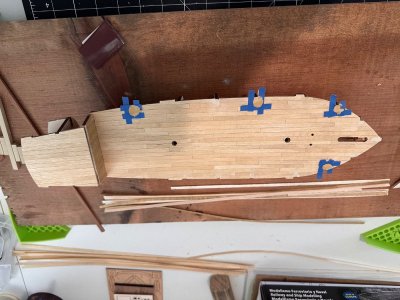
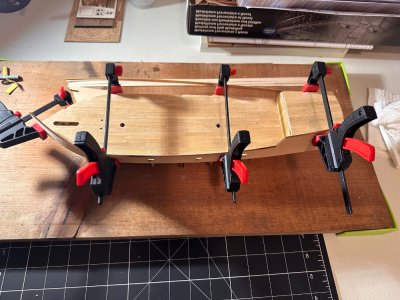
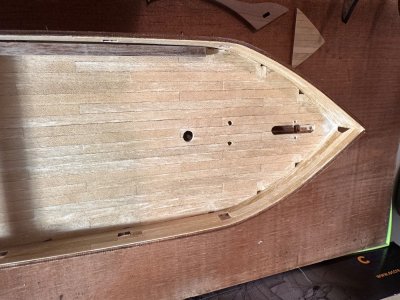
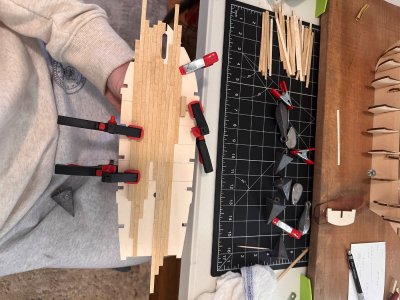
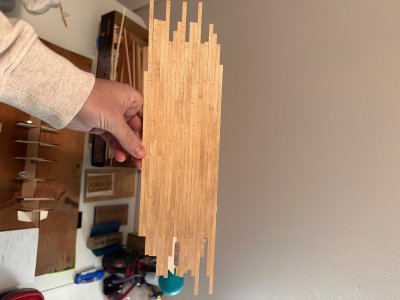
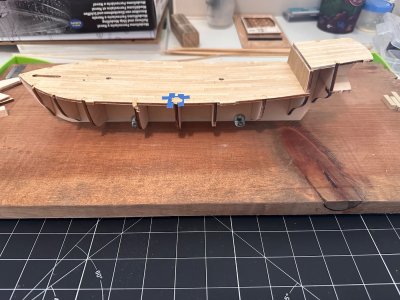
Planking the deck using planks cut to 100 mm and following a 3 butt shift pattern of 1-4-2-3. I pre dyed the planks before cutting them with the Occre walnut dye.
IMG_5224.jpeg
I am still trying to decide if I want to trace between the planks with a pencil to simulate caulking or leave it as is. I think I will probably leave it.
IMG_5225.jpeg
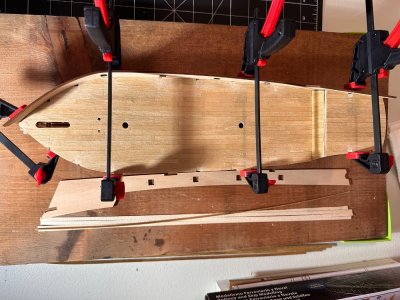
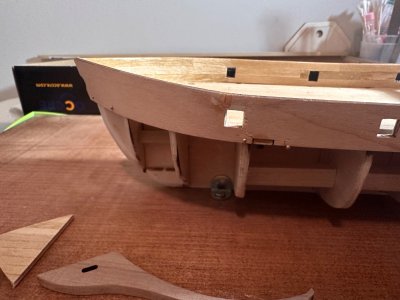
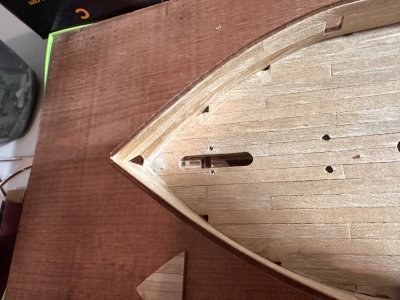
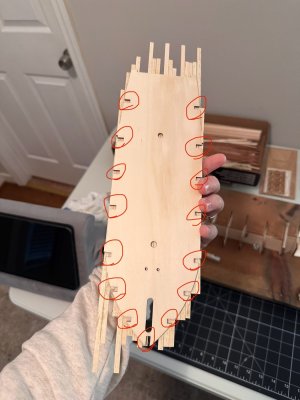
I’d like to note here that I made a grave mistake. The mistake is not pictured here but this is a good image to explain my mistake. When trimming the excess plank from around the deck, I also trimmed the planks from the cutouts in the deck where the tops of the bulkheads will sit. I circled them in red. I didn’t realize my mistake until I glued the deck on and saw the bulkheads showing.

I didn’t realize the planking was supposed to be left to cover the bulkheads here. I assumed the waterway board would cover them. I toyed with leaving my mistake as is or fixing it. I tried to cut tiny pieces of plank to fill the gaps but I couldn’t stand the way it looked. I tried pulling one plank up and replacing it, bad idea.
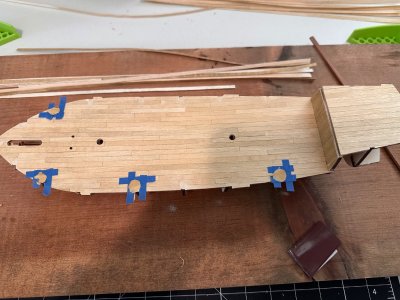
IMG_5233.jpegIMG_5236.jpeg
To fix my error I used wood filler that happens to match the color of the dyed planks almost spot on. If you zoom in you can see the spots I’ve done and the spots I’m still working on. It’s the best I got without replacing the planks to cover up the bulkheads.
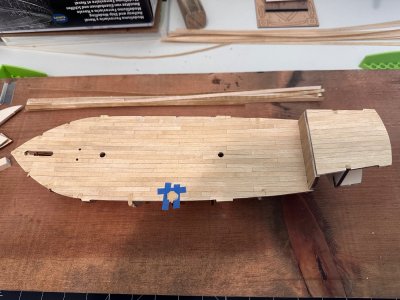
IMG_5225.jpeg

IMG_5235.jpeg

IMG_5237.jpeg
 
Last edited:
Don't worry, it's the most common error making in a first build, you're not the first one and won't be the last one .
Enjoy the build and welcome to the forum.
 
Very impressive attention to detail for a first attempt. Thanks for sharing.
There is an inordinate amount of space between bulkheads in this kit design. Are you going to fill these spaces before planking the hull?
Allan
 
@AllanKP69 I wish I had the tools to fabricate and shape some blocks to put between the bulkheads but unfortunately I don’t at this stage in my model building. Instead I cut dowels to length and glued them between the bulkheads to provide support
 
Last edited:
IMG_5239.jpeg

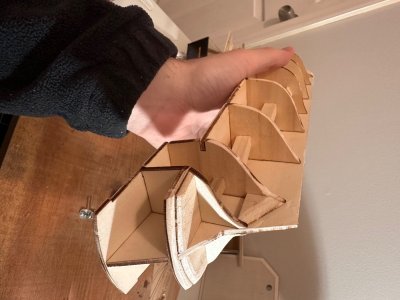
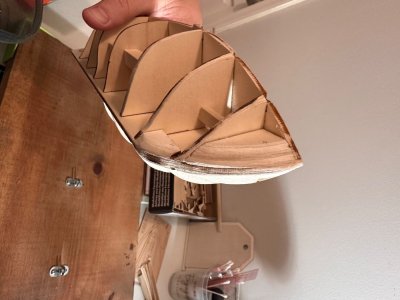
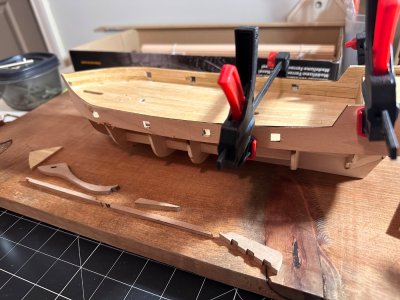
Continuing on… I cut dowels to length and fit them between the bulkheads to provide some support for faring the hull. They don’t fit as flush as they could. I have a small miter box to make straight cuts but the saw blade tends to drift even on these narrow dowels. They’re square enough to provide the support I’m after though

If anyone has any advice on how to achieve straight cuts without a table saw I’d love to know.

IMG_5240.jpegIMG_5241.jpeg

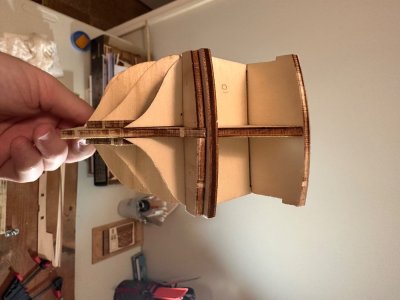
I then glued the reinforcing chocks onto bow and stern and began working on shaping the bulwarks while the glue dried. Will return later to shape the bow and stern.

IMG_5242.jpeg
IMG_5243.jpeg

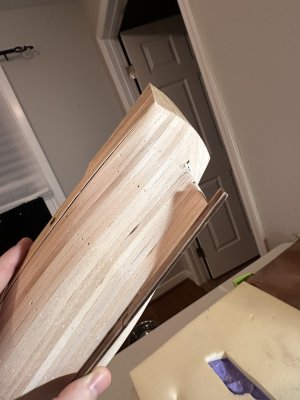
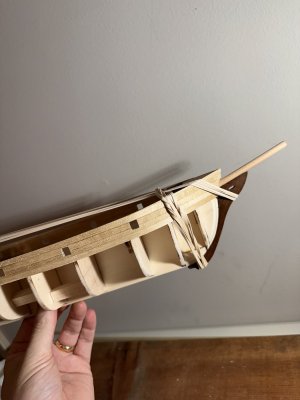
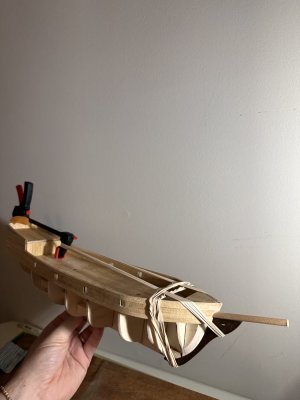
To shape the bulwarks here, I held the bow ends of the bulwarks in front of a handheld linen steamer until the wood became more pliable. I then clamped them into place like so, slowly and gently bending the bow end into place. I did one side at a time
 
Last edited:
Zlong1 san

I offer the following advice:
Soak the planks in water overnight to soften them.
This will make the wood more flexible.
Use a water-based adhesive.
If you make a mistake, you can easily remove the planks by soaking them in water overnight.

After attaching the damp planks to the hull, you can also use a warm household iron to press the planks against the hull — this method helps shape them more easily.

best regards
 
Like above. If you want to bend plywood or wood planks, simply soak it in cold water overnight or with experience in very hot water (only no boiling) for 2-3 minutes, wathing to prevent it from swelling. Then you shape it, for example, outside a pot, and dry it with a hair dryer. In 10 minutes, you'll have a piece ready for gluing.
 
Like above. If you want to bend plywood or wood planks, simply soak it in cold water overnight or with experience in very hot water (only no boiling) for 2-3 minutes, wathing to prevent it from swelling. Then you shape it, for example, outside a pot, and dry it with a hair dryer. In 10 minutes, you'll have a piece ready for gluing.
Good suggestion. Thank you.
 
I did the same thing you did with the deck planking. I had to go back later and patch it also. Albatross was my first build too. Great ship to learn on.
 
I used to get upset when I screwed something up. But as I gain experience I consider them part of the learning experience. I seem to remember things better when they’re learned the hard way. And as I progress I’m gaining skills which makes me very happy.

I joined a local ship modeling club and most members are very experienced and a tremendous source of advice. This forum is also a great resource- many great suggestions from knowledgeable experienced people.

Your build looks great, fine job, keep going, we all make mistakes but that’s how we learn and gain skills.
 
Photo 9. I too, cut notches.
Photo 14. I see you did the planking correctly. I lined one side of item 23 that was outboard. (oh well!)
Photo 23. The instructions call for nailing the planking to the bulkheads. I did this and was not pleased. I removed all of the nails. I should have tack nailed the planks and I also used a somewhat thin white glue . To help with the nailing (and the removal) I used a pin insertion plier (Micro Mark).
Refer to the superstructure photo (after photo 67. Item 86 and the foldout showing the deck. The mast belaying pin rails show four places in the front rail and three places in the other two rails. However, the rigging drawing (Sail Rig) foldout shows three pins per side on the top drawing yet the lower drawing shows two more lines going to those rails. Therefore, drill an extra hole.
The same photo indicates the cannon assembly method. I found that there is a slight taper to the base (94). I think that the narrow section should face inboard. I missed that and it really doesn't show. My dad said you won't notice the problem if you're running from a fire!
The second yard arm drawing on the foldout. (fore topsail yard?) The drawing is in error. The parts are not symmetrical. The dual block on the right side is a different distance than the left side. I followed the drawings and made the mistake. So I made another yardarm.
Are you going to install the sails? The Albatros was the first time I added sails. I had a lot of redo! First the topsail yardarm (125) is the same length as the top of the top sail (176). I added about a 1/4" on my second corrected yardarm!
I also copied the front photo and added boat rope to each sail. The fore and main mast brass rings (188) were a little snug on the masts. The masts are 6mm in diameter and the rings are 8mm outside diameter. I used 10mm OD brass rings. I don't know how others install the rings, but I ended up adding them to the sail after spreading them open to clear the mast. The rings on the jibs gave me fits! I installed the braces (144,145,146) as noted on the rigging pages. I want to mention brace 144 later. When I wanted to install the forward and mid jib using the rings, I had to cut and thread a new brace for each jib. The open ring would not behave (!) with the pliers I had.
The aft jib. (159) Its brace (144) is tied off at the mast cap. This would cause the main said to rub on the jib brace. I didn't think that was correct, so I Googled the Shenandoah bark or schooner and it shows the aft jib brace below the main sail. Also, the photo on the front of the OCCRE box shows the brace below the main sail. I made it like that photo, and I had to cut the jib sail (159). My daughter suggested using DRITZ fray check seam sealant. This worked. I found adding sails require a LOT of foresight!
Also, the parts list indicates the raw thread is 0.15mm. Do I read this correct? It measures a fat 0.50mm
I turn 90 on December 7th and the was going to be my last build. But no. I read in Ships of Scale about the Chinese plank-on-frame Bluenose. I may not finish it but I will not add sails!

Bob Walters
Portland OR

(
 
I didn’t expect to get such quality feedback. I really appreciate it everyone!!

IMG_5245.jpegIMG_5246.jpeg

IMG_5244.jpeg


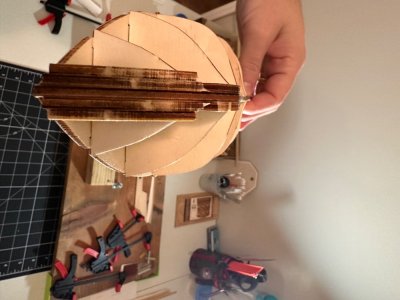
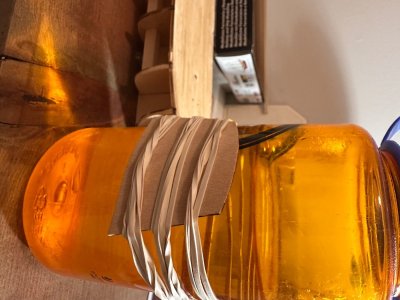
Continuing on: I’ve began shaping the bow and stern and doing some faring of the hull while waiting for my planking of the bulwarks to dry. Using a nalgene bottle filled with very hot water resulted in a near perfect curve of the upper stern.

IMG_5252.jpeg

The planking of the deck facing side of the bulwarks. I chose to go with the butt shifted pattern of planking here. Not sure if it’s accurate and it doesn’t mirror the instructions but I had 100mm length planks left over from the deck and was beginning to run low on planks.

To note here, I made a couple mistakes very early on:
1) I dyed a few planks way too dark before deciding on the lighter color I would use for the rest of the deck planking resulting in wasted planks. I ended up having to dye backsides of said dark planks the correct color but some of the darker dye had seeped onto the backs of the planks resulting in uneven stain.

2) I precut an overestimated amount of planks in the beginning, resulting in me essentially having to use the butt shift method on the deck facing side of the bulwarks whether I wanted to or not. Despite this, I like the look of the buttshift pattern on the insides anyways.

IMG_5254.jpegIMG_5255.jpegIMG_5256.jpeg

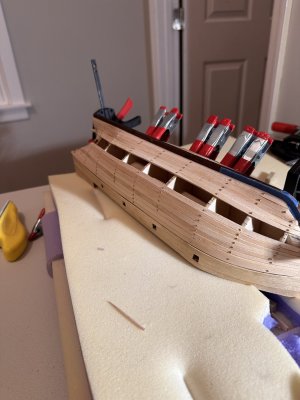
I have since mounted the bulwarks. I used strictly titebond original and clamps for the first side. On the second side however, I ran into an issue. While bending the plank into place, a small crack formed at the first gun port from the bow.

I filled the crack with some very thin aliphatic resin and clamped the piece of wood very tightly in a bar clamp. Once dried, I put some wood filler over the top of the crack and sanded it down. The repair is strong and smooth. There’s a very slight kink at that gunport now but it will plank just fine and is hardly noticeable.

The side with the crack was not wanting to bend into place as well as the first side and I feared stressing the wood again, so I used pins to hold the bulwark in place with great success.

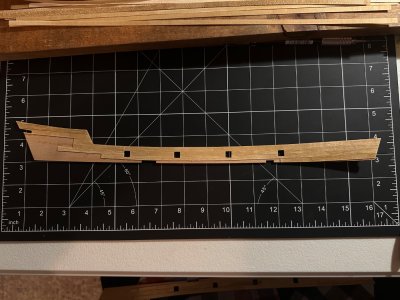
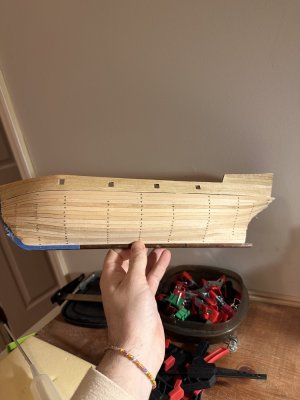
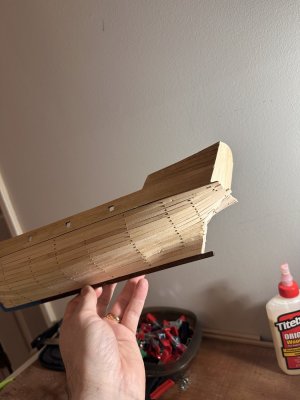
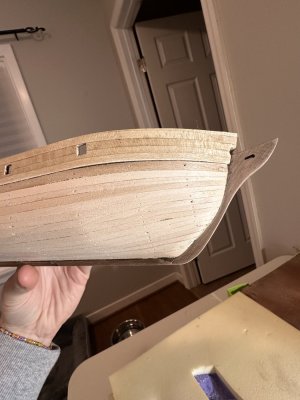
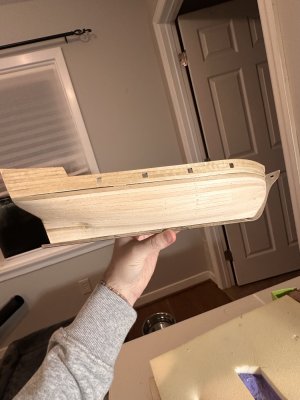
Over the course of the couple days of drying time for the bulwarks, I cut out the keel parts and began sanding the laser burn off of them. I intend the attached the keel before I begin planking so that I have something to plank up against rather than hoping it fits properly after both layers of hull planking. I’d like to try to cut a rabbet line at the stern as well but I’m not sure I’m up for it. Any tips would be appreciated.

At this time I also began building the kits provided display stand while awaiting dry time. It can be seen in the pictures above.

IMG_5257.jpeg

With both bulwarks on there was a small gap at the front where the deck comes to a point. I used a little bit of wood filler to fill said gap. I could sand it down a bit better but this will be covered eventually anyways.

IMG_5258.jpeg
 
Last edited:
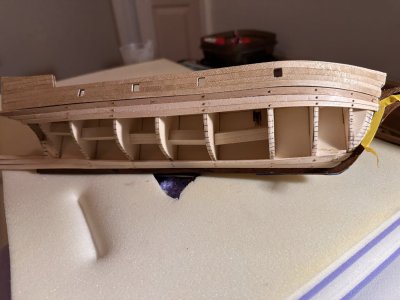
Photo 9. I too, cut notches.
Photo 14. I see you did the planking correctly. I lined one side of item 23 that was outboard. (oh well!)
Photo 23. The instructions call for nailing the planking to the bulkheads. I did this and was not pleased. I removed all of the nails. I should have tack nailed the planks and I also used a somewhat thin white glue . To help with the nailing (and the removal) I used a pin insertion plier (Micro Mark).
Refer to the superstructure photo (after photo 67. Item 86 and the foldout showing the deck. The mast belaying pin rails show four places in the front rail and three places in the other two rails. However, the rigging drawing (Sail Rig) foldout shows three pins per side on the top drawing yet the lower drawing shows two more lines going to those rails. Therefore, drill an extra hole.
The same photo indicates the cannon assembly method. I found that there is a slight taper to the base (94). I think that the narrow section should face inboard. I missed that and it really doesn't show. My dad said you won't notice the problem if you're running from a fire!
The second yard arm drawing on the foldout. (fore topsail yard?) The drawing is in error. The parts are not symmetrical. The dual block on the right side is a different distance than the left side. I followed the drawings and made the mistake. So I made another yardarm.
Are you going to install the sails? The Albatros was the first time I added sails. I had a lot of redo! First the topsail yardarm (125) is the same length as the top of the top sail (176). I added about a 1/4" on my second corrected yardarm!
I also copied the front photo and added boat rope to each sail. The fore and main mast brass rings (188) were a little snug on the masts. The masts are 6mm in diameter and the rings are 8mm outside diameter. I used 10mm OD brass rings. I don't know how others install the rings, but I ended up adding them to the sail after spreading them open to clear the mast. The rings on the jibs gave me fits! I installed the braces (144,145,146) as noted on the rigging pages. I want to mention brace 144 later. When I wanted to install the forward and mid jib using the rings, I had to cut and thread a new brace for each jib. The open ring would not behave (!) with the pliers I had.
The aft jib. (159) Its brace (144) is tied off at the mast cap. This would cause the main said to rub on the jib brace. I didn't think that was correct, so I Googled the Shenandoah bark or schooner and it shows the aft jib brace below the main sail. Also, the photo on the front of the OCCRE box shows the brace below the main sail. I made it like that photo, and I had to cut the jib sail (159). My daughter suggested using DRITZ fray check seam sealant. This worked. I found adding sails require a LOT of foresight!
Also, the parts list indicates the raw thread is 0.15mm. Do I read this correct? It measures a fat 0.50mm
I turn 90 on December 7th and the was going to be my last build. But no. I read in Ships of Scale about the Chinese plank-on-frame Bluenose. I may not finish it but I will not add sails!

Bob Walters
Portland OR

(
This is awesome information Bob. I know it will be so helpful when I get to these parts. I do intend to add the sails so I’m very appreciative of the help
 
It's good to see another Albatros build log. I just completed mine yesterday. Read other people's build logs to find the errors they made and hopefully avoid them yourself. Your Albatros is looking very good so far. I will be following your progress.
 
Back
Top