Amerigo Vespucci Mantua/Panart 1:84

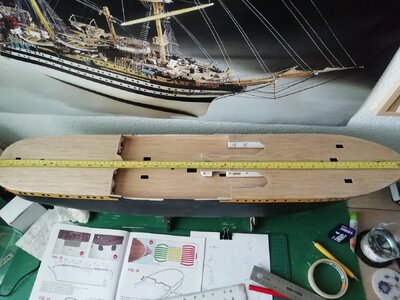
Deck planking is going very slow with only half of the mid deck completed so far.
Part of the reason for this is that my time has been taken up with making the home safe from an eight legged demolition squad in the form of two blind Siamese kittens that we adopted from a refuge. Actually one of them has one eye but she seems more clumsy than her brother. For now my completed models are safely put away but I will have to make a display case if want them visible and in one piece.
I will also have to make the terrace safe if I don´t want them taking swimming lessons in the pool two floors down. :-)
 
Finally completed the deck planking.
Started with the mid deck then the stern and lastly the foredeck as this is the one mostly seen and would look the most consistent, having learnt as I went along. IMG_20240401_204020.jpg
Now turned the over to page 8 book 2.
9 months si far. This one is going to take a while...
 
I have a problem. Is there anyone that can tell me where I am going wrong?
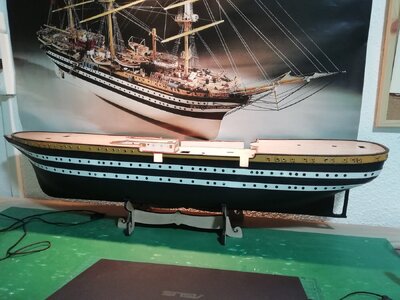
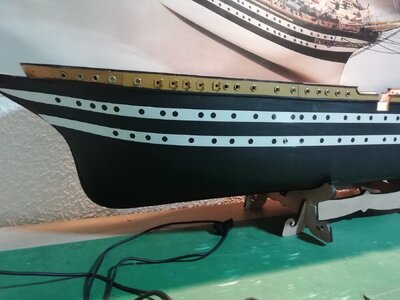
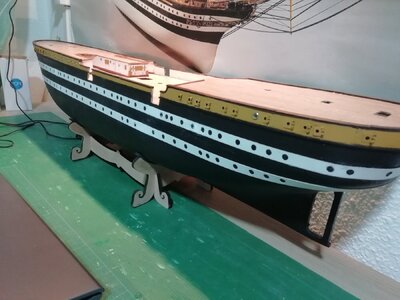
I am fixing the upper external bulwarks. As per instructions I started at the bow towards mids hips then at the three stern. I have used all the pieces in the right order but find the space at the midships too large by about 10mm. I've checked and checked but can't see what I have done wrong.
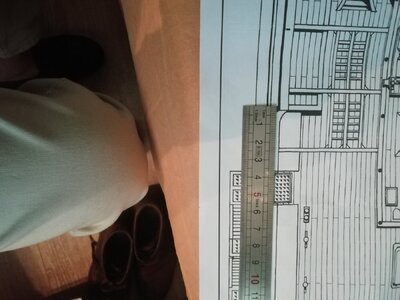
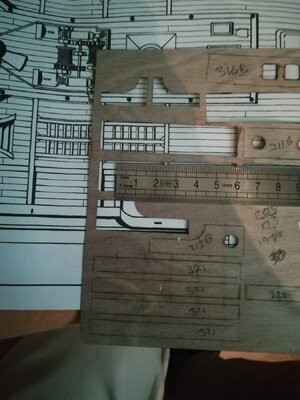
Checking my sizes against the plans I see that the curved piece at the bow end is 10 mm shorter than shown on the plans. Anyone else had this problem? Or am I missing something and being stupid (again)? IMG_20240419_203047.jpgIMG_20240419_203418.jpg
 
Help please!
I have found the problem (see my last post) but I don't know what to do about it...
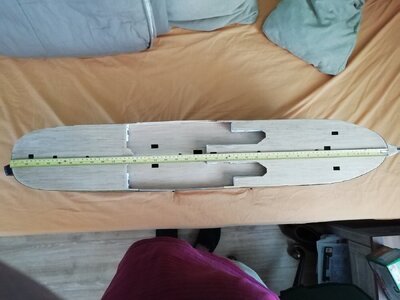
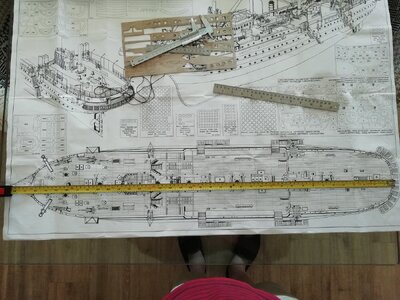
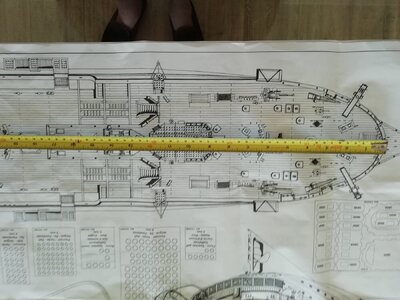
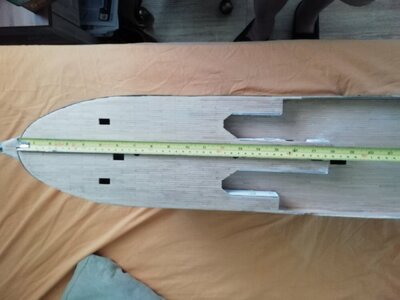
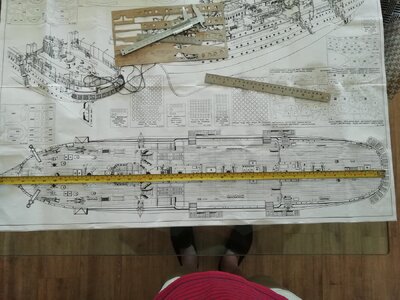
My whole hull is 10mm longer than that which is on the plans and instructions.
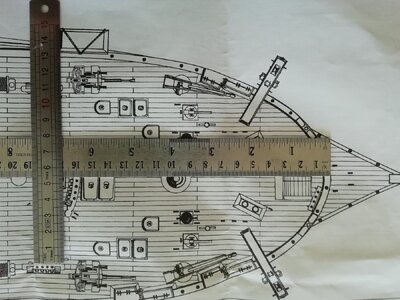
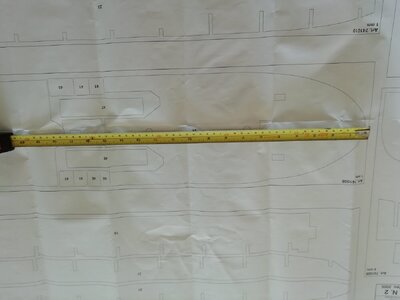
I have measured everything against the 1:1 scale plan provided with the kit and the extra length is in the fore deck, between the front of the deck and the mast. It must have also been in the keel as well but I can't check that now as i have thrown away the board from which it was cut. I certainly did not have any overhang when I fitted the deck boards.IMG_20240420_152027.jpgIMG_20240420_152303.jpgIMG_20240420_152350.jpg
IMG_20240420_152606.jpg
IMG_20240420_152428.jpg
IMG_20240420_152516.jpg


Has anyone else had a similar problem with this kit?
I can get over the current problem simply by adding a 10mm section to the ochre coloured bulwarks but am very unsure of the implications further down the line. Again any help you can offer in thinking this through would be very much appreciated.

IMG_20240420_151715.jpg

IMG_20240420_152257.jpg
 
I am now getting obsessed with 1cm extra length of my AV.
I've been looking for possible implications down the line and note that the top edge of the bulwarks fit as they should as do the deck edge mouldings.
As far as I can tell the only problem is that the midships bulwarks need 10mm added to give the correct gaps for the gangways.
So is it that the only pieces in my kit that are wrong are the bulwark trims 313A and B?
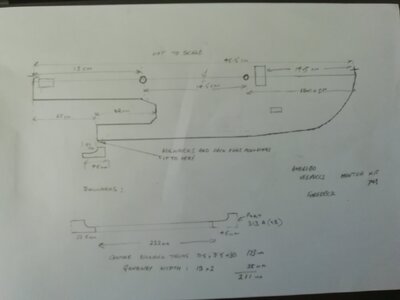
Anyone out there with this kit who can help me understand this by checking the measurements of their kit with the sketch below? In particular the distance between the centre of the foremast and the bow. On my kit it is 18cm but on the drawing supplied it is 17cm. My deck edge mouldings also total 10mm longer than the drawing.

sketch.jpg

As I say, this is driving me nuts, so I think If none of you can figure it either then I will just add a 10mm piece to part no. 313 and plough on. I have now spent 2 days on checking, researching and still can't fully understand what, if anything, I have done wrong. Are there more than one version of this kit but with the same drawing?
As before, any light you can throw on this would be very much appreciated.
 
I am now getting obsessed with 1cm extra length of my AV.
I've been looking for possible implications down the line and note that the top edge of the bulwarks fit as they should as do the deck edge mouldings.
As far as I can tell the only problem is that the midships bulwarks need 10mm added to give the correct gaps for the gangways.
So is it that the only pieces in my kit that are wrong are the bulwark trims 313A and B?
Anyone out there with this kit who can help me understand this by checking the measurements of their kit with the sketch below? In particular the distance between the centre of the foremast and the bow. On my kit it is 18cm but on the drawing supplied it is 17cm. My deck edge mouldings also total 10mm longer than the drawing.

View attachment 443115

As I say, this is driving me nuts, so I think If none of you can figure it either then I will just add a 10mm piece to part no. 313 and plough on. I have now spent 2 days on checking, researching and still can't fully understand what, if anything, I have done wrong. Are there more than one version of this kit but with the same drawing?
As before, any light you can throw on this would be very much appreciated.
Hello Barcomad
I am not at home right now and therefore don't have access to my AV
I'll be back this coming Friday and will take some measurements for you.
I don't remember having faced such issue as you describe.
 
Hello Barcomad
I am not at home right now and therefore don't have access to my AV
I'll be back this coming Friday and will take some measurements for you.
I don't remember having faced such issue as you describe.
Thanks so much.
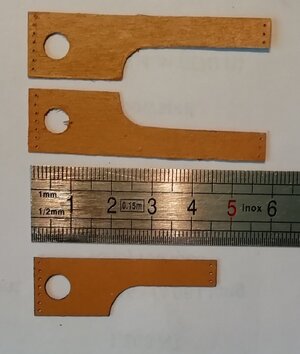
In the meantime I have made parts 313A&B to the size necessary to give the correct gangway spacings. The one supplied with the kit is the lower of the three.:
IMG_20240423_130256.jpg
 
Wow, I would be stressed out as well. I have not built this model yet...however, I have the kit (actually an older version) boxed waiting on my shelf. I plan on building next year. If you need me to open her up to check something, I will...but you will need to give me very specific instructions as I have not unboxed her completely and I am not really familiar with all the parts. Hopefully Gilbertm will be able to help you out...I have been following his build and he is an excellent modeler.
 
Thanks so much.
In the meantime I have made parts 313A&B to the size necessary to give the correct gangway spacings. The one supplied with the kit is the lower of the three.:
View attachment 443410
Ola Barcomad
I am back home and have measured the distance I have between the center of the Foremast and the bow. It is 17cm
Now, seeing the parts 313 A&B that you have redone, I remember that I had an issue here and had to redo them. I am not sure but believe this was more related to a question of height rather than length but don't totally remember.
Hope this helps
Cheers
Thanks for checking so quickly.
I have contacted Mantua who also confirm that the mast/bow measurement should be 17cm and asked me to check again, which I did and it is still 18cm! I am now waiting for them to get back to me with an explanation of what might have gone wrong. They say that the design hasn't change since the 80's
In the meantime there is nothing I can do about it and have to plough on, so I have fitted the bulwarks and gunnels and will be finishing that area over the weekend with a bit of luck and a fair wind.
By the way, as part of my research into my 1cm problem, I have studied your build log quite a lot. What a beautiful piece of work! I hope I can do nearly as well.
Thanks for for the inspiration and for the help along the way.
 
I have moved on from the 10mm problem and will work around whatever implications manifest themselves later.
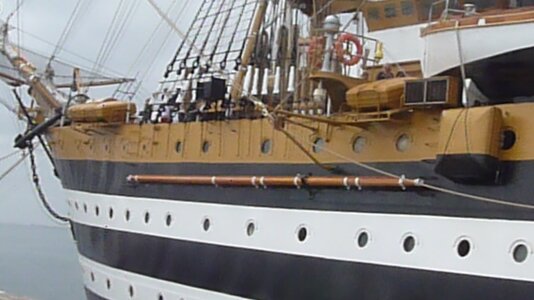
The instructions call for a strake to be fixed under the bulwark (ochre colour) line which I glued on a few days ago. I then spray painted the hull, masking so as to leave this strake for varnish later. I then looked at my photos of the actual ship to see if this strake is gloss or satin and find that there is no strake on the actual ship:
P1020402.JPG

I don't want to take the strake off and be faced with glue residue and marks to sand and fill so I have painted the stake black like the hull. Quite pleased with the compromise:


IMG_20240506_091421.jpg

IMG_20240506_090747.jpg
 
It took a long time to fit the 34 hinged portal covers. My clumsy fingers and slightly shaky hands meant that I dropped either the nail pin or the cover itself more often than not. Then the hinge eye was so flimsy it would deform under the slightest pressure making the process both lengthy and extremely frustrating. Quite proud that I dug deep to find the patience to continue to fit them properly and not cheat by just gluing them shut!

My mysterious 1cm extra length problem reasserted itself when I came to fit the upper side mouldings which were, of course 10 mm short, requiring me to cut a filler piece which I fitted at the join under the gangway gaps. Bizarrely this was not needed for the lower moulding. By now I have stopped trying to work this out and, like this time, work my round the problems as and when they show themselves.

IMG_20240516_002435.jpgIMG_20240516_002451.jpgIMG_20240516_002505.jpg

So now, apart from a bit of touching up to the black paint I have finished Instruction book 2 and now my AV is beginning to look like a ship.
 
Last edited:
Now into book 3.
The first operation is to cut the holes for the stern doors which I have done whilst all the time wondering why, because operation 3 is too fill them in again with frame, dummy doors and then the actual doors on top.

View attachment 450310View attachment 450307
Good morning. Looking awesome. It is weird to have you make holes…..maybe if you made tiny workable hinges and open the doors the holes holes are worthwhile ;) . Jokes aside your stern platforms are really cool. Cheers Grant
 
It has been a while since I posted on this log but I have been slowly ticking along with not a lot to report other than slow standard progress. I am about 2/3rds through book 3, have completed and fixed the rudder assembly also the catheads.
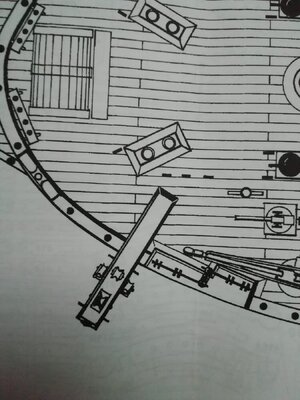
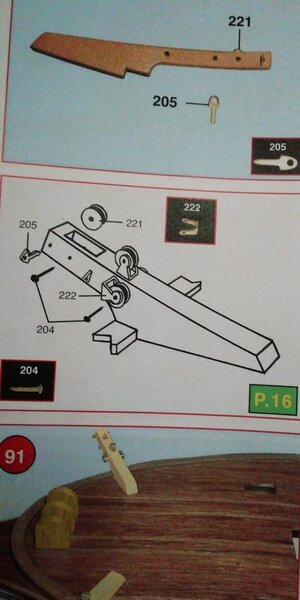
One shock momenent with the catheads when, having made them complete as per the instruction book, I referred to the 1:1 scale drawing to determine the exact position and saw that the drawing shows them made differently with the side pulleys between the two eyes and not behind them.
Instructions:
Cathead Instruction.jpg
Drawing:
Cathead Drg.jpg
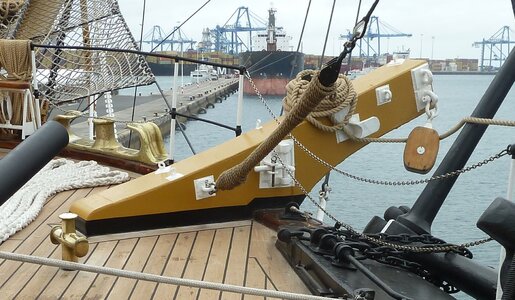
In reality the catheads are not like either of these configurations but a mixture of the two:
Cathead.JPG
Maybe add an extra eyebolt for the derick. What have the rest of you done?
Not the first time (or the last I expect) that the instructions have confused me.
 
It has been a while since I posted on this log but I have been slowly ticking along with not a lot to report other than slow standard progress. I am about 2/3rds through book 3, have completed and fixed the rudder assembly also the catheads.
One shock momenent with the catheads when, having made them complete as per the instruction book, I referred to the 1:1 scale drawing to determine the exact position and saw that the drawing shows them made differently with the side pulleys between the two eyes and not behind them.
Instructions:
View attachment 463140
Drawing:
View attachment 463141
In reality the catheads are not like either of these configurations but a mixture of the two:
View attachment 463143
Maybe add an extra eyebolt for the derick. What have the rest of you done?
Not the first time (or the last I expect) that the instructions have confused me.
Hi Barcomad
As far as I am concerned, I followed the Mantua instructions. I have to say that I am not really surprised by this inaccuracy.
 
Back
Top